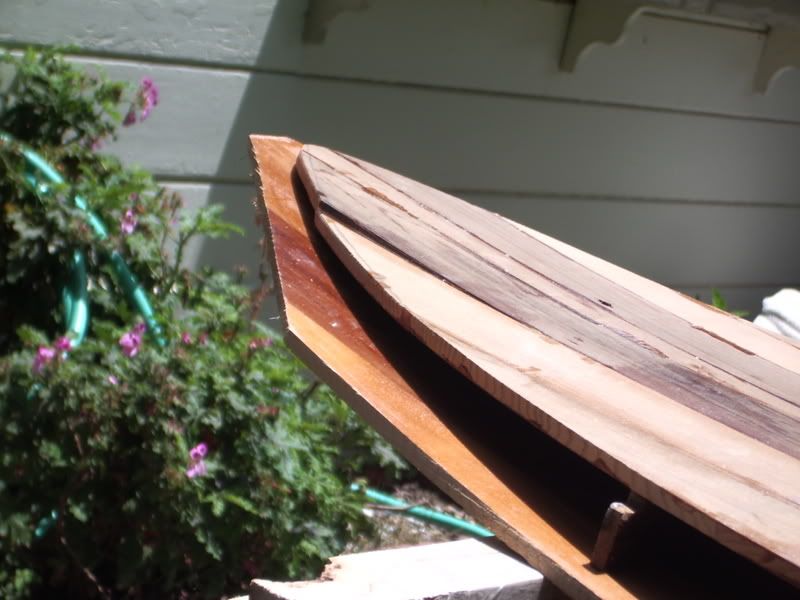
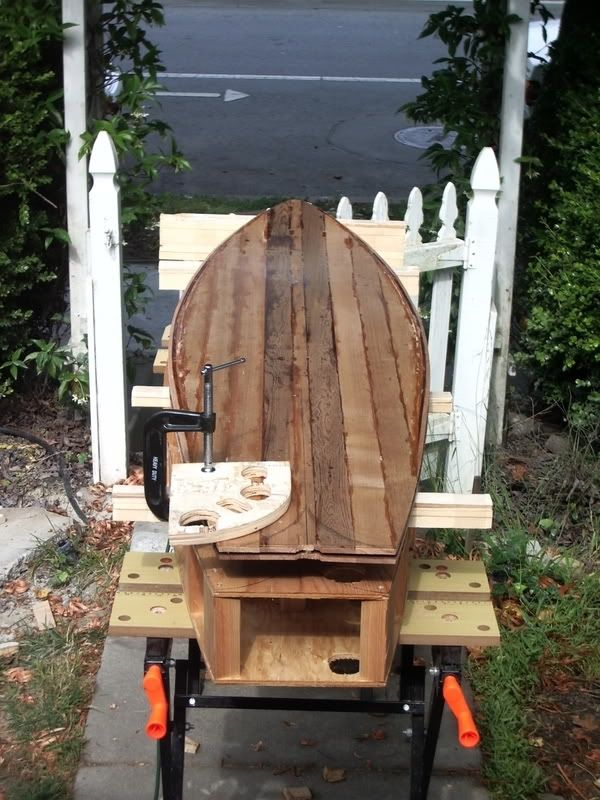
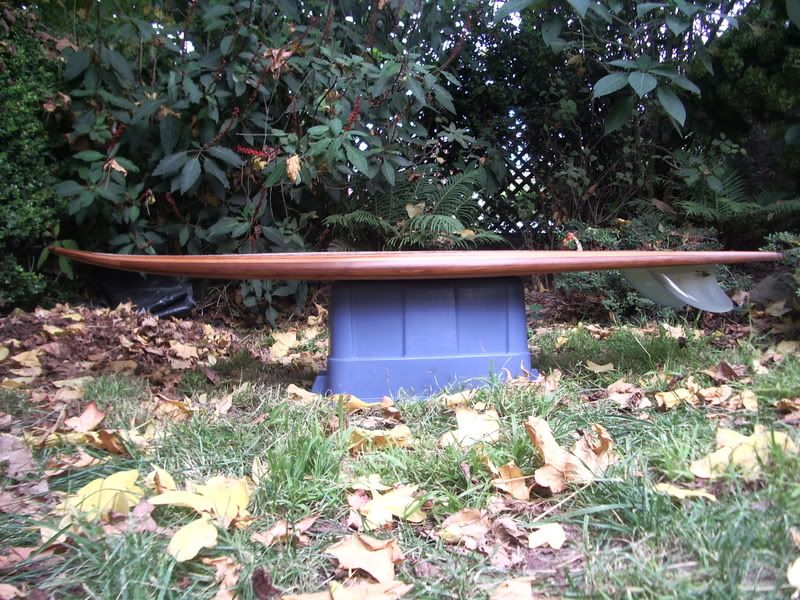
At this point I had a deck that didn’t put much force at all onto the frame, and I glued it on using the RR epoxy. I had the deck clamped to my rocker table, and then would unclamp it from the table, and clamp it to the frame one section at a time. The result here was that once it was all clamped to the frame, there was no support from the rocker table. While this allowed me to flow some extra epoxy along the rib/deck joints, it had the effect of messing with my rocker. The nose rocker straightened out about an inch. (see 1st pic). Since then I read up on more posts, and see that the frame really needs to be supported when putting the 1st deck on or this might happen. If I had perimeter rails in place, probably would have been less on an issue.
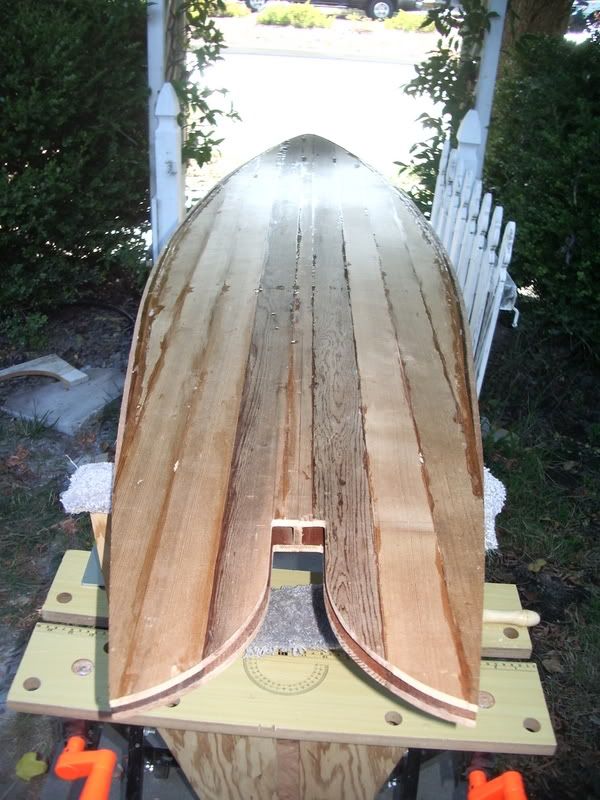
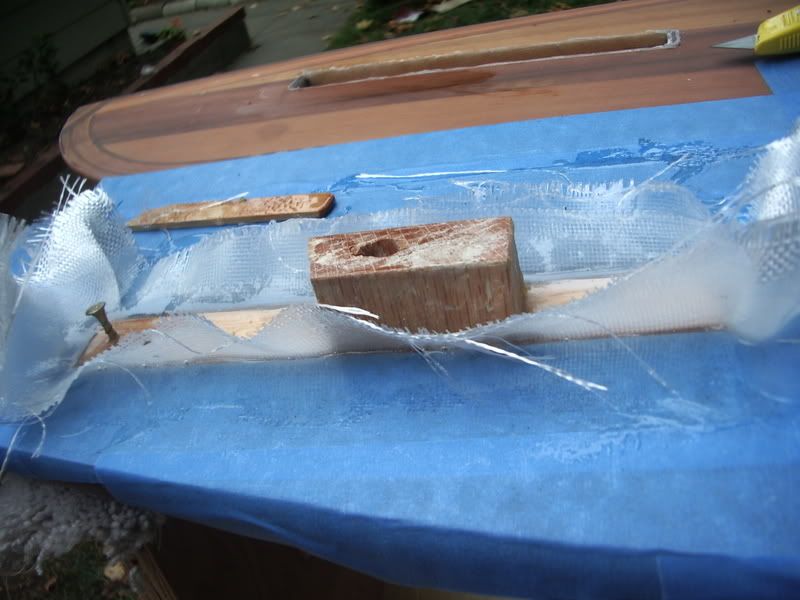
Since then I’ve added a bunch of extra reinforcement in the 20 inches nearest the nose, and a little block up near the nose for my vent to screw into eventually. I didn’t reinforce the entire board, because of weight issues, but only where the rocker was effected. (2nd pic)
Added blocks for the fin boxes out of douglas fir, and spent 2 hours with the belt sander getting them to match the stringer. Doug fir is some hard stuff. This was clear, dry fir, not the stuff that usually comes in 2x4’s around here.
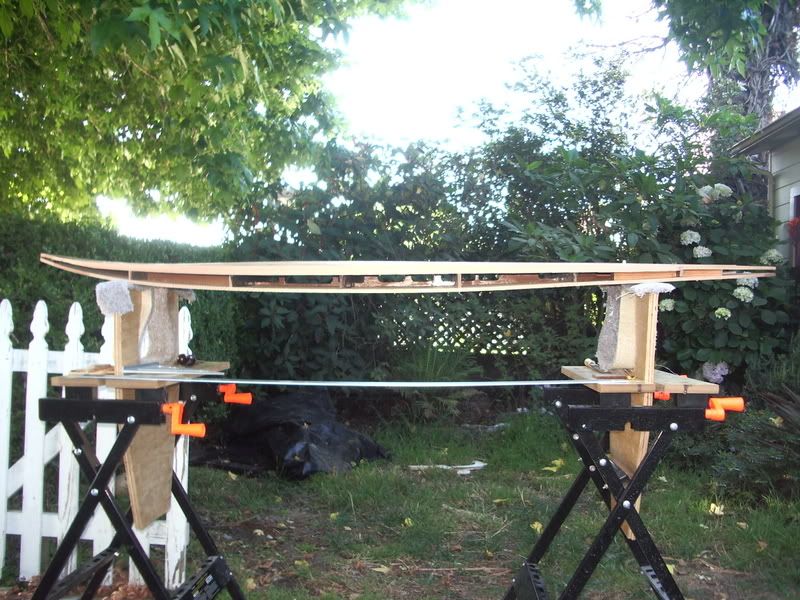
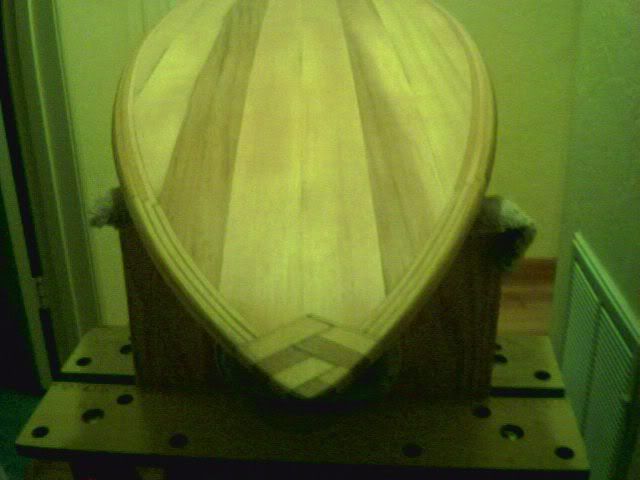
Also, here’s a pic of the whole thing, ready to have the inside sealed, and the bottom deck put on.
Long overdue update on the project, which is just about finished.
It will probably take me a few days to get all the photos uploaded and posted, so bear with me.
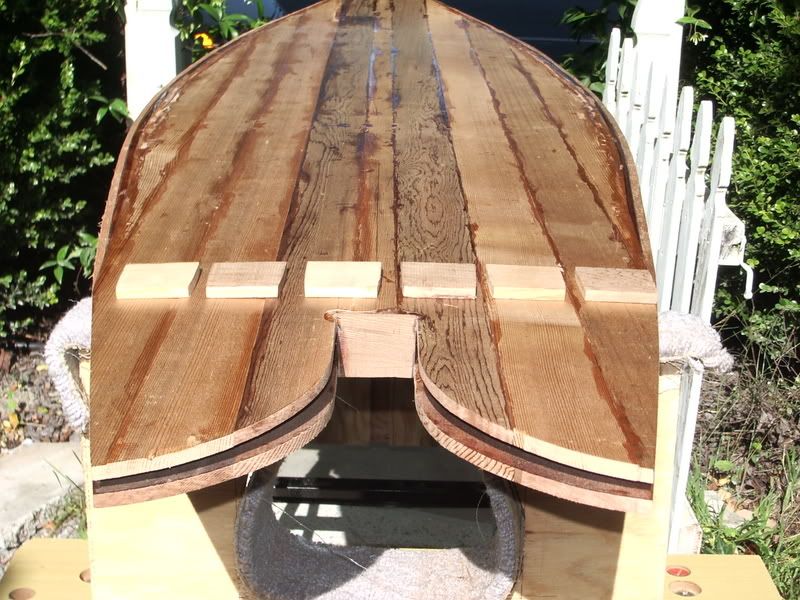
I think we left off where I was just about to put the bottom deck on. With the lessons learned from the top deck, I glued up the planks over-rockered after steam bending them to an over-rockered position. They sprung back just the right amount.
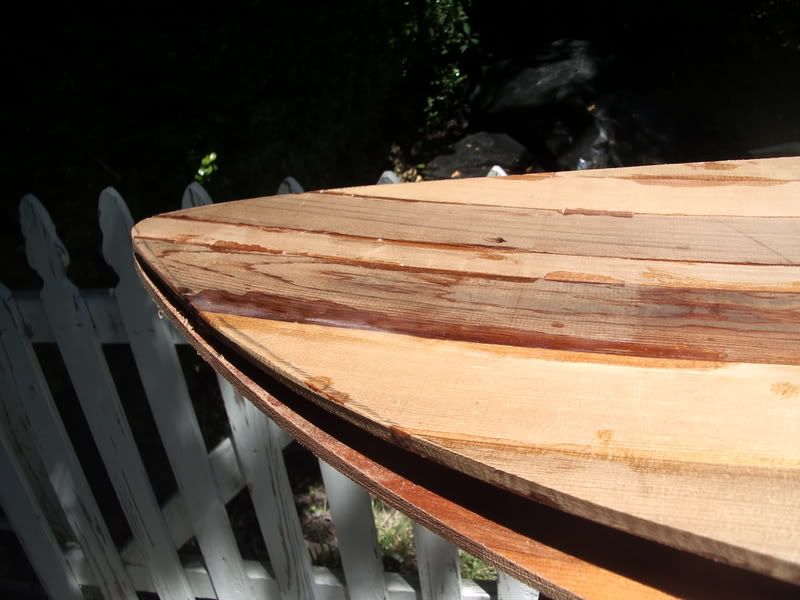
Here’s a photo with the bottom deck on, rough cutout with a saw. One very important feature: note the broken top deck.
Don’t ever clamp an un-supported piece of cedar, it will split. I think I did this one time previously in the project. I fixed it with some super heated epoxy that got really runny and soaked into the cracks, a bunch of wedges and clamps.
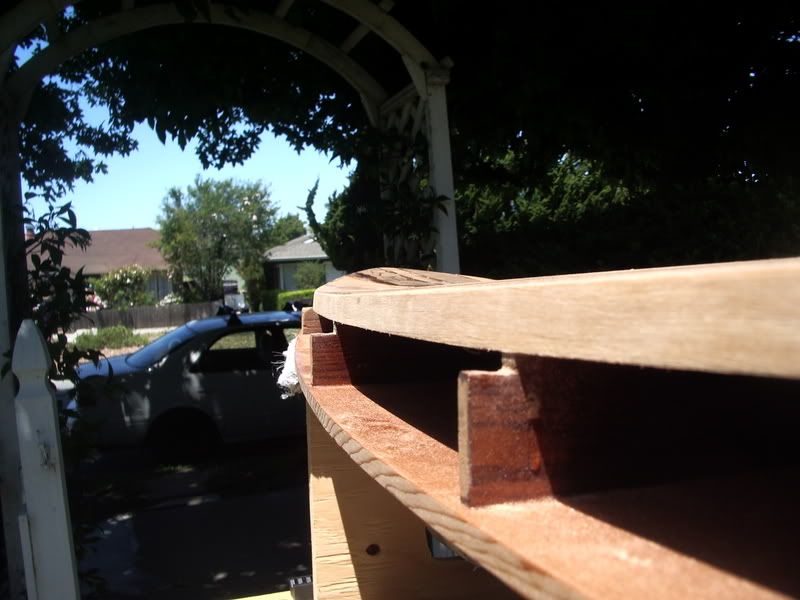
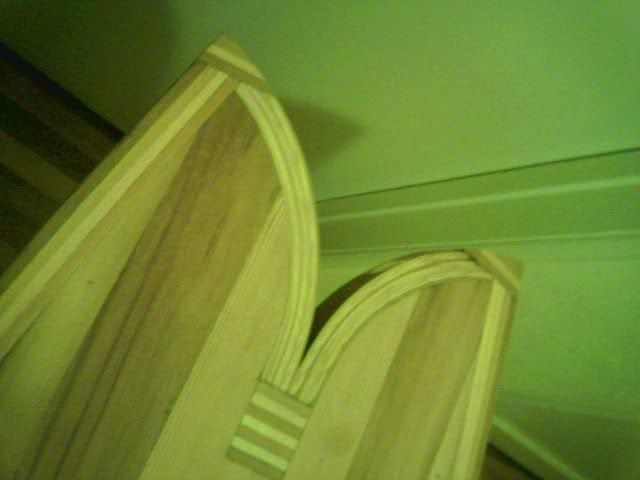
At this point the bottom deck was larger than the top deck. This was so I could have my upper rail bands correct without having 2 1/2" of solid rails. I applied 1/4" strips along the steps I had cut into the ribs. See the earlier shots of the frame for exactly where these steps were.
Here is a shot of the top step filled in, with the next step still to go. I used cedar strips that were a bit oversized, then trimmed it up with a block plane.
So I finished filling in the steps, then moved on to the tail section prior to adding the rails. I wanted the tail section to sit entirely inside of the rails for ease of shaping.
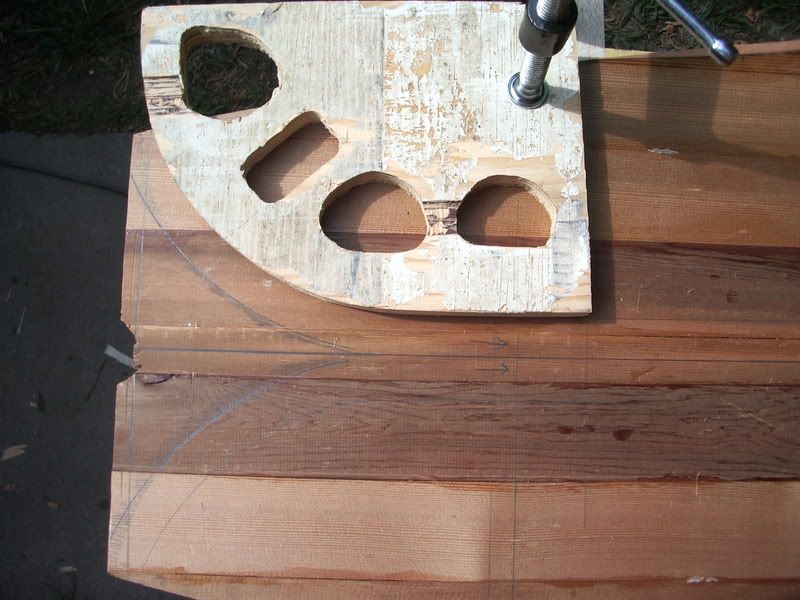
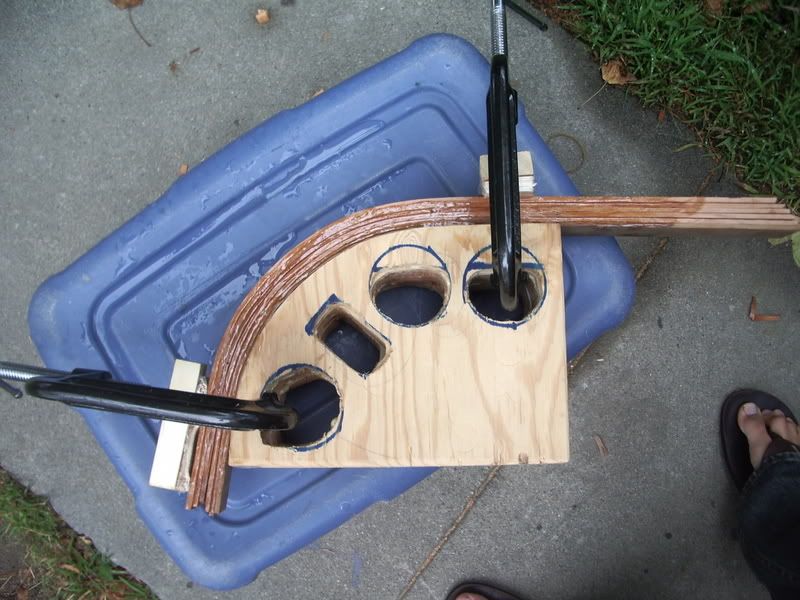
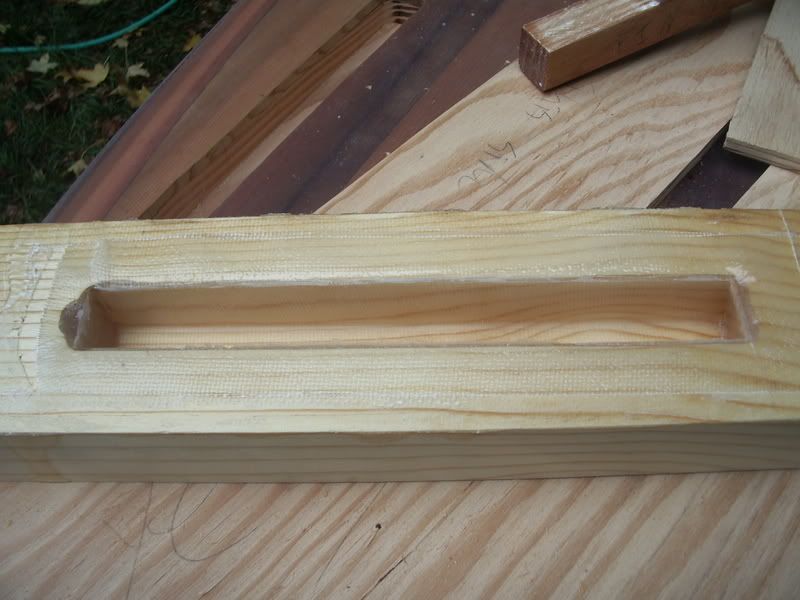
My plan: Make a template, router out the tail form on the board, then glue up the multiple thin strips on the template, and trim and install on the board. For me, this didn’t work, but here is what I tried.
Lining Up the template to router out the tail:
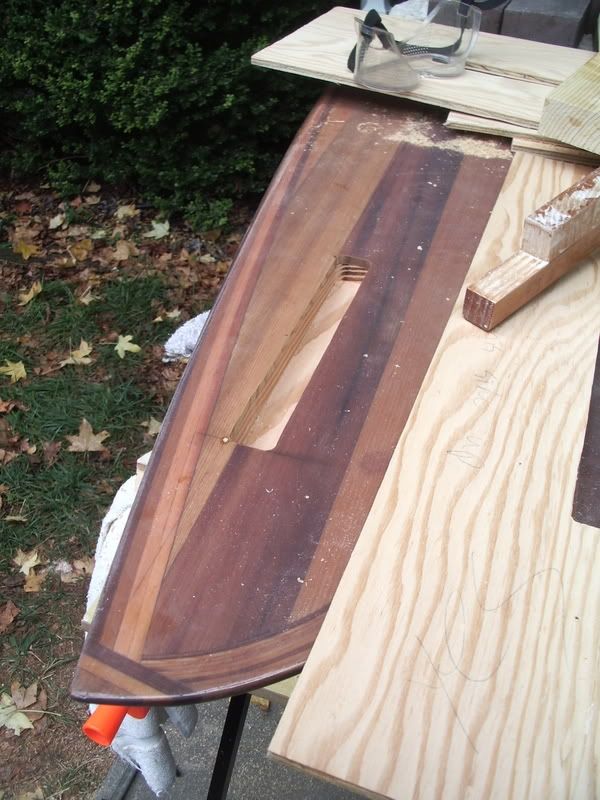
(the outer pencil line is where I want the final outline to be after adding on the tail strips)
And another view:
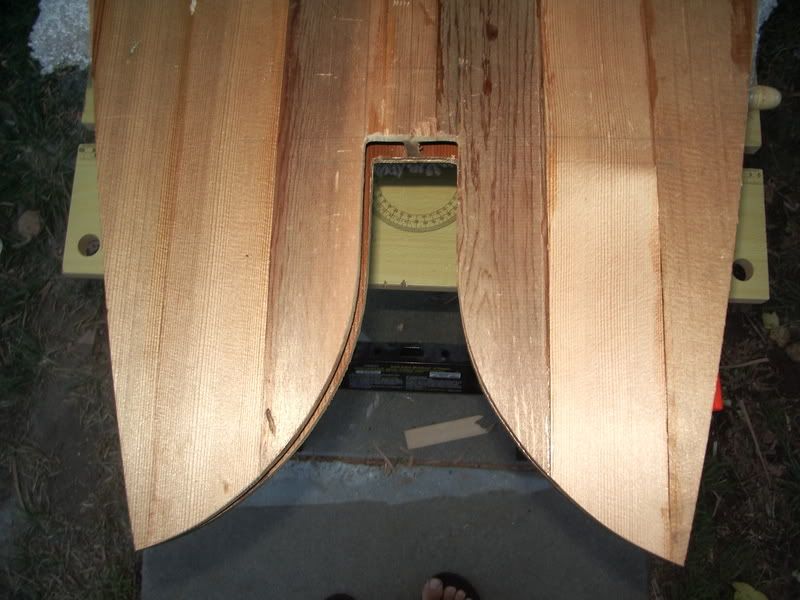
You can see here that my tail isn’t even side to side. I don’t know if I didn’t notice this at the time, or thought I could fix it later, or what. But I never fixed it and it has become a permanent feature of my board. Lets just say that since I’m regular foot, I needed a thicker rail on that side for my more powerfull bottom turn when going right
at this point I went about the business of making my tail blocks out of several strips of maybee 1/8" cedar. They required a bit of clamping to fit the template/bending mold, but did not split. This was fun.
Too bad it didn’t work. After making two of these, i tried fitting them to the board, and could not get them to fit flush no mater how much I sanded a little here and there. It just got worse. So, I scrapped the plan.
Instead I decided to fill in some of the space with some blocks of 1/4" cedar, and then bend thinner strips that would only require light clamping pressure for the rest. Here are my efforts:
1st block in place, others laid out on the deck.
All the remaining blocks and tail strips in place:
So I only have one more photo before there was a break in my picture taking due to my leaving for Alaska, and while I was gone my housemate with the camera leaving on a research project for a month.
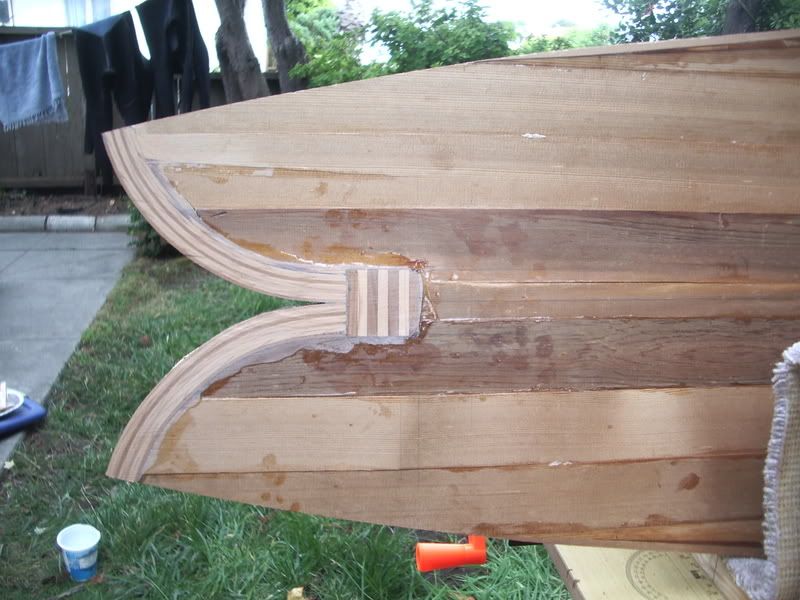
This shot is a close up of the aftermath of putting my first full length rail strip on. I’m using 1/4" western red cedar, just like everything else in the board. These planks have been steam bent, several months prior, but held in shape with the ends tied together hanging in my room for the entire time. I applied the epoxy, clamped it down, let the epoxy set, and removed the clamps. As I removed the clamps near the nose I heard a cracking sound. The epoxy bond did not break, but the surface of the rail strip sheared away from the rest of the board in the higher stress nose area:
The way I saved it was to very carefully saw off the end of the rail strip about 2" beyond where the stress had sheared it off, then use three thin strips to bend around that area of the nose. Each rail strip after that was stepped back by 1/4" so that all the small strips were put in.
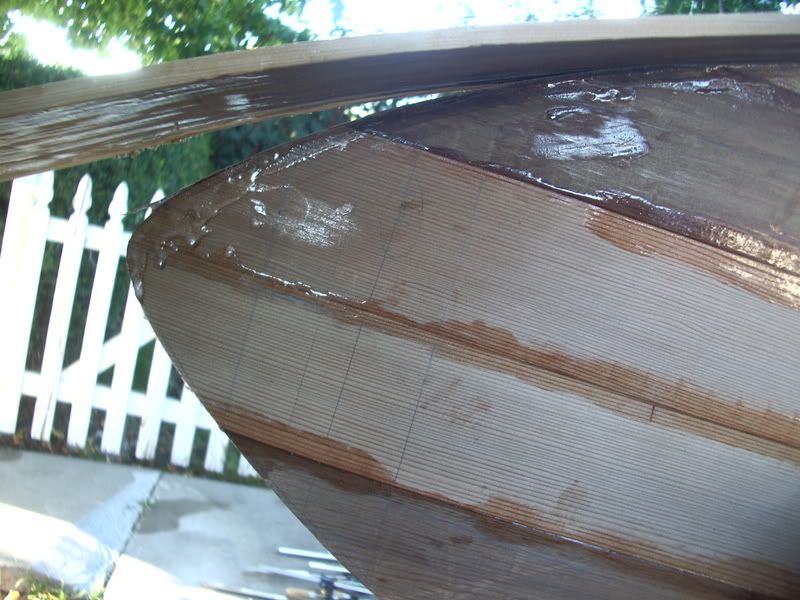
At this point I added nose and tail blocks, shaped the rails with input from some very generous folks here, and began sanding:
(pics taken from my camera phone, low quality. hadn’t finished shaping yet here either)
I slapped a bunch of epoxy on, per TomBloke’s method for wooden boards without fiberglass. 8 coats on the bottom and rails where I planned to sand, 5 coats on the top deck where I would do no sanding at all. The entire project used ResinResearch 2020 epoxy, slow hardener and this was no exception. When doing multiple layers I found that Additive F is your friend, and that if it sets up to beyond the point of being tacky, it’s best just to give it a light sanding before the next coat.
Nice board Pat. It sounds as though you had a couple of what I like to call “material disasters” that you worked out the answers to quite nicely. Overall a beautiful board, when can we know how it surfs?
It sounds as though you had a couple of what I like to call “material disasters” that you worked out the answers to quite nicely. Overall a beautiful board, when can we know how it surfs?
Ah yes, I think material disasters puts it quite well. Although, towards the end of the project every time something broke, or didn’t work out I stopped stressing about it. Everything was fixable. Although, every time I fixed something it added more epoxy and thus more weight. This is not a light board.
Almost forgot the most important part. I hope to surf it this weekend. I had one more material disaster with regard to the fins which I’m waiting on a part in the mail to fix. I’ll post shots of that fun stuff this weekend.
So after sanding the rails to 1200 grit (wet sanding after 320) and the bottom deck to 320, I started on my fin system.
Disclaimer:
This is a technique that Bill Thrailkill was generous enough to show to me while I was at the cerritos seminar last spring. It is the result of what I understood, and may not be exactly what he wanted me to do. Bill, If I screwed this one up, sorry. He showed me a board where he had used the system and it looked beautuful. I’m using wood. He did not, but said that this should work just fine with my tree hugging application. Although, with the fiberglass and epoxy, and driving to cerritos (think ecological footprint) all that green stuff looks pretty inconsequential. I guess developing and spreading techniques that can be used long term is what counts.
Enough of my hot air, Here it goes:
So here I have the model, or fin base analogue. I used a 1" by 1" by 9" block of doug fir. The front and back have 8 degree angled edges, parallel to each other. In this shot the left side of the screen is the front of the fin base. I glassed the whole thing in 4 oz e-glass, since I couldn’t get the s-glass to make those corners. All of the corners are slightly rounded. That extra block glassed on top is so that I can get it out of my mold. Lightly sanded with some 200 or 320 grit, don’t remember which, and then applied eight coats of mold release wax.
Next pic:
Skipped a couple steps in the photos, but I’ll fill in with text. I took a block of kiln dried pine (just make sure it’s dried wood, not sure it matters what) and routered out a box that was 1 1/8" by 1 1/8" by 9 1/8". I put in some epoxy, then tucked in one layer of 6 oz s-glass, wet it out really well, added a little more epoxy, and seated my fin base analogue into the box. Resin overflowed, and that was what I was going for since I didn’t want any voids. I let it set up, then used a hammer and hit really hard on the back of that 2nd block of wood to get it out. Just be sure you’re hitting from the back. After cleaning it up a bit, took this shot.
So now I have a fin box/fin base with an 8 degree undercut at the front. It is very hard to get the base out once it’s fully seated.
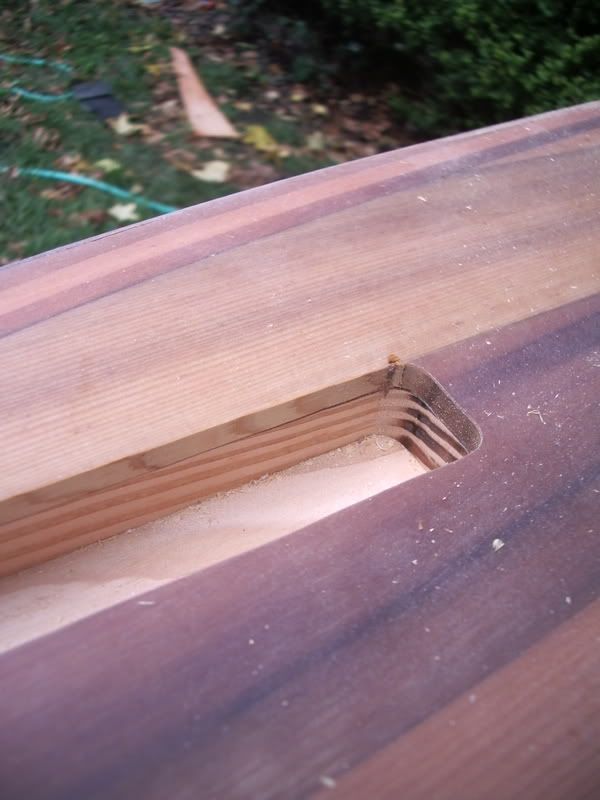
Next I routered out the boxes on my board. Now, I had placed blocks of doug fir inside the board after applying the top deck, as seen in earlier shots. After putting the bottom deck on, I measured where my routered out section was going to have to be, adn drilled two small holes along the outer edge of that line on each side. That way, when I sanded and put on the epoxy, the drilled holes would remain, where a drawn on dot would have been sanded off. I considered making a jig, but this method seemed like, for me, it would lead to less error.
Two shots of the board post router:
Did this in several passes.
In the 2nd shot here you can see a spot where I didn’t quite get the douglass fir block flush with the deck. This filled in with epoxy during the next step. (but again, more weight.)
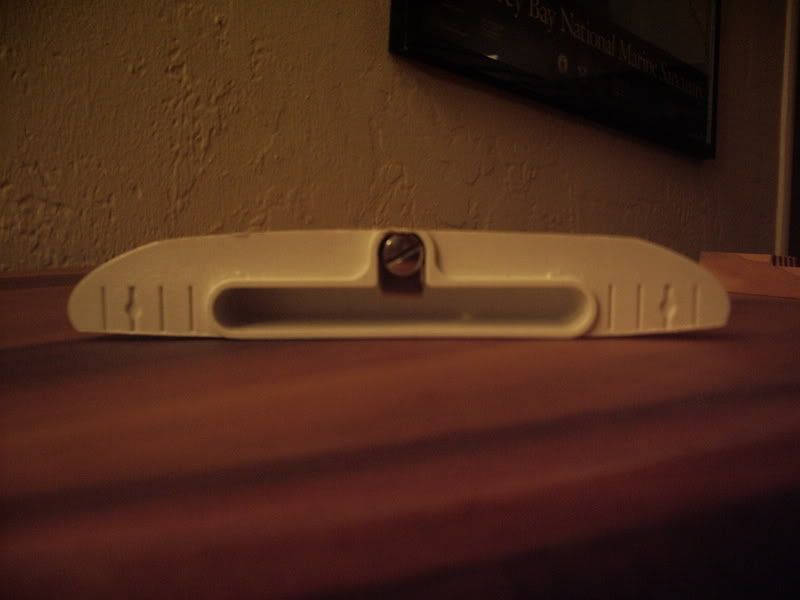
Jumping around a bit here. I decided I wanted to use some stock Lokbox fins for my first set, but also be able to make my own and change them out easily. That’s the reason for this whole system. So I went about the business of making some fin bases with lokboxes inside. These shots were taken at night, so they’re a little lower quality since I couldn’t figure out the flash.
First:
A standard box, ground down to 1" wide on a belt sander.
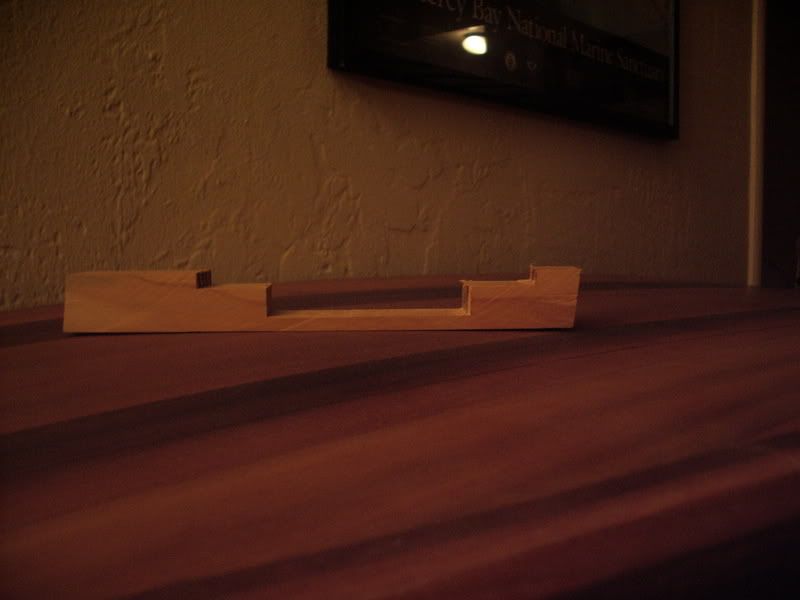
Next:
The wood insert post router.
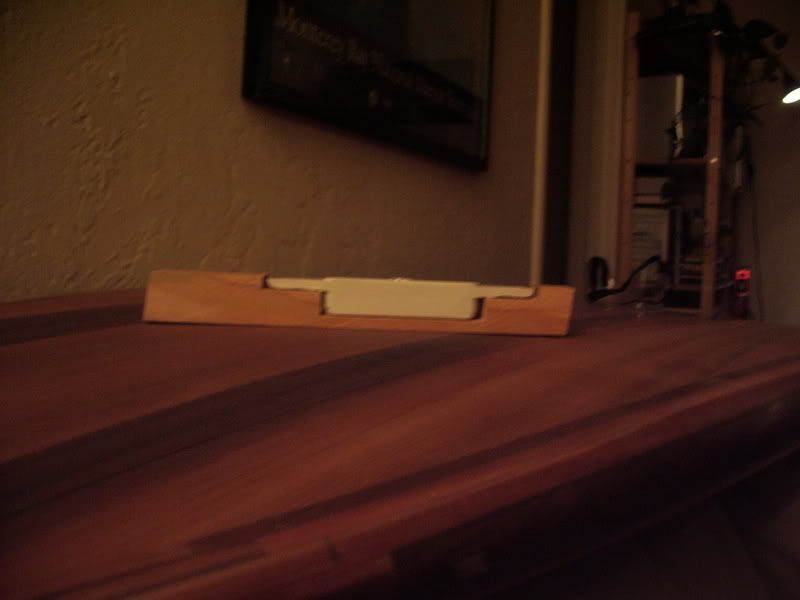
Lastly:
Oh, what a nice fit.
Next I lathered up the mold that I had made in the block of pine with 8 layers of mold release wax. Added some epoxy, added two layers of 6-oz s-glass. Placed the wooden insert in part way, really let the resin soak into the cloth, put the box in. I didn’t want any big internal voids, so took this quite slowly and carefully. I then wrapped the cloth over the top of the box/wood insert so it had 4 layers of 6 oz on top, alternating from each side. Added a couple bricks to hold it down flush with the top and cleaned up for the night. The next day I couldn’t get then whole getup out of the mold. I had to drill a 1 1/4" wood screw into the back of the block, and pry it out with a hammer claw. It left a hole which I filled with more epoxy. Repeated for the other side.
Sorry, no shots yet of the final product, but I’ll take some and get them up.
This picture has a lot going on. At the top of the screen, you see one fin box done, but not yet sanded. On the bottom one it’s setting up. I’ve got epoxy, then 2 layers 6-oz s-glass, then the lubed up fin base analogue goes into place. You can see that part of the little wood block is missing and it has a wood screw in the back of it, that’s after doing the 1st one. Once the epoxy wasn’t tacky any more but still soft I cut as much of the excess fiberglass off as I could with my utility knife, being carefull not to pull away from the sides. And if you look in the top left you can see that the leaves have started falling from the elm trees, and we haven’t raked them. When I started the project they were just budding.
Sanding time:
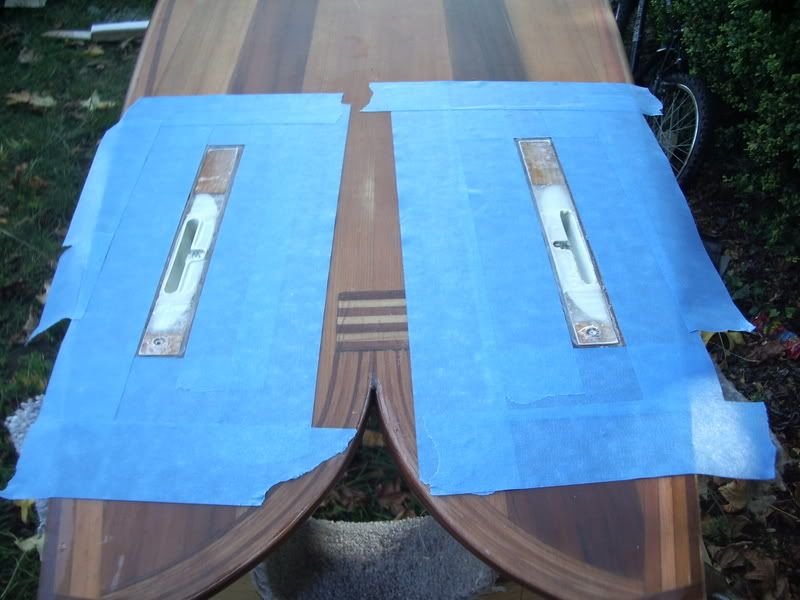
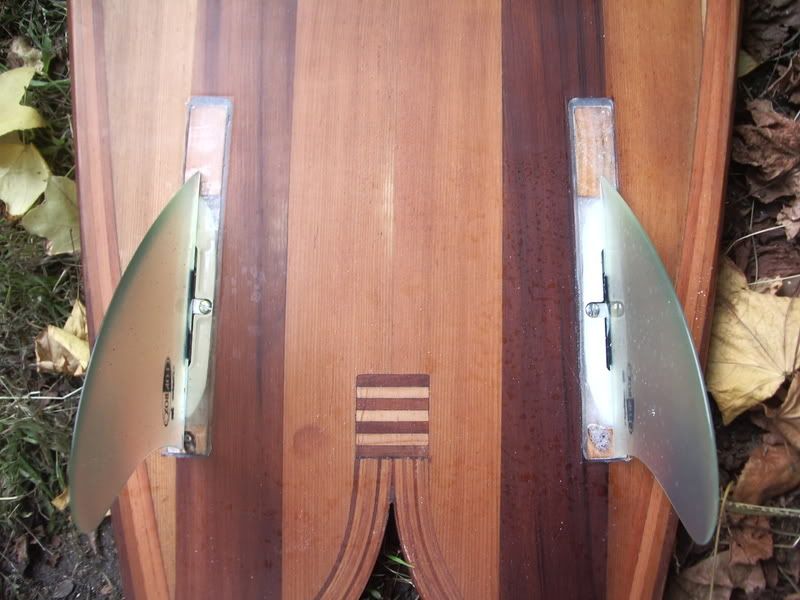
Both fin boxes are done, and both fin bases are done, and in place here. At this point I’m still taking them in and out by putting in a wood screw in the back each time, that’s what those holes are from. I sanded the boxes and the inserts at the same time like this to be sure they were even. Once I got even with the board, took the tape off and finished wet sanding the bottom deck from 400 up to 1200 grit with everything in place. I sanded into some voids in the top of the fin inserts, but it was just in resin and not through the cloth so I’m not too woried.
And that’s all I’ve got untill the next round of photos go up in a few days. Time to go check the waves.
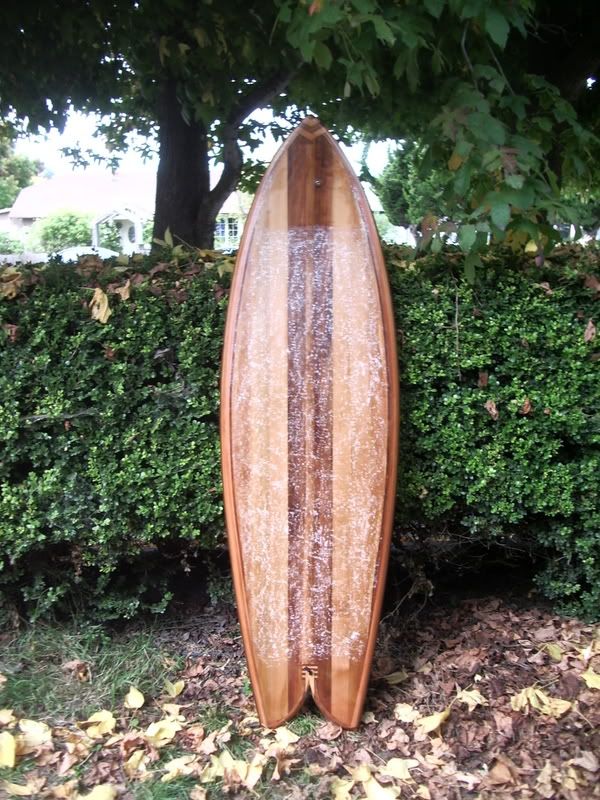
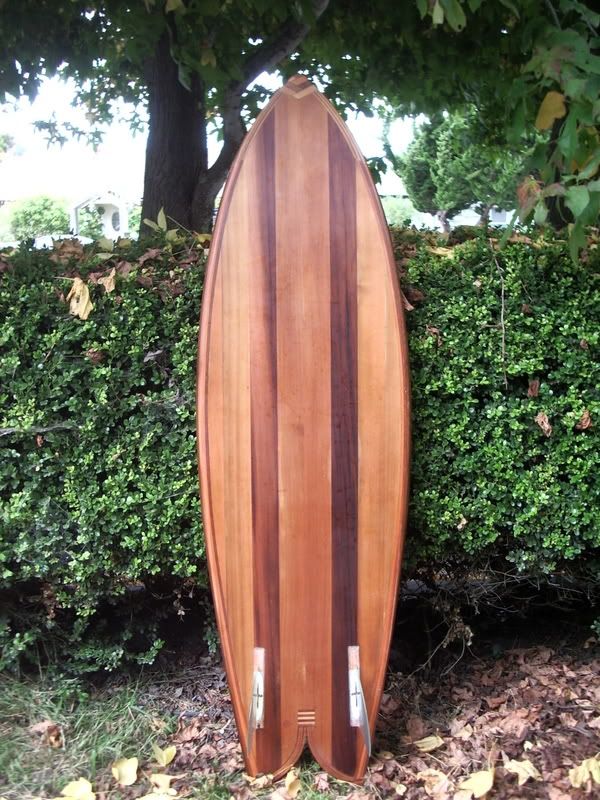
Last few photos for a while now… the board is done.
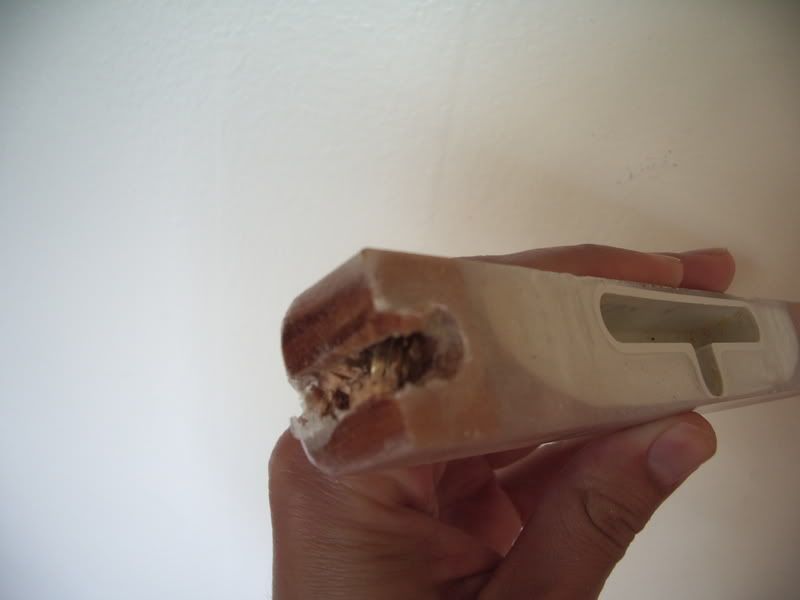
Ok, so here’s what I tried to insert into the back of those fin bases to try to get them in and out more easily:
It’s a small brass wood insert. Plan was, that a brass machine screw could be put in and act as a bit of leverage when it was time to take the fins out. The screw broke off. So, I had to try to drill these guys out.
After partial removal of the brass inserts:
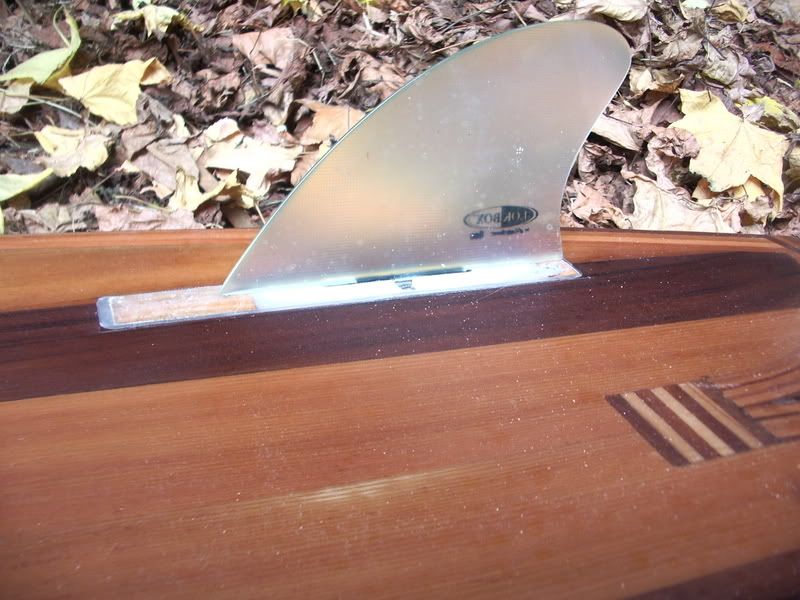
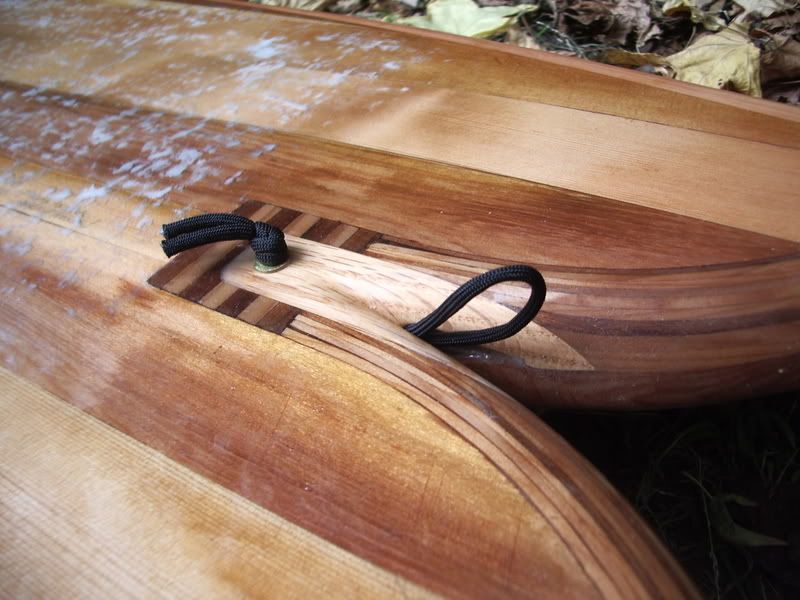
That hole was filled with epoxy. I’m back to using a wood screw into the epoxy to get the fin bases in and out of the board. I really can’t overstate how tight these fin bases stay in place with no type of hardware whatsoever, just the undercut and friction fit. Thanks Bill!
And that’s it for now. If I make any changes I’ll update the thread.
I’ve taken it on the water twice now, but want to ride it again tomorow before putting up a report. I’ll have some questions too. Thanks to everyone who has shared their experience on this site. I couldn’t have done this without the knowledge accumulated here.
I’m stunned. In a good way…but stunned nonetheless. Next time you embark on a mission of these sorts superfatpat, give me a shout. I might be able to help out…someway!?