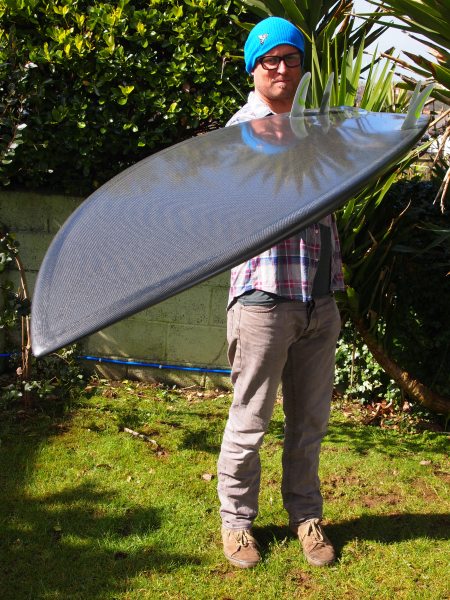
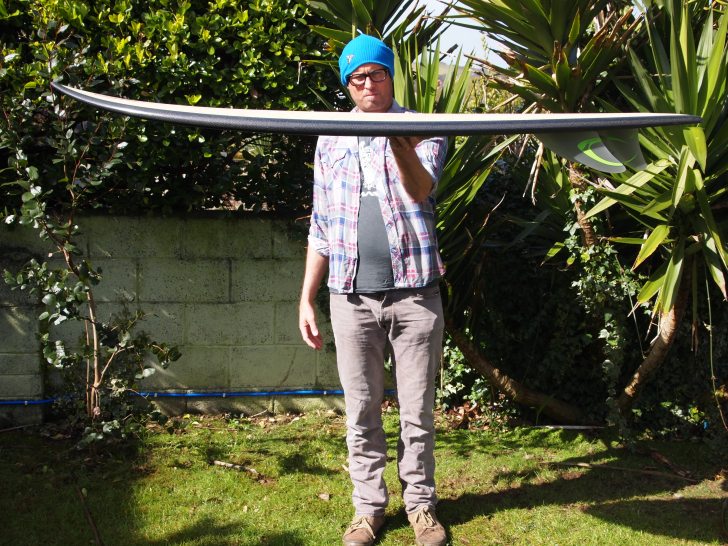
**richard looking good **
let the journy begin
** cheers huie
**
**richard looking good **
let the journy begin
** cheers huie
**
WOW , Rich !
it looks lurvly so far , mate !
thanks heaps for taking the time / effort to document this !
I can't wait to see the finished board !
a few questions , if I may ....
what fins will you be going with , mate ? .....carbon fibre ones , too ?
twin keels ? quad ? five fin option ?
lastly .... what are the dimensions of the board , please ?
cheers !
ben
Hey many thanks for the words of encouragement…all the knowledge has been handed down by Huie - amazing tips that have made the journey this far pretty stress free.
The board may end up being far too stiff - I agree - but again first time…free bagging - had to go belts and braces to minimise risks - I guess the ride report will be the only answer on this question.
The board is 5’10" x 20" x 2 1/2" its going to have Futures speed dialers clustered out on the rail. Its a remake of the board in this link - (sorry couldnt post pics again) http://www.thirdshade.com/2011/10/performance-quad-fish.html
Cheers
Rich
thanks for the link , Rich !
IS it the guy in the photos , that you are making THIS one for ?
it would be good to get [photos of ] him pulling a similar move on this board , and to hear his comments on the FEEL of the board , by comparison , perhaps ?
cheers
ben
Yes Ben - for the same friend - little changes to the board to hide a little more foam in there - only slight though as he’ll have the benfit of EPS providing a little more bouancy too…I’ll cetrtainly be reporting back with his ride report/comparisson - I have the feeling it will be amazing in clean waves but may suffer due to stiffness if it’s bumpy or windy.
Cheers
Rich
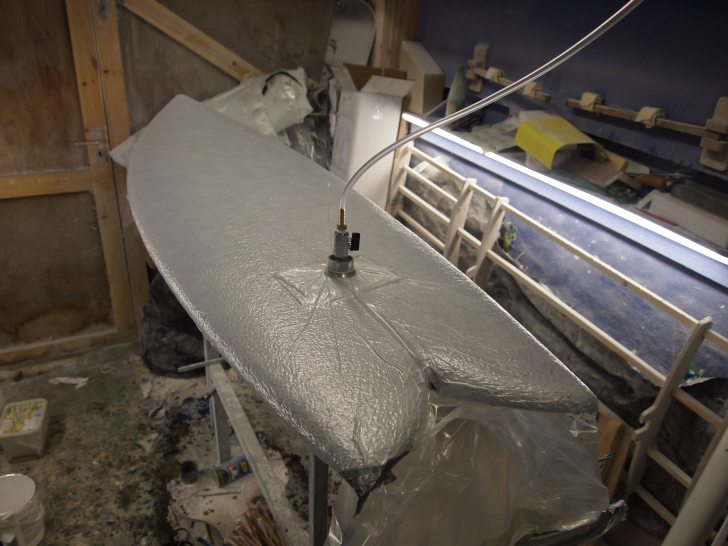
Make sure you don’t put your vacuum probe (vacuum inlet fitting) directly on the board as it will leave a big round recess on the laminate. Instead position your vacuum probe on an ear with a breather tube ( breather wrapped in fiberglass) leading to the board surface. This is an indusrty standard for aerospace carbon composite fabrication.
Hi Flynbri sounds like amazing advice but any chance of a picture…I find those so much easier to understand…
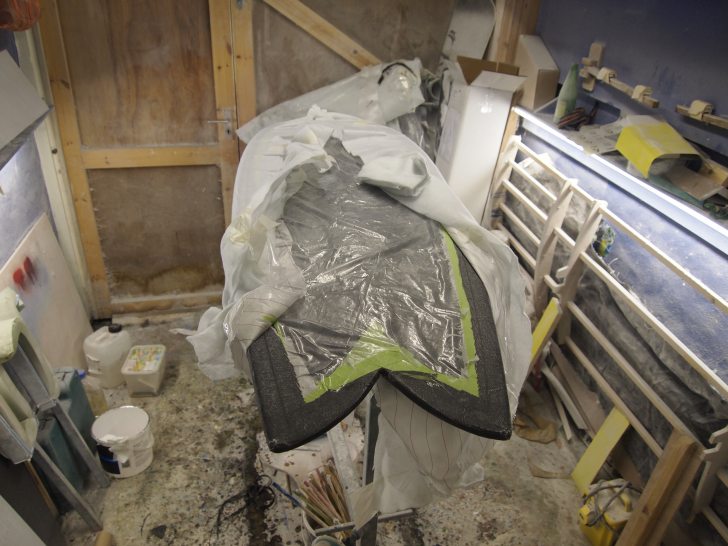
Got the top bagged up last night. All went well. I guess I need to sort out that vac exit point as I do have the ring mentioned above on the bottom. The deck got away with it as I made quite a thick pad for it to rest on in the bag from breather materail. Probably helped that I brigdged the stringer with it.
These are the layers stripping off. You can see the peel ply and the release layer is stuck to the breather. Comes off real clean.
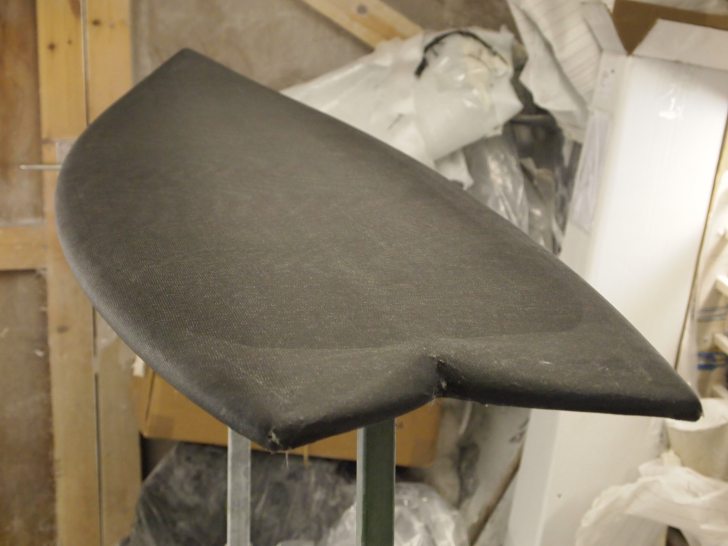
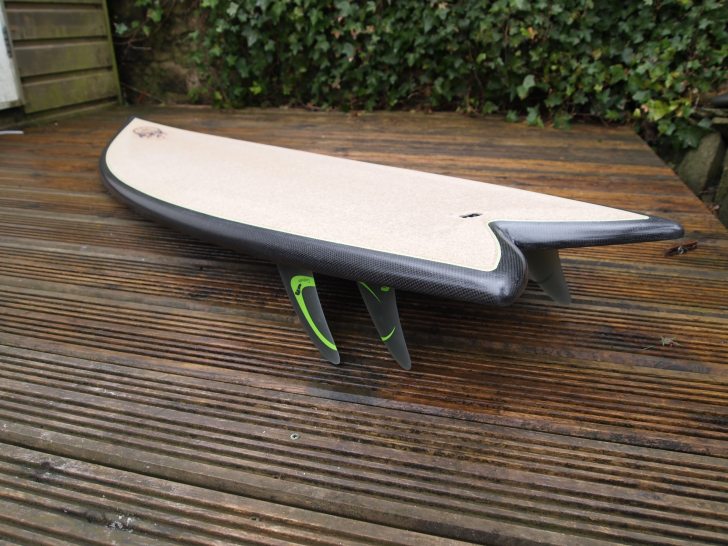
And here’s the board with a complete laminate. Stiff, feels strong and it’s light. Weave looks nice too.
Cheers
Rich
I put a layer of paper towels between my breather fabric and release ply. The paper towels stick to the breather and become a permanent barrier, allowing many reuses of the breather.
Otherwise the breather sticks like a mofo to the release ply and tears, making reuse difficult.
BTW nice job
Hi Rich -
Nice job on the carbon vacuum laminate. It looks like you got a wrinkle-free result. In my own experiences, I've had trouble with both wrinkles and pin air between the carbon and the 4 oz top layer... as if my absorbant layer was too absorbant(?)
I've also been playing with doing pre-fab deck skins using bamboo veneer/fiberglass or carbon sucked down on a vacuum table and wood strips taped together edge to edge with glass or carbon as an extender. By that I mean the wood strips or bamboo veneer might be more of a stomp pad and the carbon extends beyond the wood, etc. up to the nose. Once I get my skins in order, it's an easy enough job to vacuum the skin to the blank. As per the 'Timberflex' method you can easily trim the skins with scissors to make sure you have the correct pattern before bagging.
I can't post pics in PMs but I'll see if I can dig up your email on your website.
Thanks for posting the details on your recent projects... they are inspiring!
John
wooohooo !
looks GREAT , Rich !
can't wait to see it fully finned ....
Are you going to gloss coat it , too ? [the carbon will look unreal glossed, I reckon ! ]
cheers !
ben
Ditto, amazing job getting it wrinkle free.
I only do SUPs, so I really know how hard it is…hehe.
I never get cloth wrinkles, but still get a few resin ridges (from release ply wrinkles) that need sanding off. I’m getting closer to perfection, but can’t match yours. My latest idea is to try cutting my release ply into 2 foot wide strips and concentrating on getting each strip down tight and wrinkle free. My thinking is this will be easier than dealing with a single 8 foot long sheet and trying to get it down perfect.
I wish someone would tell me the secret
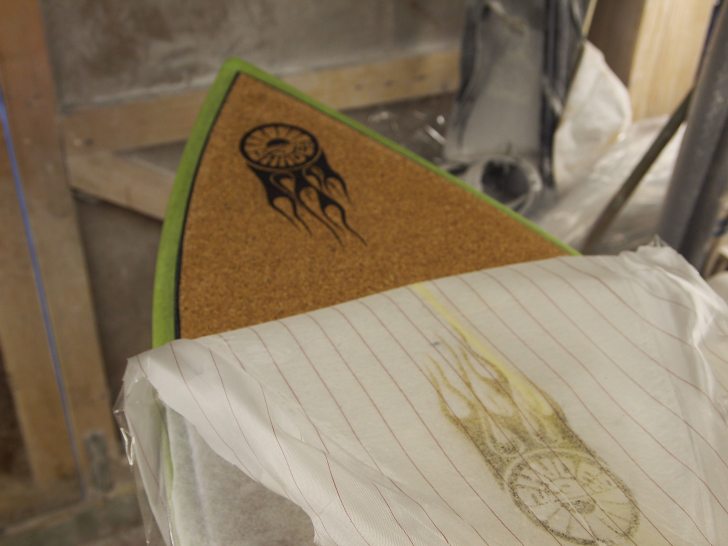
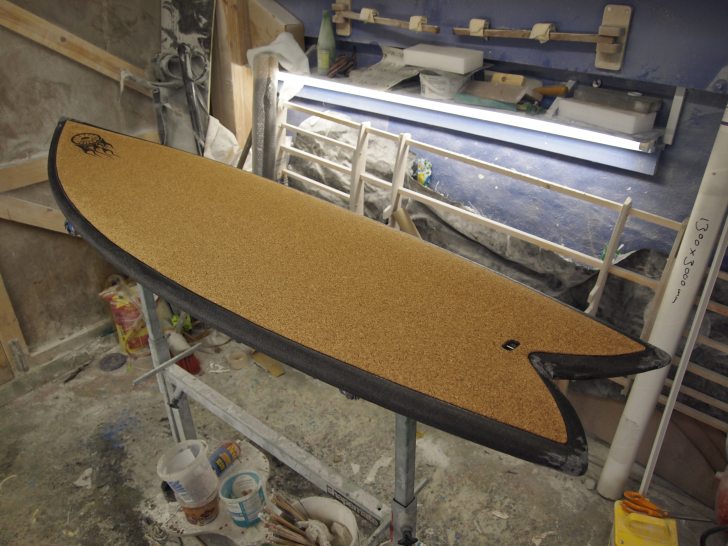
Here’s progress…she went back in the bag to vac the 2mm corecork deck - you can see where I taped up first - that gave me an area to wet out with epoxy before laying the cork down and geting her in the bag. The decal is laser etched in the cork - that came out very sweet. To trim the cork panel beforehand I did a rough cut then taped it onto the deck then went round with a marking gauge to give me the line and simply cut up to that with scissors. The taped is about 1/4" further out but it gave me a visual refernce for positioning.
Here she is after vaccing - just needs a light sand to blend the cork into the deck. The line is pretty good but there’s a few slight wobbles due to scissor cut. Cleaned up later with pinline.
And here’s the finished board…pinlined with plasticote rattelcan - this is amazing stuff for pins - very opaque and dosent suffer too much creep under the tape as it’s pretty thick. I took the precaution of first laying down a clear laquer then the colour - as it was partially going over cork I was worried about the bleed - seems to have worked as it seemed to seal the tape line first.
The rest of the board got a speedcote laquer put on quite heavy but I didnt matt it off - just left as was and it gave a nice satin finish that shows the carbon weave beautifully.
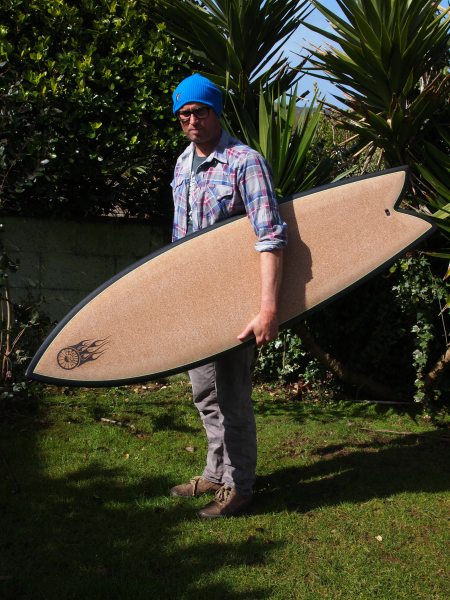
This was one happy customer!
And finally a few more of the finished project…needless to say it’s been turning heads and the orders have started rolling in…
cheers
Rich