BTW If you need to make your tissue shell a little stiffer before glassing, you can always add another thin coat of water-based sealer (concrete or spar urethane).
1 Like
It’s been a while, still pressing on with this build.
The board just got its final hotcoats and awaiting finishing sand.
Here’s a couple pictures of some earlier stages. I glassed 6/4 on top and bottom. There is a little “flex” between the hexes, but I think it should be strong enough…Not sure how much the hoatcoat will stiffen up as it cures.
Weight is not as bad as I had expected, but could definitely be lessened by using less infill and more efficient designing next time.
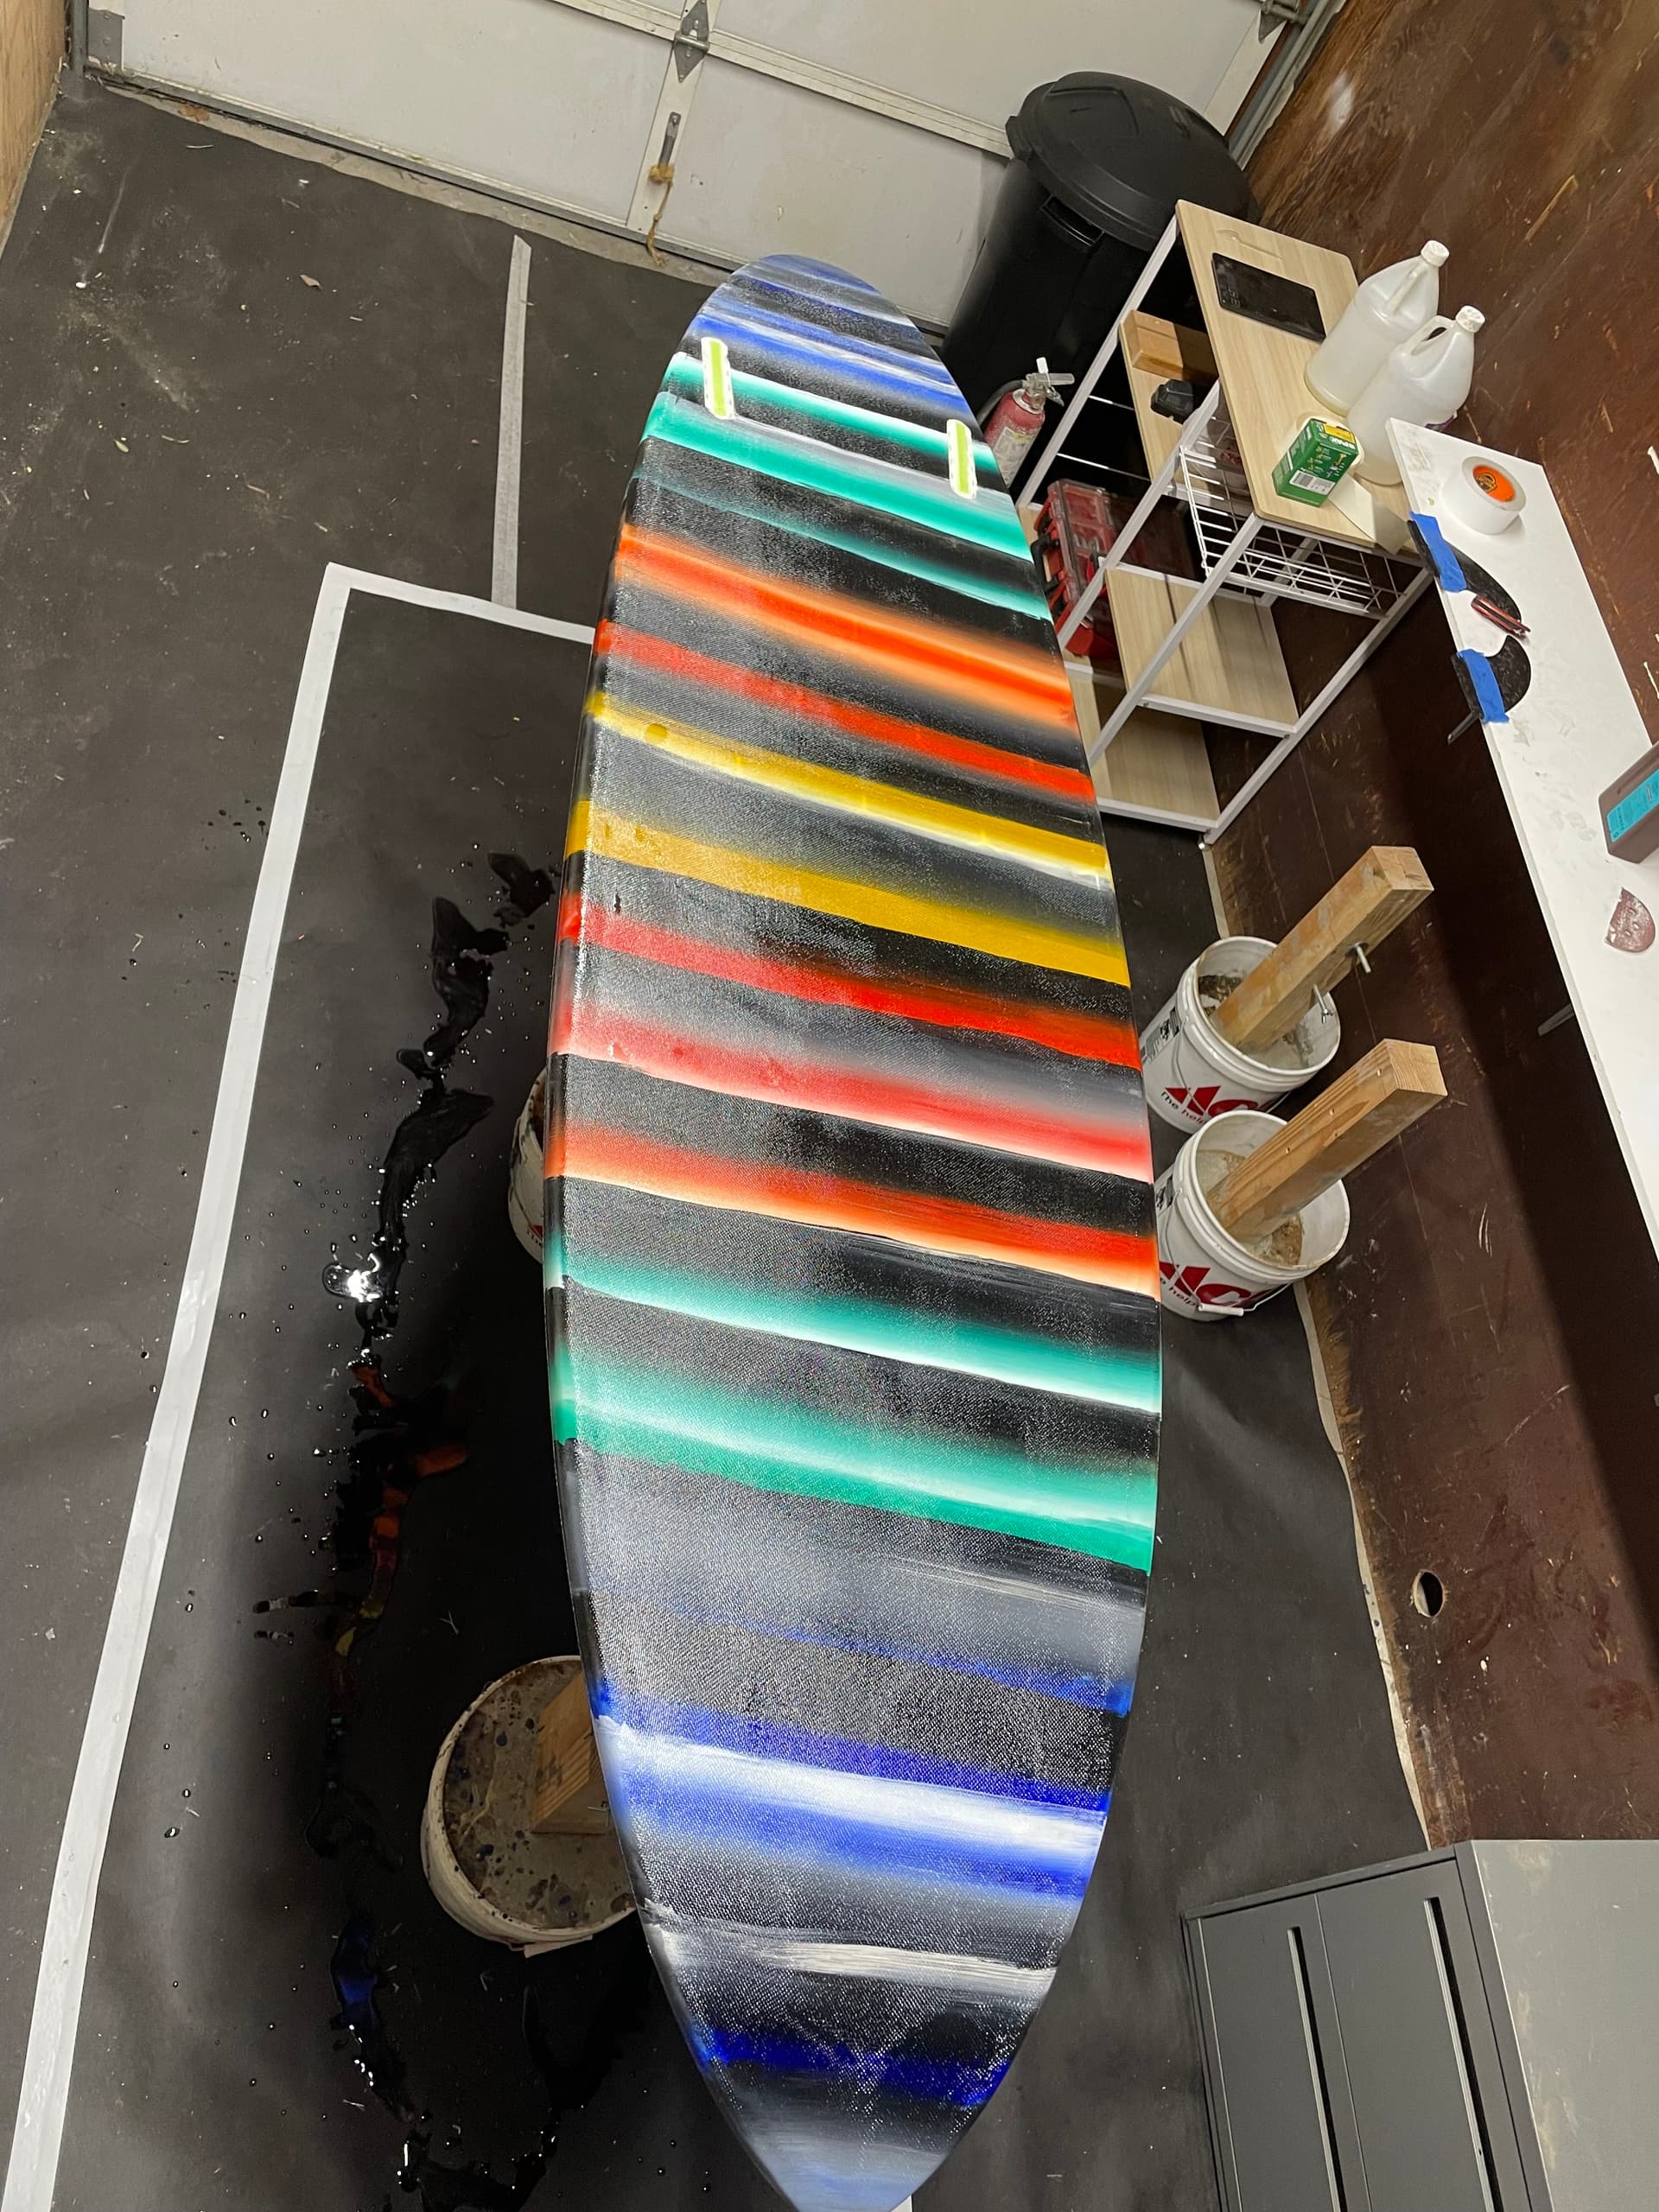
There were some minor imperfections on the bottom lam that caused some yellow spots. Being a perfectionist I decided to try to paint the board with acrylic hoping for a “stained glass” effect. I gotta say, it turned out 1000x better than expected. I don’t have pictures of the striped side illuminated right now, but it’s pretty sweet.
After investing so much time into this board, I think it will end up being surf a couple times and likely going on the wall (with LEDs behind it). I already ordered a blank to replicate the shape in foam lol.
Will report back when finished and tested in the water.


5 Likes
Very nice. Is there a mechanism/vent for pressure changes due to internal gas expansion/contraction? Do the chambers have connections that allow pressure equalization?
1 Like
All chambers are connected and it has a goretex vented leash plug that will hopefully suffice.
2 Likes
Looks awesome man! Stained glass effect is ![]()
![]()
You’re making impressive progress with your 3D printed surfboards! For your latticework style board, one technique to try is vacuum bagging for the fiberglass layup. This method can help prevent the fiberglass from bowing in the voids and ensure a smooth, even finish. By using a release film, peel ply, and then fiberglass layers, the vacuum pressure will help the material conform to the complex lattice structure and distribute the resin more evenly. You may also want to experiment with layering different thicknesses of fiberglass to minimize gaps and improve the overall strength. If you’re looking for inspiration, some insights from SUP stand up paddle board designs, which often deal with intricate shapes and precise laminating techniques, might provide useful tips to refine your process. Keep refining your technique, and you’ll likely find a solution to achieve the smooth, consistent finish you’re aiming for!
That reads like it was copy/pasted straight from ChatGPT
3 Likes
Mike here from Blueprint Surf. Mate, your boards are looking awesome. I just ran across this thread, and there’s a ton of good information and well-tested techniques. We developed a method that is a bit different than yours. However, there are many ways to skin a cat. Happy to give some advice if needed, but I don’t think you do! Vent plugs and some glassing techniques to avoid pin holes are critical in keeping the board water-tight. We print our own vent plug housing, but I think you can get a Gortex one online from one of the paddleboard glassing companies. I hope you haven’t abandoned the project, 3d printings is the future!
What if you used 2 oz glass as the first layer? Use the same wetting out technique on the first layer. 2 oz has a tight weave and it’s a pain to work with if you laminate the way we would normally do a board, but if you wet it out on a table first it should be OK. Then do another layer or 2 with 4 oz. I’ve seen clips where guys use a wet out table to get a very precise cloth/resin ratio then they roll it onto a plastic tube and transfer it to the board.
Hey Mike, thanks for checking out our thread! Its really cool to see that you’ve been able to build a real business combining 3d printing and surfboards.
If you have any pointers you are able to share on what might be a good process for fiberglassing over voids I (and many others) would really love to hear your advice! From what I’ve read I believe you use some secret composite material for the first layer that isn’t simply fiberglass so whatever you can share that isn’t a secret would be really appreciated.
I haven’t tried this with 2oz but I have done it with 4oz. I’ve wetted out the cloth on a table and then tried all kinds of different cure times on a table before placing it onto a printed board blank but I always end up with dips in the voids in the finished product.
Dips in the voids… I think you would have to use tape or a spray glue to hold down something very thin like a rice paper to keep it tight against the frame. Then you could lay a wet layer of cloth onto that. I don’t know if the rice paper will saturate, but it should. You could go back and brush some resin into the paper from the opposite side afterwards, but you can’t do that to second side. For the second side you might be able to spray a glue or use tape to keep the cloth tight against the frame then use a brush to wet out the cloth, or wet out the inner part of the cloth then lay it over the frame and pull it tight and tape it onto the cured lam, then wet out the part that is still dry. Maybe just keep the area near the rail dry.
I used a vacuum pump to pull a Balsa skin onto a hollow frame. It was a mistake, the vacuum pressure was too high and it pulled the wood down where the voids were. I think you would be better off making a rocker bed and using the techniques that hollow wood board makers use to lay the skins onto the frame.
Yeah, I’m happy to share what I can. To be candid, we have some secrets because we spent a significant amount of time and energy developing what we did, and giving that away would be detrimental to our business. I would suggest not using rice paper or something that is thin as your first layer. Although you may make a good-looking board, it will delam quite quickly. There has been a lot of discussion in this thread, learning from those building model airplanes, which is something i was unaware of and i think its an interesting path to go down. That lightweight PLA would really help the weight, just not sure it would be strong enough (we thought about testing it but have put that on the back burner). I have found that 4oz is a good weight to go with, we did test some other types of weaves and had varying results, the issue you run into is if your cloth is too light, it won’t be strong to hold the board together, and if its too heavy it will sag.
To answer your question @NimbleRobot laying up on a separate table is critical, we use a silicone mat that is easily cleaned with vinegar and have been using it for 2 years roughly. Additionally, resin rollers help a lot also, you want to get the right amount of resin, which is a hard balance but enough that its saturated but not going to sag/pool. If someone had prepreg money, they shouldn’t spend it on this, but it would be cool to see the result. Also this may not make much sense, but the people who glass surfboards, and who are good, know how to get a lot of resin out of the board, there are a lot of techniques that i think can be carried over, there are some great board builders on Instagram, but hitting up a local one and asking to come by and watch (maybe for a 6er in return) could help a great deal, no disrespect to your skill now, but at least i find its always good to watch others technique to improve yours.
And finally if your really cared about the voids, you could try a board with suncure resin, i don’t mess with that stuff due to funes and its environmental impact, but it dries very quick, and if you place the board in the right orientation it could be cool!
2 Likes
The “tissue” (not rice paper) skin base is cost effective for learning and potentially a good final build option. Bonding the tissue to the lattice is no different than bonding any other material to the lattice. If epoxy can be used to bond tissue effectively to the lattice, it is no more likely to delam than any other material bonded the same way.
The method of tightening, sealing and prepping the tissue are what affect final lamination strength with FG.
To prevent sagging the tissue needs to be stiffened with the appropriate sealant — one that enhances tissue tightening and that bonds well with the resin used. (Research bonding adhesion as related to material “surface energies”).
(I considered building hollow foam and tissue boards but decided it was not worth the hassle of dealing with temperature related pressure differentials — owned a Hansen Stratoglas hollow twin and a W.A.V.E honeycomb/hollow in the 70s.)
If I had a dog in this discussion (and I don’t), I would tighten the “appropriately bonded tissue” with water, try sealing with “water-based spar” polyurethane and build enough skin stiffness and thickness with a few more independent/separate spar urethane coats so I could do a “light” prep sand with 150 or 250 grit. I would do a cheater coat of epoxy before final lamination followed by another “light” sand with 150 maybe 250 grit. Epoxy should bond well enough with a “water-based polyurethane” finish.
Then I would lam one layer of light FG cloth (to tack-free) before adding a glassing schedule that would provide enough strength over the lattice core.
Practice and some slight process adjustments and/or additions could improve the final aesthetics. Regardless, the end product would likely be a decent/usable board.
As always, experiment with a large enough test panel to be representative. Put it through the American Tourister gorilla test. Then build the surfboard. And with a hollow core SB, any potential pinholes should be sealed after glassing (water-based concrete/tile sealer or potentially water-based spar urethane).
Further, a layer of aramid/kevlar would likely improve puncture resistance significantly but would increase the costs and expertise required substantially. I have to believe a 3D printed core ain’t cheap.
Thank you so much Mike for your insight. Without a tissue paper underlay I definitely did get the best results for the trellis blank builds with a 4oz cloth layed up on a separate table and then transferred onto the board. There were still dimples in the voids but they were definitely less obvious than other methods. I would then add another layer ontop for strength once hardened and then a fill coat. I still wasn’t completely happy with it and I feel like any sag at all is unacceptable because it results in the fill coat pooling in the voids making the board heavier than it could/should be.
I’m definitely a newbie board builder so I’ll try again with some of your recommendations like a resin roller to help to ensure there’s enough, but not too much, resin in the cloth before transfer. Sylvain from Wyve also told me to make sure to let the resin cure a bit before transferring to the board. Would you recommend waiting for some specific period of time before transfer? For laying up the cloth on a separate table I don’t have a silicone mat but I’ve just been taping down some poly sheet (the kind used on insulated walls) and it seems to work. It creates some extra waste but makes clean-up easy.
My most successful boards so far are lightweight PLA boards with 1 exterior wall and 15% cubic infill. I print them in 3 parts standing up on a 2’ cubed build plate and then glue them together with CA and then fiberglass overtop of that. In my testing lightweight PLA can be used with 1 exterior wall because it doesn’t warp at the same low temp as regular PLA. Printing with 1 exterior wall solves the void issue but it definitely doesn’t look as cool ![]() I’ve even been able to build thinner skim boards with this method successfully.
I’ve even been able to build thinner skim boards with this method successfully.
Unfortunately, there’s no board builders here locally so I’ve had to learn everything online. Maybe I can find someone local who has much more experience with other types of fiberglass to give me some pointers.
In terms of USD cost a 1 kg roll of filament is about:
PLA/PETG - $15
LWPLA - $30
My printed blanks were ending up just under 2kg and there’s no waste/support filament when printing the boards in parts standing up. My boards are only 5’ long though. The cost isn’t too bad and there’s a tonne of opportunity for time savings and reduced waste.
1 Like
Impressive as long as there are no issues with the core lattice materials bonding directly to the skin and/or FG.
What are the surface energy values for PLA/PETG and LWPLA.
What is the cost of that new foam matrix printing material you were playing with?
The best build process is usually acquired by lots of personal build and design experience, incorporating and modifying a few useful tips along the way. And testing methods/test panels rigorously.
Many successful builders end up developing their own process around a specific desired attribute or outcome.

I think the foam matrix you’re referring to is just the LWPLA with 15% infill so its about $60 for a finished blank. I have no real idea how to use surface energy values but google is telling me the values of PLA and PETG are considered moderate.
- PLA (polylactic acid) is around 38 dynes/cm (or 38 mJ/m²)
- PETG (polyethylene terephthalate glycol) is around 42 dynes/cm
I can’t find data as easily on LWPLA but I think adhesion is a decent bit better since it turns foamy when heated and doubles in size. Anecdotally it seems to stick really well but I’ll run a test and compare PLA and LWPLA adhesion at some point to get a better idea.
Epoxy is in that range at around 40, which means it should bond well with materials that have surface energy values close to 40.
I called Behr yesterday about the surface energy of their cured “water-based spar urethane”, customer rep said he would have to contact their lab division for an answer (2-3 day wait).
It may be that directly adding a thin coat of epoxy (gently) to water tightened tissue will be the best sealant, creating a tight stiff surface to laminate a light first layer of light FG cloth to. (Might be possible to add several coats and then sand at 150 or 250 grit before adding the first layer of light FG cloth.). If one coat is stiff enough, you could add the first layer of light FG cloth as soon as the epoxy sealing coat is tack free. (Sanding is not needed to improve bonding to the epoxy sealer coat if you lam as soon as [immediately after] it reaches tack-free stage.)
I believe there is some resin shrinkage as epoxy cures. So it should maintain (or improve) the tightness of the water-shrunk tissue.
Here’s the final board. Pretty happy with it, but honestly don’t think I’ll make another.
In the end, I believe the most sustainable boards are going to be the ones that last the longest. And I think compsand is a better bet for weight/performance/durability overall.
Was able to get this out in decent swell at C street. Ended up connecting a few from almost the drainpipe through to the pier. It paddled super well, duckdived real easy too. Honestly felt like a normal board, which was quite surprising.
Weight is a touch more than I’d like, could have used less infill but I was worried about strength. I think most of the sections I used 20-25% gyroid infill


6 Likes