Hicksy, good to meet you and put a face to a name, looking forward to having a paddle when you finish your hollow. Dont delay or we’ll be into summer swell season!
gray
Hicksy, good to meet you and put a face to a name, looking forward to having a paddle when you finish your hollow. Dont delay or we’ll be into summer swell season!
gray
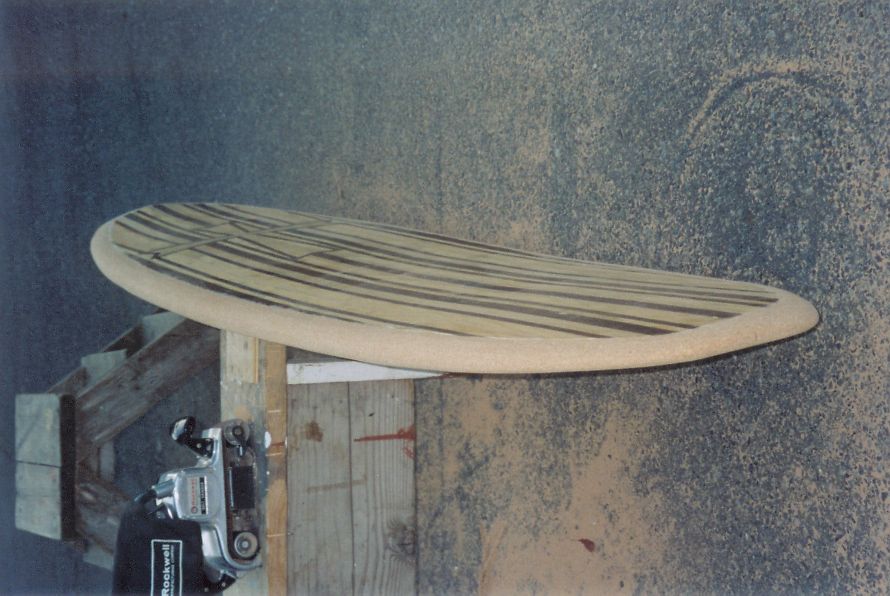
Put my cheater coat on yesterday, bloody hell it looks fantastic. It soaked in to a certain degree and left a lovely warm gloss all over and the wood looks a lot darker, deeper and lusterous. I wish Perth would get over 18 Degrees C. I’m dying to do the lam coat now but Wife is getting sick of me putting the board inside the house. Sanding a few drips out tonight. No turning back now. Piccies tomorrow.
cheers
Hicksy
dont glass in the house mate, it gets everywhere, you’ll be scratching for weeks. I did that once and I’m still picking glass fibre out of my undies!
It will be ok to glass outside, it just takes a little more time to go off. Or get a bit of polythene / tarp and make temporary tent structure over the board and put a spot light or other heat source in there for a few hours to raise the temp a bit, that will work just as well.
gray
I’m trying to visualise how you got glass in your undies…hmmmmm…no can’t work it out…
I put a coat on my fin yesterday and left that outside all night as a test. It went off with the temp going down to 10 deg C. Using West systems 5:1 epoxy.
Hicksy
Hi all, Im new to this website. Thanks for your time. Im here for venting reasons ugh… My first hollow board… acted like a balloon!!! very ugly. still works…little soft. So what i have now is a hole that i DUCT tape haha!!! before riding. take tape off and that wonderful pssssssss. sound happens for 10 seconds. Ok heres my question. Where do I find a proper vent plug??? Im in serious need now. Thanks again. Aloha Joe Cant find one anywhere here!
Hello Wooddude,
Bert Burger had a good suggestion which was to use wax! Apparently it is ‘self tending’ because it melts out if the board gets too hot and thus relieves pressure. I use quite large vents which are meant to be water or fuel ports for boats. If you try a marine fittings supplier or a campervan and caravan accessories supplier you should find something.
Regards, Roy
Go to your nearest windsurf shop and ask for a vent plug for an epoxy windsurf board, thats what I use. I think there made by chinook.
Otherwise your local hardware shop will have some sort of female threaded connector which can be glued into the board and a screw / bolt with a rubber o ring can be screwed in to get the seal.
gray
West Oz coastal joke.
Summer swell season = flat
Yes I know, I’m trying to hurry. I’m planning on going out and christening the board 29 Aug, well before the summer swell season…
Hicksy
hollowoodude Check out ‘breathable vents’ thread dealing with goretx for vents. Some really good sample pics and explanations I’ve gotta vent my board yet. last coat of epoxy went on last night. need to spar varnish for UV now…
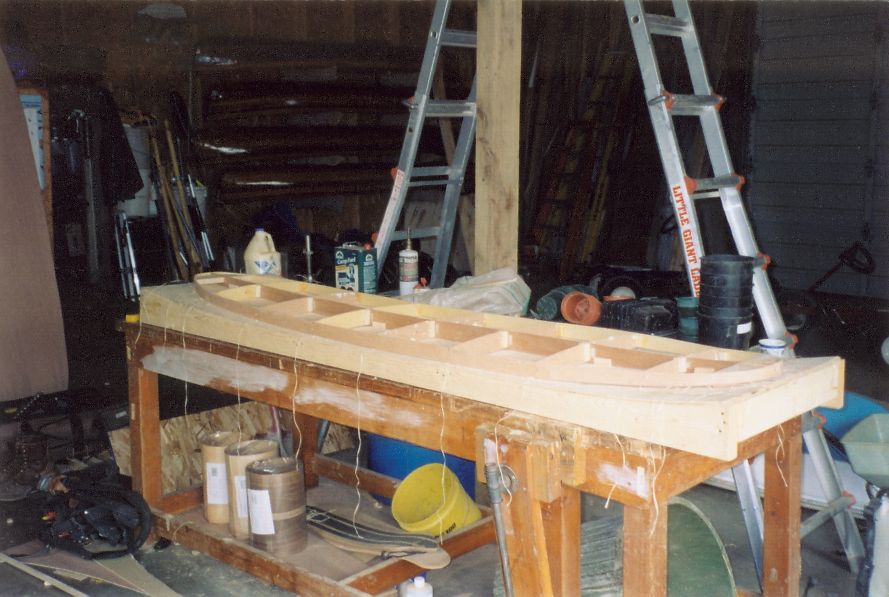
Hey Jack, finally drawn the picture of my internal rails.
I cut 2 strips of 9mm ply the full length of the board, strip cross section of say 9mm x 10mm . I cut two notches in the cross ribs and glue the ply strips in. When the ply is getting under tension at the nose and the tail as it bends I scarf the ply strip so it bends easier in these areas, this is just putting in small cuts of about 5mm into the ply strips.
This method seems to be as strong as my first board where I used the laminated internal rails.
I then glue the cork and ply rails on as normal.
I’m interested in what other techniques people have come up with, to save time and weight.
cheers
gray

The only bending I did with ply was at the nose, 3 ply worked between my hands slowly to form a semi circle. All the rest of the board was cut to shape, no bending. I found that to fit everything as exactly as possible was the easiest thing to do in the long run. I screwed and glued the rail supports to the ribs using tiny 10mm brass screws and Liquid Nails.
I looked at Paul Jensons rail design and adapted it to my specs. The nose and tail sections are solid cork with the long midsection built out in strips about 3/4" wide. After about 5 layers of this I went to solid cork leaving the hollow inside. With the holes I drilled either side of the ribs into the rail support it allows all internal chambers to breathe between each other.
After putting each layer of cork on I sanded the top/outside so it was level with the previous layer. I used 50 12"x12" 4mm cork floor tiles.
It’s a long and drawn out process but it’s really worth it.
cheers
Hicksy
Sorry about jumping in the middle here, and I hope I’m not seen as hijacking this thread or nothing here… I don’t have a digi cam, and So I gotta get film developed and then scan em. Here is my board proccess…
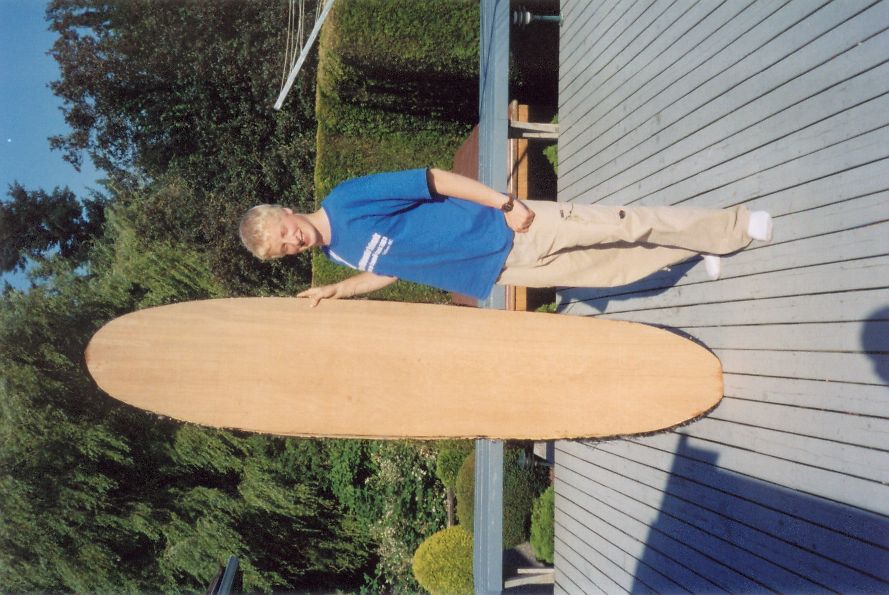
I went for a 8’3" mini mal, but it’s looking like a pig here. I built my rails jig at finish width, notcounting the cork. Doh! But I decided to carry through rather than wast time and remake.
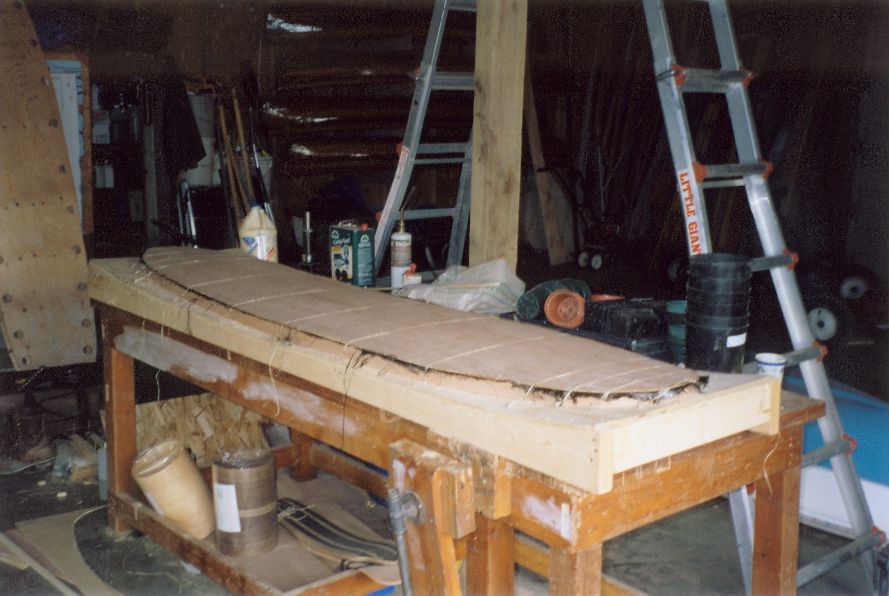
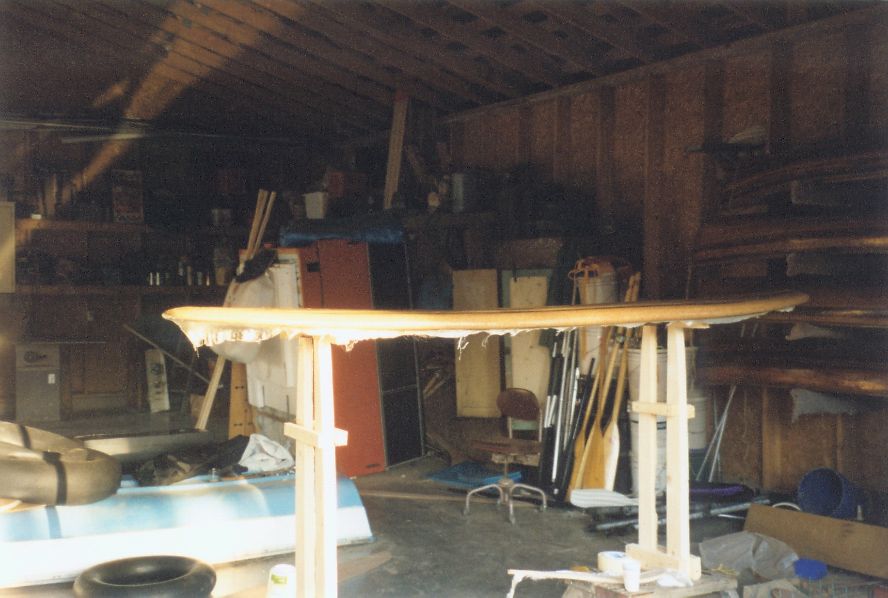
First, 2 shots of the inner framework, and then one of the deck being clamped with waxed hydro twine and a rocker table
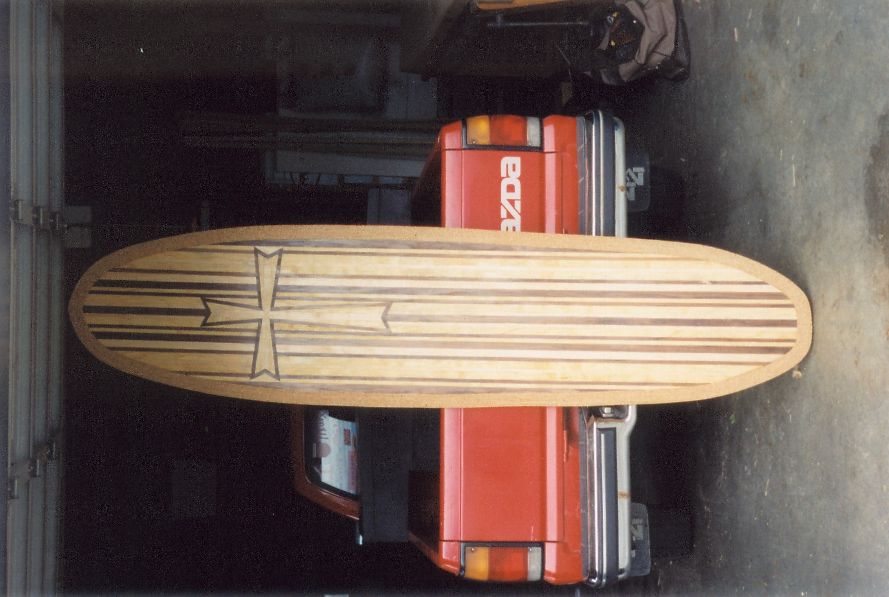
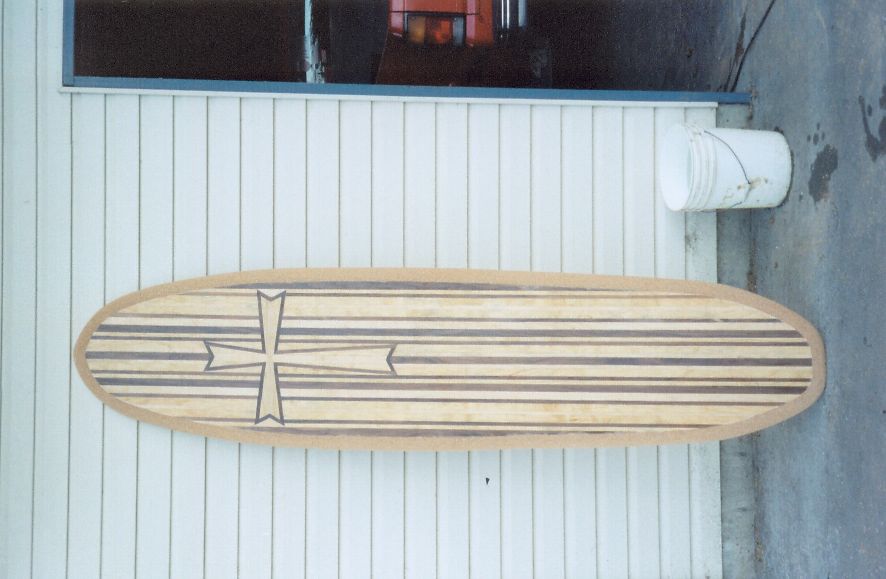
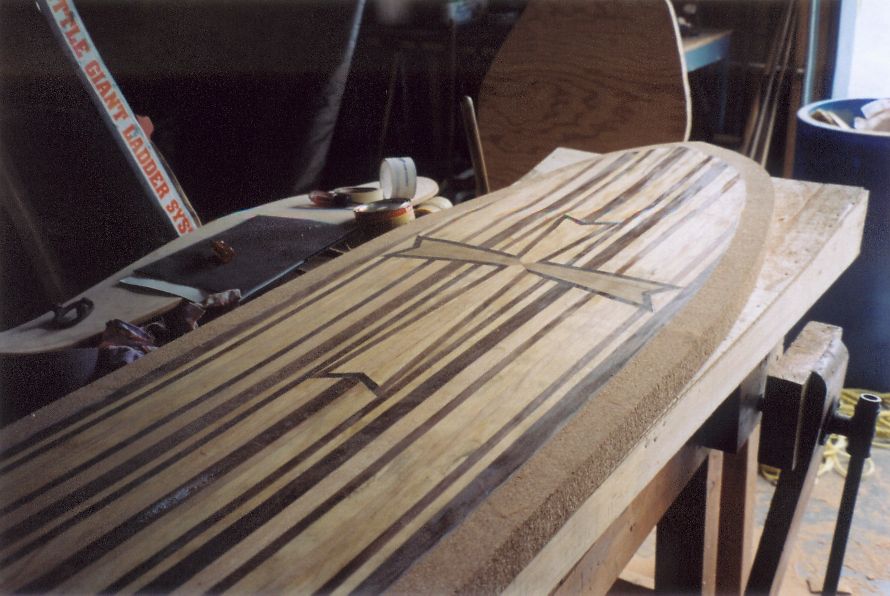
Here is the next batch. I inlayed the deck with veneer because I liked the look so much, but didn’t have the jointing tools. The next ones are of the cork rails glued down too…
Sorry about the person there… that’s just my brother practicing his “lady-killer look” Here is some more rough shots
here is the last pic on that film. more to come when done. in the varnish and polish stage now gotta get going here… Red Feenstra
Hello Red,
Your board looks good, I notice that it appears (prior to the rails going on) to have a parallel profile.
James is not showing that much interest in posting the results of his labour (He is a man of few words, unlike myself) so I am posting the pictures of his new 8’1". The board is shaped and ready for finishing (no cloth). Roy


Hello Roy, Red here. What do you mean that it has “parrallel profile prior to the rails going on” I don’t know if you are saying that it seems to have straight sides or that it is similar to your shapes to. The board is a continuos curve, although it is a way shallower curve down from about halfway to three quarters (check the “Jason with board” picture). I started this in January, but didn’t have a chance to do much because I shattered my leg (the first three of four bones I’ve managed to take out this year, along with numerous sprains and dislocations) and so I went away to school while I was trying to rehab. I’ve just been back, and hitting it hard now. Hope to have some good shots of the finished board soon. Good for your son there. none of my family surfs, so I have not had any experience to draw off except Swaylocks here. It must be nice for him.
Hi Red,
Sorry about your leg, you certainly seem to be ‘practicising what you preach’ about skidding broadside etc! Best wishes for your bone healing (loads of calcium?)
What ‘parallel profile’ means is a board which has the same thickness from nose to tail, and which thus has a deck curve which is the same as the bottom curve. It’s what I do, and is unusual.
Best wishes, Roy
Oh, that’s what you mean. Actually it looks that way in the one picture because of the cork(all 2 inch strips). they had not yet been cut down to the deck level. She is really quite a bit thinner in the ends than in the middle, and the deck is crowned all the way along. The picture is a little confusing. After my next roll of film I’ll post some showing this, along with the finished board.