Ah Hum, I just turned it around and it is a LED lamp ! That’s why it is so light… Electricity is really not my thing. So it looks like I have a wand already ? I can just attach a long power chord then.
My two most noticeable nose foil screwups are on semiguns with late 90’s/early 2000’s nose rockers, I made with too little volume for me to ever surf, and they’ve never been surfed.
Not sure if this area is an issue for other beginner shapers.
With my HWS process, the shaping of deck, hull and rails, can change the stress on the stringer(s) and can change rocker, and one has only so much wood to ‘correct’ things and it might just get worse as it is shaped and at some point one needs to stop sanding/shaping and live with it.
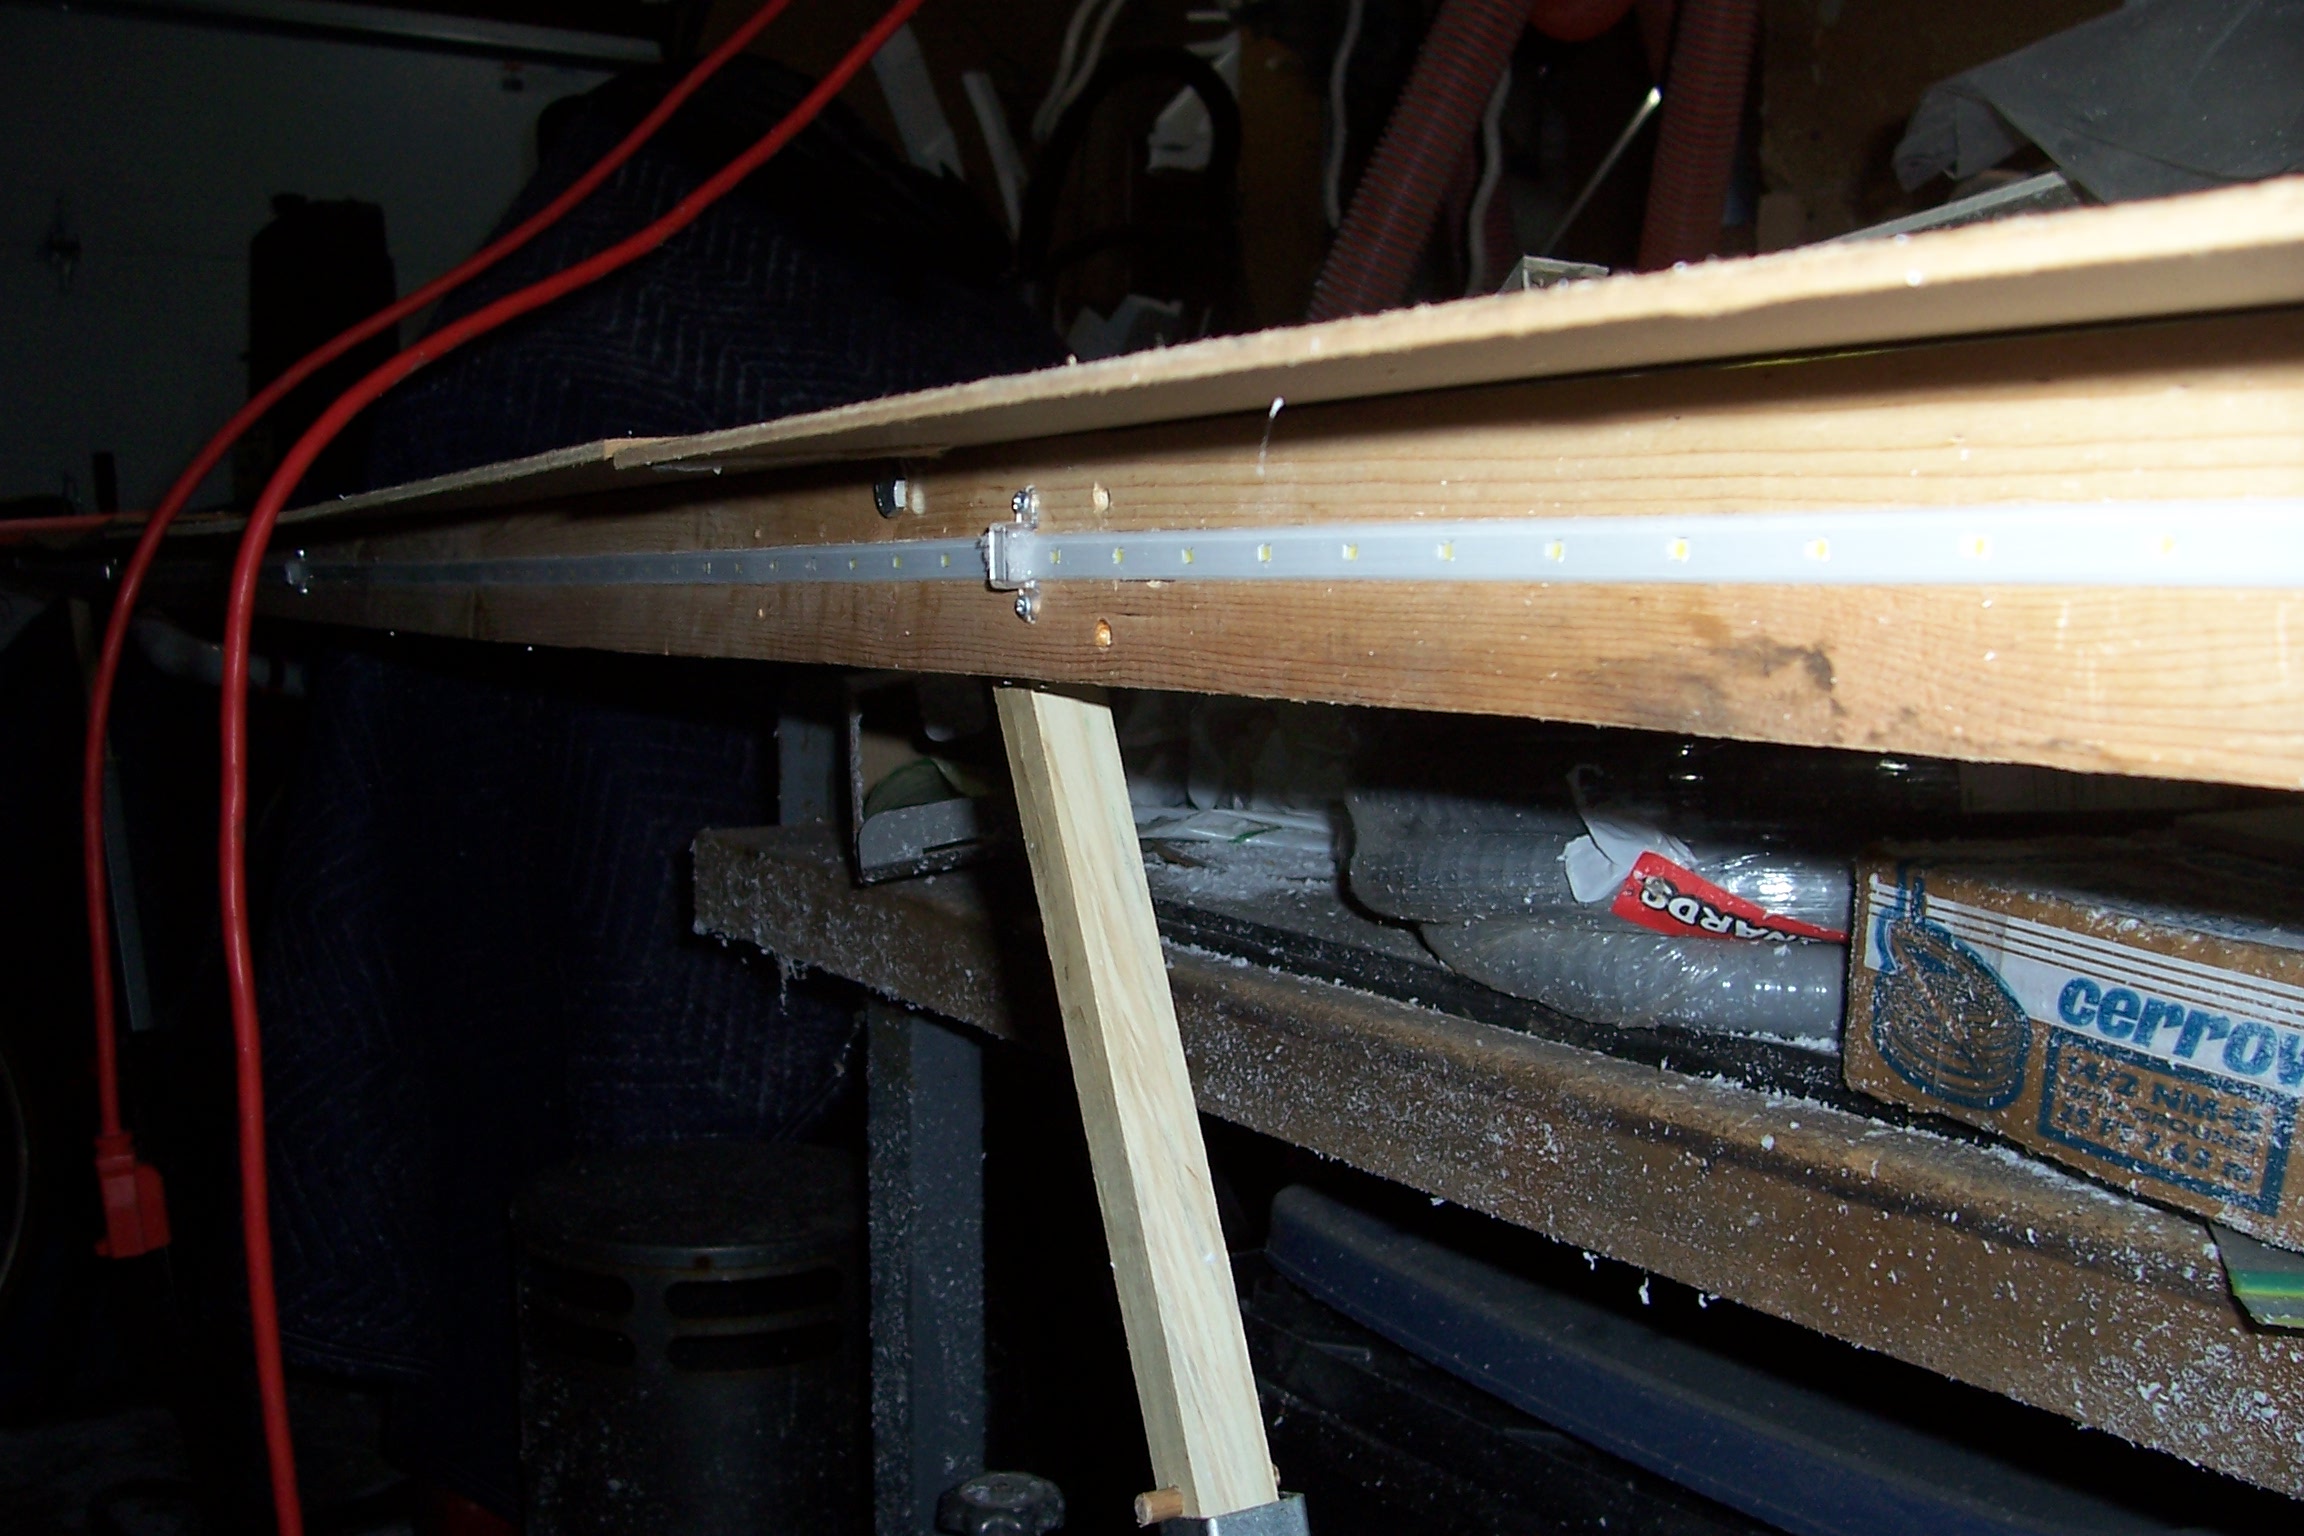
That led wand should work, but you need to confine the light with a straight board or similar, so it can’t shine in your eyes and aim light at the rails. Have a way to hold it parallel with teh board, and then move the board up and down and perhaps the light up and down, until you see the shadows you need to see and find what works for you in your shop. Really best to have one on each side of the board, longer than the board, and be able to turn one or the other off, but any side lighting is better than none.
These are LED strips with built-in silicone and adhesive on the back. I routed a slot in a board to keep them straight and added Masonite scraps as the top shields to reduce glare. Sometimes I have them attached to the walls other times I have them on portable stands, depenfing whether I am indoors or out in the garage. I ended up with a set of 2 that is about 6.5 feet (2m) which worked for up to 8’ boards and another set 13 feet (4m) long for longboards and SUP. I have never used these as ‘hand helds’, always in pairs and with enough room between to walk around and work on the boards.
The portable light stand is a good idea as well. I work with oblique light all the time but with an articulated desk lamp and for way smaller objects. Somehow I had not given it much toughts for the board but now I see it is a must. I will cook up someting with the leds I have, 4 foot will have to do for now. Not ready to make a shaping room yet. I love working outdoor in the veranda workshop, also the breeze takes care of the dust. I will just have to do the finer finishing and checking after dark. Thanks for the inputs !
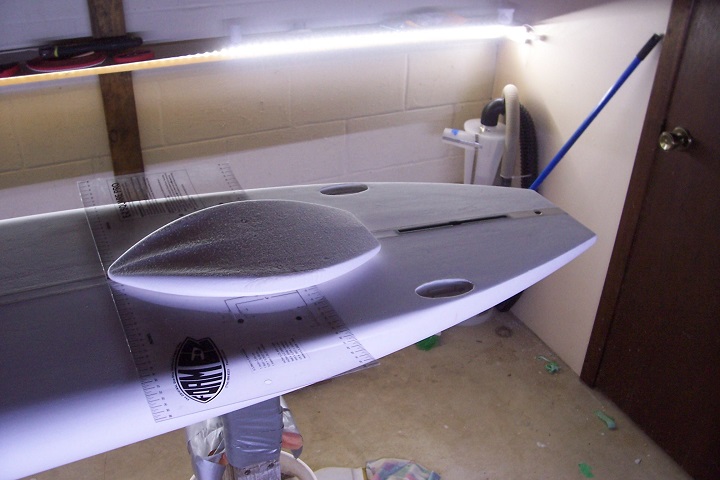
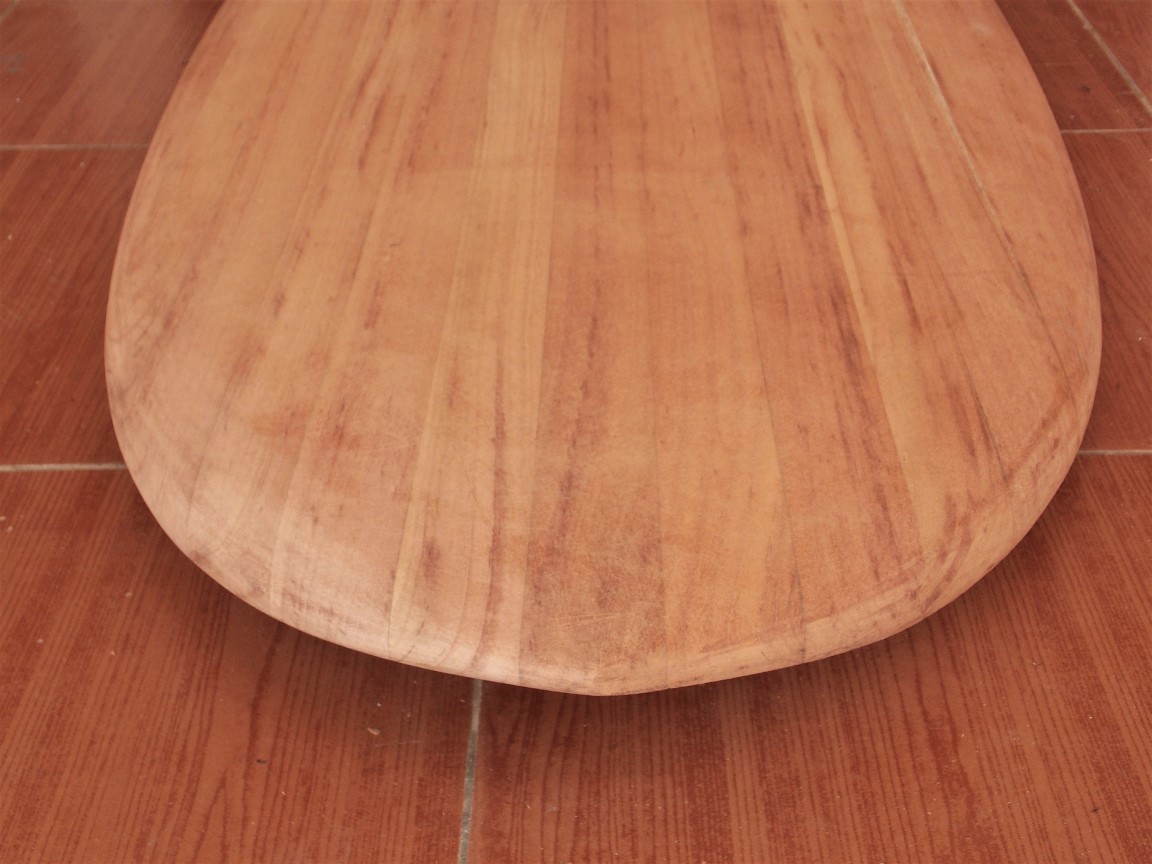
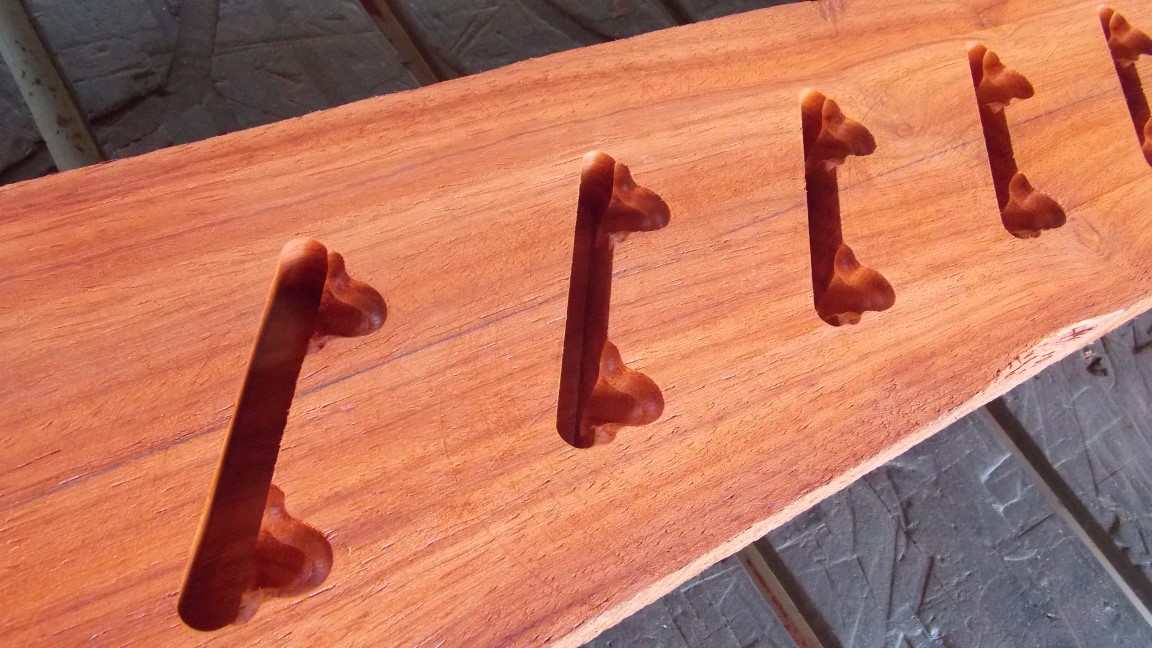
So I couldn’t wait until the week-end. These hamster cheeks near the nose were jumping at me everytime I was passing near the board. I had to see if it was solvable, I worked an hour on just one of the nose rails and it is better. And I still have room to work with, feeling relieved. I might still call the board Radical Hamster as a souvenir ![]()
The first pic shows the reworked side on the left in comparison with the before side (right). Then 2 pics of the reworked side. Still some bumps from working with the coarse sanding block but it’s getting there. I should end up in the ballpark for a hybrid groveller/foil-board (Says the guy who never saw groveller or a foil-board in his life).


Some advice please, I can’t get fin boxes with the lockdown continuing in my area. I am doing the vents and the leash plug in wood, but I am wondering about the feasability of the fin plugs. Is it realistic to expect the screw thread in the wood plug to last long enough that it is worth it ? At the same time I like the idea of making all the parts of the board myself. I want to go for standard FCS because that’s why I see the most around here and since I am making fins I would like to be able let others try them to get as much feedback as I can.
I found on the net a couple of wood board shapers who make their own wooden plugs but I’m worried the threads won’t last, even hardened with superglue. Being stuck I’m almost ready to risk it, so please tell me if you think it’s really too stupid.
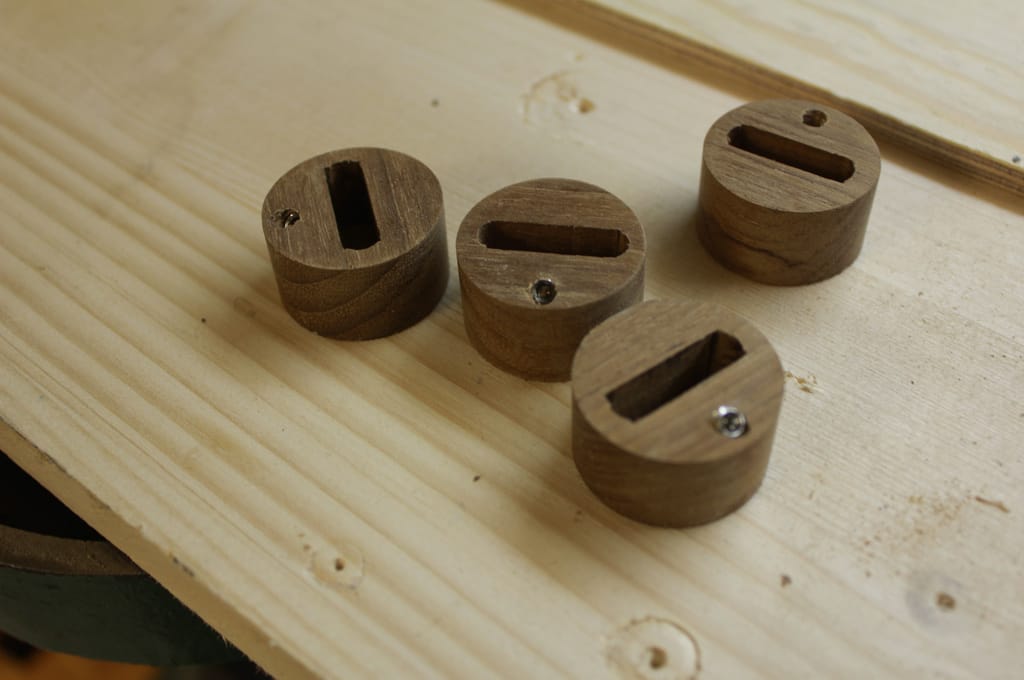
Found the pic below on this German blog : Surfbrett selbst bauen: Finnen-Plugs aus Holz fräsen - Tobias Herold
WAO, Is the supply issue by you: going to or ordering from suppliers- or getting packages delivered in general?
The wooden plugs look nice but I would also be worried about longevity between the grub screw threads and the fin acting like a lever or wedge.
Would making them out of wood layered with cloth and resin be something? Or have a G10 base with a wooden veneer for looks?
Do you have access to 3D printing?
jrandy, deliveries in general, there’s no surfshops in India so I would need to order from abroad and packets are either getting stuck at the border for weeks or are returned to the sender. Both happened to me in the last few months.
I don’t have G10 but I like your idea of cloth reinforced resin with wood on top for looks. I think I’m going to give a good think at this one.
If not I was going to try to make wooden plugs with a metal insert but still, the wood would be vulnerable, because whatever finish I put on it would eventually wear off with the fin’s friction.
So I think your idea is better, impervious plugs with wood cover. That way I get it all: doing everything myself, durability and full wood looks ! I’m going to have a look at the materials I have laying around tomorrow morning. I have a bunch of carbon cloth offcuts as well, let’s see if there’s enough. I am used to work with only wood so I don’t yet have the reflex to think resin and cloth, so thanks a ton !
FCS1 generic plugs are nice as all one needs is a hole saw/forstner bit.
But two small tabs is limiting. Lots of stress on tab and fin plug and the area of the board into which the plug is mounted, although solid mahogany takes care of that last potential issue.
If you are going to design/make your own plugs, it might not be much more work to design a single plug long enough to fit fcs1 tabbed fins, but make one long tab receptacle, instead of two short ones. That way you can still use fcs1 and the fins you have already made, and any future fins you can make the base longer, and thus stronger.
Make something like Robin Mair’s Gearbox from stacked layers of opposing hardwood grain, perhaps with cloth between the layers. I dont much care for the little round hump in the bottom of the box between where the fcs1 tabs go, but…
I like Probox, but there is too little material between grub screw and insert, and even the center boxes without inserts does not take advantage of the extra room for a deeper grub screw.
Some members here designed a universal fin box system for 3d printing, not sure which page of the thread that the files are on:
https://www.swaylocks.com/forum/61140/universal-fin-system?page=18
I’ve put some thought into what would be ideal removeable fin system, mass production aside.
Ease of fin making and tab strength being top two considerations. Thicker deeper tabs and longer deeper grub screws only for fin retainment, not to push fin against far wall of receptacle and hold it in place. Fcs1 production fins rock back and forth in fcs1 plugs, those grub screws take a lot of the load.
Since you can make your own boards, and fins, and have serious CAD skills and a CNC…Limiting to fcs1 tabs could be aim at foot and shoot type of future regret.
It’s a nearly 30 year old design.
Well I had typed out a long reply about trying to use stabilizing resin for the plugs, but it go deleted. I don’t know if the resin is available locally in India or if there is any equivalent product available locally. Here is a link to the process. I know a lot of wood turners use it so they can turn otherwise junk wood. Spalted punky wood made usable.
So this Sunday passed thinking about a solution doable with the materials at hand. Nothing simple came up.
Wrc68, I really need to stick with FCS to be able to share my fins because I will need feedback, but I did a long single slot, like you mentionned. Later on I’ll design a better system but for now I can’t be making each fins I try into several box types. Just too many ideas to try already.
Phillip, I thought about resin stabilization but it works mostly for softwoods, hardwoods won’t let enough resin in, also they’re oily.
Thanks to all your suggestions I got to consider all the options possible.
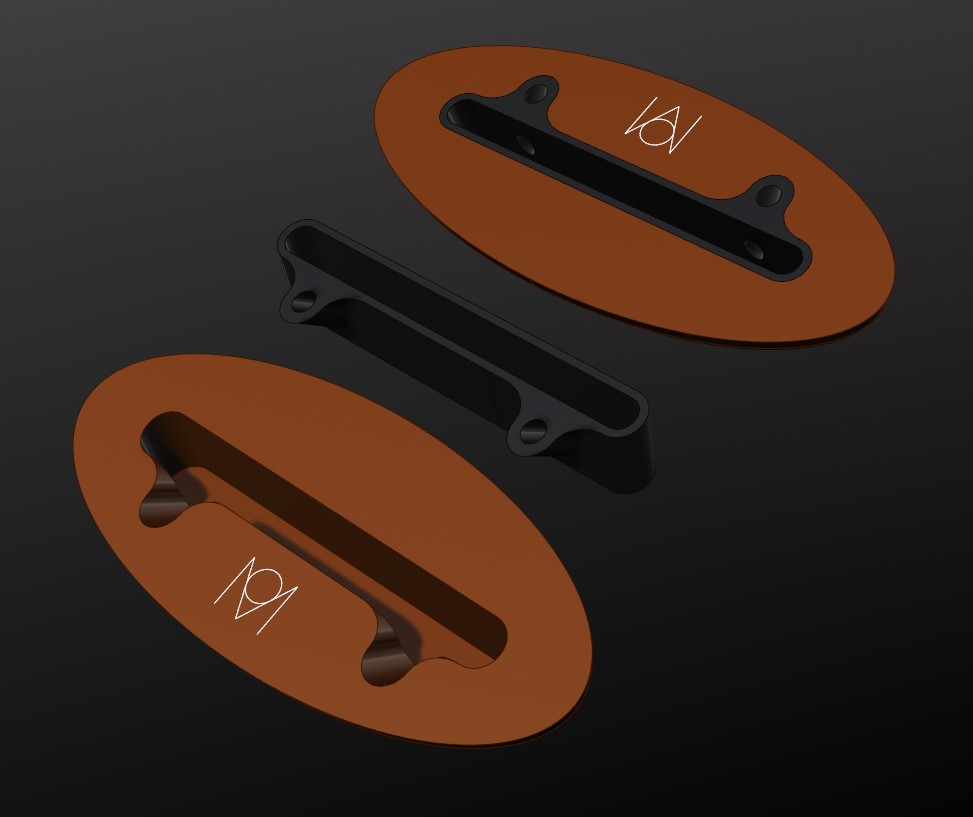
Ended up designing something without compromise on durability but it’s going to be a bit technichal on the cnc. Wood in contact with the fins or the grubs screws was ruled out and a full glass/resin panel was going to be a lot of waste for 5 plugs. So I ended up with a wooden box with a glass/carbon insert for the fins and grubs screws.
The machining strategy is going to be : route the cavities for the inserts first, fill them with resin and scrap cuts of glass and carbon cloth, let cure, then route the final fin slots and the boxes themselves. I spare you the trick to get the 3 and 7 degrees cant angles for the quads.
Then the last step which could ruin it all, drill the holes for the grub screws with the hand drill and hope that I can self tap the thread with the screw. Or I could find someone who has the tool to make the thread.
Clearly not a profitable mass production method but I will be able to boast that I have $300 plugs in my board. (facepalm)
Here’s the 7 degrees cant box :
Could you get an old or broken board and just carefully remove and re-use the plugs?
How about glass on fins?
Hello Huck, thanks for chiming in, I have been admirative of your wood builds here on sways !
I have a few boards here in storage belonging to a friend, but none bad enough to get the boxes out. I did give him a phone call but that was so that he could say no and I would stop hovering over his boards like a vulture.
Glass on is a no no because I want to experiment with fins. Do you think the design above is problematic or does it seem like too much work ? Just for this time I don’t mind, it’s about the same amount of time needed to make a good set of glassed fins.
Your thoughts mirror my own for a general process, so either ‘great minds think alike’ or we are similar-type fools…
If you do the initial work in a retangular block instead of an oval, you would have more options for either machining your own jigs or taking them to a shop for any steps you are not tooled for.
I am blessed to work at a company with a machine shop, CAD/CAM, lasers, and people willing to help each other. I would probably do the first round at home and then bring the blocks into work for drilling the grub screw tap holes on a vertical mill with an angled clamp. Then I would tap the grub screws with my discount tool store tap and die kit unless they offered to do them on the mill that is already set-up.
I would also consider trying to get some of the cloth in the slot to be perpendicular to the primary grain direction in the blocks to fight a tendacy to split along grain. If you are using epoxy you could make an undersized HDPE plug (cheap white cutting board or some other material coated with a release agent) that you could wrap with cloth and jam into the rough machined slot to help with that step. It would also save you from having to fill the whole cavity with wet materials and worry so much about things sagging.
You have your own agenda, goals, background, context, etc. so only you can determine what is best for your project.
Me, I don’t see the payoff in fabricating fin boxes from scratch on a first chambered hws for small waves. I don’t know what kind of fin experimentation you have in mind, but if I couldn’t get standard fin plugs, I would aim for a practical functional fin setup based on your past boards and glass them on. With subsequent builds, start exploring options like home made fin plugs.
If I could go back and give myself advice starting out building wood boards, I would tell myself keep it simple, and add complexity in stages as you progress building and riding multiple boards.
Huck, I see what you’re saying. I understand the keep it simple on your first build thing, that’s why I went for chambered instead of hollow build, with so many joints and the need for a good glassing.
Glass-on fins worries me more than making boxes as I have zero glassing experience. Being unsure of the performance of my first board, being able to tweak it with different fins seems like a good thing and some more learning opportunities. And I will use this board for foiling as well, so fin-less.
I would have installed ready-made boxes already, probably with a wood veneer on top if I could get some. The confinement is still tight here, so I think ordering some would lead to frustration. Also in India there are lots of poor kids who would like to surf. A board costs the price of their parent’s moped, so they are really happy when foreigners give them even the most battered boards. If some boxes come my way I’ll use them, in the meantime I take it as a fun side project, it’s not that much work, and I already did the hardest part which is the design and the machining strategy, so now it’s just an exciting Sunday ahead.
Yeah, probably the latter…
Good idea to make a jig to drill the grub screws holes, I could use a drill press and have a consistent angle.
I was thinking of overfilling the cavity to not have any sagging, then the next machining step would take care of the surplus. Not much epoxy experience, so surprises could be headed my way.
I was eagerly waiting for Sunday to come and go ahead with the boxes. All was going well until I ran out of resin. Will have to go buy some tomorrow. Not being able to get casting resin I used some off the shelf adhesive type. I know some might think I go through too much trouble but I’d rather do things and learn than wait for the world to get back to normal. No fin boxes ? Make some. No casting resin ? Use whatever has written “epoxy” on the box ![]()
But I must say I’d prefer to have the right materials. The thick epoxy turned into the weirdest slurry once the glass strands were put in. Wasn’t sure I was going to manage. I had visualized all the steps in my head, but then I had to improvise. Gonna have to buy new dish washing gloves for my ex as well, these can now be used for an albino Bigfoot costume next Halloween.

Pretty awesome you can design and build your own finboxes.
Do you need to sand that flat then run it through the cnc, or can you just go straight to CNC?
Prom an opinion perspective on color, next to wood, I think red or black looks the best. I never liked white pigment on white boards either though when the board fades to off white beige/ hyper white next to brown just looks ugly in my opinion, and the pigment makes the resin weaker to some degree.
The Probox 8 degree inserts are white. I like 8 degrees on my backhand fin but the color not so much, but its not important. The blue zero degree insert also does not look right in cedar.
I have filled one of MrMik’s hollow Printed Deaweeder fins, but decided against using the silk he provided or any longer fiberglass or carbon fibers as I was afraid of voids. I did use a bunch of bamboo skewers and other fiberglass and carbon dowels that were precured to strengthen base, but there is basically Zero flex, and it is heavy. I’ve cut some of his hollow silk and epoxy filled fins down to shortboard sizes and find a good amount of small voids on the cut line. Filling the voids, I always try to remove any epoxy blush and rough up the surface for good mechanical bond. If you find voids where the tabs/ grubs go this would be more difficult to remedy. I believe milled glass fiber would make for easier filling should you do this again, or at least chopped. I’ve sacrificed a chef’s knife chopping up fiberglass before into 1/4 inch strands. helps to rehone it often during then buts out the file afterwards and redo the whole edge, if the knife is ever to be used again as anything other than a trowel.
I have made a few Jigs for drilling grub screws. largely trial and error on the angle and depth without benefit of drill press. One Jig became swiss cheese from too many mistakes, and was violently shelved with a slew of black curses. I want more grub screws to retain probox inserts and fins, but the Jig’s angle needs a precision I lack.
I think I am going to make a deeper 0.6 GW fin moved a bit forward in the center probox next, try it with some smaller railfins, although the 0.5 deaweeder fin felt much better than the 0.5GW fin the last surf, but part of that is the DW’s lack of tubercles not being able to catch and hold the leash.
Will you be doing the one long tab receptacle like gearbox/probox, or two small tabs of FCS1?
Design yes, build not sure yet
The cnc took care of the surplus in the next operation.
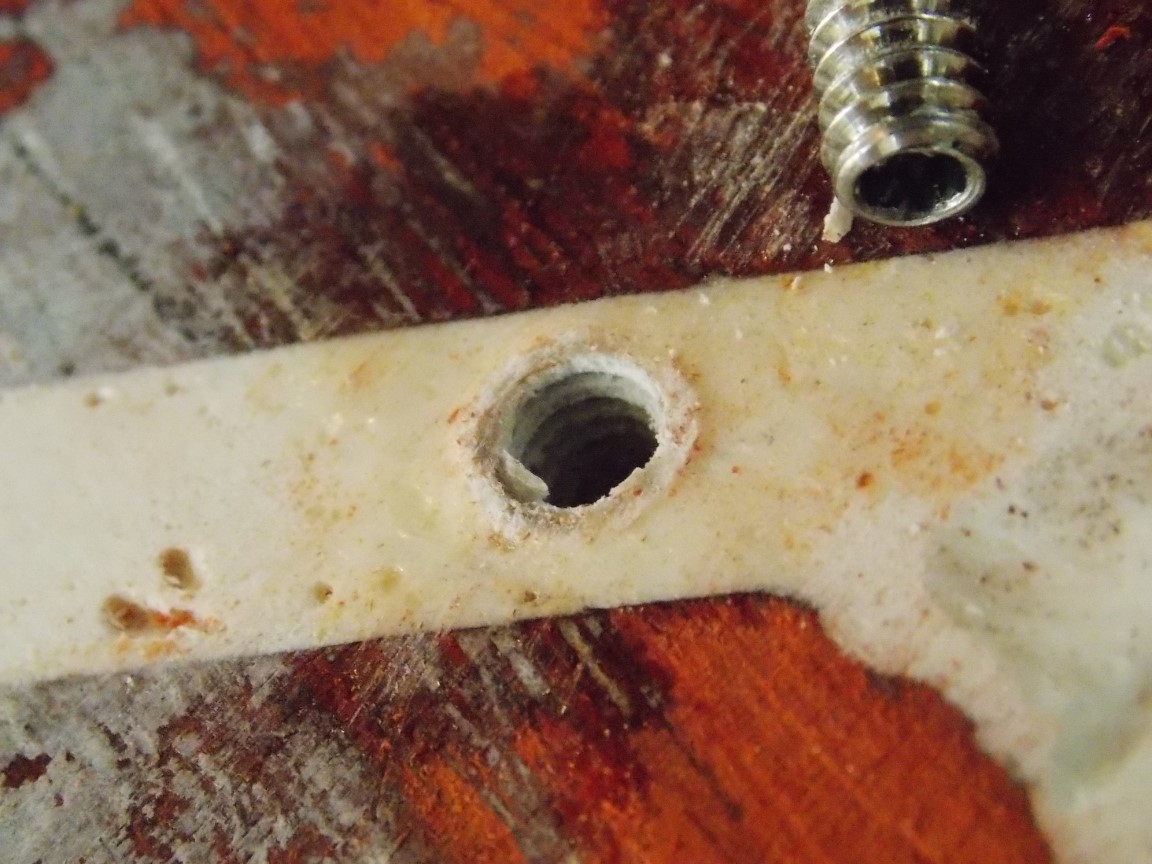
I don’t mind white and wood, but you’re right the pigment does weaken the resin. This morning I drilled a hole in it just to check and then taped the thread with the grub screw but it was way too easy, the resin seem to have become somewhat chalky (see pic). I normally use the opaque pigments to fill routed logos so I never got to see the loss of strength. I was expecting surprises and I’m surprised as expected ;) I had not planned to use pigments but when I saw the weird mayo color of the epoxy I went for white.
Right again, I’ve got lots of voids, the adhesive epoxy is way too thick.
So, with the resin that doesn’t look strong enough to hold the thread for any useful amount of time and all the voids, I call this attempt a fail. But thanks to cnc magic I’ve got an “undo” button at this stage. I’ll just re-run the code I used for routing the pockets (about 10 minutes), so just the epoxy will be removed and I’ll have brand new cavities to try another filling method.
There’s this quote on the internet : “I’ve learned so much from my mistakes I can’t wait to do some more”.
I have read MrMik thread with your detailled surf reports but I don’t really remember all the models by name, what are the 0.6GW and 0.5GW ?
Yes one long slot like you suggested, plus it looks cooler. It’s true that two small tabs makes no sense, especially since it’s more work than one long one and offers no advantage. But as I said I’ll have to do old FCS fins until I have had enough feedback.
Here’s the fail pic, sharing successes and setbacks equally in the best tradition of “Build Threads”. For your entertainment ![]()