Although the patch turned out pretty good, it did not stick to the prepared surface of the TSA Flax board. Bummer!
When I pulled of the masking tape, I noticed that in some places the edge of the resin got lifte off the sanded surface. So I decided to try to pull the whole thing off, and that was not very hard.
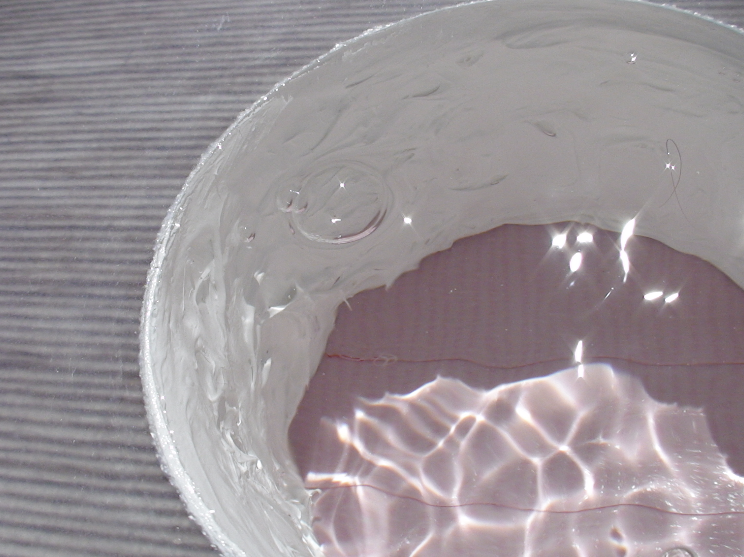
So now I’m running a little test with a ‘reptile lamp’ that produces some UV light: A few drops of Zerovoc and a few drops of Solarez PE UV resin on the prepared surfboard surface, and a drop of Solarez PE UV resin on the underside of the Zerovoc patch. When I have a bit left-over from another job, I’ll try 2-part-epoxy resin on the open wound.
It could be that the Zerovoc resin is too old, it seems quite thick. I had about 10ml in a small plastic cup, no lid, stored for several months in a light-proof but not airproof container. I used this for some initial tests on cardboard, and it seemed to work well. I was not sure if it had thickened or if that is due to the relatively cold temperature in my garage at the moment (a balmy 19C in mid-winter). However, the Zerovoc used for the lamination on the board was fresh out of the container, but the same batch otherwise, and it felt just as thick. Like toothpaste, just a lot stickier. It would take several minutes to form a smooth round surface after I put a blob of it somewhere.
Anyway, on the positive side are these outcomes:
No resin got under the tape
The repair achieved a high fibre to resin ratio
With less viscous resin, I should be able to do this better and quicker, with less damage to the plastic film. The Solarez PE UV resin is so much more runny, it will be a (smelly) breeze.
The test blobs under the UV lamp showed that Solarez PE UV resin sticks better, but not really well.
The Zerovoc came off again cleanly with some effort, but the PE Uv resin needs to be chipped off in little bits.
The Zerovoc to underside of Zerovoc bonded very well, it’s not coming off although I can flex the lamination markedly. So I guess it’s not due to old age of the Zerovoc, but rather some sort of in-compatibility issue.
I may also have cleaned the surface insufficiently, because I only wiped it with clean water and a tissue, but I did not blast it with running water or use compressed air to get the fine dust out of the microscopic grooves. Acetone (and to a lesser degree ethanol) seemed to dissolve the material.
Next time I’ll use a hand spray gun with water to blast out the dust from the microscopic grooves.
The pilot hole is drilled and more damage done to the board…
Cutting out a piece of the flax deck to put it under the microscope. Result: Very little resin is above the fiberglass layer. Once the surface has been roughed up thoroughly with 80 grit paper, it will be close to the fibres, or even cutting into them already. Minimal sanding is best to re-enforce this board.
For the next attempt I will use small pieces of 80 grit paper and discard them very frequently. A single pass per piece. They can be used for other jobs later on. wrcsixeight suggested this technique, because it creates much more surface area when sharp paper is used. I will also use ‘running’ water to wash the dust out of the grooves while sanding, positioning the board on it’s side so that small powdered resin does not sink to the bottom of the grooves, but gets washed out. A hand spray bottle with water should do the trick.
The 2nd attempt to reinforce the board seems to have gone well.
This time, I used 2-part low viscosity epoxy resin, not the UV curing stuff.
I prepped the area by using a fresh part of an 80grit sandpaper after each couple of passes, dry this time, while vacuuming the dust with a decent HEPA vacuum cleaner.
Then I blasted the already very clean area with water from a spray nozzle attached to the garden hose and patted it dry with paper towels.
5 layers of fiberglass, dabbed down with a brush and plenty of epoxy, then cover it with a layer of plastic from a large IKEA freezer bag; then use a metal spatula with rounded corners to push the resin out to the periphery, onto the blue tape. Amazing how much resin can be removed that way.
The ‘Loaded Dome’ logo appears quite clear under the new reinforcement.
When I removed the tape, a few strands of FG had made their way onto the tape and were resisting removal of the tape. The fibres were getting ripped out of the epoxy patch, rather than the patch lifting off (which is what happened during the previous attempt).
That looks great Mik. I am glad for you that this one is holding.
I was never sold on using plastic like that over a repair until I saw it being done with composite airplane wings. There are some posts and Youtube videos of Jimmy Lewis doing whole boards that way called ‘poor man’s vacuum’.
The only thing I would have done different is not to introduce garden hose water into the process. When we spackle EPS the saying is ‘tap water is c I amrap water’ so we cut it with distilled water. But spackle is fully compatible with water whereas water/humidity can affect epoxy. I would have just stopped after vacuuming or used 90+% isopropyl alocohol on a clean rag.
PS Will the Sitka product be OK with your plastics?
I have not been able to figure out what ‘c I amrap water’ is, but i assume you refer to chlorinated and hard water?
Usually my water supply is filtered rain water, but due to the drought conditions, I had to buy same tank water a few weeks ago. It has since rained and I think at least 2/3rd are soft clean rain water again. I did not let the water dry on the board, but soaked it up with clean paper towels and then I let the board dry for avout 18 hrs.
I tired 95% ethanol on the first attempt, but whatever they use to make these board, it dissolves a bit in ethanol. It dissolves very quickly in acetone.
So I figure that applying any solvents to the freshly roughed area would simply smooth it out by dissolving any remaining dust partikles and the surface of the remaining substrate.And then there would be less ragged surface area to bond to.
I believe the best way to remove the dust would be a soft brush, super clean, attached to the end of the vacuum cleaner hose. Mechanical brushing while vacuuming the dust away.
The Sikaflex-291 Marine and Construction sealant may not be suitable, but I will try it out on the foam / lamination core when it has been sawed out of the board. I don’t know why the Bunnings ‘Product Details’ tab claims that it is not moisture, UV or solvent resistant and cannot be drilled. They messed that up, I think. The actual Sika data sheet sounds promising: https://www.chmarine.com/acatalog/sika-291.pdf
I hope to have a sufficient thickness of the sealant material in the hole, so that I can screw the 3D printed camera housing into the cured sealant. That way it will be removable. No doubt i will want some other device in the board one day, so it may come in handy if I can swap the housing without much fuss.
I was a bit worried about the size of the plastic film, because I made the deck patch larger (than the bottom patch) and there was very little overlap on the sides. But, no problem.
It worked very well to have the gap in the middle of the patch (where I cut out a piece of the deck to check it under the microscope). Poking a hole in the plastic film to let the air out, while the excess resin pools in the depression. Less pushing around of resin required that way. Half goes to the middle, half to the periphery.
I bought a super-soft toothbrush and bent it (heat gun), then washed it in ethanol and dried it. Sweeping the dry-sanded area with this brush, while vacuuming, should remove practically all dust. I sanded with small pieces of 80 grit paper, just enough to take all the shine off everywhere, then a few passes everywhere with a new piece of 80 grit, replacing the sandpaper very frequently. Then sweep with the modified toothbrush.
Pulling the tape off was easy, only a few small pieces needed to be scratched off with fingernails. One little bit of fiberglass had made it’s way onto the blue tape, and it tore out of the patch without lifting it.
I’ll probably sand it a little bit with 600 grit before applying deck grip, but it could be left as is. Sanding the deck patch will help me figure out how to blend in the bottom patch once eveything is finished. But the bottom patch could also be left without any further sanding. Compared to the drag from open gaps in the fin boxes, the added drag is probably negligible.
I used an extra long drill bit in the hole saw, so that it exits through a small hole in the reinforced deck to guarantee alignment, then drilled bottom side first, then deck side. It went without a hitch.
Testing the method and the sealant to close the camera hole in a water-proof fashion:
I made a mini-file by cutting off the tip of a nail file, and then round off the corners. I ‘3D-printed’ a handle onto it with my hot glue gun. The mini-file is only long enough to reach about 10mm into the board, preventing accidental excess damage.
Using the sawed-out core to test the process.
I want a wide (10mm) and thick layer of clean lamination for the Sika 291 to bond to, aiming for a good and pretty permanent bond. I removed a triangular area of foam adjacent the laminations on top and bottom, then sanded the inside of the laminations with the mini-file. I vacuumed the dust away but did not use the toothbrush on the test core. I will probably use the toothbrush on the actual board bo be sure to be sure.
I extruded a few extra lines of Sika 291 to test flex and elongation and whatever else comes to mind.
After hollowing an area under the deck and bottom lamination, and filing it, I vacuuumed and brushed the dust off with the super-fine toothbrush.
I poked a bunch of holes in the styrofoam to increase the likelyhood of the Sika 291 staying in the hole when I stomp on the camera housing.
The Sika 291 sealant was rather hard to spead around evenly, I hope there are no gaps leaking water. It did at times open up apparently large hollow spaces in the sealant.
I will test if it is waterproof in a few days, by taping the hole shut on the bottom side, then put the board in the sun and give it a minute to heat up. Then, fill the hole with water and watch for any bubbles.
I can apply more Sika 291 to seal it further if needed. I used almost the entire tube.
It was certaily a good idea to check for air leaks: Two spots release bubbles from the Sika-291 layer when the board is pressurised by heating it in full sun.
While I was applying a second layer of Sika 291 to seal the hole, it occurred to me that the problem with large bubbles in the sealant film during the first application was probably caused by warming of the board, causing expansion of the air inside it, which in turn then gradually blows growing bubbles under the soft sealant. While I was smearing it around, I kept breaking the bubble that had formed under the surface of the wet sealant.
Had I realised this earlier, then I would have put the board in the sun for a while, or somewhere else warmer than the workshop, until the board was thoroughly warm and until it had enough time to vent the expanded air. Before the first sealant application, the time required for pressure equalisation would have been very short due to the large hole, but the cured first layer only has 2 small holes, so some time would be required to vent enough air.
I hope I figured this out in time and that my ‘emergency measures’ will do the trick: Wet towels on the board and a fan blowing air onto the wet towels. The temperature of the dry parts of the board is 24degC, the area under the towels is 16-17degC. I hope this will cause enough contraction of the air in the board to suck the uncured Sika 291 deep into the ‘vents’ which were established during the first application.
The “Fin-Eye” has taken a first glance at a set of three fins in the green room. But because it is not yet waterproof, it had to be a dry-dock green room. Good to test stuff out beforehand, anyway! Quite a few little things have gone wrong and were much more easily dealt with at home compared to on the beach or in the waves.
The footage is most promising. The screenshots below are taken from the video footage, paused in the 360 video editor. All the views are taken from the same paused ‘stillshot’, just ‘software-pointing’ the camera in different directions and zooming in or out. The running video can be viewed with exactly the same view and zoom options, plus many more.
The screenshots from the 360fly footage show:
Fish-eye view = all the info.
Looking foreward, but fins can still be seen with this zoom. When zooming out more, only the foreward view would be visible
…hello Mr Mik, I just enter here and see what you want to achieve; I did not read the whole thread but I think that I do not have too much to add.
I want to say that could be very good and wait expectant for the clips to confirm (or do not) several point of views.
Could be good to see the differences on the bottom countours in relation with the rocker; but should be necessary to have a handful of different boards and riders plus cameras and time to make the tests.
No doubt that the conditions of the surf and the riders skills are very important.
In first instance would be good to test it in mushy condition and in clean condition at SIMILAR wave height.
Never understood why the biggies companies did not do these tests only blahbling about how good a given design is.
Fortunately I like to surf McCoy Nuggets more than any other boards that I have tried. I gave up trying other boards when I got my first Nugget 20 years ago. They lend themselves very well to this little project, because they have very nice thickness throughout the board. This camera would not fit in a potato-chip board. It’s a marvellous and scary piece of technology and developing something better than this would be too expensive for the surf industry, compared to the doubtful increase in profits they might achieve.
What if they have already done it? I would not be surprised, maybe they just keep the results to themselves, because proof of any kind does not neccessarily increase sales to the masses anyway.
I plan to do semi-objective testing of fins with the ‘Fin-Eye’ using jet ski towing. I hope I can convince someone to tow me for a couple of hours, at a constant jet-ski speed, while doing turns behind the ski which should at times exceed 50kph. That will be most feasible if it turns out that there is enough light for filming under a surfboard in murky river / estuary water with a muddy bottom. I don’t like the idea of installing lights, too many bullsharks, I don’t want to look like a flashy lure! Going faster than speeds usually achieved during surfing is important to me, I worry about fin hums and wobbles which might only occur when dropping down an unusually large wave in a more or less straight line, with need for maximum speed.
…Mr Mik, I doubt that the biggies did it; most are lazy sods resting on old track records or newbie wanna be shapers that have lots of money behind (AKA the machine)
-In my opinion, I think that those speeds are triple (or more) of what you can achieve in a normal wave surfing (down the line etc not only the drop) so you will find different type of turbulence and water directioning than with normal conditions; hence most fins that perform right in the theory do not cut the mustard in normal Surfing conditions and average surfers.
Reverb, I have been riding MrMik’s high aspect ratio gullwhale fins almost exclusively on my Traditional soft railed longboard for many months now. They have all been of slightly different construction methods/ materials, and thicknesses. There have been several instances, in long period fast moving groundswell, when I am at or very near the max hull speed of this longboard, when I have to straighten out as the wave closes out or reels off too fast for me to make.
In these instances, as soon as I turn the board straight to shore, the fin has felt draggy, like drop the sea anchor draggy, whereas any other part of the wave, angling, it is the fastest/quickest least draggy fin I have used in 15+ years of riding this longboard.
My underwater video shows the One red GW fin oscillating in lesser waves, when heading straight to shore, and I have sometimes felt other GW cameraless versions shaking the tail of the board if I am headed straight to shore, and this is the only time the fin ever feels draggy, unless I am dragging a lot of weed or kelp. The lack of any rake and equal pressure on both sides of the fin, seems to be an issue, although it has been of no consequence on my board in the waves I have been riding it in, and It is easily the best fin I have ever used in this board, and by a good amount.
The soft rails on my longboard’s tail, and tail rocker will limit its top speed. But a board with hard edges and lesser tail rocker and lesser wetted surface area can attain far higher speeds with the right wave and the oscillating could have undesirable consequences dropping straight in. So better to find out being towed by a jetski rather than on a wave of possible consequence if the fin is going to start oscillating, and whether different construction methods He has developed recently, can dampen that resonance.
my comments about the jet ski testing were a bit misleading.
I do totally intend to surf this board as soon as the opportunity arises.
The jet ski stuff is just additional, to simulate conditions (large waves, higher speeds) that I cannot access anywhere often enough, and when they arise, getting out the back is hard (no reefs or channels here). On a number of occasions I have failed to make it out the back, and on those occasions when I made it and then had uncrowded conditions largely to myself, I would not have made it out a second time after a wipe-out. I cannot afford to blow any of those rare occasions on an experimental fin, that’s why I want to ‘stress-test’ the fins while being towed.
Ideally, I would like to use cable-ski world, but for some ‘safety’ reason, I am no longer allowed to use a surfboard. Doing the exact same circuit at the exact same speed, but with a different fin each time, would be ideal.
If the opportunity arises to surf some larger waves before I have stress-tested my own fin designs, then I’ll be on my ‘Big Wave Nugget’ with a standard fiberglass Gullwing fin in it. I know that combo is totally reliable in bigger waves than I could handle.
But as soon as I have the ‘Fin-Eye’ installed in a waterproof fashion, I intend to surf that board with one of my fins in it, as long as the wave faces are less than 3m or so.
Hint: I was trying to win the idiot of the day award!
I decided to seat the camera housing permanently into the board, assuming that will achieve a better and more durable seal against water ingress.
I designed and 3D printed a handy tool to make the screwing-in process easier, heated the board to 50C in the car while prepping everything…when everything was ready, I took the board into the cool garage…
and then I screwed the housing in the wrong way around! Doh!
Eventually I realised my stupid mistake and reversed the camera housing before the Sika 291 had set. But, the board was likely at room temp by then, but it should still have been containing ‘negative air pressure’.
The first three pictures are part of my application for the idiot award, the last one shows the rectified result.