Just spotted this thread. Can no longer access the photos…
Here is some real simple infusion info from our website. Hope this helps.
**Infusion 101**
**
**
****
****
Infusion process, although not a new science, has recently become more popular as better resin systems have come to the fore. Resin Research has been one of the leaders in this field with the first commercial cycloaliphatic systems in the North American market in the early 80’s and with the first infusion of this chemistry in the early 90’s. With this expertise our continued research into modern production process has led us to the release in 2005 of our latest infusion system, the Composite Pro resin line.
This line features three Bisphenol A based resins along with three unique cycloaliphatic hardeners. Each resin offers it’s own unique flexural cross section offering engineers specific modulus characteristics for each application. Three hardeners offer production management options specific to process cycling needs. Since all Composite Pro hardeners are 3 to 1 mix ratio these can be further mixed for custom application.
Other special features of this system include low toxicity, low vapor, low viscosity, excellent clarity, low blush, high gloss, low exotherm and excellent UV stability. As an infusion processing partner, this system contains a unique molecular lubricant modifier which, along with it’s low viscosity, provides for better wet out and added bond strength with interlaminate materials and substrates.
**General Infusion Process - **
While individual processes vary, a general starting point in infusion methodology using the Composite Pro System generally follows along these guidelines.
**Resin Conditioning** - Conditioning of a high solids infusion resin generally requires bringing the resin temperature to around 100F to reduce viscosity and to ensure proper resin/hardener mixture.
**Injection port strategy** – The placing of injection ports should maximize resin mixture flow within time allotted for each part according to part size and desired cycle times. Generally each part will have it’s own wet out strategy dependant on resin/hardener conditioning, vacuum pressure, flow media and the geometry of the part.
**Introduction of resin mixture** – Under vacuum introduce resin mixture. Resin mixture temperature parameters will be dependant on part size and geometry, injection port strategy, flow media and vacuum pressure. Flow speed and finished saturation should be based on approximately ½ of pot life.
**Post cure** – Following injection completion an increase in temperature to 100F to 150F for 1 to 6 hours, depending on hardener speed used and part thickness, for initial cure. This should be followed by heating to 125F to 225F for a period of 2 to 6 hours for final cure. The post injection temperature ramp will accomplish maximum HDT.
**Note**: Part thickness, hardener used, resin conditioning, flow media, composite material, part geometry and desired cycle times all play a part in the balance of a successful infusion system. While these guideline are meant as an assistance to our customers, your own infusion strategy will take on it’s own unique parameters. Hopefully these guidelines will assist you in accomplishing a successful infusion strategy.
Hi there, i just found that post searching some information about vacuum infusion built surfboards!
to make a long story short :
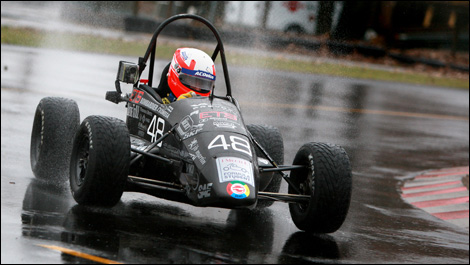
here is my background, when i was at school, i worked on a enginnering student project in wich we designed and built a racecar (called formula SAE) and we used to build a lot of parts of the car using vinyl-esther resin and carbon fiber layup. the process was different because we used molds (female form of the part you want) to make the part, all done using resin infusion.
here is a picture to give an idea of the carbon fiber monocoque.
now that i just finished my first surfboard with the traditionnal layup method, i would like to use resin infusion to make my second board but here are my questions
the fact is that now i am more a DIYer so i don’t have access to all the equipment we had at the time so i will have to build my own cheap pump and everything and i would like to waste less money i can in the process so this is the main reason i try to learn from other people’s experience.
when you infuse the board, do you put the intake on on rail and exhaust on the other rail?
also, do you use bagging on top and on botom as well as peel ply and flow media? most of the pictures i saw were using a sheet metal plate under the board, is there a reason why you don’t use bagging on the bottom and top ?
how stressfull is it that your nose stays dry ? (or how do you locate your intake and exhaust to be 100% that everything is wet)
also, i am maybe planing to use EPS… but i am not still confident that the blank won’t fill-up with epoxy enven sealed how can i know it is 100% sealed. you only need 1 way in and 1 way out to fill it all up ![]() (pretentind you have enough resin)
(pretentind you have enough resin)
do you use any epoxy viscosity reducer or should i use low-viscosity epoxy or standard does the job?
well that’s it i’d like to bring back this thread to life,and i’m pretty sure that more questions will come later
if you have some picture during the process it would be awesome!
There’s a lot of questions!!
I infused with a feed line along one rail, about 6" from the board. Distribution mesh ran from the feedline over top and bottom of board and stopped about 6" short of the other rail. Peelply was used to cover the entire board and was connected to the suction line which ran the full length of the opposite rail.
I tried EPS once and found that it distorted when the bag pressure built up and produced a twisted board but there are ways around that (double bagging, one for infusion and one on top to hold it all down on a rocker table). Have not tried sealing EPS and then infusing so not comment.
I always use low viscosity resins (either epoxy or polyester) from a reputable manufacturer. I have seen too many horror shows resulting from trying to thin resins. One attempt used acetone to thin the resin, when under vacuum the acetone boiled out of the resin and left a horrible foaming mess in the bag. Styrene also shows a tendency to boil at reduced pressure. That is why for critical parts and surfboards I always use solvent free epoxy.
Next board I will put the feedline onto a pleat of distribution mesh along the centreline of the deck and suck from centreline of bottom, this will enable me to control the glass behaviour at the rails.
Will try and find the photos and post them
Alright, you confirm my toughts!
i will wait to get a PU blank before trying this!
What kind of pump are you using and if not DIY, how much $ ?
thanks for the info and keep us updated about your future tests/projects!!