After building my first board using all the great info on here and across the web im ready to build my second.
On the first i got a bit over whelmed with the process and didnt have the mind space to do a build thread too! But its come out nicely and having surfed it a few times its quite an exciting board which im looking forwars to progressing on. 6’7 with a diamond tail and resin tint. The only thing i didnt do my self was the fin boxes. Only ridden it as a quad so far and ita good fun but i just picked up a 7’ volan beyond fin and some side bita as i thing the narrow tail will suit it more.
Any how, moving on to the new build. I sold a cuatard point 7’x23x3 egg which was really the board i have learnt to surf on. It was great but it was a thin glass job and quite bulbus. I want to replace it with something similar size but more performance orientated. Looking around there were 2 midlengths that reallt stood out. One being the takayama howard mini special and the other being the 4th Time piece ( locally shaped ). Both board offered similar measurements at 7’2 and seem to surf in the style i aspire too!
So, i went to my local supplier and picked up a US Blanks 704 SP in Blue foam with an extra 1/4" nose rocker and a 1/8th inch basswood stringer
I used the blending curves templates for the Egg C @ 7’0x21.5 and added an inch in the nose with a bit of a beak (stolen from the Egg D) and added an extra inch in the centre. I also pulled the tail out to 15" withba little thumb as i felt the waves here ( only one point break and i dont surf it ) would like a little exta width.
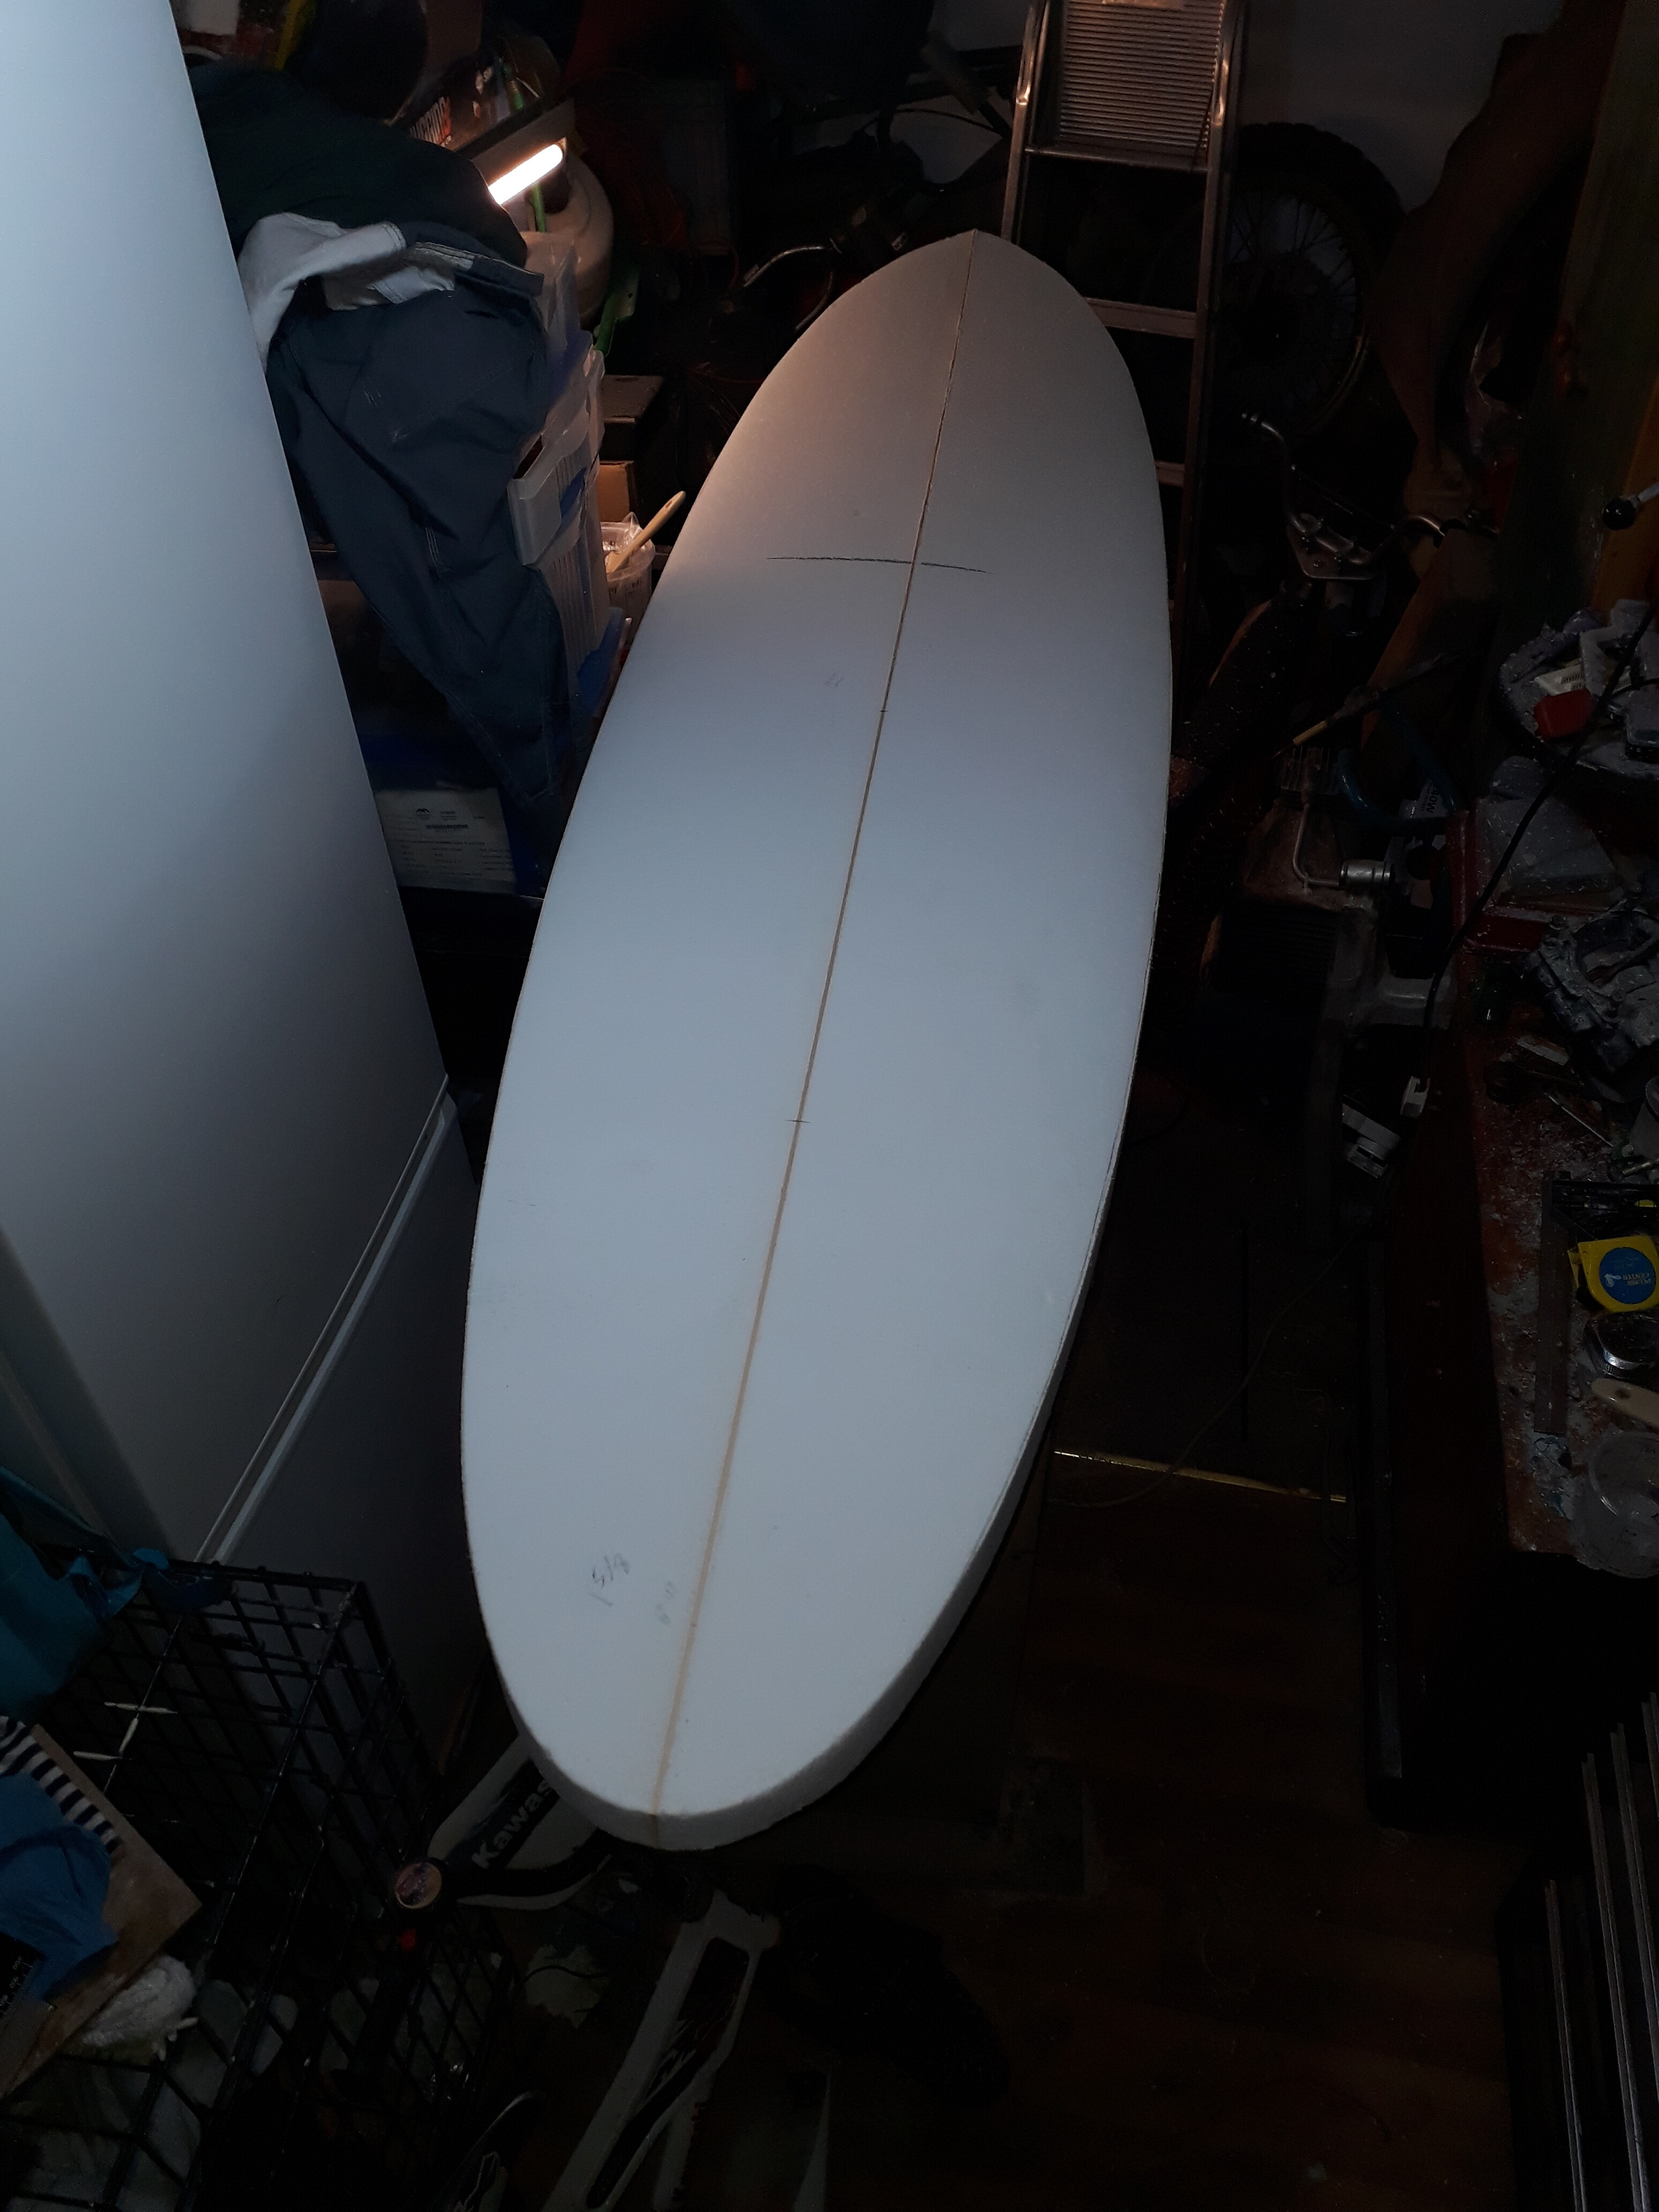
So far ive done the tenplat and trued up the rails
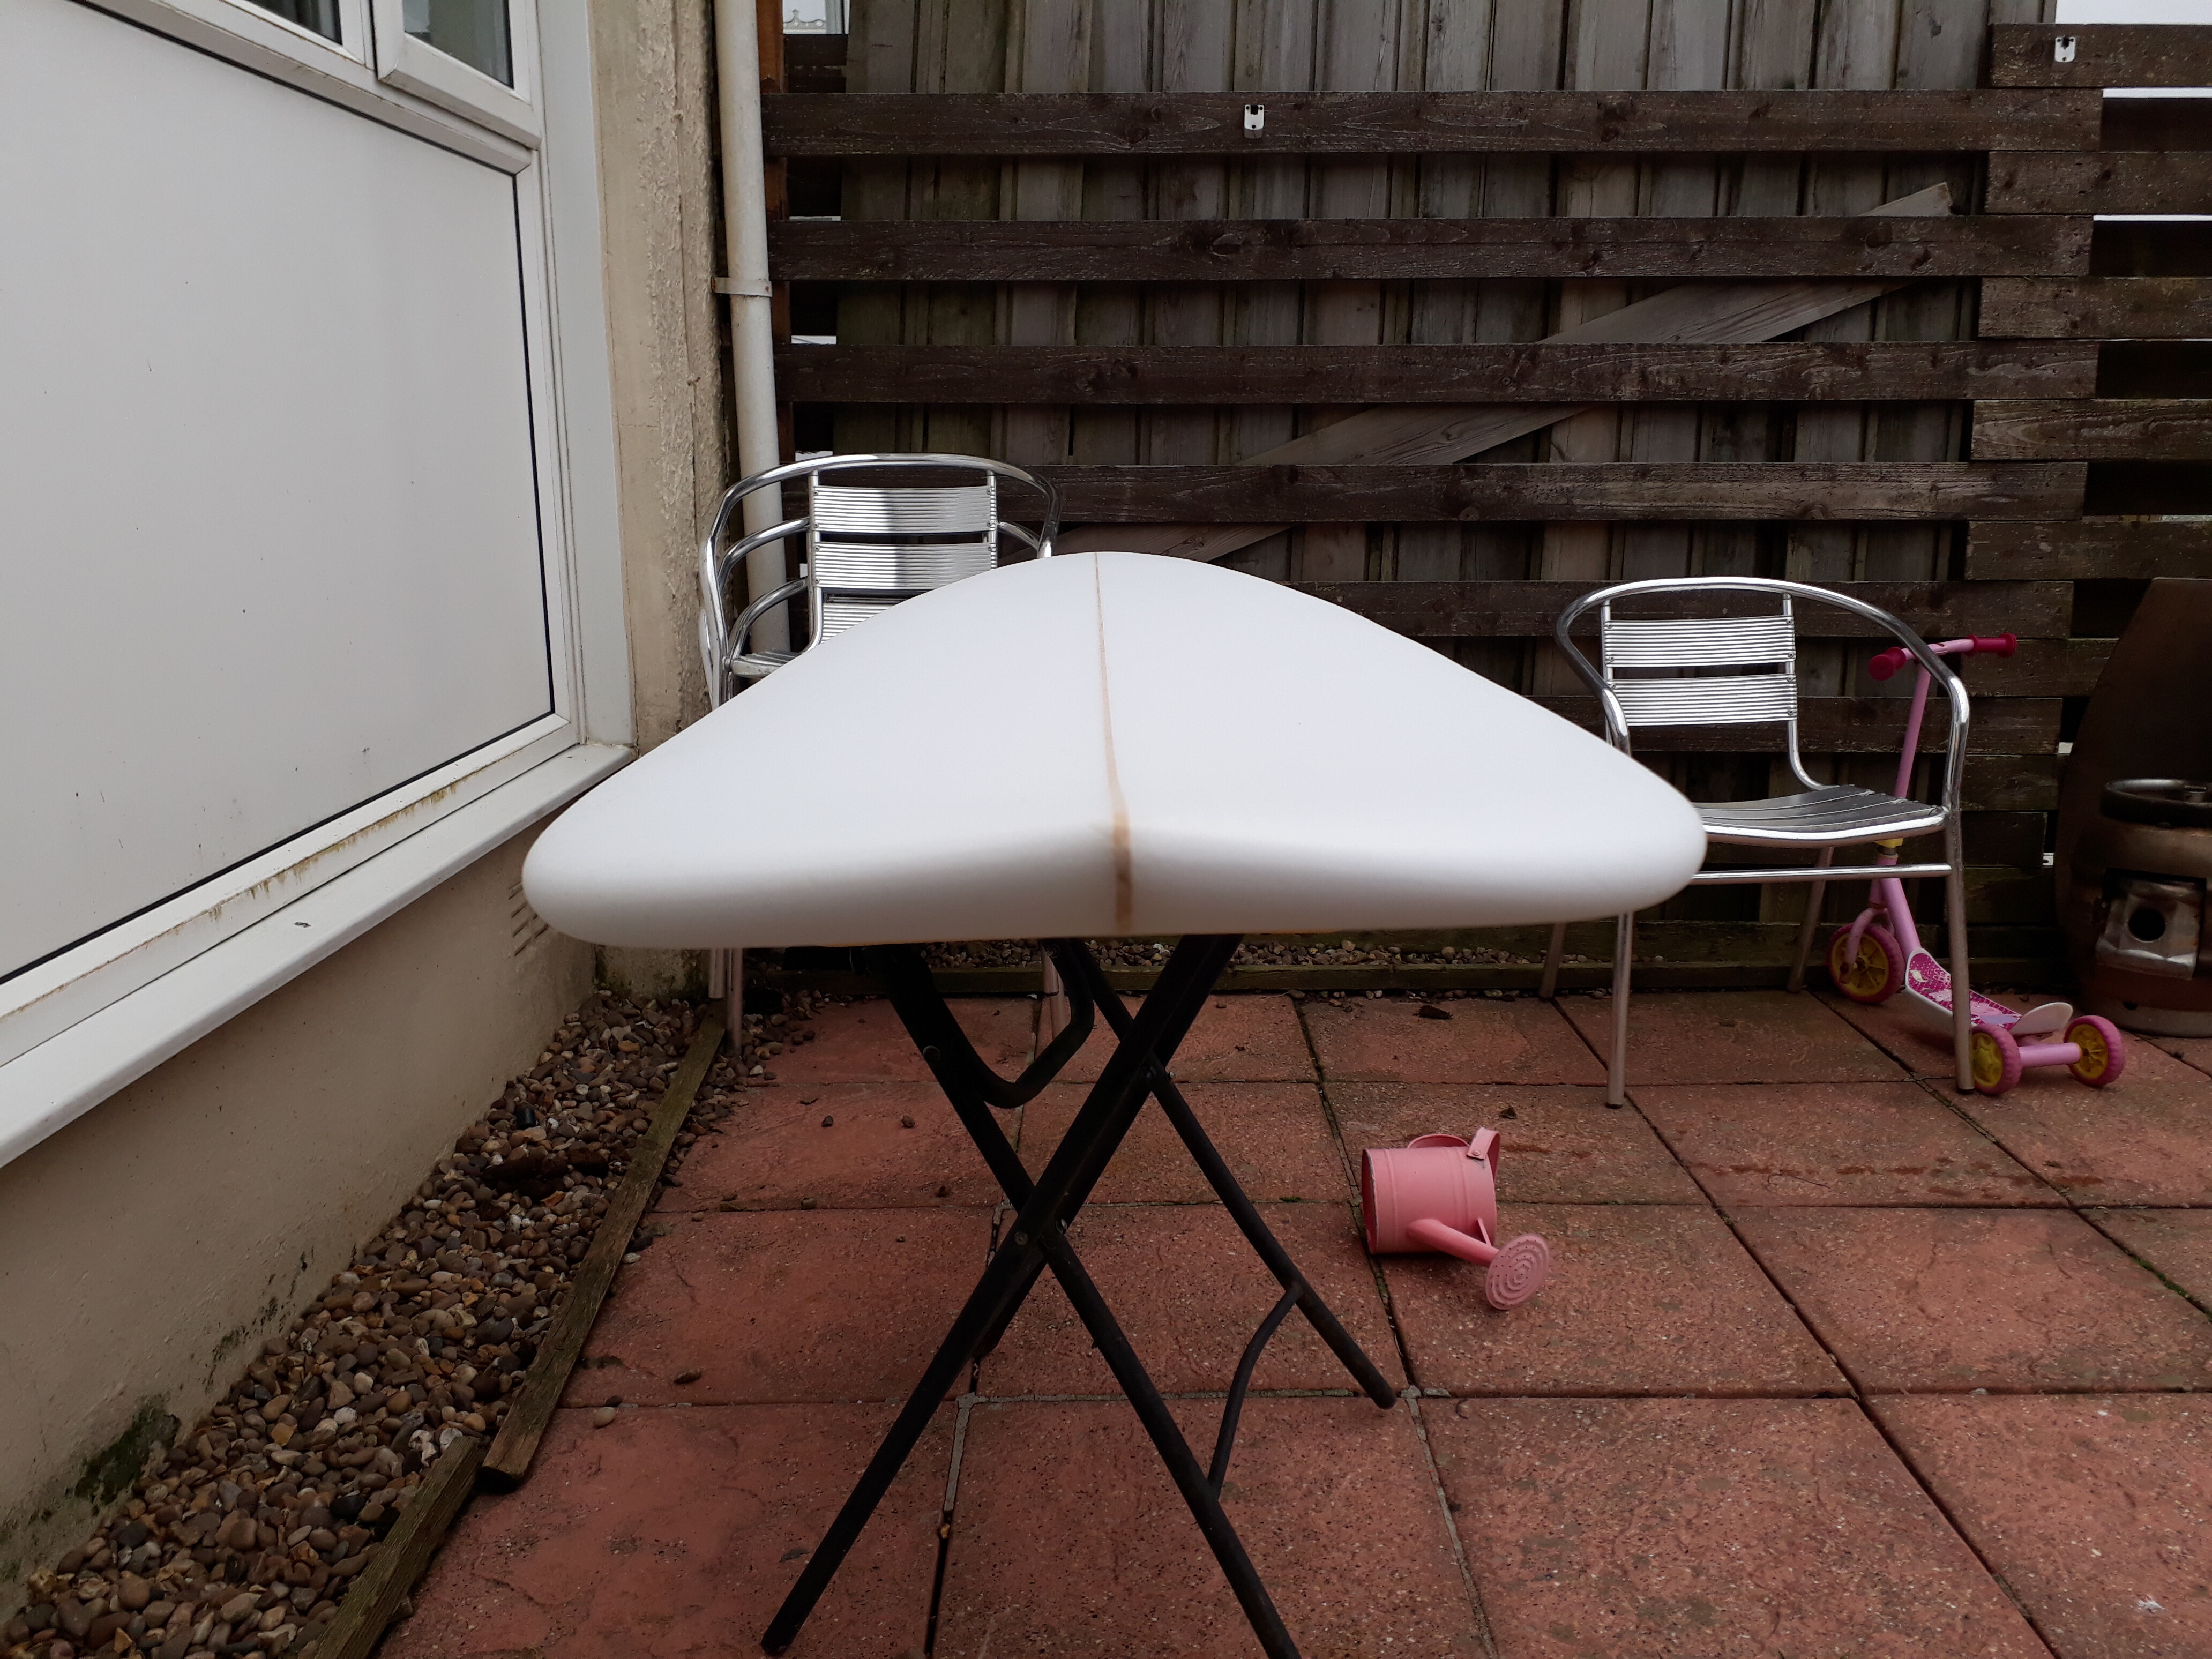
Here the old board its replacing. As you can see im no photographer!!!
This was 50L and 4+1. Used it as a quad in small stuff and a big single in the chest high area. I took this out in clean head high a few times and really couldnt get on with it. Just felt to far out of the water to engage. I guess this is due to the size and volume.
The replaclent will end up around 2 3/4 - 2 7/8 thick and Be a 2+1 fins setup. What i really cant decide on is the rail shape. The old egg was a full rail with a domed deck. The 1st shape has 50:50 raila with a short down rail in the tail. My bilbo longboard has fairly low rails alnoat down and is by far the most re assuring board in the chest high plus range
Im 5’9-10, just shy of 80kg and surf a few times a week. Im begginer-intermidiate. Will go out to just over head high and can perform cut backs, bottom and top turns etc
I was thinking this should be a medium or 60:40 rails but my local shaper sais go hard on the rails.
Got round to finalising the outline. Stared on the foil which i ended taking a little more from in the end. 4 1/2" nose rocker and 2 1/8" tail
Got the fo
Irst bands down and finished uo the rails. More to come later
I think you’re on the right track. If you haven’t already done so, finish your bottom contours before you do anything else on the deck. Start with a flat bottom from rail to rail and from nose to tail. As in, you can run your straight edge the entire length of the board.
Then add a subtle chine of maybe 1/10th x 2.1/2 all the way. You can deepen that chine a little at the nose and blend it in. This will smooth out your entry and your rail to rail action. Then start a panel vee which - since you already have a chine through the tail - can transition into the vee just behind the trailing edge of your sidebites. So basically the vee runs from 10th at the side to 3/16" or 1/4" in the last couple inches of the template. You want that panel to have an edge out at the rail.
Then shape the bottom of the rail with a slight tuck going into a 70/30 onto the deck. The combination of the panel vee ending with an edge and having a tuck between the edge and the apex of the rail will give you some hold when you need it and some release when you need it. You can transition the 70/30 to 60/40 in front of the fins and keep that all the way through to the nose or soften the nose a little more with some 50/50.
If your bottom is done then you can more accurately adjust your foil and clean up your deck rocker without accidentally ending up in an overshaping situation, as can sometimes happen when you do your deck before your bottom. I’ve made the mistake - started out with a foil but ended up overshaping by the time I refined the bottom. But when I do the bottom first there is no guesswork where the foil will end up.
Sadly i picked up your reply after i finished shaping. However i did manage to do the bottom before i went any further on the deck!
Ive done a 50/50 through the nose into 60/40 rails into a hard tail. Concave wise its a little belly in the nose into a mild single concave into v in the tail.
I dont think my V is quite as brave as it could be, its quite shallow.
Ill get some pics up in the light tomorrow, before i glass it up
Thanks Jballen2, im really reluctant to go to small given the waves we get and my experience.
I recon its around 46Litres. Based on my old board being wider and thicker, and i bagged up all the excess. Blank was around 70litres and ive bagged a good 20-25litres of waste
I found that my last board kept me a little high on the water but was great at catching waves and turned well
It’s only your 2nd board. You’ll get it out there and decide what you do/don’t like, and then you’ll eventually move on to the next iteration based on your experience with this one.
Well I’m glad you all think I’m on the right path with this one!
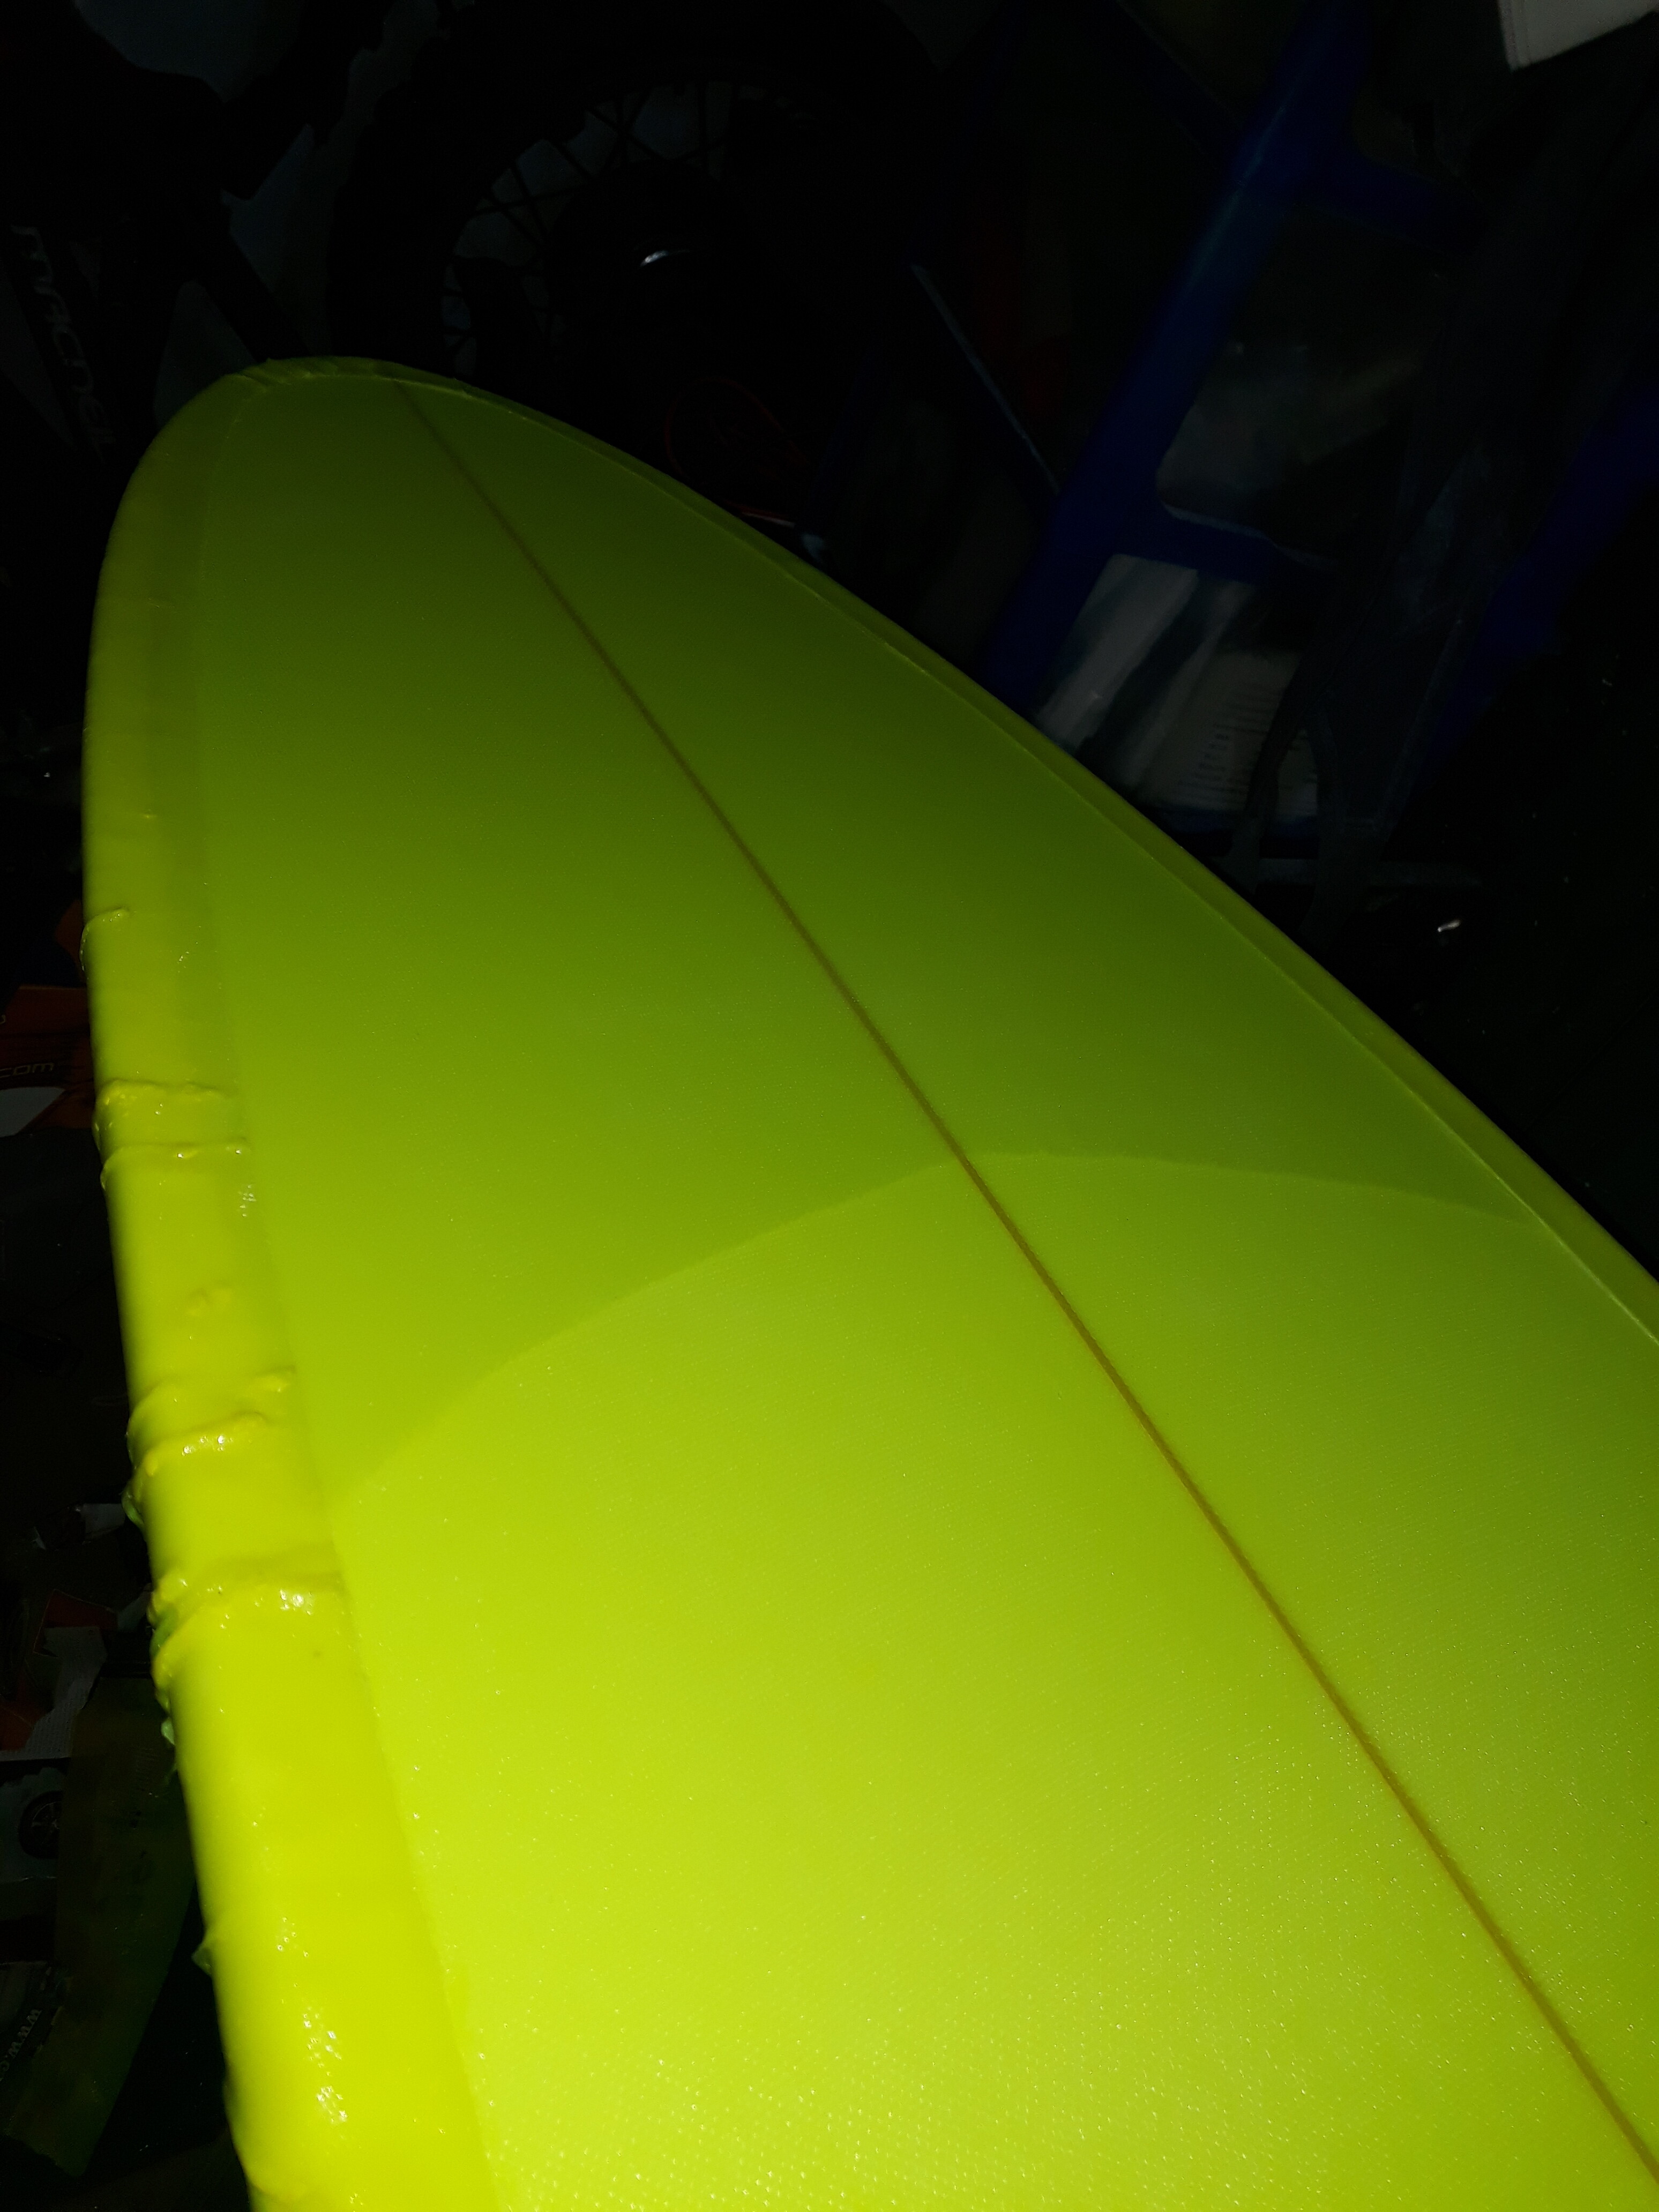
I chose neon yellow from shapers for the pigment. I dont like being flashy but I do like bright colours!
Went for 6 oz. on the bottom with a volan fin patch. Freehand masked the lap cut and the bottom came out really good. I was so pleased.
Went to do the deck and I was a foot short of 6 oz. So i put in a volan deck patch and got some 4 oz. for the second layer.
Everything was looking good. I left the resin and the hardner in a nice warm area, trying to keep it runny after my issues with the first board.
Halfway into getting the lam my pot starts smoking (should mention I use resin research 2100 epoxy) I get one lap down and I’m spreading the other side and it starts setting! The pots smoking so I run in and mix a small batch
Sadly I’ve made a right mess and I’m gutted!
I managed to save the majority of the lam job but there a good 1 foot section that was just to hard to do anything with. I guess I’ll spend the next few days sanding that section off and adding some fresh glass to the section
Its all part of the learning curve. You cannot allow epoxy to sit in a cup or in a pool for any length of time because it starts to exotherm.
To be honest, I never even do a single mix for laminating anymore. I always break it into 2 or sometimes 3 smaller quantities. I usually mix the resin I need to more/less cover the flats and then pour it all out at once, usually distributing in from one end of the board to the other in relatively thin lines so that there is no pooling and I’m not moving the resin around a lot (which sometimes makes it foam. I let it seep in a little and then go to work with my squeegee until it’s all spread out evenly. None of this batch will even touch the rails.
Then I come back with a second batch for the rails. The way I laminate I waste almost no resin. It takes longer, but there’s zero drama and very little guesswork about how much resin to mix.
You need a cheap digital kitchen scale to accurately mix small quantities of epoxy. Believe it or not, I usually use unmarked 10oz plastic cups ($4 for a sleeve of 50) for mixing. I can usually reuse them after whatever remaining resin sets up because I measure by weight. Accuracy to the gram if you do the math right.
The exothermic reaction gets worse the bigger the amount/mass and with narrow/high mixing cups.
Mixing in flat but wide cups helps a bit.
But in general: Either work with some small batches rather than one big (like gdaddy says). Or be quick and spread it out fast.
It will get easy with practice. No problem to struggle with the second board, we have all been there. I had smoking cups, too. (if an epoxy batch get´s significantly warmer than body temperature - throw it in the bin. Beside the mess when trying to pour it on the board, it will be structural compromised from the heat)
I mix up to 1000gr. of epoxy (5oz+5oz+2/3 deckpatch on Mini-Longboards for example), mix pigments/tins in, stirr it well and pour it all out immediately. Takes maybe 2-4 Minutes if all ingredients are laid out on the table before starting.
When pured out of the cup immediately, I always got plenty of time to move it aorund a bit, saturate those 3 layers of 5oz inlc. the rails, let everything sit for 2-5 Minutes to soak in and finish the laps without any rush.
The trick is to get it out of the cup quick. As long as it´s not an ultra fast setting type you´ll have all the time in the world.
But leave it in the cup and the temperature will rise slowly first but then very very quick.
If you’re going to work in smaller quantities with tint or pigment, you can mix the color into however much of the A side you anticipate using first, then break it up into the smaller batches. That way you’re maintaining the consistent amount of color
well after doing a huge repair. I cut out the section of glass that caught the exotherm. Then repaired and built back up with the 6oz volan patch cut to shape and re layed the cut lap over the top. Its come out pretty good. Little discolouration along the join but hey - in guna wax her up!
Got fed up of hand sanding so i purchased this cheap sander and got a medium pad!
I also had a son last week so the board has been on the back burner. Hopefully ill get back on it this week!
Ive taken the 1st voard out a few more times with 2+1 glass fins ( only used plastic before ) and it really rocks!
Definitely likes a cleaner wave of 3’+ but it sticks a line awsome! I even got the bose out the lip which ive not managed before!