One of my favorite things about the OG Swaylocks was the build threads. All of the questions and answers were good as well, but sometimes just seeing the process makes everything crystallize. So I’m going to do a basic build through on this hollow wood surfboard (HWS). My HWS is built in a different order and style than all of the other boards that are out there, and that is the main reason for this build thread, so others can see, evaluate, critique and adapt or improve upon it. Personally, I much prefer this style for working on one-off designs and inside of a smaller space.
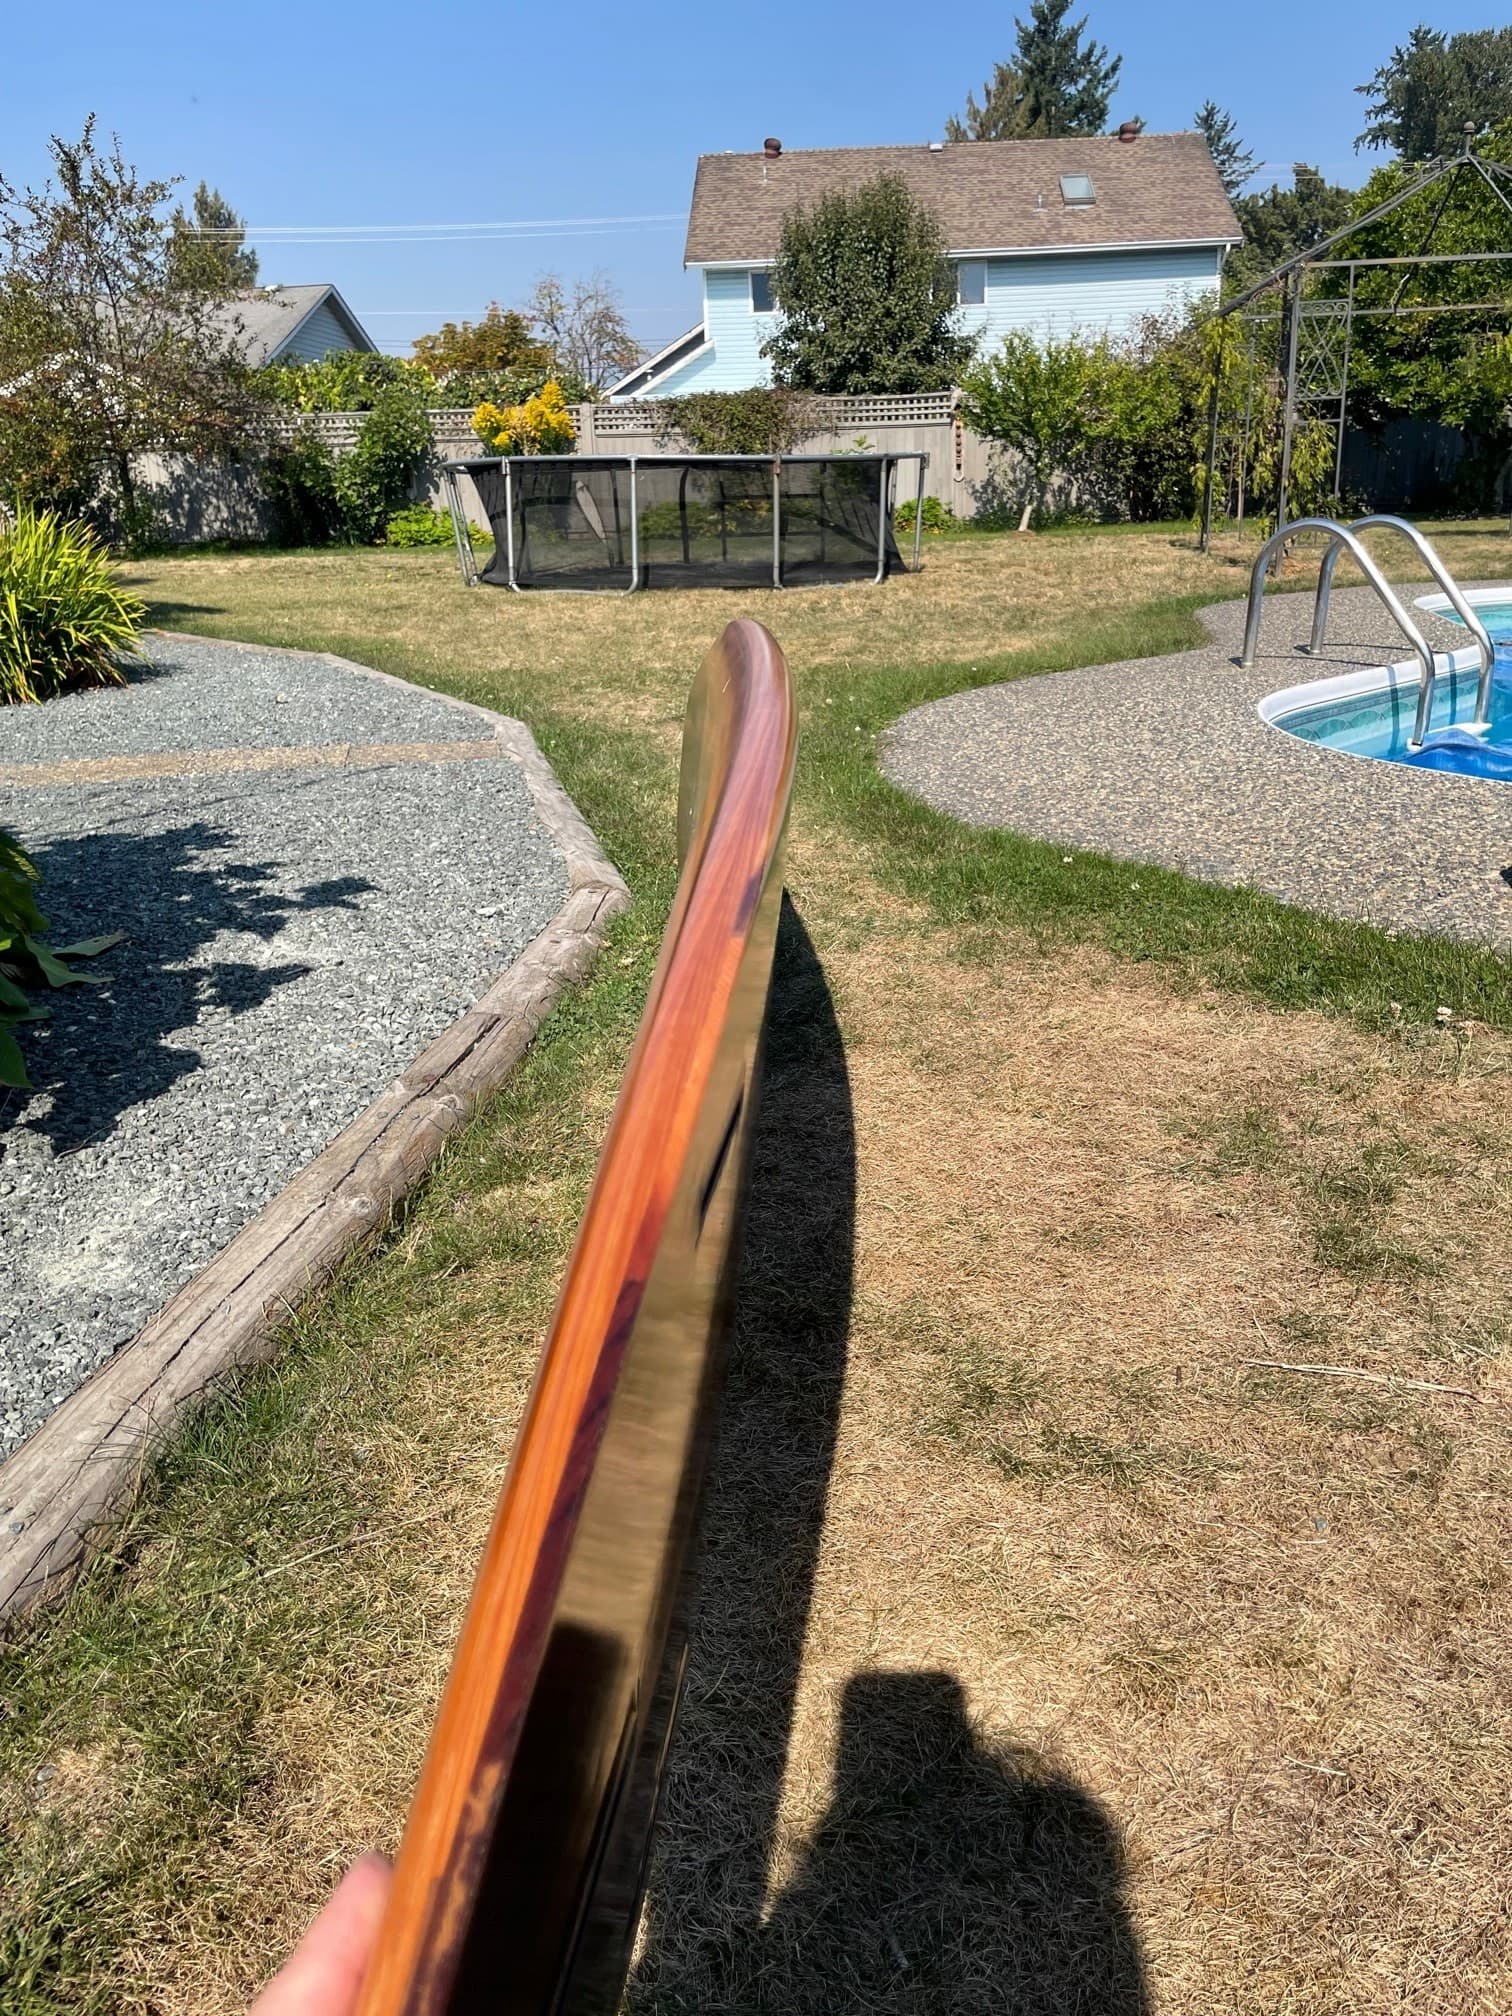
First, here’s the finished board. It is 7’9” by 21-3/4” with a volume of 54 liters. It weighs 17 pounds exactly. All of the skins and rails are solid western red cedar (1/4" thick), and the interior skeleton is quarter inch Baltic Birch plywood. Titebond III for adhesive. It is glassed on the exterior only with 4 oz. Hexcel, and double lapped rails. Resin is Entropy CLR with CLS hardener. Vent is a 10/24 stainless nut embedded into the deck, the leash loop is fiberglassed on, and fin boxes are Futures.
The Chinook salmon design was bought from my friend Jonny Williams, and I used a projector to sketch it onto the wood and paint on with Posca pens under the glass. Traditional Pacific northwest art goes so well with the red cedar, and I love it. Jonny does sell designs, and if you want to get in contact with him just PM me on here.
My method is that I keep my rib designs attached to a wooden reference base on a sprue that gives them the correct height for the rocker, as well as has a cradle for the reverse rocker. And most importantly, each rib also has a little support that extends out underneath the rail section that allows me to lay the rails up along the proper curve without a rocker table.
Each of these ribs is attached along a strong back like building a canoe, and the whole board is built on that assembly. You can see my order of operations in the pictures. I start with the rails, then plane those tangentially to the deck run out, and then glue the deck onto it. Once that is all hard, I cut these sprues to release the board, flip it and grind down all the sprues, and then place the board into the reverse rocker cradle that is created. Then I can glue up my bottom, and do my final shaping on the rails.
My very first hollow wood board was back in the late 90s or early 2000s. I followed along with what Paul Jensen was doing, and did a board in that style. All hand drawn skeleton, and cork rails. The next HWS I attempted was actually a paddle board design by Clayton at Sliver Paddleboards. That one was a regular skeleton and ribs with Cove and bead rails.
Although there were a ton of great things I learned from both of these gentlemen and their processes, I wanted to make things easier and more straightforward for myself. Both of their processes necessitated rocker tables. I wanted to do the rails a little bit different as well, as I found that the cork rails were too heavy and soft, and the Cove and bead were incredibly time consuming to mill and prepare.
So that’s what’s led to this build is using the “ribs on sprues”, with a quasi-solid cedar rail that can have all materials ripped on a table saw. Outside of the design, the actual build from milling through until it was ready to glass takes 5 days. Most of that is waiting for glue to dry as well. Lol.
Design Stage. This is a small wave mini-Mal, but I wanted it to be lower volume than some of my other boards. I worked with Shape3D until I had both the rocker and the shape that I wanted. The rails start fairly soft and harden out through the tail, and the bottom has a single concave in the nose that transitions through a slight double concave to a mild V at the tail.
Once I have the design set up, then I create a section on the board every 8 inches. Then I use the print file option to print it as a PDF, convert it the PDF into an SVG file, and then import it that SVG into Microsoft Visio. Once I had it in there I offset the lines to account for the quarter inch deck skin, and then offset again and hollowed out my ribs.
At this point, I added my bottom rocker measurements underneath each of the ribs, as well as an outline of the reversed deck rocker. It seems a bit convoluted but the pictures probably explain it better. I built my boards by first creating a strong back like building a canoe, and then I will anchor each of these large rib templates onto that with a small set of blocks. The Stringer drops into intersecting slots from the top.
Lastly, I set up the rail outline so that I could build it all out of solid cedar strips, either 0.5x0.25”, or else just 0.25x0.25”. I gave an allowance around the entire board of 1-1/4” for the rail buildout. In the middle it’s pretty easy to see how they will layout. But towards the ends they will need significant planeing in order to get them down to the final shape. But strips like this are super flexible and are extremely easy to mill on a table saw.
Once I had all the designs created digitally, I had them cut on a laser cutter from 0.25” Baltic Birch plywood.
Build day one.
I used a set of saw horses and two straight 2x4’s To create a level and straight base. Borrowing from canoe building, I call this the strongback.
With that all secure, I took two 0.5” x 0.25” Strips of cedar and glue them into the furthest back and bottom positions of the rail. Clamp them in place with PVC pipe chunks like I learned from Clayton, and tie up the ends with a bit of duct tape.
Every couple of hours I would add a few more strips onto the rails. Always working from the Stringer outwards. This is the order that these strips were glued on.
Once the strips were set, I cut out my nose and tail outline from a solid piece of thin red cedar. These were then glued to the trimmed rails and ribs.
Once I had that all done, I glued in a narrow quarter inch thick strip down the centre over top of the Stringer. By gluing this on and letting it set up, it gives you something to butt the other deck pieces against as you are gluing them on. You can get much tighter joints, which is always best.
When that was Set, I rapidly glued up the tops of all the ribs and edges of the strips and clamped everything with ratchet straps. Before I started gluing though, I laid these strips on and then traced the rail outline and trim that with a jigsaw. You do not want them overhanging the rails, as the leverage will lift them away from the deck otherwise. The ratchet straps go all the way around the board and the strong back, tying everything tightly together.
I threw a few other heavy things on top as well to keep things tight.
That evening, I used a flush trim tool to cut each of the sprues so I could free the board from the strongback.
Once that was done, I flipped it over and trimmed all the sprues on both the board and the strong back, and then ground the bases flush using a 40 grit angle grinder. I also ground off each of the perimeter rail supports.
Because the cedar decking does dent relatively easily under clamping pressure, I cut up a piece of old fire hose and placed it over top of the reverse rocker table. Then I laid the board on to that.
I also ground down the fin-box supports. What I’ve started to do on these boards is take a picture of the underlying supports marked on tape before I cover it in. Much easier to refer to later than trying to remember it all.
Like the deck, I started with just a single strip along the stinger. I wanted it set so I could butt my bottom strips to it tightly. Particularly with the bottom contours, this is harder than the full convex of the deck.
Once that strip was set, I glued strips on either side. But unlike the deck which was all one shot, now I was laying up never more than two strips at a time, as this way I could force the strips down using the ratchet straps so that I would match the bottom contours of my ribs. Like the deck, I rough cut each strip where it overhang the rails so that there would be nothing levering it up.
Build day four.
The board construction was now complete. It’s a bit chunky at this point, but that will all change when we sand it smooth and turn down the rails.
I placed three marker strips of tape on top of the board, and drew the rail profile needed on each at that point. These are just markers for me too visualize what I am doing and make sure I keep both sides even.
Once the shape was finalized, I mixed up 9 ounces of epoxy and gave the board a cheater coat to seal the wood pores. I always love this point on a wood board, as you finally get to see all the wood colours pop.
Build day five
There wasn’t much that went on in day 5, other than measuring out and setting up the Fin boxes. Once I had determined the locations, I used a template and a router to recess those.
I also took the Chinook salmon design from Jonny, used a video projector to display it on the board, and traced it over and filled it in with posca paint pens.
I could have probably gotten a bottom lamination coat and fill coat on yet that day. But I was heading out for a couple of days fishing with my brothers to fill our fall freezers, so I left it at that point.
Glassing and finishing.
Not much here to write about. Pictures are hard to take because everything is a bit sticky, and everything is on a tight timeline. But if you are on Swaylocks here, you know what this entails so I don’t need to write much about it.
I used cut laps on both top and bottom, and four ounce hexcel fiberglass with Entropy epoxy. I used fiber scraps to make a leash loop as well.
Great to see your method of building! Kind of an engineering approach, especially with the rocker tabs.
I think this is a very good solution if you build just one or two boards. If you do more, the investment of time in a rocker table would let you save wood, because you got a lot of leftover plywood below each rib.
Your rail method is a nice variation of a solid rail and the rails weight is still determined by the rails dimension. Finally it is similar to Paul Jensens cork variation, using wood instead of cork.
But as said, I love it, because you used your mind to adapt and variate existing solutions to your needs; that is what most engineering is about…
Love the inventiveness of your method, eliminating the need for a rocker table should hopefully inspire more people to try building a HWS.
As far as sealing the inside I use marine varnish and my brother uses watered down Titebond 3.
I prefer 3’’ (150mm) rib spacings, with a 10mm by 10mm strip notched into the ribs about 75mm (3’') out from the spine which eliminates the slight flex you feel if your heel lands between two ribs when moving up and down the board.
One or two of these angle brackets would be handy for clamping the deck skins when the wood needs to bend in two directions.
I love The work you have done and your methods. I have noted quite a few fine wooden Boardbuilders over the years on the internet in general and especially some fine work done here by Sways members. Hard to get detailed bottom contour in a wooden board and very often the detail in the rail just isn’t there. You put a nice rail on that board. It has been my conclusion over the years that it is hard to do a detailed rail or concave bottom in any kind of framed wooden board or even a vacuum bagged wood skin board. I noticed in a recent visit to a wood framed surfboard website that they were 3D printing an outside frame/rail out of some kind of Polymer/Plastic. They lacked detail/refinement and all looked the same.