Wow MrMik, you’re really getting into the technical side of this. Are you going to make a lot more moods or just a few ?
Just a few in all likelyhood, I’ll loose interest eventually and do something else.
But, casting is such a versatile technique, I might use it again for something totally unrelated some time later. And I might also do this as a small business, who knows.
My motivation at the moment comes from wanting to have a reliable supply of my favourite fins again. I cannot buy them any longer, so I use this opportunity to learn a few new skills. And I hope I end up with a better fin than I ever had before. Unfortunately I’m rushing a bit too much with the excitement of it all, and those ball spring plungers I bought will most likely not be suitable for the job. They arrived yesterday and one look at the actual devices made it clear, they are too small. The "Effect System’ (the one gone in the tsunami), as well as the FCS snap in dolphin fin use much larger SS balls. They have more powerful springs, too. And ‘Body Glove’ uses even larger ball spring plungers for their system. But, it’s just a matter of locating the right device on the internet and buying and installing them now.
K0334.08 might be the right one on this page: http://www.kippusa.com/xs_db/DOKUMENT_DB/www/KIPP_US/BEDIENTEILE/DataSheet/enUS/K03/K0334_Datasheet_11129_Spring_Plungers_push_fit_plastic--enUS.pdf
But I’ll try to read and understand the specs a bit better before ordering more, they are not cheap.
For now, it’s sunny and there is not much swell, time to actually make a fin in that silicone mould!

I made a little test patch of fin wall in the silicone mould.
Problem is that it will take several days to know with certainty if the Solarez Zerovoc and the other 2-component epoxy will bond very well or not. By then, the sunny weekend will be over, so I need to choose between risking wasting some material or wasting a week (or more if it rains next weekend).
However I decide to proceed, I’m glad I did the test patch.
The layers are:
-
Solarez Zerovoc
-
4oz fibreglass stuck to still tacky surface of cured Zerovoc.
-
Zerovoc brushed into fibreglass, then cured again for a couple of minutes in the sun.
-
West System 105 resin 2.5ml + 206 slow hardener 0.5ml
-
Carbon / Kevlar mesh 0.3mm thick
-
More West system on top of mesh until wetted thoroughly.
Findings:
The Zerovoc cures with a dry side the silicone, remans tacky on the air exposed side and comes off easily when the mould is twisted.
The fibreglass does not become invisible.
There are some small gaps in the Zerovoc.
The Carbon / Kevlar mesh looks better through the Zerovoc where there is no 4oz glass beneath it.
Conclusion:
I will use 2 layers of Zerovoc, without fibreglass, then apply carbon/kevlar with West System Epoxy next.


MM-
Pardon, what is the reason for using ZeroVOC Solar and West epoxy?
Wouldn’t plain epoxy or catalyzed polyester work better in a mold since UV exposure could be hindered by the mold, other materials, and the weather?
If I missed an earlier explanation, sorry.
Good question, jrandy.
The West Epoxy is not UV stable. If I use it as the outermost layer, then I will need to paint the fin or somehow else cover it up. That means extra work and a chance to mess up the surface / foil when sanding it.
Also, applying the West Epoxy as the first layer would force me to either wait until the stuff is partially cured but still capable of formng a primary bond, before I put on some fibreglass. Or I risk having an imperfect surface on the finished fin, again requiring application of a top coat and sanding.
The Zerovoc sets within a minute, but stays tacky on the air exposed side, so I can add extra layers without disturbing the perfect first layer.
It’s a lot of fiddly work…
Not for fast mass production this way, but I hope it is coming along nicely.
2-3 layers of Zerovoc applied, thicker in places to smoothe out edges too hard for cloth to hang on to.
10ml + 2ml West Epoxy brushed on, then cloth layed out on it and flattened out by hand, then carefully cut to shape. A strong vacuum cleaner and freshly hand-sharpened scissors are very helpful. You must learn how to sharpen scissors for cutting Kevlar before you try this. Once the cloth is fairly firmly stuck, the edges can be vacuumed upwards and then cut little by little with small serrated scissors.
Then another 9ml + 1.8ml West Epoxy brushed on to wet it out properly, and some more vacuuming and cutting.


Almost finished I hope…
Added more layers of carbon / kevlar weave, using all the offcuts left from cutting around the outline shape. Very little was wasted.
Wetted out with West Epoxy after each layer added. Many layers in fin tab, 2 layers at the tip, one layer at the trailing edge. Layer numbers gradually reducing from tab to tip.
Vacuuming the edge and cutting off excess parts.
Adding styrofoam balls coated in resin, hopefully the right amount, and the rest of resin.
Finally closed the mould, then rotated it every 15 minutes or so to let the resin fill any holes along the edges. Three drops came out when the front edge was down, nothing when tip, trailing edge or tab was down.
Total amount of resin used was 77ml A + 15.4ml B of West Epoxy, and guessing about 20-30ml Zerovoc.
Cloth used probably less than 30cm of the 100cm wide sheet.
And the little test patch made this morning is holding together very well so far.
It took 8 to 10hrs of work to make the fin this way (not counting any of the long time it took to make the mould).


Just a tiny bit of resin was squeezed out, hopefully it does not mean that I used too little, causing water leaks or weakness, or splitting of the two halves. But, a tiny amout of resin came out all around the circumference, I interpret it as perfect in all my modesty.
The problems are mostly related to the complex shape of the Gull-whale fin, and my inexperience. Bubbles could have been prevented by more attention to detail, maybe by use of a modified squeegee for the first layer of carbon/kevlar. I concentrated on getting the C/K mesh to fit nicely into the bigger bumps, but I messed up checking the smaller ones at the top of the fin. Consequently, there are a few severe bubbles in that area close under the surface, some even have a hole to the outside. But nothing that cannot be fixed (and probably avoided next time).
The fin came out tacky on the outside, and a bit soft and floppy. It would have been smart to wait longer to open the mould, but I was not smart enough to delay gratification any longer than 16hrs after putting the two halves together. Next time I’ll be less excited and get an even better result.
The fin tab fits perfectly into a box without any sanding. You beaut!


Good work, I think your main problem is you can’t wait ! Neither can I, but the best part of design and construction is when you have the fire to get going but take the time to think it through, draw, research, ask, over and over before you start down the right road only to soon discover it’s the wrong road and you’ve wasted time, effort, resources.
You’ve done well but even you have said that you need a bit more patience.
I’ve thought about using Eva foam inside a Mold but never eps balls, very innovative.
I’ll show you my Eva foam insert on this upcoming fin.
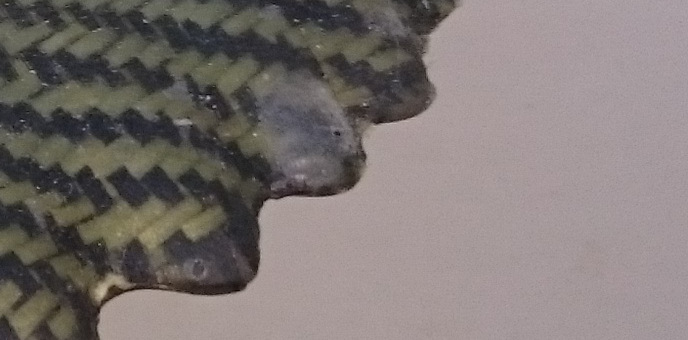
Some closeups of bubbles:
The first photo shows a only cosmetically important bubble. Better care when applying the first layer of cloth will prevent it.
The second photo shows a bit of fluff that was stuck to the underside of the cloth when I placed it on top of the sticky resin without checking. Cheeky buggers those fluff pieces. Cosmetic problem only.
The third photo shows a small bubble in each of the three smallest bumps. Largely cosmetic.
The fourth photo shows the worst bubble, it has a hole in it and it is not stable enough to be left alone. It can be easily fixed, and could have been avoided by thoroughly checking and pressing on the smaller bumps as well as on the bigger ones.


Bubbles on the surface are not going to make a performance difference and a drop or two of resin and a sand will fix them up. I think you’ve done a great job !!
The new fin is lighter than even the printed polycarbonate fin, which floats in water (only when undamaged).
And I dare say it will be much stronger, once it has fully cured. I’m confident of this prediction because I can feel that the little test strip I made yesterday morning is very strong, with just one layer of C/K mesh and resin. But this new fin has probably more than 20 layers in the tab, and at least 8 in the area of most stress just above where the fine leaves the box. I don’t think it will snap, the only failure mode I can imagine would be separation of the two halves of the fin. But then there are the unknown unknowns…
Another pointer to how much stronger the new fin is is it’s weight distribution. Check out how much closer to the tab the pivot point is on the new fin. That’s due to the incrementally stronger build the closer it gets to the solid fin tab. I need to choose a very thin SS screw as a predetermined breaking point to reduce the risk of fin box damage.
Look at the side-by-side photo of an original Gullwing fin, Roy’s BLEF fin and the new GullWhale fin to see how much thicker the foil of the Roy’s fins is compared to the the McCoy original. Nevertheless, the printed polycarbonate fin sports a 53% weight reduction compared to the McCoy (fibreglass) fin. And the fin made as shown above reduces the weight by more than 57% compared to the much thinner original.
Compared toi the polycarbonate version, the new version achieves a 7.5% weight reduction while it is (hopefully) much stronger.


Looks to me like I can reproduce a fin now, so any effort to make an original one will not be wasted.
And the other obvious fact is that the silicone mould approach is too expensive, although it is really helpful for learning by seeing through while doing.
So back to the plaster of Paris stuff…
I managed to break the hot glue mould and again learned a few lessons, I hope.


Now that I know that I can make a fin with little risk of messing it up and little loss of materials as dust into the environment, I will take next step. That is to improve a fin that I already have, but one which is still being manufactured and sold, but not in the version I would like to have.
I would really like to have a different incarnation of the 'Straight Tip Gullwing Fin", especially one that allows 'Snap In" and one that also floats (if it ever falls out of the fin box somehow).
So I’ll try to integrate what I learned from Surffoils hints and my experiments and whatever else I’ve read in the last couple of weeks.
It would be too expensive to use transparent silicone for a process that might use multiple temporary moulds, so the main issue for now is to work out how to effectively use plaster of Paris.
My last attempt to use Pop / cement mix again resulted in a cracked mould. I will try to mend it when it has dried, it is the one meant to recycle hot glue.
So I need to make the Pop more resilient to cracking, without accelerating it’s setting time. Cement seems to make the Pop mix go off much quicker, too quick for my liking.
Using what I have lying around, I decided to add some PVA glue to the Pop mix and further reinforce it with Hessian cloth from unused empty sand-bags. I expect the PVA will need to dry out completely to set, so a week or more of drying time will be required, but then the resulting mould should be much more resilient to cracking.
The following experimental Pop mix worked really well, it took almost 30min before it set, it levelled itself well and no water layer formed on the top:
1 part Pop + 0.7 parts water + 0.1 parts PVA glue (I had several litres left over from my attempts to seal leaking polycarbonate fins). Coarse Hessian weave sourced by cutting up unused sand bags. I added two layers.
All of the hessian bag cut-off’s (the thick seams) were used to further enforce the outside perimeter of the Pop mould.
I shall try hard to keep my paws off it for a very long time… one-one-thousand, two-one-thousand, three-one-thousand, …
Things to do differently next time:
- Dunk the Hessian into the Pop mix and squish it until it is thoroughly wetted and has less air bubbles left in it. In this first attempt, bubbles kept coming up very late in the process, and I’m not sure the lowest layer of Hessian is thoroughly soaked.


I think this one here would work to make snap-in fins: K0333.08
These businesses usually stock them in Australia:
Maxiloc Tooling Pty Ltd.
2/359 Settlement Road
3074 Thomastown
Australia
Tel.: +61394641748
Fax: +61394642708
E-Mail: sales@maxiloc.com.au
Internet: www.maxiloc.com.au
**NEIS North East Industrial Supplies Pty. Ltd.
Heidelberg West**
25 Culverlands Street
3081 Melbourne
Australia
Tel.: +61394594811
Fax: +61394592311
E-Mail: sales@nei.com.au
Internet: http://www.nei.com.au
MM, thanks for the info about the Snap in part.
Fins. I always thought that for smaller fins they could be hollow and some commercial ones have a foam core so that foam isn’t exactly a structural component. So using a two piece Mold I’m testing the use of a flexible foam insert like EVA that won’t absorb the resin but will allow me to lay up both halves of the Mold , place a piece of foam in the middle and when compressed the foam will push the lamination against the inside of the Mold. When set it’s a lightweight, almost hollow fin.
Molds. Pop is OK for a few copies but the Next step would be to make multiple inline fibreglass molds and pop them out like a sandwich press. But that would only be if you’re going to sell them.
And my low tech version continues with a cardboard collar around the Mold so I can pour the other half of the Mold.

How important is it to hit exactly the midline when sinking the fin into the Pop?
I was a bit over-enthusiastic when shaving off the surface of the mould today, and removed too much.
But otherwise it is looking OK I think.
And I need to figure out what to do about the hessian bag bits sticking out. Hopefully I can cut them once the Pop / PVA mix has dried.
Tomorrow I’ll buy a 20kg bag of Pop for $16,- at Boral, instead of 3kg for $13.25 at Bunnings.


It’s better to go too far into the mix on the first pour and then trim down a larger flat edge around the cavity, plus if you don’t go far enough on the first side , you have to do it on the other side to get the full shape.
However I have heard long and boring discussion about setting one side deeper than the other to enable better Mold removal but it’s fraught with danger and its easer to go with the basics.
What’s your suburb ?