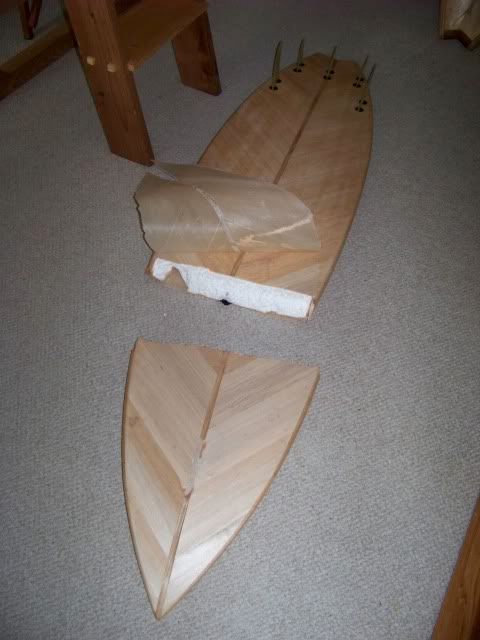
After a morning of further suckee-suckee and sunshine, I deemed the ding dry.
Remember:- I have opted to use absolutely no specialist ding repair equipment here...especially not digital scales. I’m thinking of a guy in a hut at Puerto-Escondito, or even on a boat...
[IMG]http://i364.photobucket.com/albums/oo85/joshdowlingshape/Ding/banned_one.jpg[/IMG]
The Sander is Banned...so for me this seems like scrubbing the mess-hall floor with a toothbrush...
[IMG]http://i364.photobucket.com/albums/oo85/joshdowlingshape/Ding/trim_one-2.jpg[/IMG]
Use a cutter to trim away shardy glass and pressed-in skin material. Make the hole neat with no overhanging edges.
[IMG]http://i364.photobucket.com/albums/oo85/joshdowlingshape/Ding/two_part_one-1.jpg[/IMG]
5 minute Epoxy – The one pictured is by a composites supplier, but an equivalent can be found even in the supermarket. A common brand-name is “Araldite”.
This stuff is for SEALING THE EPS only. Its expensive, and gets HOT...so DO NOT think about filling the entire hole with it!
If you miss this bit and go ahead putting the polyester resin straight onto the EPS, YOU ARE FERKED!
Never forget this.
[IMG]http://i364.photobucket.com/albums/oo85/joshdowlingshape/Ding/blobs_one.jpg[/IMG]
Mix two equal parts of the 5min...Be absolutely sure you have’nt done two blobs of the same one. They are a slightly different colour.
[IMG]http://i364.photobucket.com/albums/oo85/joshdowlingshape/Ding/poke_one.jpg[/IMG]
Poke the mix around in the ding-holes, push it in with a stick and your finger. Make sure it gets into any crevices and covers the EPS completely, but do not allow it to pool thickly. Too much puddle and it gets hot. Hot is not good.
As the 5min begins to go rubbery, use your finger to smear any glossy surface you can get to. This means the next mix has grip on the 5min...simply put, shiny is slippery.
There is no need to let the 5 min go completely hard before continuing.
Next we are going to use...gasp...Sun cure polyester resin. Again, we are simulating the most basic conditions...no tubs of epoxy, no scales, no fancy-schmancy professional poofontery...
The Ideal way to do this is for another time and place.
[IMG]http://i364.photobucket.com/albums/oo85/joshdowlingshape/Ding/filler.jpg[/IMG]
Take a small amount of your sun cure resin in a cup. It needs to be thickened with a filler to get a paste-like consistencey. There are a number of ways to do this, Q-cell, “Cabosil” or PU dust from the floor of a shaping room, but for our hero the intrepid surf-traveller, we are using TALC...
Talcum powder is available all over the place...and it happens to be the ingredient in car body filler also. Hmmm...car body filler...No...
[IMG]http://i364.photobucket.com/albums/oo85/joshdowlingshape/Ding/stir_one-1.jpg[/IMG]
Mix the powder into the resin. Now, because the resin just became no longer clear, the sun-curing will not happen down deep in the thick mix...So...we need catalyst. The combination when put in the sun goes hard nice ‘n quick...
You can of course use standard catalysed resin, but we’re, like, in a hurry now after waiting two damn days while the core dried...
The uninitiated ask me – “How much? 1%, 2%?”
[IMG]http://i364.photobucket.com/albums/oo85/joshdowlingshape/Ding/this_much_one-1.jpg[/IMG]
I’ve been doing this since I was 9...I say...ummm, this much...
[IMG]http://i364.photobucket.com/albums/oo85/joshdowlingshape/Ding/spread_one.jpg[/IMG]
Mix it all in thoroughly, then smear the mix into the holes. Get it right in there and be sure to leave the dollop higher than the board surface level.
Allow it to go hard...but not super-hard.
[IMG]http://i364.photobucket.com/albums/oo85/joshdowlingshape/Ding/surform_one.jpg[/IMG]
Super-hard is more difficult to surform down. NO SANDER!
Surform carefully so as not to take the filler to under level with the board surface. There needs to be a little left for neatening it up with 60grit sandpaper on a block.
[IMG]http://i364.photobucket.com/albums/oo85/joshdowlingshape/Ding/60grit_one.jpg[/IMG]
[IMG]http://i364.photobucket.com/albums/oo85/joshdowlingshape/Ding/prep_60.jpg[/IMG]
With the filler blocked flat, “feather” the edges in without the block...you want to expose some of the original fibreglass, allowing a new layer to be blended in.
Next we add new fibreglass to replace the lost strength...I’m using two layers of 4oz here...offcuts of this are found in any lamination shop, (Ask the grumpy man nicely...or maybe it came in your ding repair kit)
[IMG]http://i364.photobucket.com/albums/oo85/joshdowlingshape/Ding/offcuts_one.jpg[/IMG]
Brush some on the bare area first, then add the fibreglass and wet it out. Pat the resin down with the brush and check for air bubbles.
[IMG]http://i364.photobucket.com/albums/oo85/joshdowlingshape/Ding/cloth_wetout_one.jpg[/IMG]
Out in the sun again. This time also, you can surform it back more easily when its not absolutely rock-hard. If the edges of the glass fray and go white when you surform, its still too soft!
[IMG]http://i364.photobucket.com/albums/oo85/joshdowlingshape/Ding/surform_start-1.jpg[/IMG]
[IMG]http://i364.photobucket.com/albums/oo85/joshdowlingshape/Ding/surform_glass_done-1.jpg[/IMG]
Again with the Surform, leave the edges a tiny bit raised for blocking with 60grit. After surforming, allow the sun to harden the resin fully, because sanding is more effective...the edges of your new glass blend with the original board surface better. The point to stop sanding is easily identified along this join line.
[IMG]http://i364.photobucket.com/albums/oo85/joshdowlingshape/Ding/sixty_grit_done-1.jpg[/IMG]
60 grit is a good “tooth” for the filler coat. Hopefully your travel repair resin has “wax in styrene” added already...this makes the following coat easier to finish off cleanly.
In my case the resin needs wax-in-styrene added...a “dribbleworth”. (Its metric for you old-timers...)
[IMG]http://i364.photobucket.com/albums/oo85/joshdowlingshape/Ding/filler_brushed.jpg[/IMG]
Brush the filler coat over the sanded area, stopping where yor scratches stop.
Let this cure
[IMG]http://i364.photobucket.com/albums/oo85/joshdowlingshape/Ding/120_block.jpg[/IMG]
[IMG]http://i364.photobucket.com/albums/oo85/joshdowlingshape/Ding/240_grit.jpg[/IMG]
Block down with 120, then 240.
[IMG]http://i364.photobucket.com/albums/oo85/joshdowlingshape/Ding/ooh.jpg[/IMG]
Oooh nice...
Now you can go surfing with your healed battlescars. Girls like men with scars.
But paint...OK...now we step out of the amateur zone...because colour matching is a skill, let alone if you ding my airbrush!
[IMG]http://i364.photobucket.com/albums/oo85/joshdowlingshape/Ding/paints_one-1.jpg[/IMG]
[IMG]http://i364.photobucket.com/albums/oo85/joshdowlingshape/Ding/colour_one.jpg[/IMG]
This one is raw Klegicell...its a dull orange, so colour match is a little yellow and red with drips of white and black to dull it.
[IMG]http://i364.photobucket.com/albums/oo85/joshdowlingshape/Ding/touch_up_one-1.jpg[/IMG]
Spray touch-up...
Then “Speed Finish”, the typical matt acrylic board finish (The original finish on this one is unbuffed 2part polyurethane. ) There is a special trick which allows you to buff “speed-finish “into glossy 2pack, but I don’t need that here...
[IMG]http://i364.photobucket.com/albums/oo85/joshdowlingshape/Ding/wet_rub_one-1.jpg[/IMG]
Lastly after the laquer is dry, a rub wit a blunt 800 wet n' dry...
[IMG]http://i364.photobucket.com/albums/oo85/joshdowlingshape/Ding/next_one.jpg[/IMG]
Hmmm...what'll I damage next?
X
