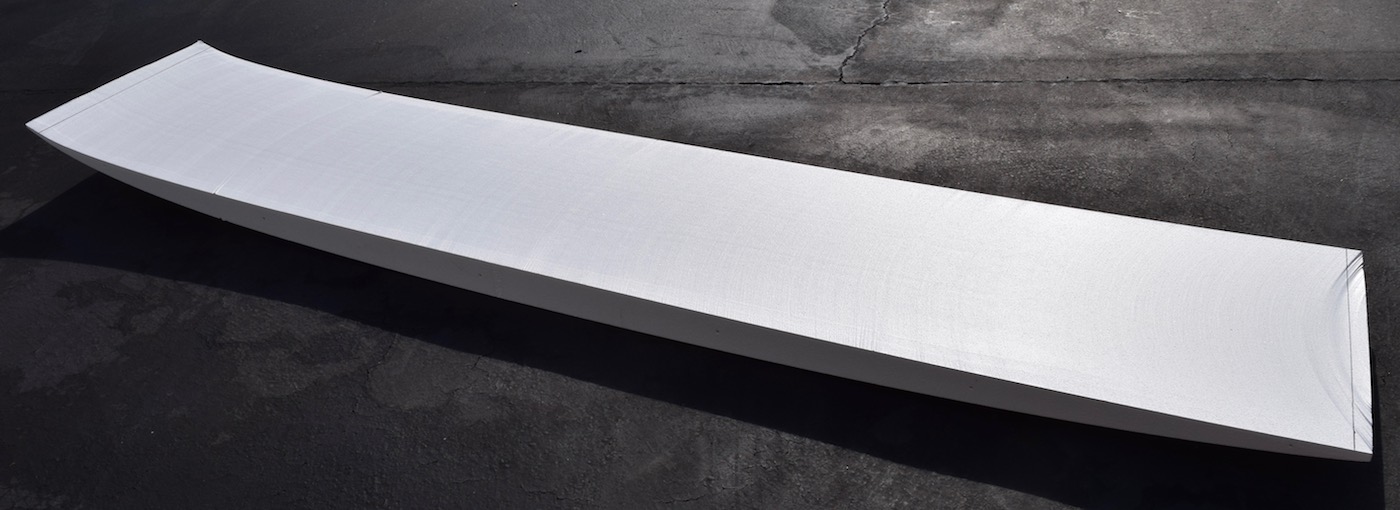
My Brother has worn out the old board I gave him. He really likes it, so I got out the old file and decided to make him a new one. This is the file in Boardcad.

I made the profile templates in this topic.
https://www.swaylocks.com/forums/mataco-method-template
I use drywall screws to hold the templates to the block.


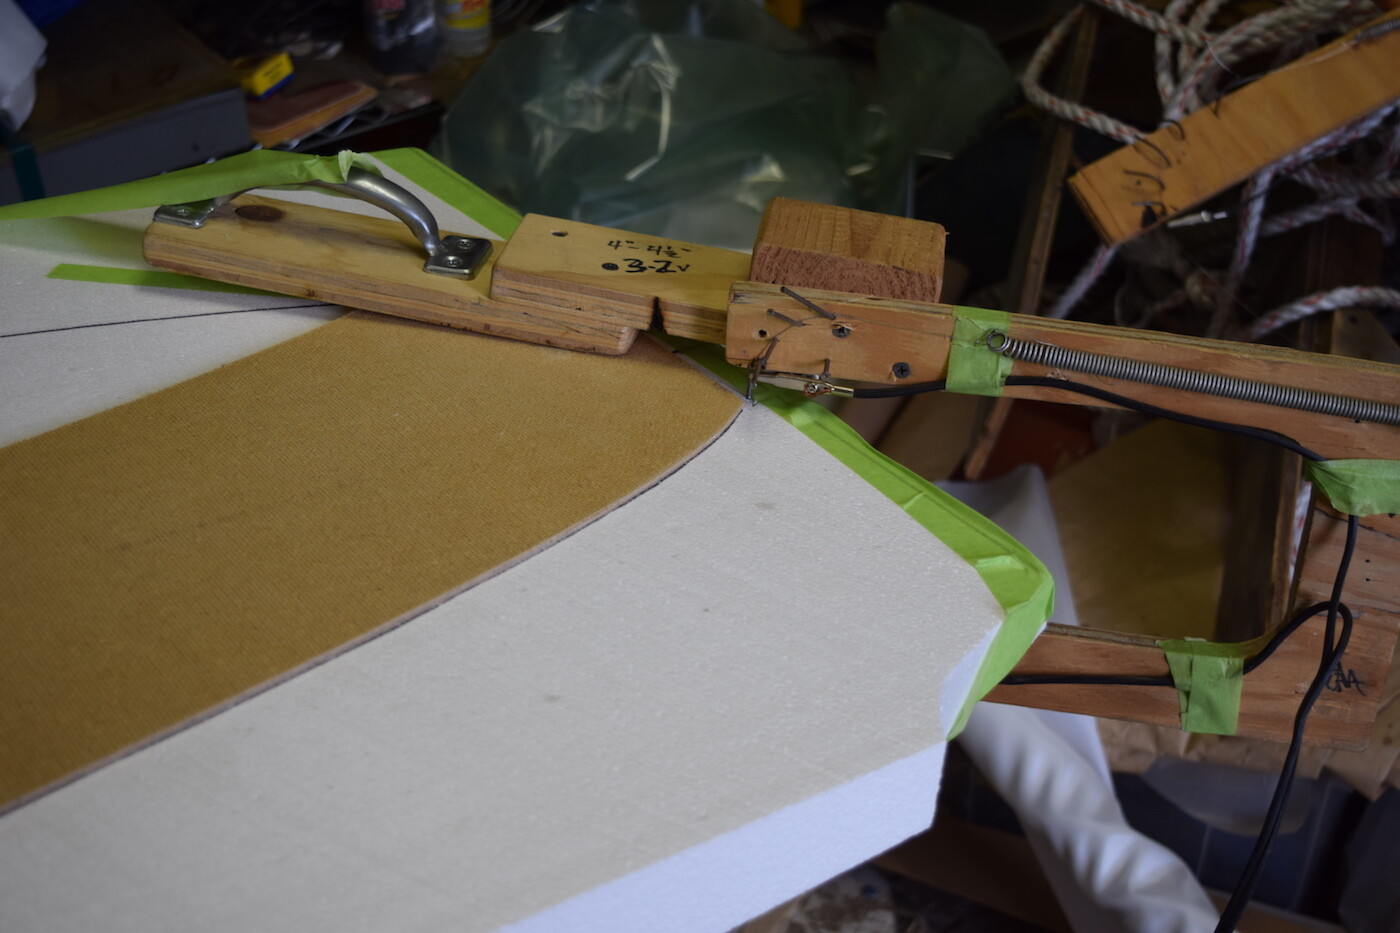
When I cut out the profile the butt joined MDF caught the wire and I ended up with a bad section. Next time I’ll put something in the gap, like a small nail, and sand it down. so I don’t get this problem. My hotwire tool is imperfect so I had to add the broomstick with roller. If I redid it I would use another piece of PVC pipe instead. My power source is just barely strong enough to do the job.


I use a laser level to put on the center line. This board will have perimeter stringers so the center line is critical to get right and to protect it during shaping so the fin(s) go on straight. At least, I try to keep the end points so I can repeat this process if I need to later.

I make a template for the stringers out of MDF.This is so I can make smoother cuts since its really hard to get any bumps sanded out of the slot for the stringers. The template is about 2" shorter and 4" narrower than the original outline. I make partial tapered stringers because I was never very good at shaping the nose where the stringers came out of the blank if there was more than one in the center. I decided I wanted to have more flex in the tip. I set up the cutter running from the tail and have it on the floor so i can turn it off with my foot as I get to the end point. I tape the tail of the board so the piece doesn’t fall down and break off.

I made the stringers out of 1x12 kiln dried redwood that has been re-sawn in half at the lumber yard. I use my bench top planer to smooth both sides to about 3/8". Then I use successive cuts to taper the ends. The tips and tails go as thin as the planer will go, about 1/8". Then I use a sander to get the tips very thin to fit in the end of the cuts easily. The tapering makes the curves of the perimeter stringers much easier to bend to fit.

I probably over glue the stringers but its hard to get the glue in the slots without cracking the foam. The stringers are not to hard to slip in, but the clamps and tape holding them are a pain and probably should have two people doing it

If you make the same shape more than once, you could cut 2 thick pieces of wood with the rocker of that board and use that to clamp instead of tape. You’ll need more clamps. I do that when I make boards using rocker slices.
EPIC, as usual!!!
When you have to butt-join your template, just glue a small piece of Masonite on it to bridge the two pieces. Slightly round off the ends of the scab piece so it won’t grab the wire and sand the rest down to match the template. When you screw this to the block, put the scab side out. No more hang-ups at the joint while cutting your blank.
Nice tip Surfthis. I have done that when I forget about starting and stopping spaces on the templates.
I have many templates that are seamed at 2’ intervals from being cut on the CNC. It helps if I smear the joints full with 5 minute epoxy and microspheres and sand them flush.
When I find something wrong last minute I just use masking tape.
Mataco, looking good. I am surprised you are running out of juice with that 30v 6A supply. I can heat 40" of 26 gauge Nichrome with 22v from a Variac with theoretical amps of 2.5
http://www.jacobs-online.biz/nichrome/NichromeCalc.html