


it could end up like this …(without the 'sparklies")
0r, possibly , a blue fibreglass version of this ?


No fiberglass roller?

yep , roller …
…it’s cropped in the top left hand corner of one of the pics [yellow handle]
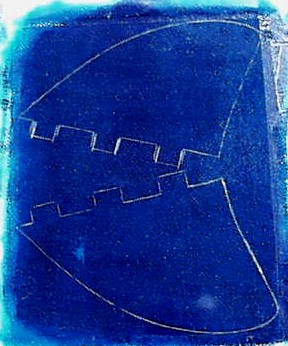
By the way , the panel ended up as 2 7x5" twin keels .
The OTHER panel [a blue tinted caron fibre inlay panel] ended up as a pair of canard quad back fins … “ready to roll” now , bish and oldy …
once I get some waves , I’ll let you know my findings on the canard setup.
[interesting fact …
I looked up “canard” in my Pocket Oxford Dictionary , from the seventies…
and found this…
“an unsubstantiated rumour” …
Well, that’s a STRANGE name for a pair of fins , I thought !
…maybe I should put them on the equally unfortunately named “nugget” board , eh ?]
cheers !
ben
Quote:
…“By the way , the panel ended up as 2 7x5” twin keels .
[40 layers of 6oz in these ! …they are some solid keels , those ones ! ]
The OTHER panel [a blue tinted caron fibre inlay panel] ended up as a pair of canard quad back fins … “ready to roll” now , bish and oldy … "
[these are 3 1/4 " x 4 7/8" ]
cheers !
ben


okay , so the process …
I mask off an area on my ‘cutting mat’. [photo 1]
And cut out the layers of cloth [this takes a while !]
So I don’t lose count when I lay down 4 or 5 layers at a time , every 5 layers I place the cloth at right angles to the previous layers [this is when they are not yet wetted out , obviously]
Then , when they are ready , I tape off [GREEN 3m masking tape is GOOD for this !] the borders of the sheet of glass I am laying the panel up on [extend the borders by at least 6" off the edges of the glass…you will see why once you start laying up tinted and or pigmented panels !!]
Now that [time consuming ! ] preparation is done , pour out and set aside your resin [this is the time to have separate , pre-mixed [but not yet catalysed !] containers of resin . This is when you add your tints / pigments to the resin , too…
And have a different roller for each colour , preferably !! [I always try to have spare rollers…]
And , get lots of little measuring cups [in the 60ml size , if making around 8x12" [ 20x30cms] panels ]
Okay…
now all THAT is ready …
paint tinted resin onto the glass that you are going to lay up your fin on [see photo 6 on this thread].
lay down 1 layer of 6oz cloth to saturate [photo7].
lay down another 4 layers .
use a roller , so resin soaks through the whole five layers. Do this carefully , and thoroughly …
put down another 4-5 layers 6oz cloth
pour more pre-mixed tinted resin on these layers [remember to catalyse it , and stir , before pouring it out]]
roller it thoroughly
…repeat, till all layers of cloth have been used.
Then , next …
I filler [‘hot’] coat it then , just to have it all ‘gelled’ , and ready to cut out , within an hour of finishing the fin panel layup…
As stated before [but worth repeating , I think ] …if doing multi-coloured pigment layups , I have the different colours pre-mixed , and sitting in different ‘measuring flasks’…
I then transfer the colour into smaller sized [60mls] medicine measuring cup type containers , and catalyse as I lay up each colour …
okay , I hope this has been helpful !
cheers !
ben
[ unfortunately , I let this thread ‘lapse’ beyond the ‘editing’ time , sorry …otherwise these descriptions would have been captions for each of the earlier photos …]
I think you forgot to mention laying down some kind of release agent on the table and tape border before wetting the table. Or do not use release? I use a tub of carnuba wax.
I also make little walls with my tape to hold in the resin that gets squeegeed off the edge of the panel.
And cut out the layers of cloth [this takes a while !]
I think you meant to say “have your assistant cut out the layers of cloth.” ![]() Probably my least favorite step in the process.
Probably my least favorite step in the process.
I use Dixie cups (medicine cups) to do each set of cloth. I tried catalyzing a large batch in a resin cup one time and the process is just too slow and you have all that resin sitting together in one cup. I now have a very large chunk of burned resin. It got so hot it was smoking and turned the resin from clear to amber. One Dixie cup is good for 3-4 sheets of fiberglass I think. I think I add quite a lot of catalyst for the small dixie cup. Is it possible that I am adding too much and that is causing the sparklies?
In answer to the other thread ( http://www.swaylocks.com/forum/gforum.cgi?post=257919;sb=post_latest_reply;so=ASC;forum_view=forum_view_collapsed;;page=unread#unread) , I eyeballed the proportions of colored resin batches before hand, think I needed to add a little more clear to my blue later on. I knew how many layers of each color I had so just a guestimation. Not sure what they were since I was just looking at the height in the cup. I measured out around 60oz of resin total for my 10"x20" and used almost all of it.
One thing, my first layer of blue was too light. Was a very nice dark blue in the cup but when you lay it out thin on that first layer it was like baby blue. Adding the other 7 layers didn’t help it much. I would say try to go very dark if you are using tints since it will probably always be thinner on the table than it is in your cup. I fixed it on the other side where I had blue again and I think because of the way I was doing my fin it shouldn’t affect it except when you are looking at it face on.
I used a melanine sheet I bought at Home Depot especially for doing fin layups.
And I didn’t take step by step photos because I was going by your excellent pictures from this thread.
thanks for that !
no , no release agent used …
the panel lifts off the glass in one piece , by lifting up on the masking tape . [The other reason why the extra over the edges of the glass !]
I have no assistant to cut out my cloth . [you have patient friends , evidently…or did you shout them beers ?]
It is fairly easy when you have the tape guidelines to cut by , but I think a solid bit of ‘non-cutable’ [word?] metal or similar,the exact size of the wanted fin panel , would give a more accurate / consistent shape and size to each individual layer …
How does the melanine go , did you get any pattern left in the fibreglass on the inside layer of the panel ?
Tint colours …yes…hmmm…
I really think PIGMENTS [opaque] give a more consistent ?colour/ ? density? / consistency? for fin panels . Combining tint and pigment WAS [?is?] an experiment I want? [wanted] to do …good to try all different stuff , and report back here …hopefully it helps someone, somewhere , at some time ?
I’d like to have seen photos of your different colours being laid down , mate …with that many helpers , ONE could definately have taken some shots !
[I do panels by myself, and as you have now found out , it is almost too much of a rush to get all the layers laid down , smoothed out , and no bubbles , before the rollers get ‘gunked’ up with messy coloured gelled resin [now you know why I recommend spare rollers , and LOTS of measuring cups eh !!!] …so , VERY difficult to get ANY shots , for me , normally !
…I’m assuming your latest big fin panel was done with polyester laminating resin , yes ?
cheers mate !
ben chipper
Quote:
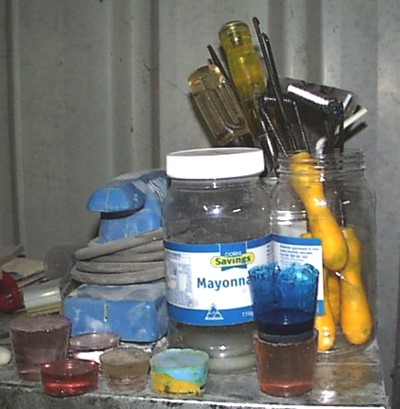
yep , roller …
…it’s cropped in the top left hand corner of one of the pics [yellow handle]
cheers !
ben
here is a shot of some ‘Aussie rollers’ …[ much better than the “Bay City rollers” , I MUST say !]
cheers !
ben
I cut my cloth from a 60" roll I bought for my hovercraft so we just used a piece of paper the right width and scoot it along as a guide. We cut them 10" wide then we had 10"x60" strips we cut into 10"x20".
There is a little texture from the melanine but not much and it’s pretty easy to clean the board. You are using glass-glass to work on? I could probably do that too.
And yeah, Polyester. I haven’t touched the epoxy yet.
I did my first panel alone so I grabbed the help when I had it. Not sure we actually went that much faster but it was less tedious.
hi Kai !
I’m intrigued …
please explain about your ''hovercraft " ??
[don’t worry I don’t mind ‘hijacking’ this thread …heheh…unless of course you DID want to make a “hovercraft” thread ? …but then , “Hicksy” might shut it down , “because it’s not about surfboards” …hahahah , kinda]
cheers !
ben
Hey Chipy
How much resin did you use to lay-up that panel? “if making around 8x12” [ 20x30cms] panels ]"
Also, you used 32 layers of 6oz, right?
MDS
Shellharbour NSW
hi Mate !
40 layers of 6oz for the blue [twin keel ] panel .
8 layups of 5 layers each , from memory …60mls per layup = c 480mls [again , from memory …I have GOT to start writing this stuff down , in my surfboard making and fin making notebook !..because I do different sized panels]
the carbon fibre inlay / blue tinted quads was more of a 6" x 10" panel , from memory. Because that was for fcs …yes, I think it WAS 32 layers I used …again , of 6oz cloth [in the past , I used 5oz flatweave , but found I needed more layers , to get the same thickness.
Results vary , depending on how many layers , and how much resin , and how thoroughly [or not] it is "rollered " out .
okay , I hope this helps mate ?
cheers ,
ben chipper
Yer thanx Chip
Gives me a good idea of resin quantity. dont want to run short now
How many layers would you normally layup for a longboard center fin for a box?
MDS
Shellharbour NSW
well, I used to use 50 layers of 5oz ,
but I found I can use 40 layers of 6oz now .
Buy yourself a litre of lam resin , and you should be right mate !
filler too, just say 250mls , if you can get those smaller quantities . I use about 1ml of catalyst too [per 60mls lam resin layup] …
probably get yourself a COUPLE of rollers , as you will find the acetone and toothbrush for cleaning the gunk off the rollers takes a while […best to clean them all AFTER the panel is finished , just my opinion ].
cheers !
ben
Since buying those measured cups starts adding up a lot of my measurement is based on the DG (Double Gulp) system. The top of a board is 3/4ths of a DG. Fin panel is just shy of a DG. Sanding coat is about 1/2 DG.
Cheapest resin cups around and you get to drink them first. Tap plastics does not provide any beverage with their measured cups ![]()
I just think paying $1 for a plastic cup (without a drink) is rather ridiculous. Is there a better alternative?
Chip, I’ll tell you about the hovercraft when I have more time.
A DG is 64oz btw and you can get them from 7-11 for about $1.10
…but I still have NO idea how much an american fluid ounce is , compared to a ml [millilitre ] …
ben
Ben, (and you all out there): wouldn’t it be easier to laminate all those layers with UV cure resin and take the whole panel out in the sun when it’s done? Just curious, I never used UV resin…