[img_assist|nid=1066787|title=ted spencer|desc=|link=none|align=left|width=557|height=640]hey paul thought i would share this photo, its the board from innermost limits, thought it may be like the one you saw. lovely build thread you have going. If it was me I would go for a 2 plus one, with small sides like chip has recommended. The wider the tail the bigger the fin i rekon.
? 7" back fin , 3 1/2" sideys ?
6" back fin , 3" sideys ?
5" back , 2 1/2" sideys ....
CHOICES galore !
the good thing ...
with using a back finbox, and side plugs ....
.... is being able to play around with the fin sizes [?ratios?] , to go from big singles , with stabilisers , to closer to all three fins similar [thruster-type 'experiments' ! ] .
I still like a slightly larger back fin with my thrusters , anyway [possible , using a finboxed board , with side plugs / boxes]
.... EXPERIMENT ! ....
see what YOU like , in YOUR waves , Paul !
have fun , stay STOKED ... [ie: keep SURFING !]
cheers mate !
ben
by the way ...footnote ...
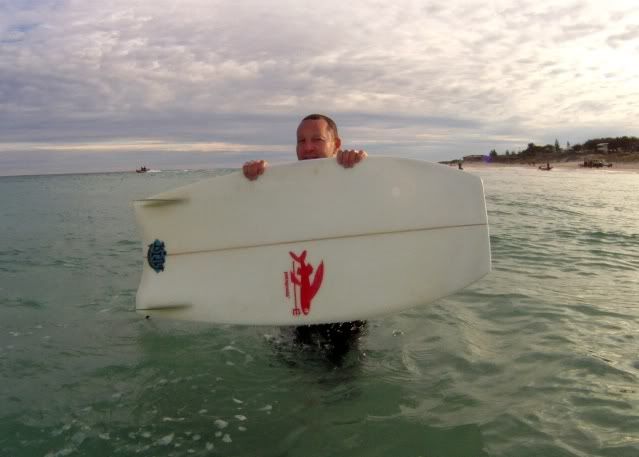
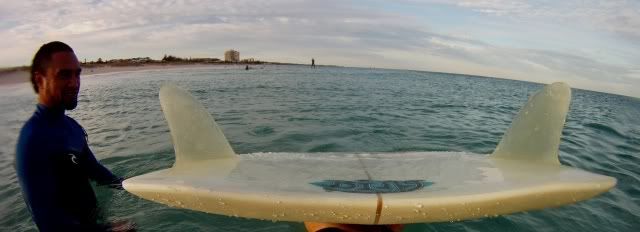
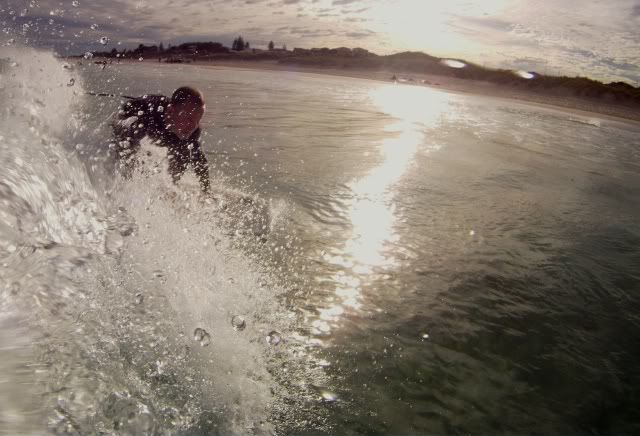
here is a short board I saw on monday , here [yes , he stands up on it !! ....and yes , I 'TRIED' to ride it , too ! 4'6 is a bit hard for me to paddle , I found ....]
Brilliant thread. I love seeing the methods and the step by step progress which is actually more instructional to me. It never gets old. Looking forward to the conclusion of this build!
“I always have the problem of some resin seeping under the jig, with the
black resin making it pretty obvious in this case. Doesn’t really
matter, it’s easy enough to grind off, but so far I haven’t been able to
prevent it from happening. But given the distinct lack of criticism
I’ve received, I must be doing it right!”
Um… NO. Despite the fact that nobody has mentioned it, you are definitely doing something wrong. There should be NO resin seepage under the jigs, or at worst a tiny tiny bit. You need to do a better job of spray gluing the jigs to the board. It’s fairly easy, just mask off the approximate area where you want the jig to be, spray the board with 3M 77 (or similar good quality spray glue), then spray the bottom of the jig as well, and carefully align before pressing down firmly in place. Do one jig at at time until you get it right…
Thanks for your input Keith. I know I was doing something wrong, I was just being a bit cryptic and poking fun at the fact that a thread about mixing resin gets a lot more input than a genuine build thread.
From what you’ve said, there’s two things I’ll do differently next time.
- I haven't been spraying adhesive on the board, just on the jigs. According to the adhesive directions, this should have been ok, but obviously it isn't. I made sure to press firmly (especially around the inside edge) for a good 30 seconds per jig, but it must have still lifted a little, or the epoxy eats away the adhesive. Next time I'll spray both surfaces.
- I didn't use 3M 77 because I've not found it anywhere (Melb, Oz). I did make sure I used a "permanent bond" adhesive, rather than a "removable" one, but for the next board I'll try to search out 3M 77 a bit harder.
Cheers
Paul
Wow Zac, the similarity with that board is uncanny! Biggest difference I can note is the rolled bottom. I think that’s the board Ben was referring to in his earlier post, it’s nice to see such a detailed photo of it. You’ve given me a good starting point for my single fin position, I’ll tune it forward or back from there.
Cheers
Paul
Hey Ben, that looks like a bodyboard with fins! Actually, many years back as a teenager, I used to bodyboard. I started standing up on the lid, 'cos riding prone or dropknee was getting boring, and I moved to a shortboard shortly after from there. But I can’t imagine riding such a tiny board now, my 80kgs require a bit more board and a bit more push! I made a 5’6 shortboard (around 27 litres) a year or so ago, and while it rode great, it was hard work paddling. This 5’2 is around 37 litres (I normally ride around 33 litres) so it should be alright to paddle and a breeze to surf.
I actually had a pretty good surf on Sunday at Lorne Point in chest high waves, and it got me thinking that it would have been the perfect conditions to try out the mini single - shame it’s not done yet! Nice long waves down the point, not too slow, not too quick, with a steep pocket and plenty of shoulder for cutbacks. I’d love to take it out there for the first time, but as anyone who knows Lorne Point will tell you, it can be a long time between swells big enough for shortboards.
Cheers
Paul
hi paul
yep
"the speed square"
if you go on the bing site ,
theres a film clip of same cali version of rasta surfing it , and he talks about standing up on boogers too..
some nice surfing shown , given the limitations of the equipment ...
cheers
ben
[and yes ...isn't it strange how build threads on a surfboard design forum are about as enthusiastically received / commented on , as leprosy or syphillis ... oh well, its a funny old world , 'geekland' eh ?!]
[quote="$1"]
Any recommendations of the size/style of fin and where I should place it?
[/quote]
Hey Paul yeah that is something about the lack of imput / participation for the thread. I don't have an answer, but I did find this photo in the mid-sized simmons thread, thought it might be helpful. Looks like the back of the box is about 2-3" up.
hey paul ive been riding my singles at between 8 1/2 - 10 1/2inchses from the tail to the end of the fin, this seems to work for my mid-length boards in the 7ft range, I measured an old shane aswell, and that was 7.09 inches tail/ to fin. Not sure if that helps but i think as the board gets smaller it can be moved back abit, I guess its all personal preference. i like using these small sides, still gives a single feel but keeps the rail from releasing to hard on the hard edge [img_assist|nid=1066821|title=fin setup|desc=|link=none|align=left|width=640|height=426]
nice , Zac !
how long [deep] is the singley ? and the sideys , please ?
fin placement ...
are you talking 8-10" from the tail pod to the trailing edge [base] of the single fin ?
and ...if so ,
WAS the 'Shane' a shorter board ? .... say , 6' something ? [any photos of THAT board , please , mate ?]
cheers !
ben
the one in picture is 8 1/4’high, with a 7’ base, the sides have a 3inch base and are 2 3/4’ high. its just the template i sent you a couple weeks ago. [img_assist|nid=1066833|title=shane 1969|desc=|link=none|align=left|width=480|height=640]Heres the shane also it was a 7’6’’ pretty much what wayne lynch rode in evolution I wasnt a fan of the mini pig outline, i spun out on it all the time
Great build thread paulr!
There really are plenty of ways to skin a cat and this thread really shows it.
Can’t wait to see the finished product and hear the ride report!
Vac Bag everything...you can't even do a basic fin box install.....feel better now?? You asked for it...
Black resin everywhere. Have fun sanding all that shit off. I saw the group hug and stepped back......
Like most people...you need love......
Somewhere on Swaylocks a guy named AFOAF posted a thread ......search for it....you need it......The title is something like" how to install probox."......"how I probox"..."how I use black resin without making a mess"......
[quote="$1"]
Great build thread paulr!
There really are plenty of ways to skin a cat and this thread really shows it.
Can't wait to see the finished product and hear the ride report!
[/quote]
....ditto !!
hiya , Paul !!
ANY update , please ???
.....please don't let one person's criticism* kill this , the only interesting BUILD thread , for AGES !
cheers !
ben
*
"
Re: Fin placement for a single fin mini - ...
Black resin everywhere. Have fun sanding all that shit off. I saw the group hug and stepped back......
[....hmmmm....]
Like most people...you need love......
[ yes ... ah ....the irony ?!]
Somewhere on Swaylocks a guy named AFOAF posted a thread ......search for it....you need it......The title is something like" how to install probox."......"how I probox"...
"how I use black resin without making a mess".....
[SARCASM , too ?]
.... hmmmm.....
....there is probably a reason why build threads and creativity / being 'different' disappeared from here long ago , I'm guessing .....
Hey Ben
Don’t worry, I haven’t given up on this thread, and I certainly haven’t let any comments get to me! Some people’s advice I embrace, and others I ignore. Sometimes it depends on how it aligns with my own approach, sometimes it’s based on their reputation, and sometimes it’s gut-feel. That’s the neat thing about building boards only for myself, I’m answerable only to the harshest, but most forgiving of critics - me!
Lack of activity on this thread is mainly due to lack of activity on the board. I’ve been pretty busy at work, and tend to spend my weekends down the coast, so I haven’t had much in the way of daylight hours to work on this board. As I need to use the orbital sander to “sand all that shit off”, I don’t want to disturb the neighbours by doing it at night…however, I did get a half-hour or so the other day to make a start, and that’s all it took to grind down the boxes and get most of the black resin off. I still need to sand the hotcoat, which I’m hoping to do on Saturday, at which point I’ll post up some more photos.
I’ve also got an idea for fabricating a fin that I think you might be interested in…hold tight, hopefully I can make a start on that soon too!
Cheers
Paul
ripper boris !
getting waves down the coast ?
[probably better fun !]
keep 'em [photos] coming ... I'm looking forward to seeing your fin , mate !
cheers
ben
I bit my tounge until I read this ....." But given the distinct lack of criticism I've received, I must be doing it right!"...
........... be careful what you ask for..........did you guys find the ProBox install thread?
Ray
That’s alright Ray, I know I invited it, that’s why I wasn’t offended by your response. I found that ProBox install thread quite some time ago and did my first couple of installs as per Afoaf’s method. However I’ve decided I don’t particularly like all that tape as I think it causes more problems than it solves. I also did my first couple of centre box installs as per your guide, and can’t help but make sure my laps are as good as I can get them after Ghettorat’s comments!
I know I still have a way to go to do a flawless ProBox install. I’m aware of what my (current) problem is and I’ll try to get that right with the next install. I’m not trying to hide anything with this build, so in the next few days, I’ll post up some photos showing further issues with my install. I know how I’ll fix it for this build, and I have some ideas for avoiding it next time, but I’d still welcome input once I post the photos.
Cheers
Paul
Ok, I’ve finally had some time to work on this board. As Stingray said, I had a lot of black resin to sand off. That’s cool, my favourite power tool is my Makita 9227 variable speed orbital sander. I put on a hard 6" pad with 80 grit paper. It made short work of the resin, probably taking about 30 mins to grind it all off.
[img_assist|nid=1067173|title=My favourite power tool, the Makita 9227!|desc=|link=none|align=left|width=640|height=480]
The leash plug came up quite nice, my best one yet. This photo makes it look like I sanded through the glass in a major way, but I think it’s mostly a trick of the light. It doesn’t really look this bad in reality. I’m going to cap the plug with 4-oz so it should vanish anyway.
[img_assist|nid=1067174|title=Leash plug sanded down|desc=|link=none|align=left|width=640|height=480]
The fin boxes after all the black resin was sanded off came up ok. Not great, but ok. I’ve got quite a light touch with the sander, so it wasn’t a problem grinding the resin down to the hotcoat, but when I sanded the hotcoat, there were a couple of spots where I guess the bottom wasn’t as flat as I first thought, so I hit the weave, although I didn’t sand through.
[img_assist|nid=1067175|title=Black resin all ground off|desc=|link=none|align=left|width=640|height=480]
Now this is the other problem with my ProBox install, I tend to get settling in the resin that leaves “holes” around the box. The holes aren’t deep (maybe 1-2mm), but annoying none-the-less. Part of the reason why my fin box install resulted in black resin everywhere is that I topped up the resin dam to avoid this. Some of this seeped under the jig (probably poor gluing on my part), but I suspect my working conditions mostly contribute to the issue. As I’ve said before, I can only really work on the board at night, after the kids are in bed, and this time of year, the temps are getting fairly low. So I think the resin takes a bit too long to cure, resulting in some of it seeping into the foam, and the amount of resin in the dam isn’t enough to keep it above the surface of the board. My fin boxes are installed in PU inserts, not directly into the EPS, so I don’t know how much seepage would occur. The big question I have for the experts is “How can I avoid this?”. I’ve thought about thickening the resin with a microsphere blend…would that work? Any tips?
[img_assist|nid=1067176|title=Air bubbles left some holes in the resin|desc=|link=none|align=left|width=480|height=640]
Now to fix the holes, I just mixed up some 5-minute epoxy and added some black pigment. Yeah, it’s a little messy, but when I sand it down you won’t notice.
[img_assist|nid=1067177|title=Holes filled with pigmented 5-minute epoxy|desc=|link=none|align=left|width=480|height=640]
Next on this board is to finish sanding the hotcoat (I only sanded it around the leash plug and fin boxes). I’ll then cap the boxes and leash plug with 4-oz, re-hotcoat them, and resand. Then it’s just the gloss coat and final sand/polish. Hopefully I can get this done in the next couple of weeks…
Cheers
Paul


