I’ve shaped them in all different orders and it doesn’t seem to matter. What matters is the wood selection itself and the shaping. With balsa your dealing with several different densities all in one blank. Sometimes this can be extreme while other times you can have fair consitancy. In my experience I alway tried to get the shape as close as I could with the planer and do as little sanding as possible. Sanding balsa is a sure way to get wobbles because of the different densities within the blank. The lower density spots sand quicker than the high density spots and you can quickly end up with a mess. The power planer cuts the same depth always no matter what the density so you use that as far as you can. The old masters (and Joe Quigg specifically) who originally shaped blasa before foam had this down and many of the techniques used in shaping foam today were developed in the balsa days. Hope this helps. BTW, where is Balsa Bill on this one?
Greg’s advice is spot on of course regarding your board arrangement for glue-up. I would add one bit…if you are putting stringers in your blank, try to orient your grain directions for planing to avoid tear-out. I’m doing final glue up on my latest balsa today and have seven stringers using both spanish cedar and redwood. The different woods have wildly different grain characteristics. However I’m careful to keep the stringers ripped from each board in the same direction when glueig up in the blank. If grain is critical and tear-out looms, I often even scribble out a “map” with an arrow showing grain direction for each stringer because once the blank is glued up you don’t see the grain direction…only the top edge shows. When planing the stringers I can refer to the map and know for example, that one striner or another needs to be planed from center toward nose on the deck and perhaps nose toward center on the bottom, etc.
First balsa experience eh? A great adventure awaits you. Best advice I could give is to go super slow and be methodical. Think all things through in advance. Be careful not to ding the soft milled edges as you’re flipping things around in the shop (or the yard or the garage or the living room) cuz they will show in your glue lines. Go to the lumber yard and find two 3/4" thick straight as an arrow dried boards the length of your board. Cut out the rocker shape on each and use on either side of the balsa boards as you clamp. I don’t like pipe clamps because they require you to pull equal pressure on the top row of clamps as the bottom row which is difficult to calculate. I’ve seen guys squeeze the top of the blank too tight and the bottom doesn’t close up. I use bar clamps and alternate them down the blank on top and bottom of the blank and keep the clamping pads in the center of the outside glue clamping boards just mentioned. If your clamping boards are very close to a glue squeeze out line you can avoid the hazzard of accidently gluing these to your blank by getting a roll of masking paper from the low or depot place and cover your clamping boards with it (using masking tape). If the glue out sticks to your clamping boards, just peel off the paper later and sand or wash off the paper/glue residue. The old saying: “If you can’t find the time now to do it right, how will you ever find the time to fix it later”.
Like most of the guys here who have done balsas, there are lots of little clues and tricks, but we all learn our own way by trial and error. Swaylocks is a great place to get you going right. Go slow, and you’ll do great. Enjoy the ride!
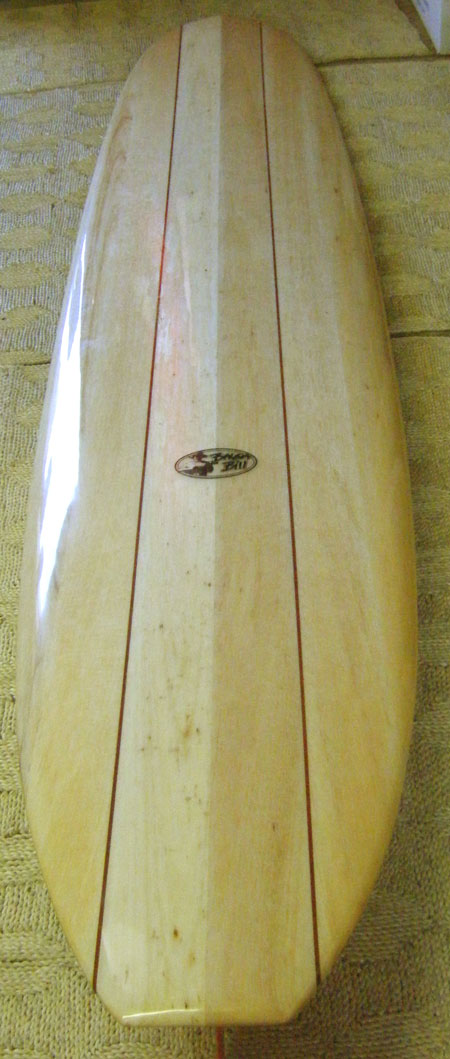
When shaping this one last year I had a problem up near the nose on the left rail. If you look you’ll see some grain patterns. Well, I had just started to sand and on the second pass I got two straight parts between the grain. I got frustrated and left. Bill Eberwein, who I share a shaping room with, called and said, “Hey, you know you have a bump in the rail on this board?”. I told him yeah I’d be back to fix it.
Well, I re outlined it twice more and both times the bumps came back on the first pass with the sandpaper (50 grit with balsa strips glued to the back).
I gave up and sent it over to Quiet Flight to glass. I told Bill E to call me after he sanded the hot coat. I went up there with a wood block and a piece of 50 grit. All the guys at Quiet Flight were laughing and saying, “Nobody will ever see that little bump”. But I wouldn’t let them gloss it until I knocked it down. That’s not the first time that I’ve fixed bumps after a board was glassed. Sometimes that’s the only way to do it: Sand out the bump and fix it like a ding.
I was showing the board to someone the other day and told the story and I can’t find where the bump was now.
By the way, I rode the board all last week in Amelia Island and the board rides great.
As far as growth rings. Never considered them. There are so many other issues to deal with when sorting balsa that is always the furthest thing from my mind.
Photos per my previous post above regarding using bar [img_assist|nid=1043019|title=blank glue up|desc=|link=none|align=left|width=480|height=640]clamps and clamping boards on outside of blank glue-up. Remaining two balsa outside rail boards will be glued up to this tomorrow. [img_assist|nid=1043018|title=clamp rails|desc=|link=none|align=left|width=640|height=480]
All these guys are awesome and knowledgeable off the Richter scale.
Probably obvioius but I would add, make sure all your tools are very sharp and you have an excellent mask…the balsa will swell from the moisture in your lungs if you don’t take the precaution.
I had that problem with one rail on my cedar chambered deal. I work with wood daily so I was aware of this tendency with soft species and was conscious of it while I sanded. My method is to random orbit with coarse grit. Get the shape true then switch to hand sanding because the higher grits on a sander will dish out the soft stuff. But Like I said the rail developed a flat. I used a compass plane to cut a smooth arc back into the rail.
Everything said above is right on. Here are a few more tips from my one balsa board build.
Add some short dowels to the planks, so then you can easily line them back up after breaking the board apart. This also reduces drift when you glue them back together again. I think I learned about this from a post by Jim Phillips.
Use a band saw to cut out your rocker outline on each plank. It will save you a lot of time planing and/or sanding.
Save the off cuts when you cut out the outline. You can use these later when you clamp everything back together again.
If you don’t feel comfortable using the planer then, a belt sander works OK when you are trying to flatten out the bottom. Mark out the high spots with pencil marks. Move the sander back & forth and side to side (don’t stay in one spot for long!). Try not to let the edge catch, or you will get a nasty gouge.
as usual your information is the kind. This pictures that you have posted he have a wealth of information, and lots of clues for anyone willing to put in that kind of time. I'd imagine that there are many hours of work to get o that point.
Yea, you are right and a good point to make here. If you spot glue the various rockered balsa boards first, then rough shape, take back apart, chamber, then glue up again you won’t use the outside clamping boards. You will agree the best way then, would be to use a different glue-up system. My favorite method is the one Jim Phillips turned me on to, which is inner tube rubber bands, etc.
This particular board was pre chambered then final glue-up for shaping, thus the outside clamping boards. Granted you can’t get the same amount of chambering this way. The client, one of the best nose riders here on Maui, wants this board to weigh between 34 and 39 pounds (old school shape and will be a rider), so I didn’t have to chamber down to the nats butt. Since this pic yesterday, I’ve glued on the two outside rail pieces to complete the blank. The whole rough pile of wood weighs 37 pounds, so with cutting out the plan shape (fair amount of wood to be cut out), shaping, then glassing with greg’s recent posted recipe for a gloss epoxy, add a big D-fin, and tail block, I hope to hit the objected total weight aimed for.
I won’t speak for Swied and look forward to his requested comment about dowls. I have used 1/4" wood dowls before and I know some guys use 3/16" brass rod for dowls. I placed one in the vertical wall between two chambers at a point about 34" back from nose and also one the same distance back from tail. I made a rocker template from which all the balsa pieces were traced and bored this hole in the template so all boards and stringers would have the hole in the exact place in order to line up the few boards at a time for glue up. I mention past tense because I don’t personally use the dowl method anymore. Especially in softer pieces of balsa, the pressure produced from clamping will still want to slide the boards up or down a bit which just seems to mush out the hole and the dowl moves any way. I prefer to simply glue up only a few boards at a time, and hand tweek the boards for positioning as I work the clamps. Set a clamp about 30" in from nose, another about 30" in from tail which holds everything in proper position, then go back and work down the board starting from one end to the other spacing the rest of the clamps. When you see that small uniform equal line of glue squeeze out running the length of the board top side and bottom, you know you got it clamped right on.
Thanks reverb for inspiring the clarification and further comments which will hopefully help those who are starting on such an adventure. Always enjoy the ride!
For all the time it takes to make a board it might be prudent to just glue up two pieces at a time if you have trouble with alignment. Most of today’s glues only have a half hour clamp time anyway and I have routinely used less with no issues. I think doweling is basically a hassle since the method RichardMc described is simple to do. One thing I would add is to draw a large arrow like this > across the boards before you separate. Then you can easily see if you are aligned as before.
Having your own or access to big sharp power tool like jointers and thickness planers will save hours of work and heartache if you are going to break the blank down and chamber. Wood is wood and you’d be amazed at how two pieces that have been glued together for a year will not fit after you bust them apart to chamber. Having that smooth even suface makes the final gluing and clamping a dream.
I second the comments on gluing pieces up in pairs before the final assembly. Rubber bands are the kine!
Making a balsa board is the most rewarding thing I’ve ever done in surfboard building…
When I did my build I only glued up two pieces at a time. Trying to do the whole lot at once would be hard. I found that the dowels did not wiggle around very much, and actually made the job easier. It wasn’t hard to place them. I’ll follow-up later with some pictures.
Here your can see the placement of my dowels (see below). I concentrated the dowels in the center of the board, and put my glue dabs on toward the ends. That way I could achieve more leverage when breaking them apart later.
This picture may be little confusing, since there is glue all over the place. I ran the dowels all the way through the thin redwood strip, and tacked the bottom piece with a few dabs of glue (already dry). The glue slathered faces, shown below, are meant to be permanently fixed together.
Here is everything clamped up after chambering. Notice that there is only one line of dripping glue. I did each section one at a time. I wish I had saved the off-cuts. It would have made clamping the nose easier.
After a ton of hours laboring in the shop I finally got to surf it.
 I had a problem up near the nose on the left rail. If you look you’ll see some grain patterns. Well, I had just started to sand and on the second pass I got two straight parts between the grain. I got frustrated and left. Bill Eberwein, who I share a shaping room with, called and said, “Hey, you know you have a bump in the rail on this board?”. I told him yeah I’d be back to fix it.


