Today i glassed my first board. Shaping was really fun. Glassing is not so much fun. I used a 6 ounce fabric on the bottom with a UV resin. I only did the bottom because i am running out of daylight. I hope to do the deck tomorrow with two 4 ounce cloths. I have a whole bunch of strands and what might appear to be air bubbles. Can i just sand those things out?
Is it ok to wait a day to do the deck, or are you suppose to do the deck immediately after you do the bottom?
Let me know what you think. I’d love to hear some suggestions. Here are some pictures. Thanks.
Heres what you need to do with that beast. First, take some tweezers and pull up those pesty little fiberglass strings that are running out onto the deck. Pick them up carefully from the foam and cut them with a really sharp new razor blade. Now take some laminating resin and a paint brush and go over all those dry spots on the rails. Use just enough resin so you get a wet out but not so much so you get a bunch or drips. Let the whole thing kick off real hard.
Now take a surform with a clean blade, not that old rusty thing in the bottom of the tool box. Take the surform and run it flat and smooth around all those bumps, zits, dog hairs, and bugs. Try to get it as flat and smooth as possible, the more you work at this “getting it flat” the easier it will be when you sand the hot coat.
If you got some big rail air bubbles, split them open prior to the next layer of cloth. Doing this will allow the resin from the next layer to fill up the hole.
Next time don’t rush and work the rails longer, set the glassing stand higher so you don’t have to crawl around on you knees to roll the rails. Anyone can laminate a deck or bottom, it’s the rails and pointy places that separate a fair glassing job, to a great glassing job. And one more thing, make sure you have enough resin to do the job. If it’s your first few boards have 2 qt per side at your disposal, if you have done a bunch of boards then you can get away with 1 qt per side. it’s better to throw away $2 in resin then try to salvage a once fun, turned pain in the ass $250 project.
edit: one more thing, next time take more time cutting your fiberglass laps, make them even all the way around the board…take your time, so what if it takes 2 weeks to finish the board.
that’s a really THICK tail!!! You won’t have problems of floatation when standing on the back of the board, believe me!!
Non-wet laps:
I use a simple trick for laps. Let’s imagine we’re going to glass the bottom.
Turn board deck up.
Mix the resin+catalyst, very little catalyst (not hot)
Paint the lap area of the rails with a paintbrush. Do it quickly and don’t save resin here.
Turn board bottom up, trying not to touch wet rails.
Lay glass on bottom and start spreading the mix as usual (squeegee).
If laps are not completely wet, don’t worry, when you fold them around the rails they’ll stick to the resin you have spreaded with the paint brush. If this resin is not set, it will wet the laps. If it’s set, the laps won’t get wet but they’ll keep stuck to the foam and you will be able to wet them when glassing the deck.
This really work for me. Always.
An option is to mix first a small batch of resin+MEKP (really not hot) for the lap areas, then paint them. Then you turn the board, lay the glass and mix the rest of the resin+MEKP for the standard glass. This way, you don’t need to hurry so much on painting+turning+glassing.
That was a great explaination, 100 people looked at this post before this message. I didn’t know how to do it so gently.
Cafka, be well assured that almost all of us here have had that same experience, 30 years ago or 30 minutes ago, it doesn’t matter. You jumped in an gave it a go and you have learned a hell of a lot from your first try.
I glassed my HWS last year and I was filled with fear. If it wasn’t for the great people here I wouldn’t have even attempted it.
WELL DONE MATE!!!, once you’ve tackled the obvious problems the deck will be even better.
Keep us posted on your progress and welcome to the world of building surfboards, it won’t be your last!!!
As resinhead says. “Anyone can laminate a deck or bottom, it’s the rails and pointy places that separate a fair glassing job, to a great glassing job.”
Here is my method of glassing the rails.
Laminate the deck as normal. Pour the resin down the stringer and work it out toward the rails. Try not to let it run over the rails but let it puddle near the edge. Once satisfied that the flats are done fold the glass up onto the deck. Get a 2" paint brush and wet out the glass using the puddled resin and if needed resin left in your container. Once wet fold the glass back down. Now using the same brush or a 4" brush, starting in the middle of the board and working towards the nose and tail start folding the glass under as you would with the squeege. I find using the brush a cleaner way of doing the rails, less resin dripping everywhere. Once all the laps are finished I do a tight pull with the squeege to remove any excess resin left on the rails by the brush. If it is a hot day I will do a batch for the flats and a new batch for the rails.
Keep at it, don’t let it get you down . I had some shockers when first starting out.
Here’s an update. I glassed the deck and i was having a hard time with it. I couldn’t get all the air bubbles and bumps out for the life of me. I should use a metal roller next time. I also realized that where the lap came over from the bottom lam, it created a visible high spot along the rails on the deck. Should I have sanded down the bottom lap more?
For the hotcoat, i’m going to use a surfacing agent mixed with some UV resin. Will this coat produce any thickness to cover up some of my blemishes?
…after the resin kicks you dont smooth nothin (in a perfect way)…so , Resin head the explanation about twizers and other stuff is not posible without damaging the shape…
trust me, If your careful you can tweezer those strings right up. I’m not talking about the full triple laminated 6 string fur balls. If you start off with a mess, your board is going to end up a mess. If your no good at laminating, start off with a clear cut lap, pretty hard to screw up there.
I can’t stress enough about sanding. 99% of the guys who make backyard boards don’t sand nearly enough. If you don’t get your rails flat from the beginning lamination your going to be chasing bumps all the way to the gloss coat. And when you finally catch up with the lump bump, your going to sand through a nice resins tint job…so just start out with a flat lamination from the get go. If you need more time, use less catylast.
He’s right, go slow, have good lighting to see the bubbles, to fix the bubbles dremel small pin holes on both sides and press resin in with your fingers and set use the UV.
Since its a clear board you could of cut the laps even, prior to the deck lam, lessons learned!
Now, you can sand the lam bumb/zits high spots down before hot coat, but you’ll use alot of paper 80/100 gt cause the lam don’t dry and clogs the paper quickly and watch out for hot spots from filled papper. You can hotcoat, sand it down flat and have probably a bunch of sand thrus where the bubbles where on the rails, fix like dings w/lam and hotcoat again spots or sections if need be, Almost anything can be fixed with clear resins and cloth try some 4 oz for repairs its thin, remember you must sand everything before re-hotcoating, and clean first w/acetone.
By the time you read this you might have finished it already, anyway where’s the fin box, should of could of would of cut it in on this longboard with the laminating just for the added strength, did anyone tell you about adding patches of extra cloth where the fin/s are suppose to go? Lessons learned fun yea.
When you finish sanding, are you going to gloss/finish coat?
We all understand and are shaking our heads, but keep on keeping on the next one will be better, I still have some problems after the last 15 or so boards, Hey, my bubbles are FREE.
I haven’t done anything further with the board than sand the nose and tail a little. I’m going to try and attack those bubbles next week. I’ll try the dremel idea and if that doesn’t work, then i think i might just sand through and smooth it over with some cloth.
I’m going to cut in a 10.5" box in after that, then hotcoat. I don’t think i’m going to go with a gloss coat at this point. It doesn’t really look worth it on this board. But I’ll see when i get there.
I think it has to get better after this board. I have definitely learned a lot so far. Thanks to all the Swaylockians for all the advice.
I found a tutorial on glassing on the net, sorry can’t remember the site but if you search under Col Colburn. Loads of pictures and what not. The use of masking tape around the rails before laying cloth and resin then cutting the glass just as it starts to set up at the tape line was a major tip for me, dead straight and neat rail laps (well, the second attempt was). All I need to do now is learn to put the resin on flat without great mountains in the middle.
I’ve glassed five complete boards so far. All came out good in the end. Don’t stop now,sand, hot coat and gloss that board. This thread has a wealth of information in it. Millions of backyard glassers like myself are cheering you on. I just got some great tips from the questions that you asked.
I did my hotcoat yesterday and it turned out alright. My problem now is that i can still see my bumps along the rails from before. I’ve sanded a little already.
Is the hotcoat suppose to be a thick coat so that it covers up imperfections? I tried to make it thick, but it kept running, so i thinned it out a little then put it in the shade(UV + SA).
Are you here in Ventura? If so, maybe we can get meet up. I can show you how to use a sander/polisher…or you can use mine if you need one. It’ll save you a lot of elbow grease. I’m no pro but I do know enough to help.
I’ve only done the one board so far but found that stuff really useful as I was without a clue where to start before. Some excellent advice here as usual.
I’m on my second at the moment but have come to a bit of a halt at present, waiting for more funds and time to materialise.
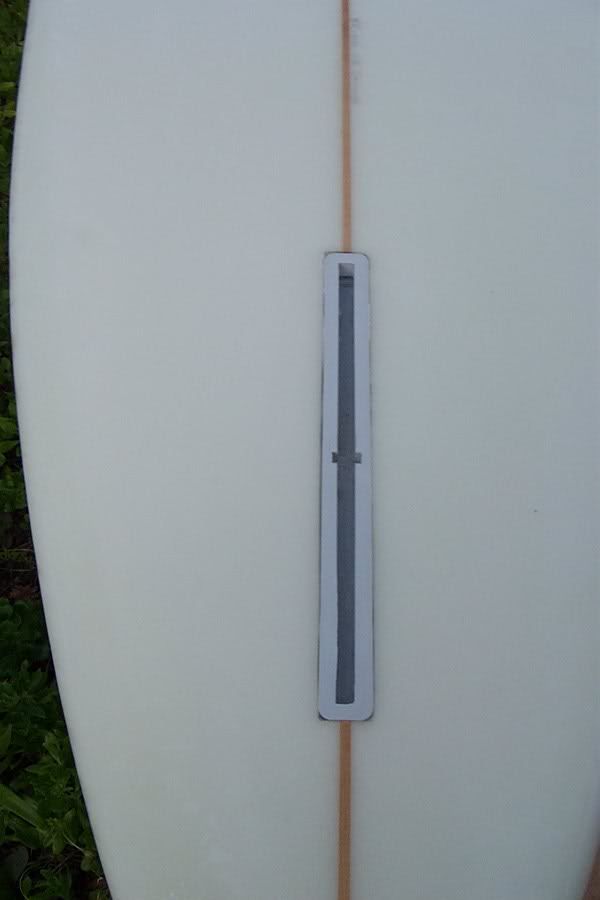
Ok i think this is the final product. I still have to put in a leash plug and fix a few blemishes. The finbox came out pretty nice. Next time i should add some white pigment in the mix.
I think overall, it turned out better than i thought. Can’t wait to take it out next week.
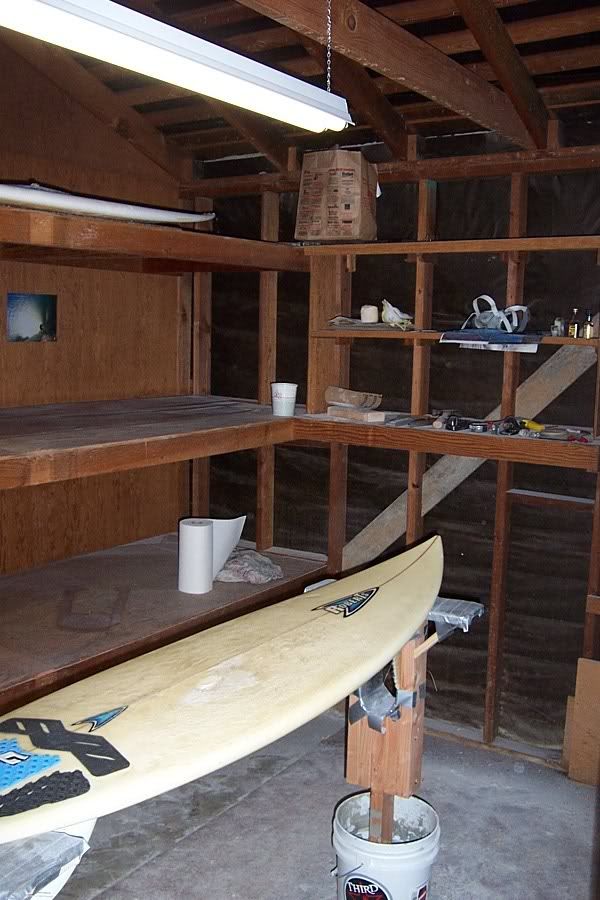
Here are some pictures, the last one is my shaping room.
Thanks again for all the advice. Now to get ready for the next one.