Anybody diy a jig? I’ve always done FCS but got a request to make. Board with futures boxes.
Are you thinking of getting the one pass bits or doing them with router bits you have? Do you have Futures boxes to take dimensions?
https://forum.swaylocks.com/t/futures-jig-for-a-plunge-router/83023
Edit: link to the 3D printed jigs in the thread above-
Thank. When searching I saw a few posts you did on Futures. Pardon my ignorance but I’m trying to figure out whether it’s even worth it to me to take this order. How do you set cant? I notice the supplier I use does not have any options for the cant of the boxes. So I assumed the cant is in the fin tab. So I looked at their site and the fins I looked at had 6.5 degrees listed for angle. But one set (Vectors) had 6.5/9.5. There was no option to choose when ordering so that confused me a bit. Maybe it’s a bent fin? But bottom line is you set the (rail) boxes at 0 degrees?
The boxes are straight up and down, the fins have the cant. Some of the fins have varying cant from base to tip.
I think the beauty of the system is how easy it is to use with the 1 pass bits and fixtures.
The downside is that fins become less of DIY thing with the base and the cants and stuff.
The 3D printed homestyle fixtures look cool, esp. if you are looking at one or two and done. They could be made from wood too.
I have the ‘real’ kit but don’t have a board with them installed as far as I can recall.
If you know somebody with the install kit, offer to bring drinks and snacks, that might be another means to an end.
FCS will eventually phase out “two tab” fins. The single “plugs” and Fusion plugs. By next year they will be in short supply. You’ll only be able to buy the Chinese knock-offs. So what we will end up with is two competing systems with bases that are unique. Which means that you can no longer manufacture or duplicate fins without 3D Printing or CAD/Computer/CNC aided milling. No more grinding custom fins at home. With Futures the cant is in the fin. With a little practice on an old board or blank, Futures are a clean, strong, easy install. The “One Pass” and the “Two Pass” kits are both available from Futures. For what you get, the “Kit” is reasonable enough $$ wise. It’s the Makita router that cost more than the kit. The Futures kit sleeve doesn’t fit most routers. You can buy a “Factory” rebuilt trim router from CPO tool outlet for less than $100. The Makita router is a good investment if you plan on building and repairing boards. The FCS install jig and bit will work with any trim router. I have yet to Install an FCS II box. The install looks pretty simple. I have installed lots of Fusion plugs and the cant is in the box with Fusion. I hate to see the Fusion plugs go. They are an easy install and are lightweight. You can definitely feel the difference between a 4 or 5 fin board with Futures boxes compared to a board with 4 or 5 Fusion plugs
1 Like
![]() I should stock up on some Fusions for my twinzer builds…. No fusions,no round plugs, the canards will be a problem.
I should stock up on some Fusions for my twinzer builds…. No fusions,no round plugs, the canards will be a problem.
They will continue to make FCSII? That’s what I’ve been using for many years with no issues.
Yes. As I said: two competing bases. I think it’s pretty obvious that FCS is tired of Chinese,Thai and Viet Nam ripping them off. The FCSII box and fin base is a more involved duplication.
Got my Futures setup out tonite and did a test run with the 3/4” bit. A little too deep, like 1/32–1/16”. I’ll reset the depth. While it is easy to compensate for too deep by using more resin in the bottom of the slot, I’ll reset and take another test cut. I like to set the boxes the way Greg Loehr uses in “Epoxy 101”. A little Cabosil to thicken the resin.
I ran out a copy of the Gecko Surfboards files as a make-and-do project.
I had 1/4" [6.35mm] cutters on hand so I 3D printed that base plate and routed the flat plates to save time on the printer. Results were OK for a first attempt. I then noticed that this base plate on my router is not very concentric with the cutter, enough to see with the naked eye and something I did not check before testing. Had this been better aligned I think I would have been even happier with the results. One does have to set the cutter depth for the base and the flange.


2 Likes
Nice. Does the slot jig fit inside the flange jig? Since I don’t have a printer could I just use my 7/8” (depth) router bit with top follower , one jig for the flange (1/4” MDF) and one for the slot (1” MDF)?
Yes, the inner piece for the slot is in place and routed deeper for the slot, then it is removed and the bit is shallowed up to cut the flange.
I use a top following 1/2" router for Bahne boxes. The only trouble with top following is that there is a little gap between the bearing and the blades and you’ll want to make sure the blades are not being pulled up into the template but the bearing is still landing nicely on the template. I want to say that some of the box install systems use a bearing that was one bigger than the cutter to prevent this. If you try to use a different bearing or bit you will need to check the math on the template. The Gecko stuff is sized to work with either of those baseplate and bit combinations.

1 Like
I am sure I would nick those up first attempt.
I ended up taking my board to a local glass shop. They charged $20 to rout them out. I was stoked…until I got home and put the boxes in. The flanges sat almost 1/4” under the surface of the board. RRRRghh! I have to shim them up. Do you use cabosil in the resin mix? I don’t want to shim them up and then have them “float “ up even higher, but I also don’t want a 1/4” of solid resin at the bottom of the boxes.
Before shimming.
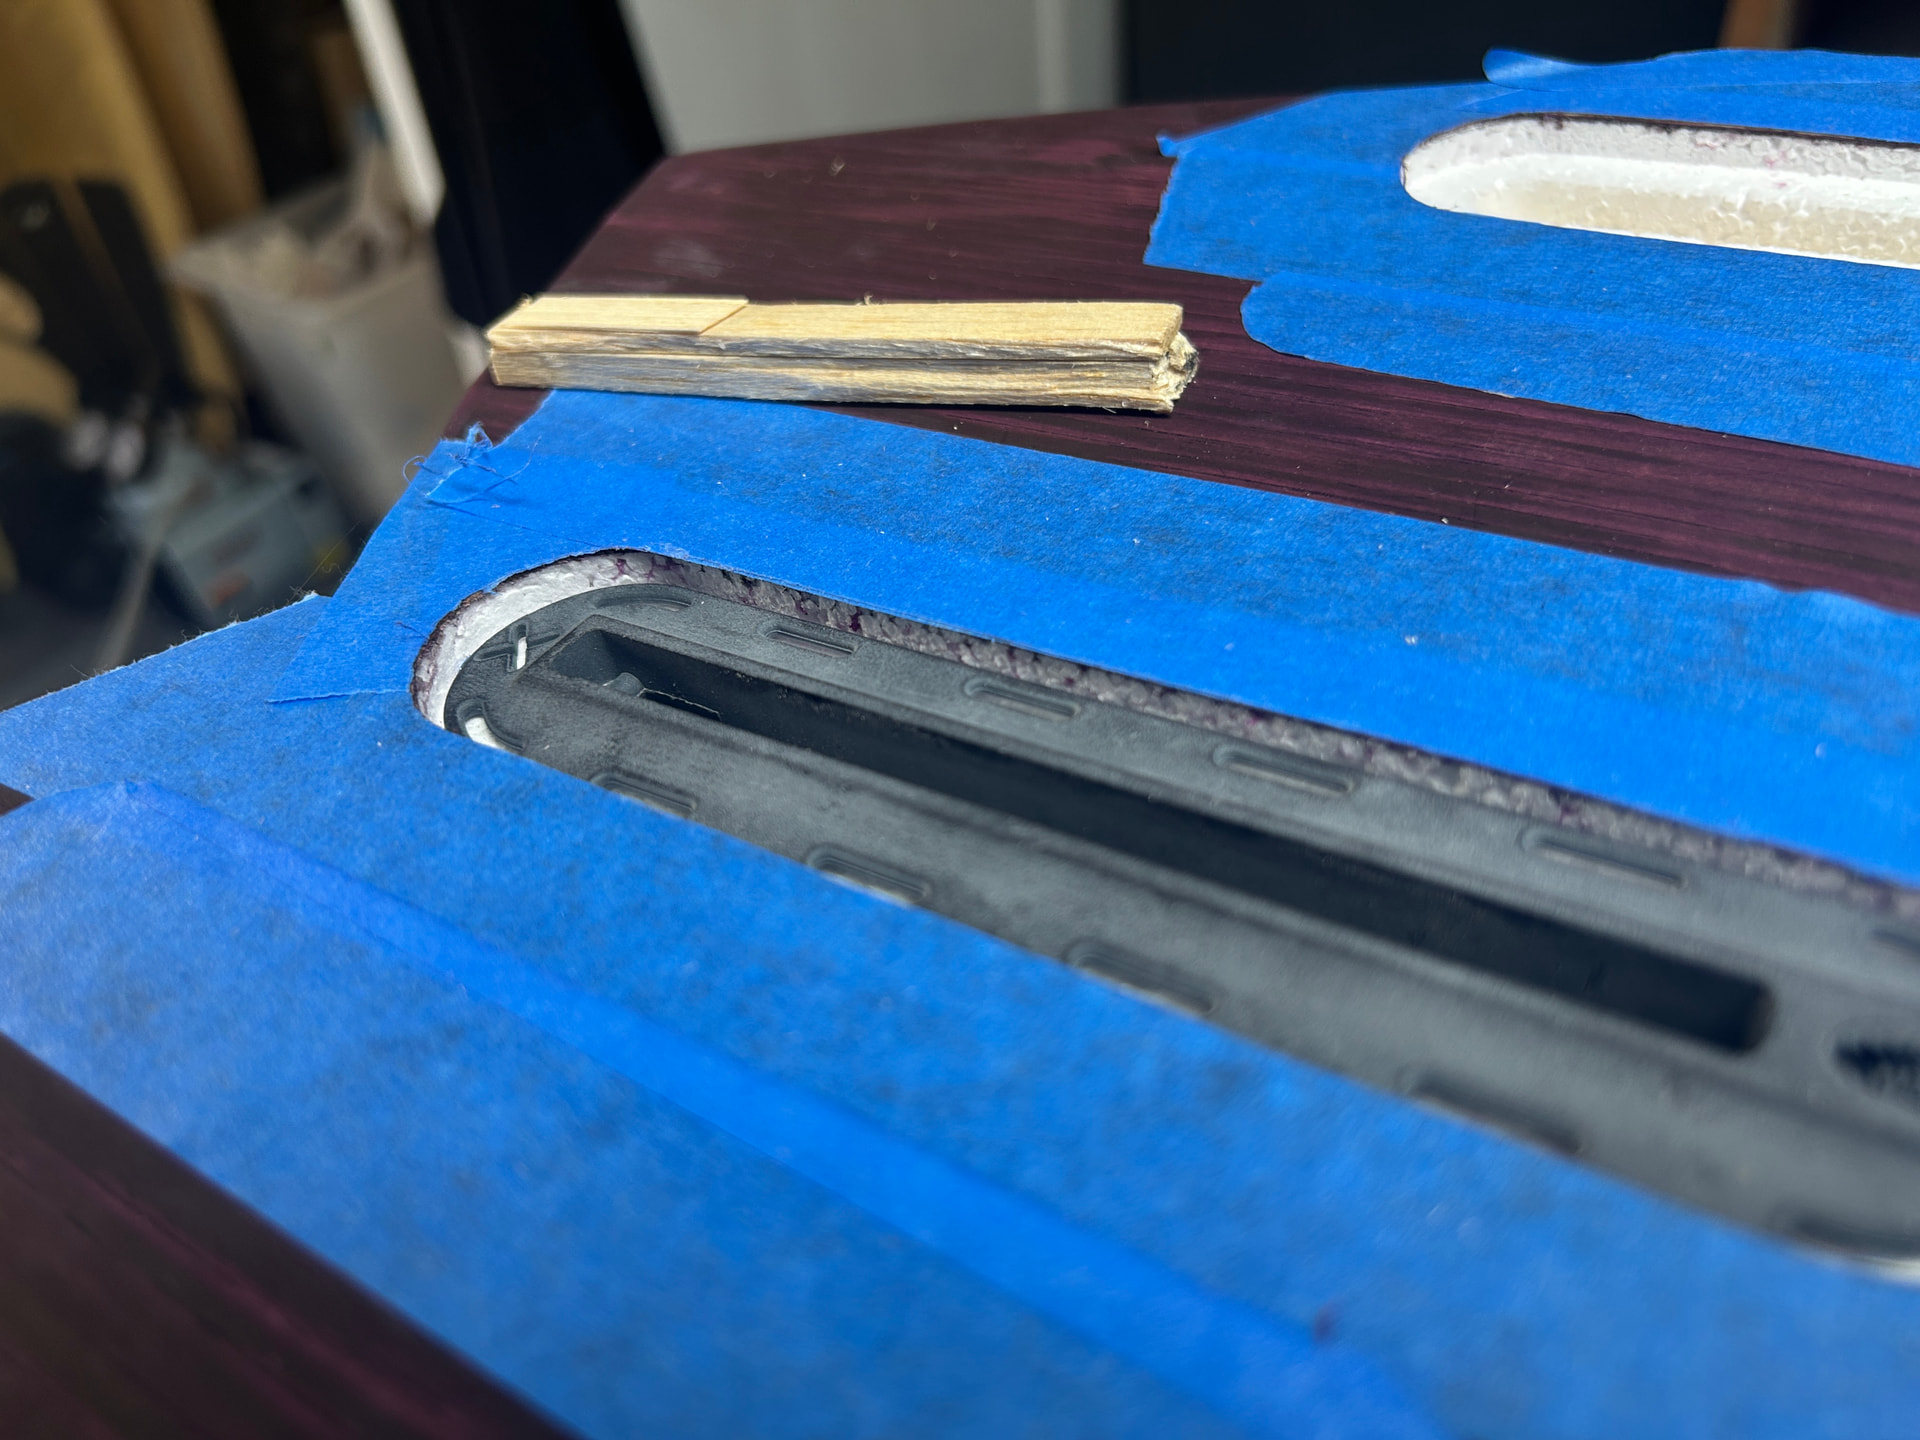
Shims. The back of the boxes were also much deeper than the front of the boxes.
With shims-
I also painted the edges of the cut with tempera because the white EPS showing did not look good. I know if I mix cabosil, the paste will be white. If I tint the cabosil/paste black it will be grey.

Always thought an epoxy/cotton flox (flock) mix would make a decent fin box filler. And you should be able to tint/pigment epoxy/flox mixture.
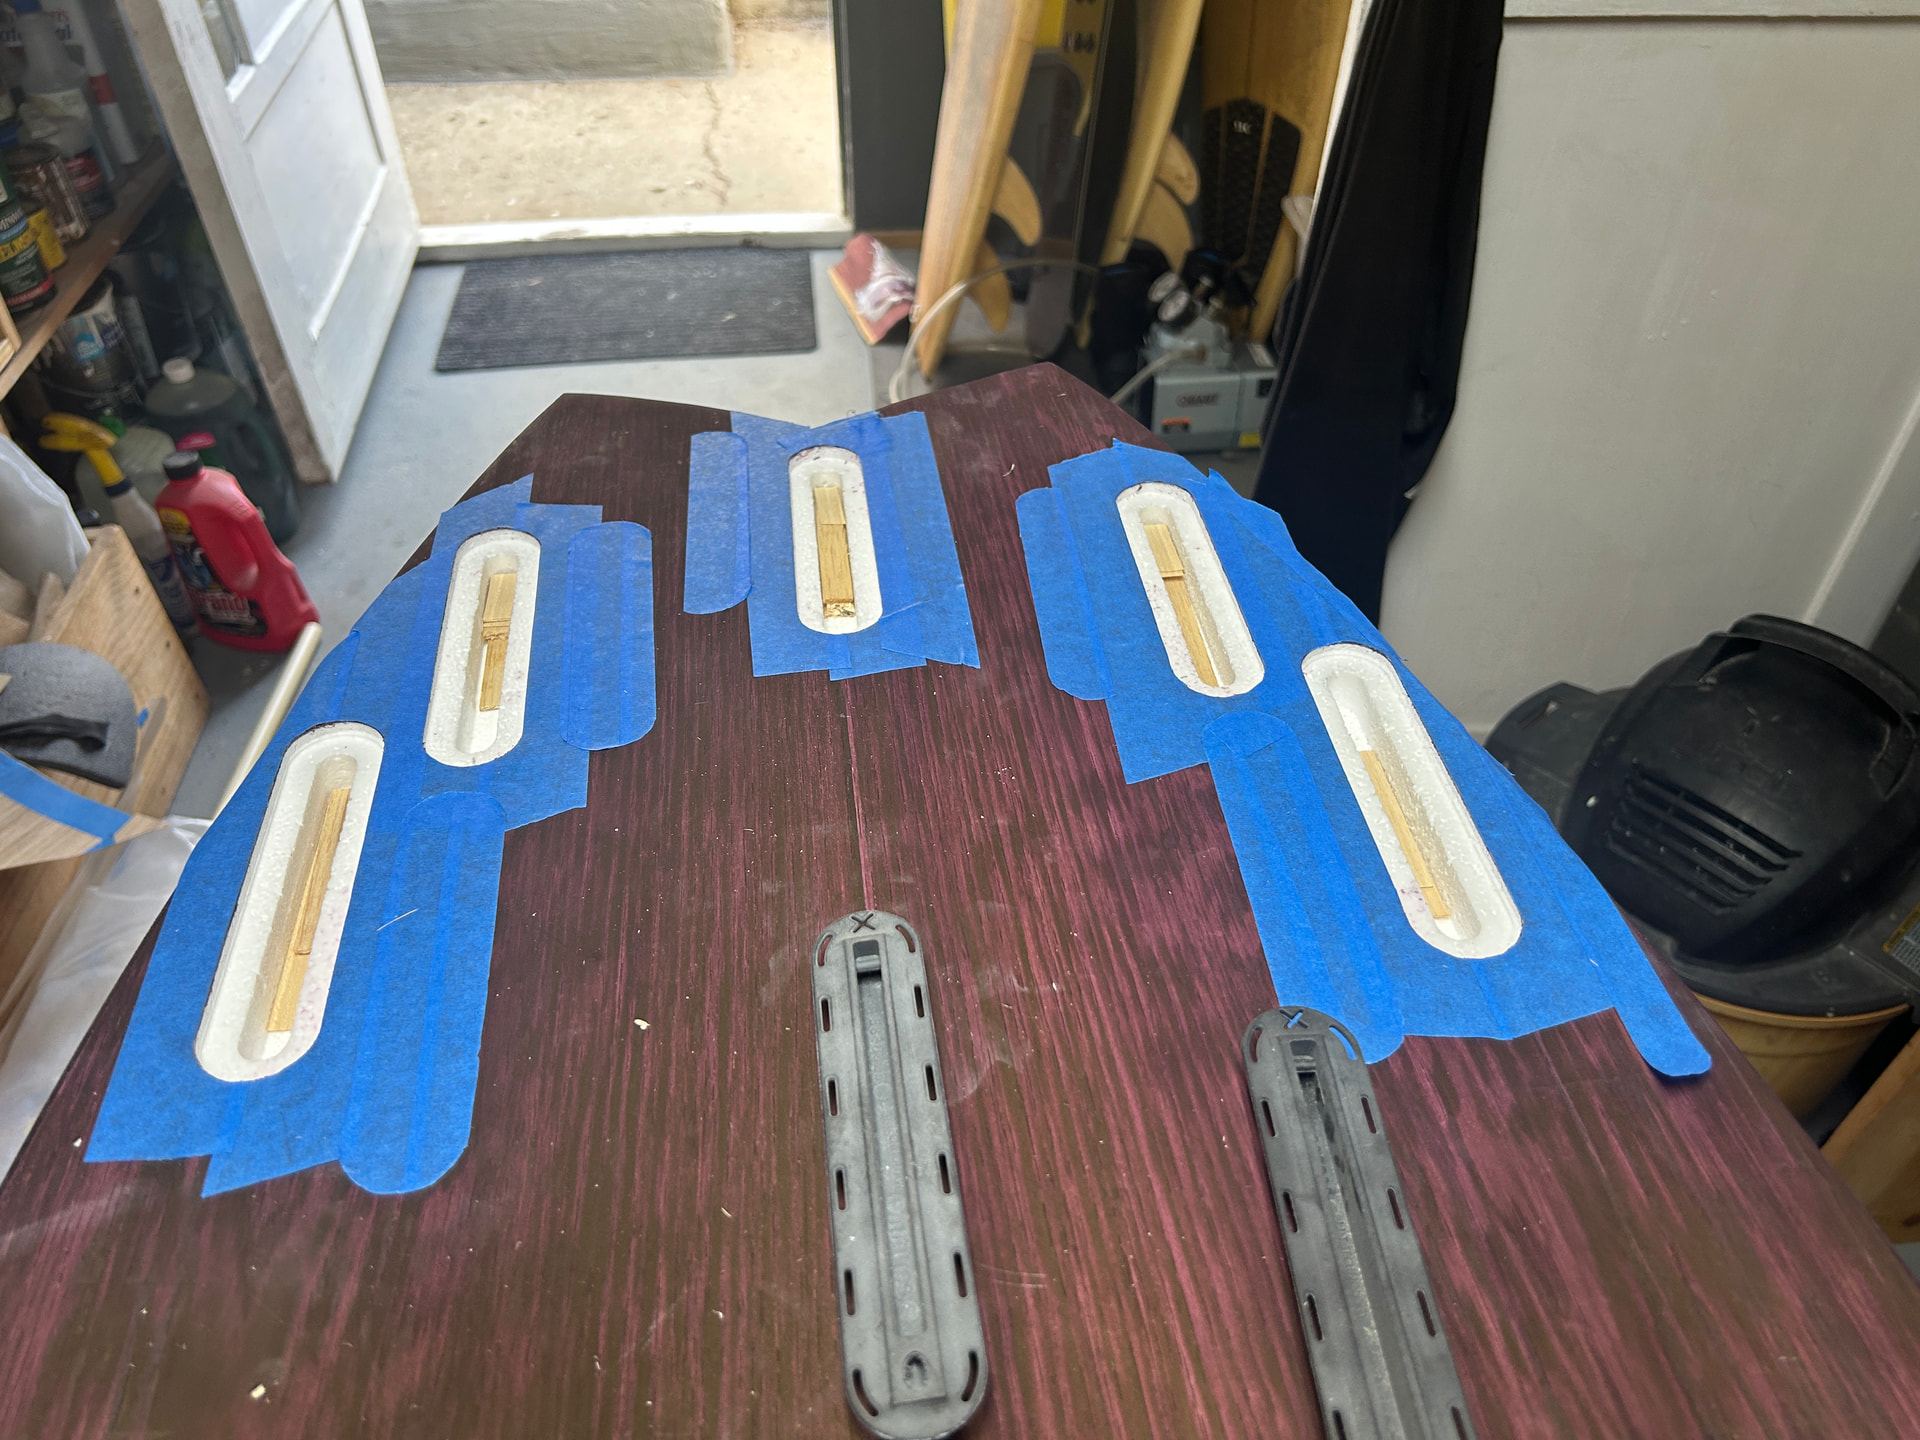
Can you use hobby balsa for your shims.
https://www.aircraftspruce.com/catalog/cmpages/flockedcotton.php
I would use some PU foam, like a PU blank offcut.
Most of my boards have some sort of HD foam between the plastic finboxes and the EPS.
The tough part for me would be how to handle the shop: let it go, educate them, or give them a a hard time for not doing a test cut off-board…
I’m using balsa I have left over from when I would do balsa rails.
I’ll just let the shop slide. I like the old time owner.
1 Like
Tell him in a nice way. Let him know you handled it with a shim. Better too deep than too shallow. He most likely overcompensated for the thickness of the wood skin. You don’t want him doing it again to somebody else.
1 Like
i had the 1/4 issue once, turned out i had forgotten to put the blue ring inside the cup for the router to fit the makita hand router.
sometimes you cleam the cup and forget to put the ring back inside.
can be the case? because the ring is actually 1/4 inch size.
1 Like
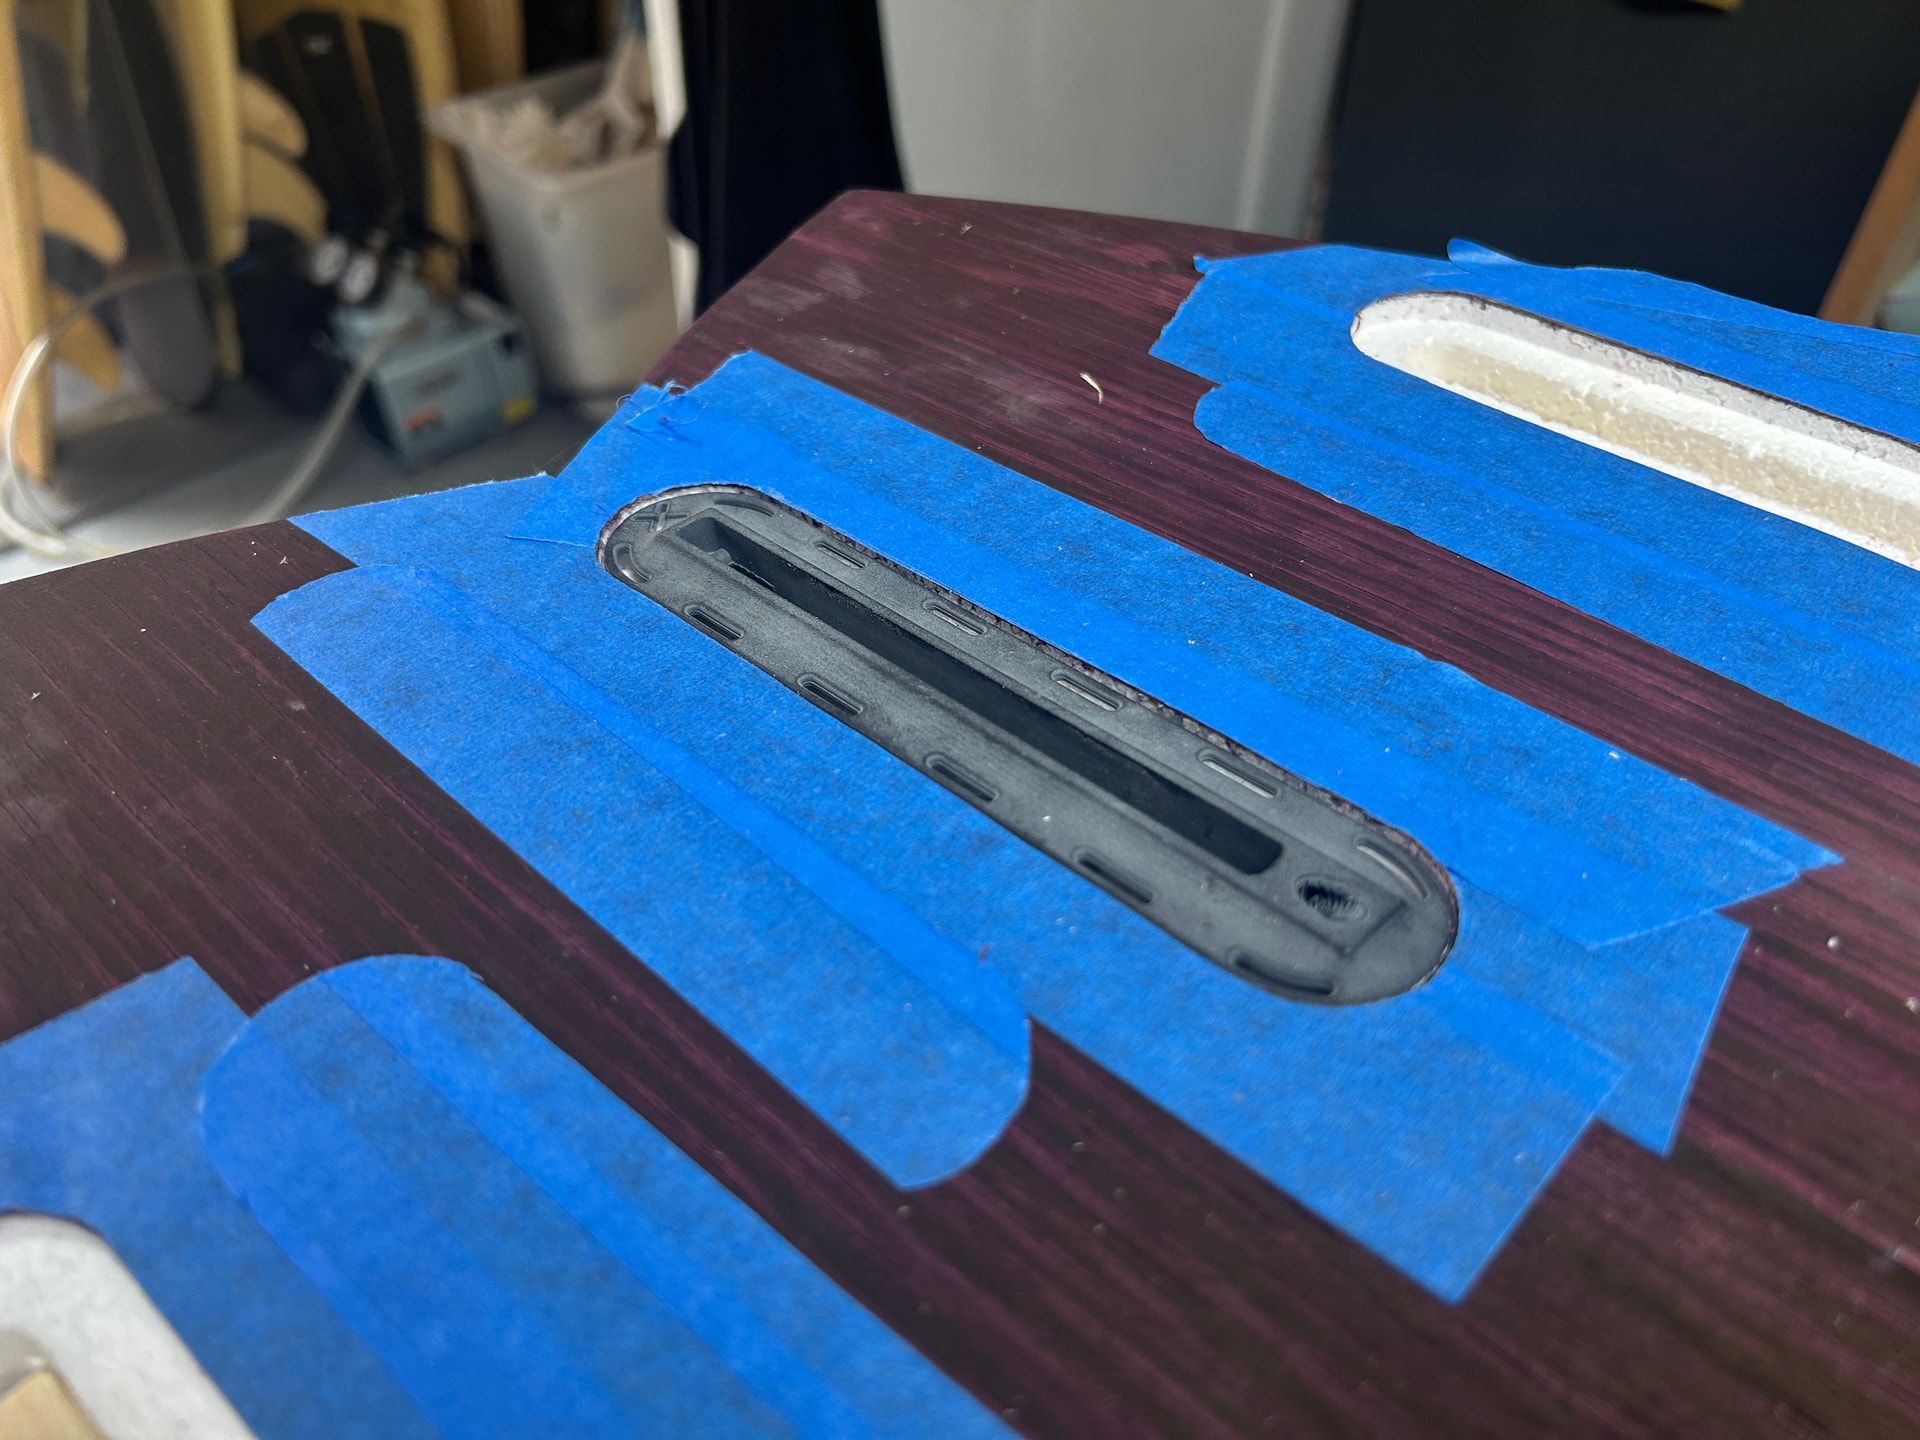
I put in the boxes. Because of the zero cant sitting in the area of the double concaves, the outside edges of the boxes sit low. Also the backs sit a little low. Would you fill this area before or after laminating?
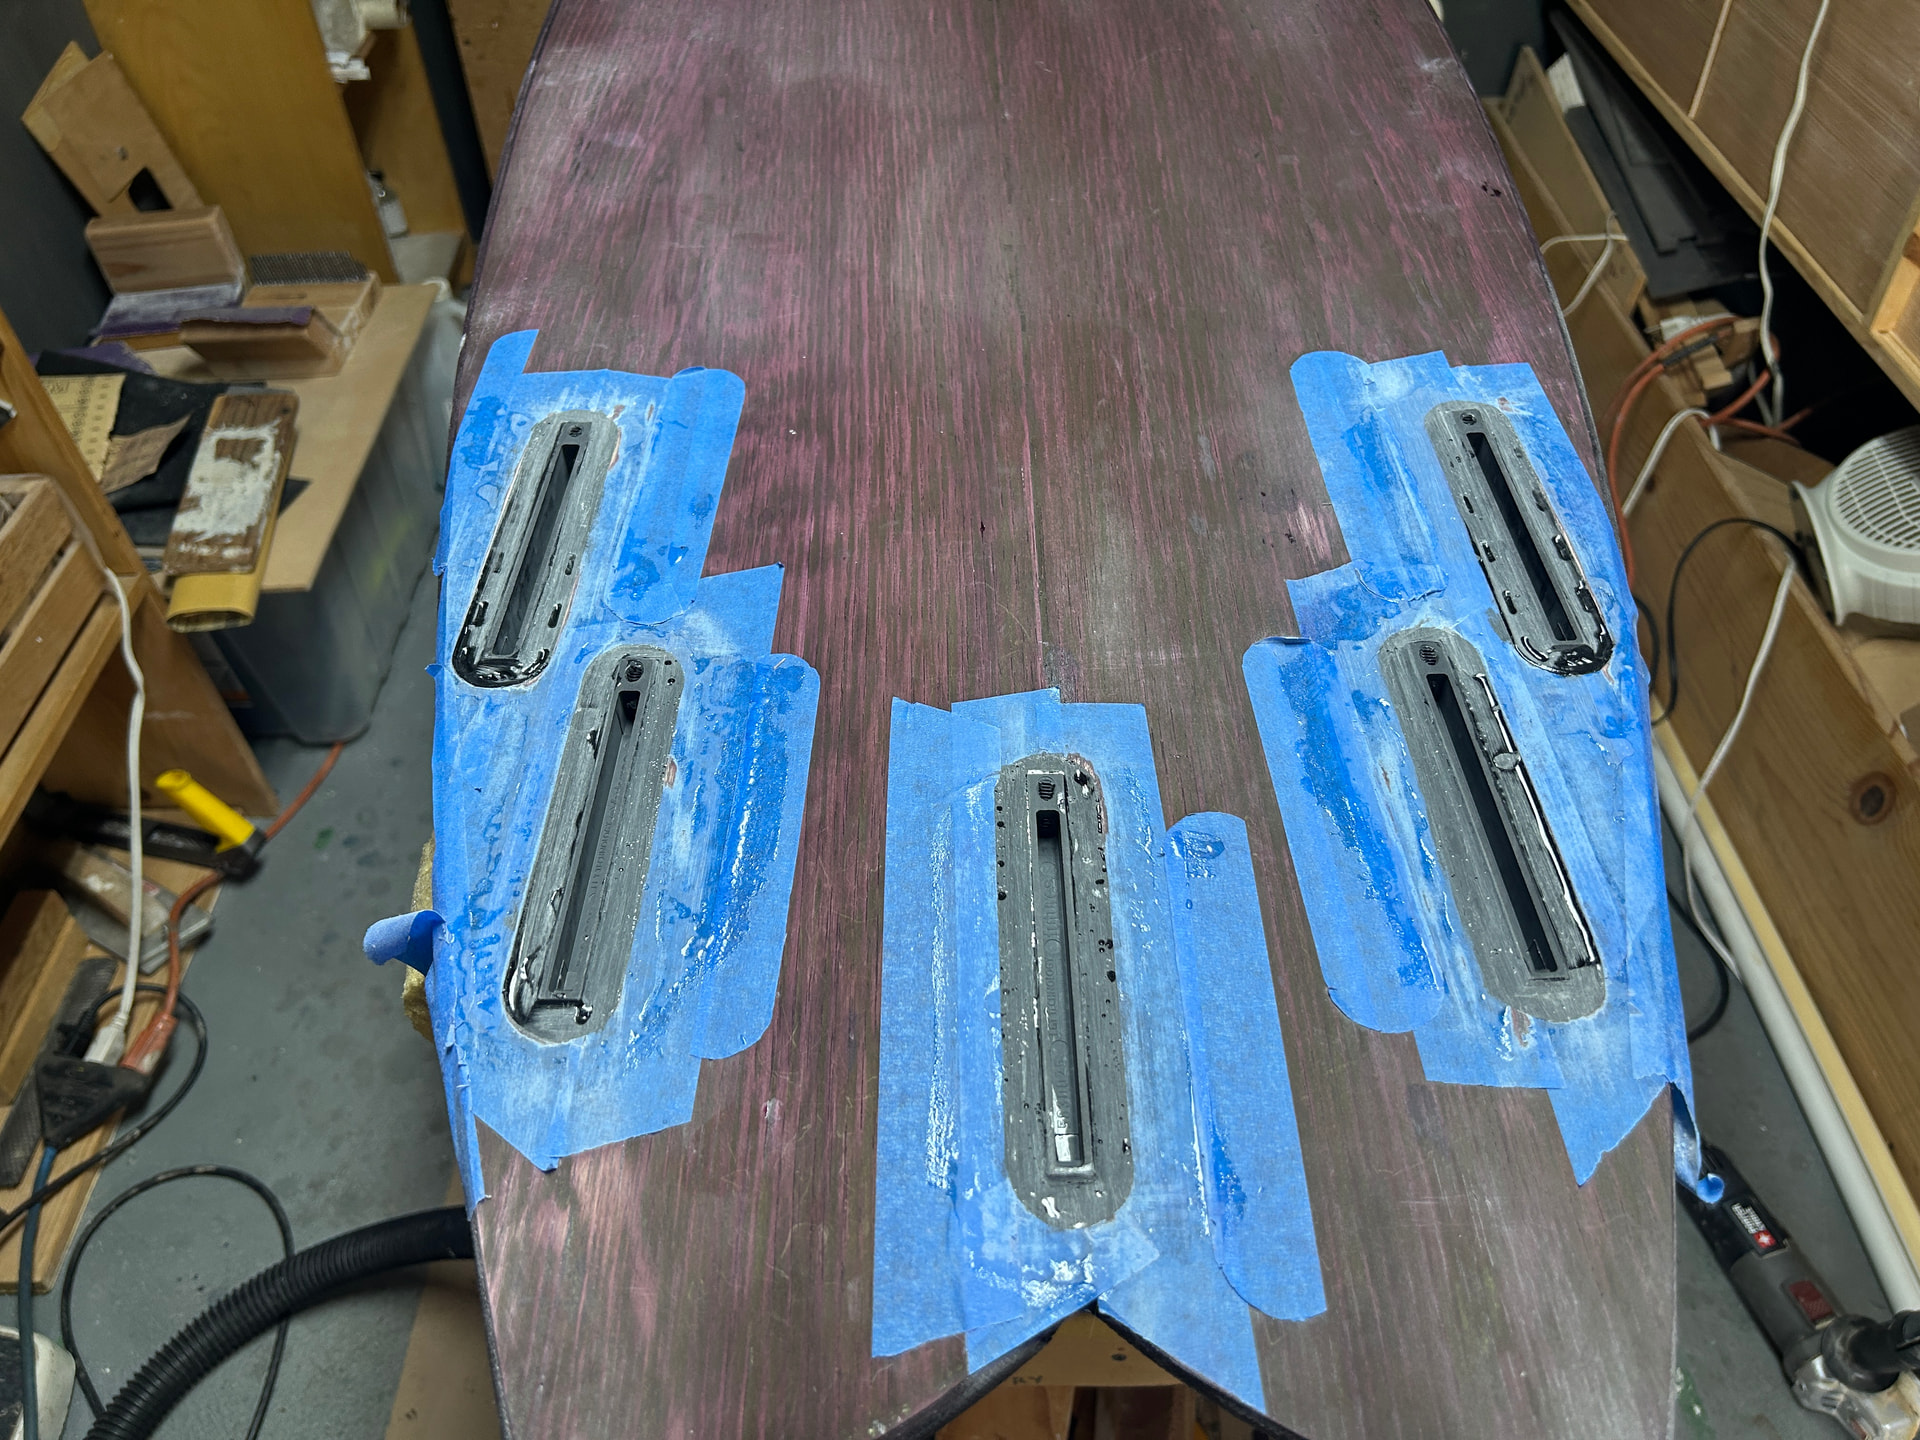
You can probably make up for that during the lamination by floating a little extra resin over the box at the low spot. A light touch on the squeegee. The hotcoat/fill coat will handle any thing left.
1 Like