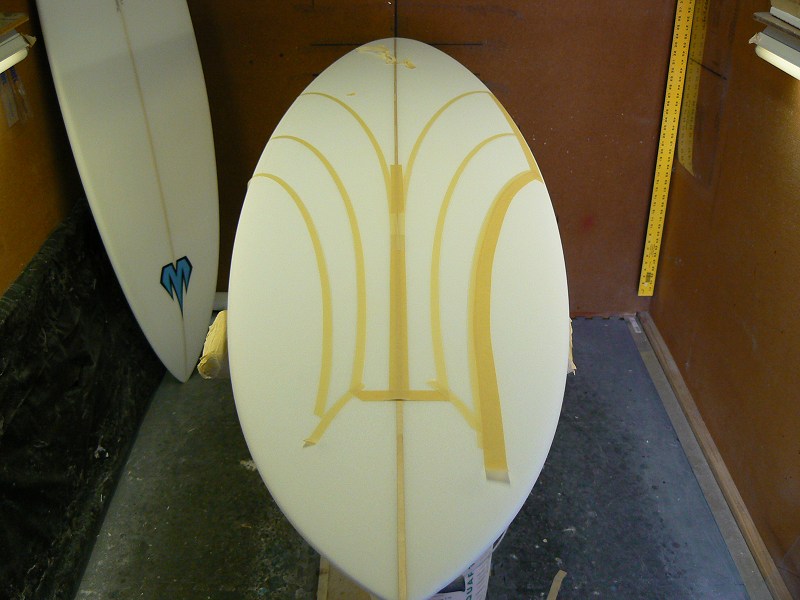
I am doing some painting on the foam before glassing and am having trouble getting the masking tape to lay flat around curves. I am using 3M 218 fine line tape which is designed for this. I have 1/4" width tape. Part of the problem is the foam is so soft that you can only push so hard without making dents. As I run the tape around even a mild curve, the tape puckers up a little which will become the sites for bleed-unders. I would appreciate any tips or methods people use to get the tape to lay flat on the foam. I believe the tape is available in 1/8" and even 1/16". Do I just need to use thinner tape of can I get the 1/4" width to work.
I try to stretch the tape by pulling a bit with my right hand, while I place the tape with my left. If you’re painting on the outside of the curve this works OK for me. On the inside you might still get the puckers. Here I use thinner tape, or tear the ouside curve of the tape to give “relief cuts,” essentially making the tape thinner on the inside of the curve.
how tight of a curve are you trying? maybe too tight ?
keep in mind I’m a backyarder, my advice make sure you blow off and then vacuum the foam thoroughly before
taping. try not to stretch the tape too much, more likely to pull back/shrinkage like you describe. concentrate more on bending versus stretching the tape around curves.
an example initial tape off using 1/4" 3M 233 on US blanks red formula (soft & light).


The “fineline” tape lacks crepe, is good only for straight lines, you need a crepe bodied tape, it will go around corners, Scotch # 233, in 1/8-1/4"/ 3/8" and so on
Nice board BUD…looks like a barrel riding machine!
if you dont feel like the hardware store merry-go-round trying to find a
specific product.
A good place for online 3M 233 tape, cheap rolls, cheap shipping
you might have to do mm-inch conversions though.
http://www.shop3m.com/3m-scotch-performance-masking-tape-233-plus-lrw0pb42l5.html
http://storeapps.net/search/3MeStore/?keyword=233
I wanted to say that I really appreciate all the replies. They have been very helpful. As Jimthegenius pointed out, the Type 218 tape did not go around curves very well. Luckily, we have a store nearby called Finish Master that sells automotive paint products. Most of these tapes 218, 233, 233+, etc are in the 3M automotive line. Finish Masters has a pretty good selection. I’ll be picking up some 233+ later today. I have been making good progress with the painting despite my tape tribulations. I’ll mention a technique that I am using to minimize bleed unders. The idea is to seal the tape edge. When I have done this with house walls where the paint is opaque, the ides is to paint a little too far with the lighter color, lay the tape down, paint the edge of the tape with the light color that is also under the tape. That seals the tape. Then you paint over the tape edge with the new darker color. This eliminates almost all bleed unders. The problem with surboards is that we use thinned paints that are partially transparent so you can’t paint past the tape edge with the lighter color. I figured I needed something clear to seal the tape edge. I tried the Future stuff but it was a little too thin; not ebough polymer to seal the edge. So I went to my local Micheals and bought some Liquitex Matt Medium. This worked well. The only issue is that if you look closely, the paint is a tad lighter where there is the matt medium under it. So I tried to just stay close to the tape edge. I hope other people find this useful. I’ll post some pictures of how things are coming out.