Epoxy Resin Tips
by: Greg Loehr
Below I’m writing some tips on making our stuff easier to use. If you take your time, epoxy is actually easier to laminate than polyester, uses much less material and eliminates harmful chemicals in the factory.
-
Mix ratio must be adhered to. Deviation from the mix ratio will keep the resin from attaining a full cure. Also, the material must be THOROUGHLY mixed. If not there can be soft spots. We use metered buckets (I’m sending you one which we get at the local hardware store) to assure proper mix. We use large paint stir sticks (like the ones hardware stores give you to stir paint). All our resins are 2 to 1 mix ratio by volume. The metered buckets work unreal, actually better than pumps and we laminate right out of those buckets.
-
Additive F. We use it in every batch we shoot, including laminates. It eliminates blush, which is the biggest problem in building epoxy boards. It only takes 1cc per ounce of hardener in the mix. We put it in after pouring the resin and hardener into the bucket and then mix them all at once. It makes the resin a bit cloudy but clears out when the resin cures.
-
When laminating, the first thing to do is to pour all the resin out and spread it over the glass. You then wet the rails and tuck them. This gives the resin time to soak into the cloth on the flats. Polyester must be pushed through the cloth. Epoxy just soaks in and it does that in its own good time. It can’t and shouldn’t be forced. Additive F actually helps with this quite a bit. After it soaks in, squeegee out any air and remove any excess. We use plastic, “spreader,” type squeegees. We’ve found that they move epoxy better than rubber squeegees do. They take a couple boards to get wired but after the initial learning curve, laminating is much easier.
-
We use VERY little resin. Below is an example of our use levels for different size boards. As there is no “gel” time, any resin left over can be used on the next board. If you run short, you can easily mix up additional resin to finish with. Usually we just work out of one bucket and simply keep mixing more material as needed. It isn’t the same, “this bucket for this board,” as polyester.
These are estimates for total mixed material.
6’ and under - 9 -12 oz. bottom 12-15oz. deck
7’ and under - 12 -15oz bottom 15-18 oz. deck
8’ and under - 18 - 21 oz bottom 21- 24 oz. deck
9’ and under - 24 - 27 oz bottom 27- 33 oz deck
Hot coats run just a bit more than an ounce per foot. For instance, a 6’ board would take about 7 oz. per side. Longboards, 9’, take about 12-15 oz. per side. If you’re glossing use a bit less than a hot coat.
We use 3" disposable white bristle brushes for hot coating. We don’t clean them. We use them for one batch and pitch em. Not only do we feel that their not worth cleaning but we’ve also had problems in the past with contamination from cleaned brushes which manifested itself in bad hot coats. New brushes always make for clean hot coats.
- Do not use acetone for clean up and never let contaminated acetone touch the skin. Any toxicity problems we’ve seen in the past always included contaminated acetone. Not only that but acetone doesn’t work that well with epoxy anyway. Leaves everything sticky. For your hands use disposable vinyl gloves. Clean gloves between boards with scrap fiberglass. I usually cut scrap and pile it neatly on the table so I have plenty ready. Clean your squeegee with scrap glass. Anytime the squeegee gets slick I just wipe it and my gloves down. When the gloves get funky, peel em off and put on a new pair. 10 cents a pair is cheaper than acetone. With so little resin being used very little goes anywhere except on the board so things tend to stay much cleaner. We don’t ever get more than a drop or two on us. If you do get some on you, use Go-Jo or Fast Orange or some other waterless cleaner with water to get it off. These clean epoxy more effectively and are much safer to use than acetone.
Different Resins & Hardeners
Mixing hardeners for custom applications is one of the reasons we made everything 2 to 1.
With fast, you have a 25 min pot life, slow 50 min and extra slow 200 min. Slow has 4-6 hours flip time; fast has 2-3 hours flip time.
Mixing different hardeners together will give you other results and there isn’t any algebra necessary.
Additive F
First, as I’ve stated earlier Additive F is a miracle breakthrough in the production of epoxy surfboards. It does so many things it’s unbelievable.
In laminating, it helps wet the cloth eliminates most air bubbles, especially around wings and boxes, reduces the amount of resin needed, and most of all eliminates blush. Blush is what causes the banana peel effect you were referring to. In hot coats it eliminates blush, fish eyes, and other surface blemishes and increases Barcol hardness. This increase in Barcol makes the board sand easy and improves the bond and strength between layers.
It also doesn’t interfere with recoating as wax solution in polyester does. That means no sanding between layers. One of the things I’ve tried to relay on this site is that epoxy boards have become easier to make (and safer as well) than polyester boards. Somehow I don’t think that has gotten through.
Additive F reduces resin use by about 20% in laminates.
How much?:
1cc per ounce of hardener = Laminations
2cc per ounce or hardener = Hot/Gloss Coats
Laminating Tips
Epoxy doesn’t need to be pushed into the fabric. If you do this it will get frothy. [GO SLOW].
The first thing to do after mixing is to pour all the resin on the board and spread it around so the entire surface is covered.
The first pass is merely spreading the resin out over the cloth leaving it very wet. Then let it soak. Move the resin from the middle towards the ends. Don’t push towards the middle. That way you won’t rake the glass. This is the really hard part to explain to people that are used to polyester. Letting the resin soak in instead of pushing.
Then wet your laps by pulling resin off the flats onto the lap. This gives the resin time to soak into the flats. Also, use a stiff squeegee that moves the resin more effectively. I use one of those plastic spreaders, the yellow ones. After you wet and tuck the laps, the resin should have sufficiently soaked into the flats with no elbow grease. Now simply remove the excess while flattening the fabric and clean your laps. It’s that simple. Also by pouring all the resin out immediately you reduce exotherm and lengthen work time. Using the above technique I laminated a 12 foot board with a 3 layer 6 oz deck the other day with our new fast hardener in 85º with time to spare.
Hot Coat Tips
Hotcoating/Gloss Coats:
With RR epoxy you double the amount of additive F when hotcoating or glossing, they are the same mix. For glossing/hotcoating you add 2cc of F for every ounce of hardener used. When you laminate you just use 1cc per oz. So , yes…just another layer…with double the F…
There are some simple rules to glossing:
-
Everything must be clean. That’s the board, the room, the brush, the bucket and everything else that might come in contact with the resin. Contamination will surely ruin your gloss coat.
-
I usually sand to 100 for glossing. I’ve seen others go to as far as 220 but I’ve never seen the advantage to the extra work. 100 is just fine.
-
You’ll never get a good gloss using a squeegee, you have to use a brush. It takes a certain amount of resin for it to be able to “flow out”. Using too little and the resin can’t move and self level. This does add a bit more weight than getting it really thin but it’s the only way to get that show room finish. If you don’t want the extra weight then go for a sanded finish.
-
With Additive F you can polish RR epoxy. In fact it polishes just about like polyester. Without Additive F epoxy doesn’t polish well at all.
-
When glossing with epoxy double the amount of Additive F. This will give you better flow and your gloss will come out flatter.
As for urethane finishing, this takes really good equipment and a VERY clean spray booth with a constant flow of fresh air. Most of us aren’t set up to do this reasonably. I’ve done a good bit of this and it’s a real professional type of effort to even attempt it. As much as I did, I never had the equipment to get the consistent results I wanted. This is also VERY toxic.
The dry spots on the rails are probably from oil in your hands. All hands have a certain amount of oil. Wiping the board down with denatured alcohol will help remove this. By the way, denatured alcohol is ethanol with 5% wood alcohol which makes it poison. They put a small amount in so people can’t drink it since ethanol (grain alcohol) is what is in alcoholic beverages.
Temperature:
Keeping a small room between 60º and 85º isn’t that difficult and gives consistent quality results.
The new fast hardener is fine above 50º. Additive F will solve many climate problems as well.
At less than 70º time is usually not an issue. Fast hardener has plenty of work time and you can still flip it in less than 5 hours. Slower curing agents like our slow or the surf source resin doesn’t allow you to flip in less than 12 hours, or even more, in cooler temps. Also when the resin doesn’t kick in a reasonable amount of time, bad things happen. Again Additive F eliminates these problems and a faster curing agent always gets better results in cool temps.
Keep Additive F warm to keep the solids in solution.
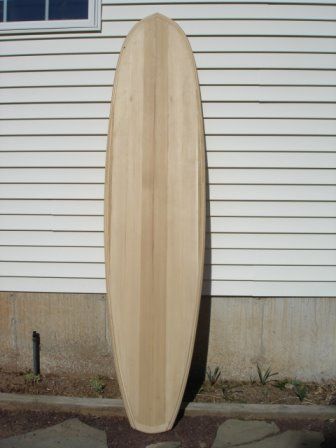
Epoxy hot coat disaster
I’ve made a major blunder whilst hot coating the deck of my first timber hollow board. I’m using epoxy. I brushed it on to the deck and it looked ok, but an hour later it had gone all pitted and wavy. It hasn’t delaminated, but there are areas which are still sticky (toffee like) even after 4 days. …Gray
Re: Epoxy hot coat disaster
I’m sure that there is an easier way, but I’ll pass on my disaster correction. I used a hair dryer and a scraper. After I got most of the non set up epoxy off, I went through a BUNCH of sand paper… Jeff Wells
Re: Epoxy hot coat disaster
Jeff has it exactly right. Always be sure to THOROUGHLY mix epoxy. It is not a catalytic reaction like polyester so each part (resin and hardener) has molecules that must react with the other part. It’s called an addition reaction. If they don’t get together they won’t kick. Thorough mixing is the solution and an easy one at that. We use big paint stir sticks, they do a better job than tongue depressors. One good thing about having this problem…you won’t ever do it again…. Greg Loehr
Greg Loehr
e-mail:
Resin Research
131 Tomahawk Dr.
Indian Harbour Beach, Fl. 32937
Ph. 321-779-2369
Resin Research
4231 S. Fremont Av.
Tucson, Az. 85714-1628
Ph. 321-223-5276