Hey Guys,
I just installed my future fin boxes and am about to lam the board now. I’m not sure what the best way to go about glassing over them is. Any suggestions?
Hey Guys,
I just installed my future fin boxes and am about to lam the board now. I’m not sure what the best way to go about glassing over them is. Any suggestions?
I have never used futures. I use fins unlimited and probox. One time I used fcs. But I always glass over my fin boxes. I just make sure to mask off any slots and screws, then glass. I cut the glass later - its easiest when the resin starts to gel.
There are several ways to do those boxes. We will sometimes slice the wet cloth right along the edge of the tape protecting the slot. Another thing to look for is “tenting.” As with any good glass job, you will find yourself pulling the lamination tight, like a drum head. But this tension causes the wet cloth around the fin box lump to raise and produce very distracting bubbles. Ignore. Pull your glass job nice and tight, then AFTER you are finished, go back and “sag” the area around the fin box(es) and dribble resin to keep the areas nice and wet. Be warned, when you use your flat palms to sag out the glass job, your nearby rail laps will wrinkle, so go back and check.
BUT, when you pull the laps tight, be sure you don’t tent the fin boxes…
I think you see the dilemma, it will take you a couple cycles of sneaking up and letting the cloth get trained to what you want it to do. Just do not let the bubble/tenting distract you, get your glass work done, then finally go back and adjust, and “baby sit” until completion.
My Laminator is so good, that he justs seems to touch the areas a tiny bit, sagging them just enough and he moves on. This comes in time, I understand your situation as you are going into a lot of unknowns and kicking resin is a little unforgiving when it comes to “WAIT!!!” or “Just a minute…”
Another way is to pre baste the boxes-
Roll back your cloth so the fin box(es) are exposed, mix a little batch of lam resin and get the showing surfaces of the boxes wet, but NOT gloppy. Wait a little while until the resin gets tacky, but not hardened, like glue. Now roll your cloth flat and as you smooth out the cloth by hand, push the cloth into the nooks and crannies and glass the board as normal.
I like this gluing method better than spray adhesive since the gluing effect in this case seems to get stronger as the “new” resin hits the work. Also the sprays tend to get overused, which can result in contamination and lower quality of finished work…
HTH,
George
Futures has a decent install video here
http://www.futuresfins.com/media.php?medtype=Install
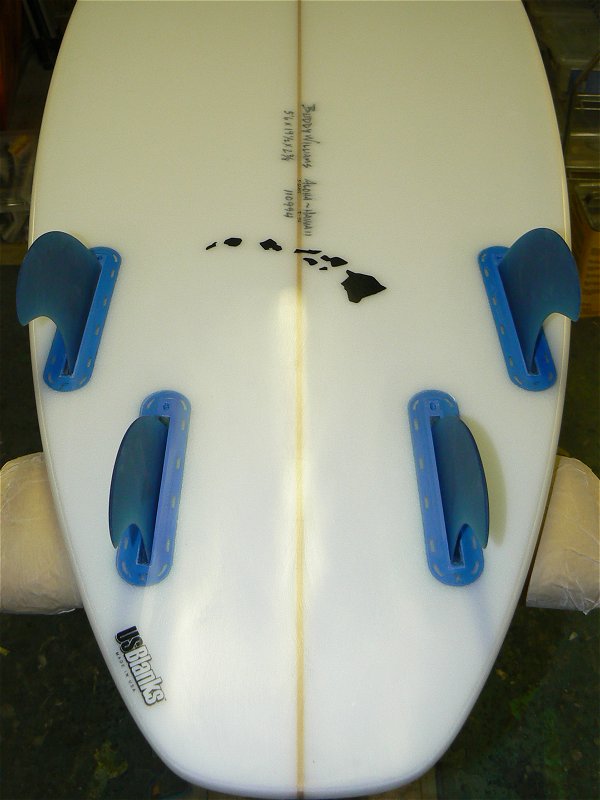
Here’s one a did recently - 1/4" 3M 233 tape, pre cut football patches
Do you want idiot proof with no baby sitting? I use spray adhesive airtac 2, which is a clear spray glue. Spray on a clean rag and dab your taped off boxes with the glue. Let dry for a minute or two. Put fiberglass patches over box and press down with your fingers conforming the fiberglass patch to the box. Now it will not move. I now will either wet out the patch and let set up past tacky and then glass the whole bottom or just go right to glassing the bottom over the dry patches.
Filler coat when bottom is just past tacky. Finsh your deck when appropriate, Sand fin boxes flat to bottom and retape and finish with final coat of epoxy.
They will look as nice as Bud has them.
Everything those guys guy said above and make sure you put the extra cloth patches over every box. Cut like a football with a good few inches of overlap. The time I forgot to add the extra cloth patches on a single 4oz bottom I got cracks radiating out horozontaly from the top and botttom of the boxs from the fin stress of turning while surfing. I had to go back and add a tail patch.
Bb30, I’m gonna try that.
Surfll13, if u have an extra piece of foam try making a few practice cuts first to get your depth right. It can get tricky if you have concave or v’s out the back. Bouble’s are another sticky spot but with practice u will figure out how to work them out, usually less is more.
Yaar43,
You need to set your depth with how far you put the router bit in your laminating router. You need a 1/2" wide by 1" long straight bit. Usually it comes with the install kit.
Put your your bit in with aprox 1/2" shaft remaing out of the collet(sp?).
Put router in deep portion of futures donut
Hold upward with router bit facing the sky
Place jug on top of the donut
Now put 3/4" deep futures bow on top of jig to see if the exposed bit is just barely higher than the futures box depth.
Adjust as needed to acheive this.
Tighten collet and recheck adjustment.
Now you will NEVER need to readjust depth ever until you change your bit in a few years.
You always leave your router adjustment clamp wide open and let the router do its thing.
The spacers that come with the futures donut for the jug allows you to go higher with the 1/2" center box when applicable.
I have never had problems even with complex bottoms. I no longer use the foam height wedges included with the install kit. I always set my desired cant with dummy fins when glassing them in.
Also, I personally add milled fibers in my resin to thicken it up when placing the fin boxes.
Watch the video Bud suggests and develope your own routine.
aloha,
Charlie
I was lucky to have a glasser let me sit in and ask questions while he lammed a board. You’d be surprised what you can learn by watching videos of a pro glassing. Youtube has a bunch. There was even a pretty cool video of bambam808 doing a board with Futures and epoxy here on sways.
The glass patches over the boxes are pretty mandatory especially for 4 oz. bottoms and larger riders. The rear corner of the box where it is closest to the rail can be a problem spot. Got to make sure the patch covers the box and the corner.
All of the above is so true, especially the tenting and pulling the glass tight tip.
I have a few tricks you can try, but ultimately you got to work out what works best for you.
If the box install is fresh and the lam resin is still tacky I’ll run my finger around the box after I lay out the cloth. You can get at least the patch layer to stick tight to the box. Nothing overt just a quick run around the box with one finger will do the trick, kind of a poor mans spray adhesive.
On the first pour of the resin I try to take a fresh pass of extra clean resin, (no froth or bubbles), with the squeege and flood the box. I just let it sit there and soak in as I push the resin around the rest of the board. Then I go back and use the edge of the squeege and tease the box edge, just a few passes, super gentle. If the resin is fresh and thin you can get lucky sometimes and get all the air out.
Pull all the extra resin away from the boxes, lam the board tight and be carefull to not tent it up as plusone said. Once all the laps are tight and every thing is all good I’ll go back with some fresh clean resin and dab it over the bubbles. The clean resin will show the bubbles and I use a cheap hardware store dental pick to tease them out. A squeege tip, fingers or a needle works but the cheap little two sided pick is my fixit tool. It sits stuck in a cutoff piece of foam next to my lam stand.
The very last thing I do is that little corner of the box on side fins closest to the rail gets pushed flat. Sometimes it bunches up even without bubbles and a tight lap then gets sanded into causing a weak spot. As the resin starts to kick it is easier to make it stay flat and not cause another round of lifted glass and bubbles.
Hey DMP,
Try my way with a level board where you are putting the box patches on and never worry about any of the steps you mention. No baby sitting pre glass boxes/vents or leash plugs again.
I saw that the Fins Unlimited guys replaced the wingnut on the router collar with a regular hex nut, so it doesn’t come loose. They also marked the router at the correct distance with a sharpie, just in case. I’m going to do the same with mine.
I’ve used super 77 to tack the patches down and it really helps. Its just when I pull my laps tight that the tenting (great term plusone!) occurson the outer layer. For sure it is easier to have an air bubble only under one layer of cloth instead of two.
I can get a bubble free lam about 1/3 to 1/2 the time now if I flood the box and make sure all the air is out before I pull the lap.
I’ve also been paying closer attention to the timing. You can catch the resin just at the right stage that it causes the cloth to lay down and stick without popping back up and pulling air into a void by the box edge.
I can almost do the dance with rhythm that I’ve seen pro laminators do. Just jam, focus, relax, rip through the steps. Then other times it’s like a slow moving train wreck, bugs, hair, stringers blowing air, strings, bubbles, geckos crapping on the lam, you know all the fun stuff.