Hello + First Board (wooden)

The second cross ventilation vent is good piece of mind, for me  I made sure my interior of the latest build was well sealed before attaching the deck panel.  There’s too much work involved to allow it to get water damaged from the inside out. and if there is only one vent in the nose, it seems downright impossible to get all the moisture out of the tail.


I never got the 1/4-20 brass grub screw for my rear brass plug, I just cut some stainless, then cut a slot in it for a flathead screwdriver and screw it to just below the surface of the glassed over vent. I seal it with some Vibratite v3 thread locking compound which claims to be waterproof and reuseable.  I also smeared a bit of ‘Amazing goop’ over it, as I found this stuff adheres well, but can also be removed in one piece cleanly with some chisel tipped tweezers finding an edge and lifting.  I’ve only removed the rear vent once just to make sure it was not stuck.  Now it is covered with wax just in case my back foot stries to slip off the very end, again.  

I have a method to pull air through the board with a small computer fan forming a slight vaccuum. I put the nose vent as far forward as I can for maximum drainage, should it get wet inside. I’m thinking a regular purge when we get hot dry desert winds would be a good thing, though I’ve yet to make the effort, with a fan and cross ventilation anyway.  I always open teh thumbscrew vent in teh water  after 10 to 15 minutes to allow it to suck in more air and perhaps again a bit later if the board was pretty hot entering cold water.

  No doubt some moisture gets inside from this process, not to mention condensation.


I don’t use wood glue, only epoxy.  I’ve rarely had good luck with PU glue, and I dont believe either titebond or PU glues really bonds very  with the epoxy saturating the fiberglass cloth, though thin pinlines of glue should not really make much difference. I still prefer the exterior cloth to adhere well to the joints. Just a personal preference based on experience with non surfboard related projects.  If it has got to endure, it gets epoxied, despite the extra work and cost involved.


I’ve used gorilla glue on a few outside projects and had it fail. I trust titebond way more especially if the joints are good and tight…  I think while titebond 1 says it is not waterproof it is more resistant to breaking down from stains, and other products, compared to titebond 2 or 3. Not sure though.

How did that go? Is the Open Source file useable for CNC routing or did you need to make adjustments?

How do you wipe the superglue off wood without getting something stuck to it?

Haha yes the idea seemed stupid when I had it but I just grabbed the superglue and it worked. You just put a lot of it and it dries on the cloth first, which then become kinda stiff and doesn’t adhere anymore. If the cloth sticks at one place you’ll get the threads pattern but it is easy to sand. A friend of mine started flipping out for an asian longboard tour competition he had in 3 days and asked for a last minute fin. I didn’t want to get into epoxy, because I still suck at it, and tubercles are tricky to sand, so I just tried this. I should mention that you need the fluid type of superglue, not the gel kind, so it just flushes into the pores very quickly and waterproofs the wood deep. It’s just a quick lazy fix but it is the fastest finish I’ve ever done, 5 minutes and you can hit the water with it !

It worked better than I thought, but I still have some parts that need to be tweaked. Only things I changed were the size and fin base. Tried making a tab that could be glassed into a fin base instead of the entire fin base being wood. Honestly, the hardest part was getting the stl oriented correctly in the cam software. If I remember the original file was diagonal to fit on your 3d print bed. My cam didn’t like that so I had to manually try to rotate it in two axis and get it flat, or at least as flat as I could. I’m still trying to figure out how to best do fin bases, but the fin came out very nice. At least until my dog decided it was a good chew toy. I am planning on making a much nicer one, probably out of filipino mahogany because I have a lot of scraps of it. One of these days I’ll take pictures of my end products and processes.

As far as the superglue, you need to buy “special” superglue. Its commonly called CA glue and comes in various viscosities. The thin works best with wood because it really soaks into the grain. Wood turners have been using it for years to stabilize softer pieces of wood and as a very tough waterproof finish. As long as you keep a decent amount of glue moving around it doesn’t actually harden that quickly. The medium viscosity can give a shine comparable to polyester resin. Paper towels work best for applying it. Once you feel it starting to “catch” or stick pull the paper towel off. Also try to keep it off body parts. Its very difficult to get off and usually pulls off skin with it.

Just curious if you would be willing to share some of the other tubercle fin files? I would love to try the gullwhale version.

I imagined that I would / will use a laminate rather than straight wood for CNC milling the fins.

G10 or similar core (at least 6mm thick) , with nice wood bonded to each side. Might even get away with something much smaller than a square G10 plate.

I suggest use the UTFB file and difference the UTFB from the fin file before recombining the UTFB with a shrunk down fin file. The UTFB is extremely functional.

I know of no other single fin tab system that will likely allow a tight fit in most (except for wrcsixeight’s worn out) fin boxes.

You would need to use some very strong wood to make it out of a single piece, but I think it’s possible.

I have added a post to let people know about the 140.5 degree rotation needed to put the file straight around the z-axis.

For any further posts about this, we should probably continue this elsewhere to avoid hijacking WAO’s beautiful thread.

You guys are obviously welcome to post here if you like. I have had way to much fun reading your posts theses last few years to tell you to go somewhere else.

I’ve not used superglue in many surfboard related tasks yet, but I have used it with fiberglass roving to fix broken plastic items.  I’ve just been using the ‘the original Superglue’ sold at the 99 cent store, two 4 gram bottles.


I’ll rejoin the broken plastic with the superglue, then once It is held together on its own,  I lay the fiberglass or carbon fiber roving across it, or perhaps cut grooves with a cut off wheel to insert the roving into it, then saturate it.

If I really want it to endure I use some tiny drill bits and inside the groove drill some small holes at different angles, to grasp and cling and lock the roving in place.  The thicker the roving amount saturated the longer I let it cure before touching/stressing it.


I take some similar approaches with epoxy and roving when reinforcing fin bases that include cedar, but anywhere a grub screw hits I try to have it press on solid fiberglass, or CF.  CF does not allow the grub to bite as deeply and the fin key feels different once max torque is realized.

  The bottoms of the grub screws can be flattened in order to not chew up the tab’s grub receptacle as much.

I posted up some of my fin pictures and explanations on the 21st century fin thread. Seemed like an appropriate place as cnc for hobbys is still pretty new.

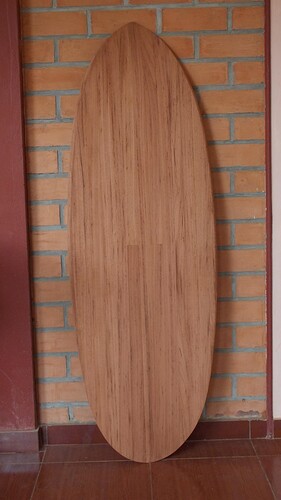
Ok so now it starts to be really fun. Closed the board and doing the final shaping. Most of you guys are sleeping on the other side of the planet right now but I would really appreciate some inputs when you wake up ! 

Pic 1: Cleaning up the bottom

2- Self explanatory picture on how I shape the concave. Is 4.5 mm (3/16") concave at the deepest enough or is it too shy ?

3- Concave progressively going to flat at 2 feet from the nose. Then 15" of flat before starting the vee slowly over the last 2 feet of the board. Is that even a thing to have a flat between an entry concave and a vee in the tail ? Or single to double concave to vee is better ? When designing the board, early last year I had the possibly whimsical idea that the flat area in the middle, near my front foot would be my “accelerator”. This is coming from my limited surfing experience where I often had the impression that leaning a bit more on my front foot was helping with speed to get past sections.

4- Vee starting 2 feet from the tail. Not properly centered yet, haven’t been working on this part much. I often read about vees, spiral or rolled out? I never got the difference between them, so I have no idea which kind I am doing, or even if it resemble anything.

I will smooth things a bit more today but leave some for tommorow and not rush things.


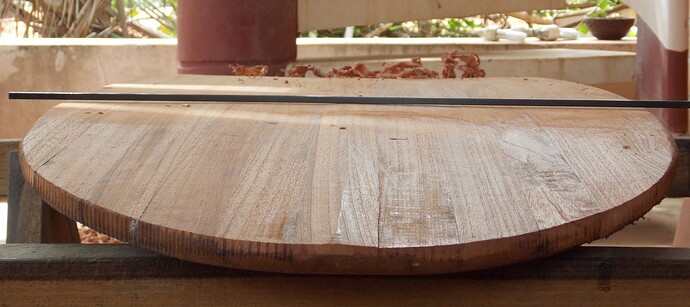
The board is really coming along nicely. Are you using those two bars as winding sticks? I know it’s an old wood working trick, but never seen anyone do it on a surfboard. I can’t comment on the design aspects and bottom contours nearly as well as some people here so I’ll let the pros chime in for that.

Regardless of how it surfs that board is going to turn heads. Keep up the stoke.

Ps not all of us are asleep at this hour.

Yes, they are carbon rods, always straight. Good to see the symetry of the bottom, not there yet in the pics. Also while gliding them along the lenght of the board I get a good view of how the curves progresse. Winding sticks ? I didn’t know these had a name, you learn every day. I shape outdoor so I’ll have to wait for the night to check the curves with a light but this trick plus feeling with the hands gives you a good idea of the surface already. I just wish I really knew what I was doing in terms of actual relationship between curves and board behavior in the water. 


Thanks for the hint! I missed that thread because I thought it was about Hydrofoils. Looks super-interesting.

Winding sticks are an old school hand tools era wood working trick for flattening boards. You place the known flat sticks, the winding sticks, across the board at various points and then look down the length of the board from one end. If the winding sticks are parallel to each other you know the board is flat at those points. If either is tilted and not parallel you have a twist. If there is light under the middle of either stick its cupped. 

I’ve never seen them used by shapers, but I think they would be handy for fixing a twisted blank or squaring up a home made blank.

Sanded it all around today, really coarse. Worked a bit more on the vee and the rails transition from full to tucked to sharp. Finding it tricky because being a newbie surfer I have not seen that many boards close up and there aren’t that many in my area, especially good ones. Doing something that looks like a surfboard from a distance is easy, but now that I find myself with my nose close to the rails I realise that I don’t have a clear mental picture of what it is supposed to look like. Same for the vee, the concave is less worrysome right now. Working from pictures becomes tricky once you get into the finer details.

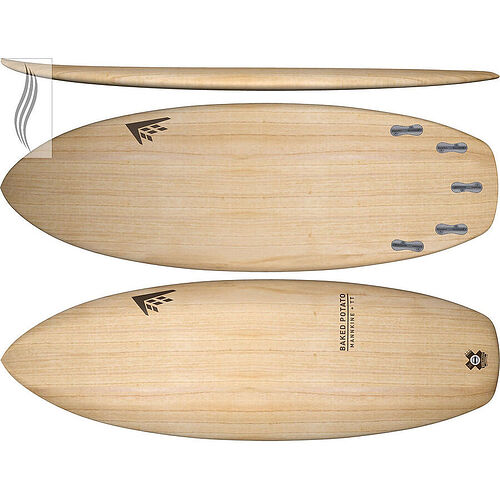
Also finding it too fat in the nose, and the nose rails, not elegant even for a tubber-style board. The baked tatoe is quite fat but it looks good.

I’ll leave it at that until next week-end, finishing the day a little bit pissed :slight_smile:

Edit: fixed some humongous typos.


Not having a clear picture of what you wish to end up with, means stop, put the tools down and walk away, in my experience. 

There’s no powering through it to 'get ‘er done.’  Perhaps those with many dozens+ of boards under there belt can do this sucessfully/acceptably but not a newb to the shaping process, still figuring out their own process.


The grain of the wood makes it harder to see the rail profiles and bottom coutours, making one need to feel them more.


But what helps the most, is proper side lighting, and being able to either move that side light in relation to the board or the board in relation to the side light.  I’ve shaped several HWS without the benefit of proper side lighting, but many were shaped outside without the benefits of such lighting, or even electricity sometimes…

My current workspace is no shaping room, but I rearranged it after completing building the close tolerance blank,  moved the light from ceiling to side, and was very much wishing I had a light for both sides, but was just flipping the board around more often.  This was most easily done by taking it out the door, flipping it around and bringing it back in.  I had another pair of racks outside and would pay the board on it, and walk arond it from all sorts of angles, notice things which I did not like or that I noticed inside but could not out, then back inside to the side light.


I did not have it at the time I shaped my HWS. but more recently I made a lightweight 8’ long  LED strip light, about 1.5 inches wide.  A ‘C’ channel into which I laid a few rows of 12v DC  LED tape/ribbon lights on the bottom,   and was able to measure similar numbers of light on my table as dual 8’ fluorescent lights, at ~1/4 the wattage, and no buzzing or flickering.  Something similar was used on my latest fin.  Side lighting in a dark room, and low angle wedges to hold the fin at a certain angle in relation to the light allowed a precision I never came close to achieving before, a single swipe of sanding block with 400 grit was moving the shadow and revealing so much that a contour gauge was not.


In short I think while one can easy arrive at a complete shape without proper lighting, The result is not nearly  as good as it will be, if it is employed.  With the grain of the wood tricking ones eyes, it is even harder to shape without side lighting.  


Wait until night, try and find a longer thinnner light you can place off to the sides, even if it is just a hooded incandescent light, at or near the same height as the board.  See if your hands can feel what the light/shadows reveals.

If you are going to do a lot more boards, doing it without side lighting in the shaping process is shooting oneself in the foot, in my opinion.  You dont have to make a full on shaping room.  a Narrow LED light ‘wand’ in an otherwise dark room can be as valuable a tool as any sanding block or hand plane.


+1 on stopping when you are frustrated, +1 for sidelights (such a difference learned 2 boards too late…)

WAO, do you have a good feel for where you want the shape and apex of the rails to end up?

Would having some rail templates be useful in your work?

Are you able to reference other boards and/or see designs in 3D CAD?

I am very impressed by the project so far, I do not have the courage to go after so much wookworking.

https://www.swaylocks.com/sites/default/files/rail%20designs.jpg

Thanks for the support wrc68 and jrandy. Had a look at it in the night with a desk lamp. A wand tube light would be perfect, I’ll definitely look into getting/making one. The wood grain can plays funny optical tricks.

I’m going for full rail in the nose, then the apex going progressively down, starting to tuck mid board and sharp where the fins are. As usual, not sure I’m making sense, it could be the Dunning–Kruger syndrome doing the talking. But I think I’ll manage to do what was planned for the most part.

The problem is that there’s a flaw in the CAD design itself, which became apparent to me only at full scale. Now that I know it is there, I see it in the file too. The rails at 6" from the nose to about 15" are too thick and the deck is not as domed there as elsewhere on the board. Somehow this part of a bit more than half a foot is not blending properly, both rails and deck. As I’ve already chambered it I have little room to change it. Deck and bottom are 6 mm (1/4") thick but I’m not worried if I get down to 1/8" in some areas, except where I’ll have my feet most of the time.

As I said I have very little acquaintance with boards and I didn’t see it in the software. I should have submitted the design to this community, I’m sure it would have been detected. Not that the rest of the board is a masterpiece but if this part bothers me then it must be really bad. There is obviously a learning curve in being able to translate what you see in CAD and reality. I will probably use BoardCad next time. Didn’t use it this time because it was acting twitchy on my computer.

I had read a comment in this forum, that stuck with me, about wood boards but I forgot from whom. Somebody had mentioned that they were putting more volume in the tail and nose of wooden boards than they would in a foam board. Because as the board gets thinner, the wood skins stay the same thickness, it is the chambers that reduce. So same ammount of wood but less air than in the center of the board. So the nose and tail are proportionally denser. That made a lot of sense and I decided that I would do that. 

I think I will manage to blend it better. Anyway a board 1/4" thicker than the thickest boards for this length will be stubby. I just need this part to not stand out like it does now. I’m sure it looks weird all over to the master shapers here anyway. Inputs are still appreciated, even if it means pooping all over my design. Be my guests I’m here to learn. :slight_smile:

I know that my first board will look naive to me in a few years but I would like to never have to think that it is garbage. It’s just where I put the bar when I do something for the first time. It is why I went for a small mushy waves design, more likely to succeed than a HPSB fine-tuned for a specific barrel. Also the foil options will make this board always useful as long as it paddles well. With the width, volume and flat rocker I hope it will at least do that !

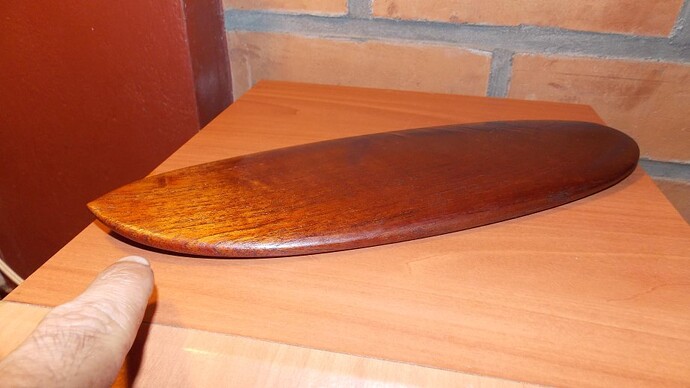
I had made a model at about 1/6 scale before starting and now I see the same thing I don’t like in it as well. Pointing at it in the pic. The rest, my newbie eyes are ok with, pocket longboard go !


That thickness distribution  up the nose rocker is the biggest flaw I find in many of my earlier boards, and when I look at them now, I’m like how did I not see this then???


The mistakes were aided by lack of side lighting and not looking at it from a bunch of different angles/distances, and walking away from it when required, returning with fresh eyes.  Also, its easier to see mistakes when it’s glassed and shiny.


The pic below shows  the very end of my 3 foot long C channel light wand before it was finished.  My 8 foot light wand does not have LEDs on the sides of the C, only 2 rows on the bottom and has a narrower  light output, and an rgb strip in the middle of the warm white leds

  If I were making a dedicated shaping LED light wand,  I would make the edges of the C channel longer and the bottom deeper and perhaps 3 rows of leds, side by side.  This light also has some RBG leds controlled separately, not shown


These are warm white LEDs.  Cool white leds make wood have a greenish unnatural hue, but cool white are  a bit brighter for the same wattage consumed.  One can get 10 meters  of this tape/ribbon light, for about 35$. I control brightness using voltage by a 5 amp  XL4015, or XL4005 based voltage bucker which one can get for under 5$ each, or 5 for ~12$,  at least in the states.  I remove the little blue 10k ohm or 50k ohm trimpot they come with, solder wires to its legs and use a larger fingertwist potentiometer.  The brightness control is not really necessary as an aid for shaping, but my lights are multipurpose.

There are dedicated PWM led dimmers, but in my experience these will make the LEDs whine when dimmed as they are 13khz. The rgb led controllers I bought  has the rgb leds whine at reduced brightness levels of which there are 9.   The XL4015 voltage buckers are 150KHZ, and only drop 0.18v across them when asking for maximum voltage from them.


I’d recommend against trying to use a RGB strip for white light.  Very bizarre effects when all three colors combine to make white.  RGB+W strips exist, no experience with them though.  Some of these are IP68 rated with the ribbon encased in clear silicone


I think you should finish it, surf it, and build another fixing the mistakes you made.

My first board was 6 foot and weighed 45lbs. It surfed exactly twice before filling with water. I kept it as a testament to how much I’ve learned. 

Just keep up the stoke. You already have a one of a kind board, enjoy it!

Interesting, could this be a common newbie mistake ? Are you still surfing these boards and how does this extra nose volume affect the ride ? 

In my my case it is mostly in the rails. After looking at it again I think I should have some room to reduce it somewhat. Can’t wait for the week-end. 

Thanks for the light advice but electricity doesn’t like me and it is mutual. I could not follow you. I think I would ask a local electrician to put one together for me. I can do the casing.

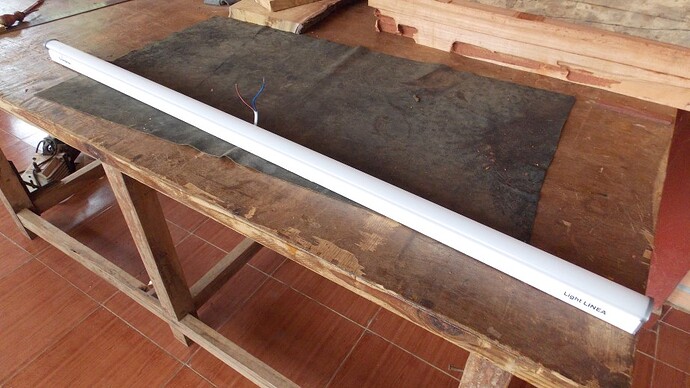
Stupid question may be : is it possible or safe to make a wand out of a regular tube light ? I have some almost 4 feet, small diameter tubes lying around already encased in plastic. Very light. Would it be safe to just use it like that ? I could add an insulated handle may be.