Hey all. When I get information off this forum that helps me in what I’m doing i like to give back. I got the idea that I would make a water housing for one of my cameras (Nikon d100). I ended up finding a couple threads on it here that helped me.
I built mine from a mold made from cardboard lined with packing tape. In the corners I put modeling clay and filleted it with a quarter (25c piece) to give the glass something to wrap onto smoothly. I had some resin research epoxy sitting around going bad since 2009. The layup was done a white pigment on the outside with some 4oz offcuts then backed with enough layers of 1oz mat to bring it to about 3/16 thickness.
I then layed up the flange with mat to about 3/8 of an inch. i roughed out the flange and attached the two with resin and chopped fiber then ran a fillet of roven around the outside. I made a jig for the router and the 1/4 inch o-ring for the front seal. after that the outside and inside of the flange was trimmed and rounded and the front plexi piece was cut to fit 3/8. For the port I used a piece of 4 1/2 diameter plexi tube and the front element is a piece of 1/4 all of that was glued with weld-on #16 and trimmed with the router and a trim bit. I installed a little shelf on the inside for the camera to be attached securly to. The handles were based off of a design by Photographic Support Systems out of Carlsbad, CA.The handles are wrapped with a bicycle innertube and taped at the ends with black electrical tape. The control was a gland from Ikelite which you can order from B&H Photo (http://www.bhphotovideo.com/c/product/24519-REG/Ikelite_9254_Control_Gland.html). The shaft that passes through is a piece of 1/4 inch brass rod bent in an L shape. Two stainless cotter pins keep it from moving in and out and a 3" bent machine screw passes through the end to press the shutter on the inside. I put a recess in the back to install a window but I’ve found I don’t really need/want it right now. Plus its just another place for the housing to leak. Maybe in the future I’ll install it.
Things I would change:
Probably use a smaller o ring
Reduce weight by composite construction (anyone know where to get that aircore stuff?
Less bolts for the front port
Use cast acrylic for the front of the port. The regular Plexiglas is clear but not optically clear.
I made the housing a little oversize for the camera as I didn’t want to cut it too close. I think next time ill try to make it more fitted.
Eliminate the shelf for the camera to bolt to and use foam on the inside to secure the camera.
I think for a first housing the front loading design gives you a lot of flexablity as far as changing/making new ports and using different lenses. With a back loader like aquatec you would have to use some sort of threaded front section to change ports. If I didnt already have the Nikon, Canon’s 20d would be a great first water camera. The bodys are realativly cheap, it shoots 5fps and there is a back focus control.
I have a few shots but they were usually taken after the work for that step was completed.
This was after the box was layed up to the right thickness
After the flange was layed up and glued to the box in the back. The joint was glued with a mix of resin, fumed silica, and milled fiber. On the backside of the joint i used a little bit of 4oz cloth to tie the two together and some roven strands to make a nice fillet.
After the flange was trimmed and the groove routed for the oring
Shortly after constructing the front port
Hope that helps a little.
Honolulu, I tested the housing with no camera in the pool quite a bit. I also put a mix of bakingsoda and vinegar in there and submerged that to check for leaks. The biggest concern I have is not the oring seal but the front port getting knocked off. I gave it a good couple karate chops and it seems pretty sturdy. The weld-on works by chemically bonding the acrylic, much like PVC glue.
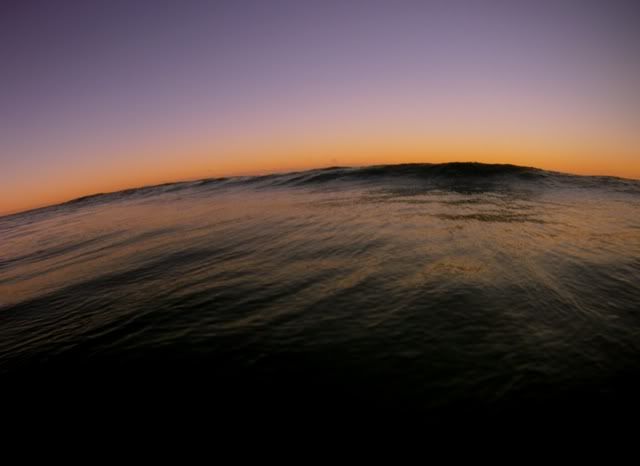
Not a surf shot, one of my favorite places to surf though. Its been DEAD flat here. Emily should be changing that pretty soon though.
Greenough acutually was the one that inspired me to do this after waching the movie Crystal Voyager. Any chance the article you were reading is on the web?
thanks very much mate , those photos show it well !!
umm, i dunno ...it's nearly a 40 year old issue??
but i could possibly old school photocopy and 'snail mail ' it to you , if you like ?
the whole issue was about photography , and my brother Simon ['lazarus' here on sways] got a two page spread of his work , with a written [by him] article 'chipper's tips' [he worked for Tracks for a while in the 1970s]
Just a few updates. No leaks, and got slammed pretty hard, pinned on the ground with the camera between me and the sand. A few scratches on the front of the port but no leaks at all.
love the different water colour you guys have there . and the last shot is a cracker !
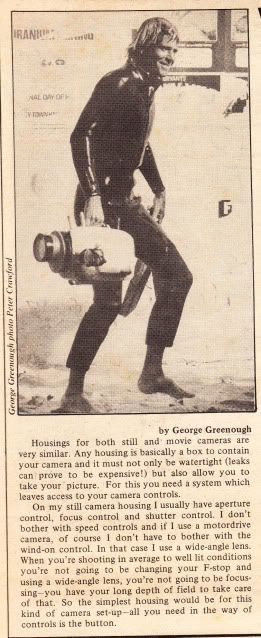
hey , finally I got it together , located the 1978 tracks with the george greenough article on water housings , and today I have scanned it for you .
enjoy !
and please keep the water shots coming eh ?
[as an aside ... I christened my brother Simon's 'Go Pro' , today . VERY generous of him to give it to me ! [he won a new one , along with ALL the acccessories they make , in a go-pro 'photo of the day' contest , a while back ...yeehaaawww !!]
5.30am.....
]
so , anyway ...
.... here is the article , Smov !!
enjoy !
cheers
ben chipper
west oz
[also in the same issue [august 1978 Tracks] was an article by Simon , called " chipper's tips]
Trevorn,
Looks good. Care to show the inside? How do you keep the camera from moving around? Also, what do you use to press the shutter?
surfthis,
Thanks!
chippy,
That morning shot is pretty killer. Not too sharky in the morning? The water here varies depending on the season and swell (I’m pretty sure it does that everywhere right?). When the water cools down and we got good groundswells in the winter it turns crystal clear and blue green sometimes.Hopefully ill be getting a fisheye and making a new dome port for the housing. Not much different than the go pro as far as the style of the image goes. The only real advantages are that the shutter click is instantaneous and the image quality can be better. Thanks for throwing that article up too!
Ive been considering building another housing for my D200 but this time it would be a rear-loading design with pistol grip and rear controls too. Probably wont happen for the next 6 months but if I do start on it I’ll post some things up.
I used hard foam pieces to keep the camera in place. For the shutter I used a rubber plumbing end cap sanded down slightly for flex, then I made this spring loaded shaft mechanism that after the shutter is pressed springs back in to place. It was a massive pain in the ass. You can’t use those wired remote cables with the D50 or else I would have rigged up some kind of pistol grip trigger.
The lens housing is a threaded PVC joint I fed in through the hole I made from the inside so the edge butted up against the inside of the hole, then I screwed on outer piece and glued it at the same time, it’s pretty soild. I sandwiched a piece of lexan in between the threaded piece and the inner lip of the piece that screws on as well.