I’m a beginner builder, done one HWS 6 years ago in a workshop 9’3" noserider, and currently building my second board a 6’3" 21-1/2" 2-3/4" mini Simmons.
I rented a small space in Munich, Germany and building as much with hand tools as possible. I don’t like the noise and hand tools are kind of meditation but of course slow but I don’t mind that. Half is remembering from the workshop, other half is experimenting and reading up here on sways.
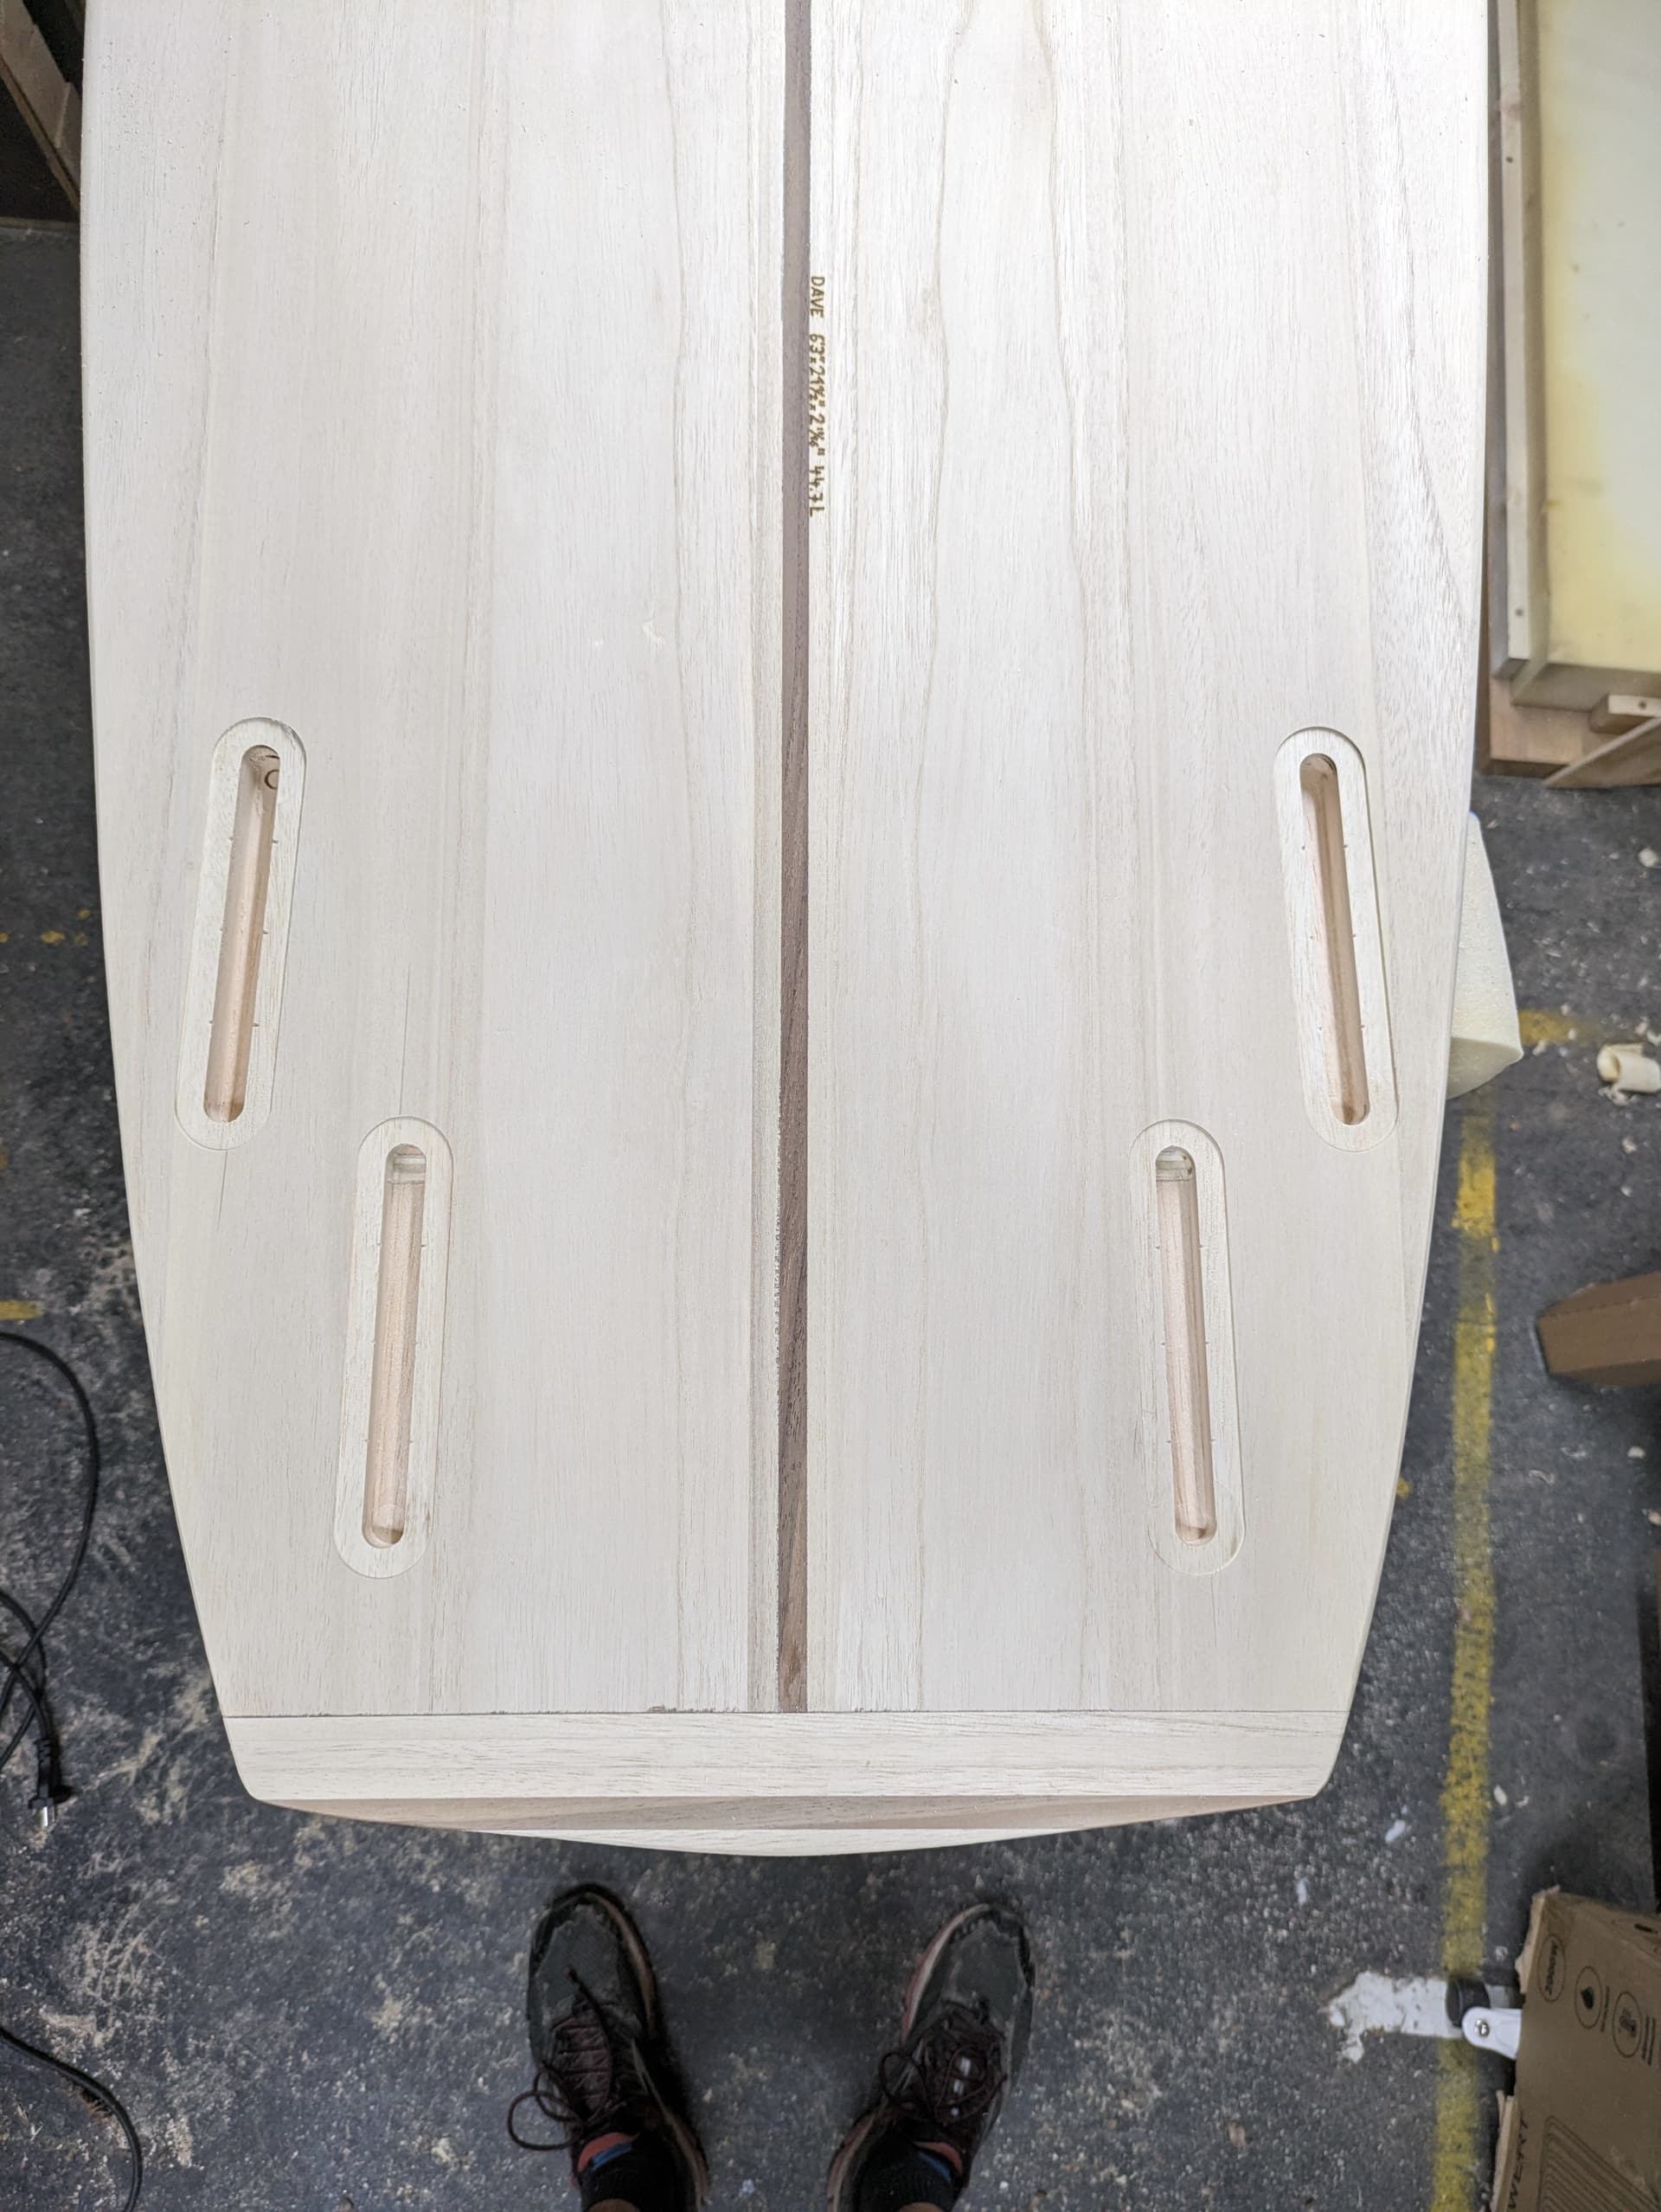
The frame is 10mm birch plywood, deck is 6mm Paulownia with an inlayed stringer of American walnut.
Rails are beats and cove method.
The deck is from 10cm wide 25mm thick 2.5m long Paulownia boards that I ripped with a Japan rip cut saw and then plained down to thickness so I have a book matched grain
The frame is done with a shaper origin (hand hold CNC router) so I have a reliable base to build on.
The rails are done currently with a router with a jig and a beads and cove bit but I want to do that in the future with a combination plane. The one I want is out of stock since over a year everywhere so noisy scary tool has to suffice currently.
Latest challenge was to stream bend the starter strips around the nose. I stole the egg cocker/steamer (not sure if that is a German only gadget or not) out of our kitchen. That worked amazingly great. Steady supply of stream. Since you usually only need a small part of the strip steamed it usually is done with one or two rounds.
Progress so far is deck and bottom prepared, frame assembled and glued to the bottom. Chine strip and Starter strip glued in and tail and nose blocking installed. Fin boxes are also marked (will be a quat setup) and next step is fin blocking. Blocking is also Paulownia off cuts except the fin boxes. They will be balsa.
Last months I was busy with another project and work so progress was quite slow. Now I got some time off and will continue end of October.
thanks!
For that board I used a already finished template but I want to get into doing my own shapes and templates for the next boards.
Still undecided what Software I will use. I am currently looking into webshapingbay, looks quite intuitive and it is designed for HWS so looks promising and the licence is not too expensive for a one man business.
But still a long way to learn the software and get into designing the shapes as well
Quick update regarding the build.
It’s progressing quite well but not as fast as I would like.
I built up the rails one by one and used C clamps to apply pressure. That did not work as good as expected so some rails shifted somehow. For the last couple of rails I used the tape method. Old and reliable.
After installing nose, tail, fin and vent blocking, I started to cut the landings. Was quite nervous at the beginning but I took it slow and the landings developed them selfs and it was not as hard as feared.
The blue tape was an amazing help to see the landings even better. With the high contrast you can see even small bits and pieces that still need to be fixed.
I sealed the inside with some cheap clear coat for some water protection.
Today I cut the top to size, applied a lot of glue and clapped down the top deck to the board.
Next days I can finally start shaping. Looking really forward to it!
That board is looking beautiful, well done!!! The glass looks like a little contamination. Dust possibly, oils coming out of timber. Epoxy can be very picky!
Stunning work! Congratulations. Looking forward to seeing the build of the Retro Fish. I’m going down that road soon too so will be watching with interest. I’m going EPS though, would love to (or should that be wood love to!!!) build something like yours but don’t have the workshop space just yet. Well done, fantastic work … hope you got some waves on the lake
after hot coat of the fish if think I finally found out what caused the “hail damage”.
for the Mini Simmons I hat do heat up the glassing room since it was too cold. To avoid air circulation and therefore some dust in the air, I turned the heater off. That caused a drop down of 2-4°C in the room after I applied the hot coat.
I am not 100% sure but I would assume now that this caused the dimples.
For the Fish, room was hot enough, no heating required and the temperature was stable until it was fully cured. Hot coat looks fantastic now, both sides.
Working on the next board already. 7’0"mini Malibu with performance elements. Almost done already with the shaping but winter is already here in Germany so need to see if I can glass. Also new epoxy since the RR supplier in Europe has troubles right now