Input on reverse lam/layup/glassing process.

Less lively in the sense that the lams are being bonded one by one and not a singular cohesive shell, Reverb? If done one after another with UV resin, wouldnt the bond be chemical between layers and not mechanical?


Edit- Got ahead of myself. Less lively how, Reverb? Stiffer rails? less flex? 

…man, you should do the lam as usual not one layer then other layer, etc

stiff rails are good, in fact the rails are the stiff part in the surfboard glassing.


-resin ratio/layers of fibers/density of the foam.

So, too much resin ratio and too much cloth; this is not a PS build where the outer shell have to be rock hard…

All these types of boards look very nice but again not lively in normal or good surf only have “momentum” and glide on small surf, or sometimes if the rider is very good, knows the hip techniques and is big, he can ride it ok in the other type of surf conditions.

You say that you want to go heavy in the glassing schedule due to possible dings etc; however the board will have a not so good resin/fiber ratio and you ll see stress marks in the gloss in the near future; mostly if you surf in normal surf conditions in beach breaks.


Kensurf: I tried to say: thicker not ticker

The lamination is the easy part, just do the 6/6 deck + 6 inlay and 4 overlam free lap on the bottom, however I would overlam with 6 instead and cut lap. The difficult parts will be the full length fabric lamination as it’s  9’6" and also uniform tinting on that much area.  On the fabric, use slightly thinned lam resin and a brush on the blank first, then put on the fabric and brush more over it.  Don’t assume that you can put resin on top of dry fabic and it will penetrate the tight weave.  There’s going to be lots of wrinkles to straighten and fabric movement, so get a helper.  For this step I would recommend UV cure + a tiny amount of catalyst to allow as much time as possible.  On the tinting, much depends on how dark of a color you’re going to use to get uniformity.  Test out a sample on scrap foam to get a feel for the amount of tint needed.  The key to uniformity of color tints is to seal the blank with thinned lam a day ahead, and of course throughly mixing the color.   It’s also a wasteful process, since you’ll need almost 2 quarts for the deck of a 10’ spread heavily to soak the 2 layers. Saturation of the cloth and pulling the excess only when the cloth absolutely cannot absorb more is also key to color uniformity.  Having a helper for the laps on this large of a board is a good idea.  If the tinting is too much work, just spray the blank masked at the bottom lap lines. Use the acrylic craft paint that says “transparent” not a thinned down opaque or it’ll be blotchy.  Hard to tell from a real tint without looking closely at the weave.

verb

when I said thicker, I was refering to 7.5 or 8oz volan being a heavier weave the color will be a deeper shade because the glass and resin combo will be thicker than 6 or 4oz.

volan seems to be very course weave


personaly I would just stick with all 6oz

as someone pointed out 4oz may not make the rail wrap

I always refer to materials that are readily available.


Reverb, I understand ya on the resin/cloth ratios being off… The layer-by-layer approach just seemed interesting since it would minimize the cutlap on the bottom, which I’ve had a hard time in the past hotcoating over and getting flush. Usually have to do a 2nd thinner hotcoat on the bottom to even everything out. Still learning. I did try basting on my last board, but the laps still came out bumpier than I would have liked. 

As far as a heavier glassing schedule, would the gloss still show stress if I did the layers the “normal way”? I couldn’t tell if you meant it would crack doing the layer/layer way or the traditional way.

My priorities at this point are color depth and durability. I don’t want the thing to be made out of concrete, but Im not too concerned with trying to make the thing as light as a performance longboard. Access to different cloth is not a big issue either, since I can just jet on down to FoamEZ, or visit Aloha around the corner. 

So, with color and durability in mind, and assuming I’ll lam the board traditionally (but still reversed to get that inlay effect), does it make more sense to just stick with 6oz to lam with (using 4oz for the inlay) or go heavier with 7.5?


…hello,

I ll put you an example of not so good resin/fiber ratio: resin panels, then gloss; well, that gloss will have stress marks if the board will be used in normal good waves; so too much resin, no matter which way, gloss will have stress marks if the board is long and is used in beach breaks.

You say that you are hunting the cosmetic aspect and not the functionality of the board, so you decide; I only tried to say a fact.

I say again: if you do each layer at once, will be worst for you in all the scenarios, you ll see the nightmare and cry a lot when you sand and sand and again sand to flat all that fiberglass to a decent flat finish.

You have there a long board, a big board, if you put too much fiber glass you not only kill the lively thing of that shape but also with that stiff the % of break the board rise; but still you say that you are hunting the deep, etc; so go ahead and do the learning curve.

In any case, better to use 6 and 4 and not 7.5; as John said previously, you can use Volan finish in weights similar to 2, 4 or 6oz, normally in grams.


Thanks for the clarification reverb, all of that makes total sense. My learning curves have been shortened significantly by consulting sways, but I don’t think I came across very clearly before-

I am NOT going to do the layer by layer approach, as per the advice from you and others in the thread. I have only done deck lams 2 layers at a time since my first board a year ago, so it was interesting to entertain other possibilities, if just for the sake of discussion.

However, I would still like to do the reverse lamination if the separate inlay lam wont mess things up too much. But from what you are saying about the inlay spanning the length of the bottom, that might still be a risky move. 

I certainly don’t want to compromise the surfability in search of cosmetics. When I said my priorities were deeper color and durability earlier, I only meant that I am not super concerned with keeping the board feather lite. Ive just seen boards online and in the shop advertising heavy glassing, deep intense tints and whatnot, and thought that wouldn’t be a bad thing to shoot for myself. 

Regardless, for now I’ll plan to stick to 6 and 4. Jury is still out on the inlay I guess. 

A simple process made complicated with a bunch of wrongheaded backyard “Mumbo-jumbo”.

It is really simple, just turn the board upside down and glass the thing.  Inlay, seperate layers are fine, cutlaps, zip, it all works. Sit down for five minutes and formulate a plan then go after it. 

Great shape Gene....I'm not sure how you keep those curves in control.....so much rocker and hips!

ummm.....so reverse lam is...lam the deck first....ummmm....no problem......hey Gene...got any more photos?

Stingray...................................

Most of the replies here have atleast some merit, but I think Im comfortable with the consensus reached in the first few pages of the thread. I will definitely do the bottom inlay now at 4oz, and wrap that in 6oz. Deck glassed “traditionally”. And thanks for the photo Gene. An example of what I’m trying to acheive, although I’de probably cut the board in half if I had her as my glassing assistant when I go to do the laps. 

Fantastic work as allways Gene!!!


Hamrock

here are a few shots of the Harbour Banana

hope they help

also some measurments you asked for...

hard tail edge starts approx. 23" up

nose thickness at stringer

3" down 15/16"

6"           1. 3/16"

9"           1. 7/16"

12"           1. 11/16

the channel is a V cut , stringer and rail pontoons are about the same thickness


I’ve still got the first calender Gene did.  It’ll be hanging somewhere in my little factory when I get all the sheetrock etc. done.  .  Lowel

Hey guys- figured I would update this thread with the board's final outcome. 

As for the lam process, I pretty much followed the script that was outlined in the first few pages of the thread-

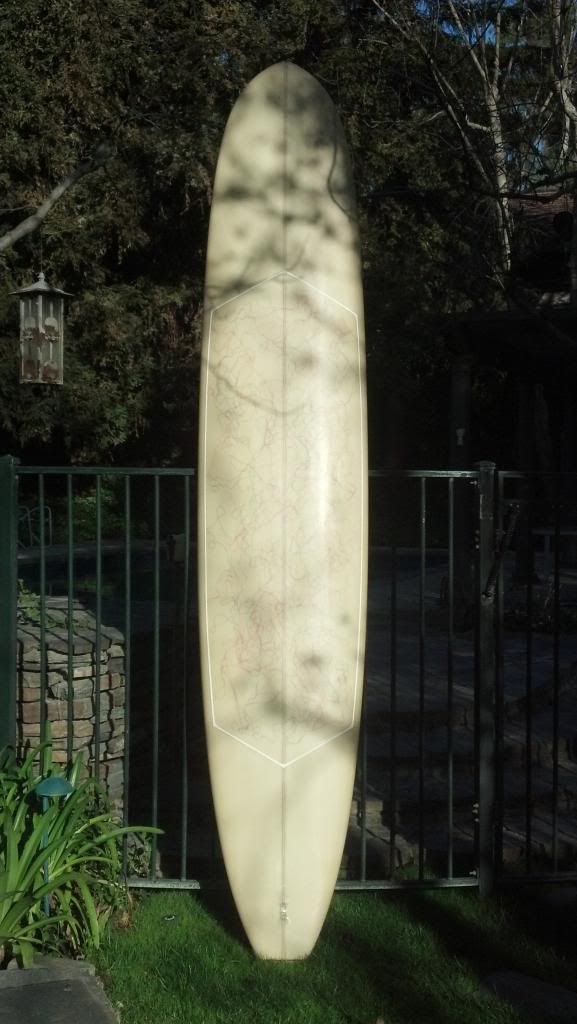
Lammed the top first in 7.5 volan, cutlapped to bottom. Then did the bottom inlay at 6oz instead of 4oz (thanks for the tint tip Gene) and cutlapped that right at the edge of the lap from the top. It was fairly easy to cut since I used the unfared edge of the cutlap from the volan to steady my razor; pretty much just like tracing an outline. Next, I went back to the top and did a clear deck patch cutlapped at the limit of where my eventual 4oz bottom clear wrap would come to. The thread you see is plain old red and blue sewing thread lammed underneath the patch. I saw something similar done on my Uncle's old acid splashed Haut from the 60's. Maybe some of you saw it at the longboard collectors club meet not too long ago... In hindsight, it would have been better to put it under a heavier weave. 

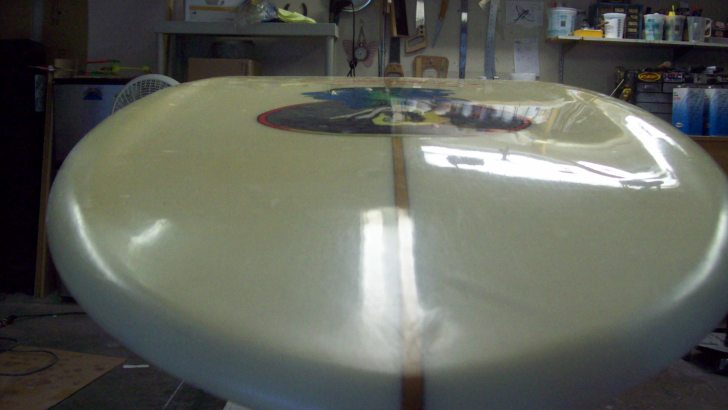
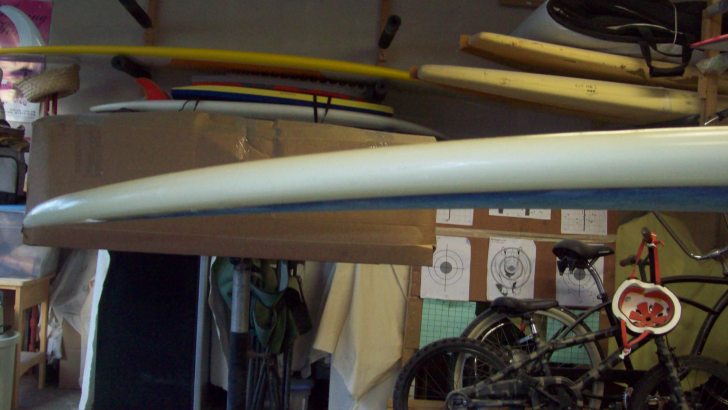
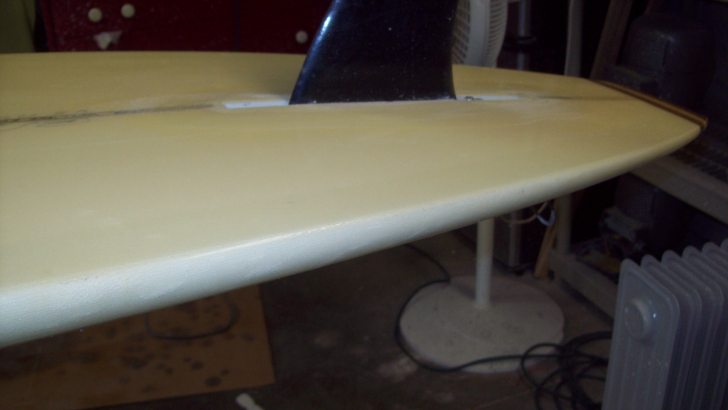
After the deck patch, I decided to try a pin technique I read about in various threads. On the bottom I fared the junction of the deck and inlay lams as best I could and basted the zone where the two laps met in a 1'' strip, once with lam resin to build up some material and again with sanding resing to cap it off. I then sanded this 1'' strip smooth and layed down two pins in acrylic to cover the juncture. Looking back I should have really thinned the strip more since it showed proud in the hotcoat, as it was as thick as a fingernail. I wasnt after a mirror finish, but I should have gone till I was juuuust hitting the underlying weave to get that flatter bottom. After the pins set, I wrapped the bottom in 4oz clear cutlapped on the deck, and after that I did the final deck wrap in 6oz clear and zip-lapped that at the rail apex to avoid the edge from what would have been the final cutlap on the bottom. Then I hotcoated!

Final sanding, fin box, sanded gloss, tailblock and deck pin were done at Aloha Glassing here in SoCal. 

All in all I am happy with the way it turned out. A lot of the advice in this thread rang true during the actual process of laminating, and since I took an unorthodox approach, it cleared up many grey areas I had about the hows/whys of certain glassing techniques like lamming in separate layers, reverse lamination, working with volan, etc etc etc. Not the most efficient way to do things, but it was one hell of an informative process. 


I took her out this morning at Porto, and my initial reaction is positive. Never ridden a log like this, and with N and T rocker numbers coming in ~4'' each, it actually performed quite well on some of the steeper faces. Trimmed really nicely from the nose area, although I'll need a better fin to tinker with true noseriding. Thanks to everyone who contributed!


that looks great hamrock… nice work on those cutlaps. Will be trying my first cutlaps soon. 

Right on Zac. I’ve only ever done cutlaps, with varying degrees of success. Some things to remember after you tape off- 


Go over your original tape-off with another layer (or two!) of cheaper tape. Get it to within a hair’s width from the edge of the 1st tape you laid down. This will create a raised edge that will help guide your razor when the whole thing kicks. Good to use when doing opaques as well. Also, when laying the tape down around the nose and tail, you really want to pull tight and minimize wrinkles. if big enough, ive found the wrinkles sometimes translate to the cloth on the lap and has a greater tendency to lift it up during cure. Always a headache. Other than that, dont rush. Every single one of my laps that ive rushed turned out for the worse, requiring pins to cover up. Patience is very important. 

thats a great tip hamrock and I was wondering that myself. Ill give that a go, 

…if you put too thick the tape line you ll finish with a darker resin line; on a tint work, that s not so clean.

When you say rush…man, you have few minutes until gel time…