After all this work I don’t want to mess up. I have glassed the bottom (free lap) and I want to grind down the glass to make it nice and smooth on the deck. I am afraid that if I hit the weave it will show through the hot coat.
Should I build up resin over the glass and then feather it out onto the deck
or do you guys think I can get away with grinding through the glass to the wood.
Did a similar one there a while back. You glassed the deck first I take it? I went the other way around, bottom, then top, but mine was a cut lap. It hid quite well along the transition from the rails to the bottom sheet. I’ve only done the one wood board(although numerous cedar canoes and other boats), and so take this all with a grain of salt, but here is what I’d do.
It looks like your glass is pretty hard, so I’d say maybe pour a really, really thin epoxy mix right along the seam. On the centre side of the lap. Heat it if you need to in the microwave. Just for a few seconds. You want it to pull right under the glass lap. Next cut the glass off for as low as you can get. What you should end up with is a slight ring all the way around the board now, sloping off in both directions sort of like a mountain ridge. From here you should be able to take thin sanding block, or maybe even a plane and shave that down. The hard part will be getting epoxy under the lap without airbubbles. I’ve used that for bulkheads in a canoe before, and it worked alright.
or
Very careful cutting and sanding.
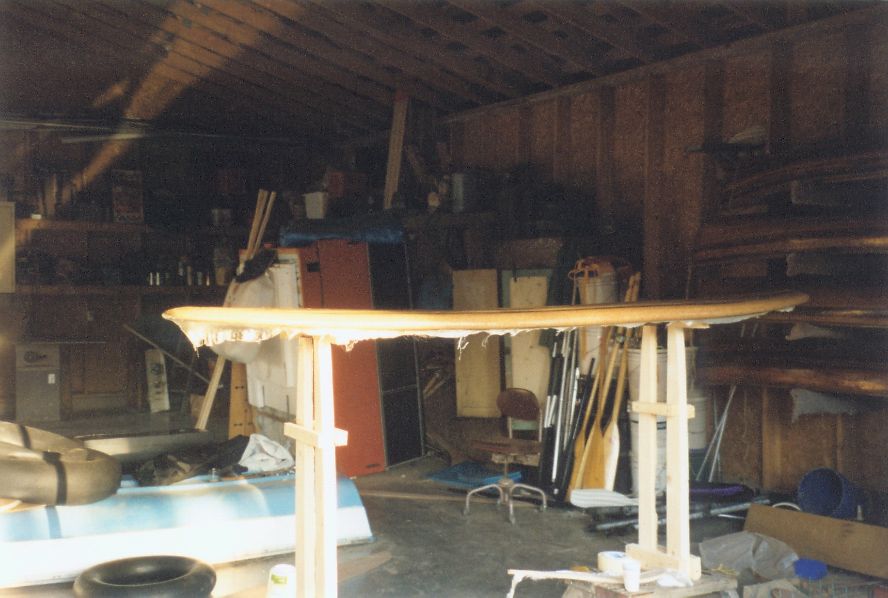
Nice board there. It looks really good. Are the decks solid? I used 1/8 luan for the sheets and cut and glued veneer for the design. Weighed about 25 lbs when all was said and done. I might do a little extra glass on the nose. My buddy tried it while I tried his rental, and he drove it into the bottom on a funky takeoff. Cracked about 2 inches in a straight line back form the nose. just incase, and you aren’t planning on having a really light board anyways?
I thought that you had glassed the deck first because it was so dark, but I’m guessing it was just a cheater coat so that it doesn’t soak in the epoxy? I’d say that you could just go with a razor blade along the deck to cork transition. Press down a little so that it goes thru the glass into the cork. Hopefully you can pull up the cutoffs off the harder wood without it pulling the wood with it. If not you could likely grind down the excess. Don’t worry about the cutting into the cork, it seals pretty good with the epoxy. Try a cut lap on the deck, and you should be able to clean it up a lot easier. I’ll throw some pics on this email. Really, really easy to do, as long as you go careful on the cutting. Don’t go through the glass below though.
Did you cut the strip yourself out of larger strips? I cut mine all out of a 12" sheet. Took a really long time.
Red, Thanks for that. You are right I did a cheater coat as suggested here.I assume by strip you mean for the rails. I did the rails
with 1/8 " bending ply around the nose and tail and then I used strips of
1/2" multi-ply glued and clamped with yellow glue on the sides. I tried to make the rails as hollow as possible to save weight. I actually sanded through at one point but was able to make a neat repair. The rails were very time consuming and I began to loose it towards the end. Having said that it is a great feeling to be at the stage I am at now.
Hicksy… Yah, I guess that wasn’t the clearest pic. I actually took the bottom lap all the way around the rail. But this was my top lap, and it only came halfway around. It still had a full half rail overlap with the bottom one. But yah, on the nose I wish I’d done a larger overlap.
Marke… I was trying to say(but I miss-spelled) stripS. I meant the pine and walnut ones on deck. The rails certainly drove me crazy too though, at least the cutting. I’m helping my buddy do another one off the same mold, and I came there and he had all his rails glued up. But he didn’t follow the instructions on the contact cement can and they are falling apart. Gotta re-do them, but better now than after glass… Good luck with all the rest of the glassing. What are you using for a vent? Stainless or Brass? I lucked out and got a knurled bolt off an old telegraph key. I don’t know standard procedure, but I put mine on after glass. Just chopped strand and epoxy to the underlying wood to hold the base.
I’d say that you could just go with a razor blade along the deck to cork transition. Press down a little so that it goes thru the glass into the cork. …Don’t worry about the cutting into the cork, it seals pretty good with the epoxy. Try a cut lap on the deck, and you should be able to clean it up a lot easier…Really, really easy to do, as long as you go careful on the cutting. Don’t go through the glass below though.
On the first side a cut lap is fine…But DON"T do any kind of cut lap on the second side…You might cut into the underlying glass…Hollow boards when being surfed are sealed, right…???..There are forces on the board while being surfed that exert pressure on the board (ie: breaking waves, turning pressure, etc…)…There is the possibility the if you’ve done a cut lap on the second layer and have compromised the underlying fiberglass, you’ve created a weak spot on the board, in an area of vulnerability…
I know this the hard way…I was surfing a 10’er, and near the end of my 4 hour session, my board felt heavy, still surfed fine but something was wrong…I went in and immediately knew there was water inside…A mid-20’s pound board with a gallon or so of water inside is heavy…Racking it on top of my van was a chore…
On the drive home I thought about what to do…I could get all the water out through the vent in the nose, but there was no way I could get enough air to circulate through the board to fully dry it out…Once I got home, I just grabbed a sturdy utility knife, and cut the cork rails off…Five minutes later they were gone…In the trash can…I allowed the inner board to dry thoroughly for a couple days then re-shaped the tail from a square to a round pin, then re-built the rails with bending ply and cork…Re-shape the rails only then I re-glassed the rails …
A lesson learned the hard way so you don’t have to…
That board was eventually donated to the Waterman’s ball auction, and sold for $3,500…
I guess I stand corrected. Paul knows a whole lot more about doing these boards than I do.
I had read his one post about cutting through the bottom layer before I glassed, and believe me, I cut carefully. I also used a utility knife with the point cut off flat, That lets you slide it along the hard bottom layer next to the tape for a clean cut. I did the cut lap just for an easier to clean up edge. Also, where I did my lap ( mid point of the rails ) is a lot harder to get water into the board than a cut along the rails-to-deck transition line. That was the main reason I lapped it only that far.
She has been water tested, and there was no water absorbtion. I went along the whole seam pressing with my fingers for a soft spot or bubbles. I know I’m by no means infallible, and I’m not saying that it will never happen, but so far she still holds out… But if you feel more comfy doing it as a free lap, by all means go for it. You are the one who will be your own harshest critic and most worried about what might happen.