Hi folks, I’ve got a request for help here…
I was expecting a sort of installation manual to come with my order of fins and boxes, but all I got were catalogues.
As some of you will already know if you’ve been following my attempt to build boards #1 and #2 in record time, I don’t have time to wait for them to arrive; basically they need to go in tonight if they need doing before glassing, or some time tomorrow if they need doing after. I’ll be putting the sealer coat (RR2000 and SP microballoons) on the first board in about an hour or so.
Can anyone point me to an installation guide for LokBox (side) fins and a 10.5" Fins Unlimited centre box? I’m somewhat lost without some kind of clear instructions. I have seen a thread on the surfermag forum where someone cut through the glass to do a freehand install of the LokBox system, but I’ve been told it’s actually better and probably easier to install them before glassing.
I could wing it and I’m fairly confident I’d be able to figure it out, but I’d rather not need to if at all possible.
I have absolutely no idea how best to go about installing them, I saw a few useful tips on here, like Kokua suggesting someone use a mixture of resin and milled fibers (chopped up rovings pulled from the glass cloth?) to install the F.U. box.
Apart from that though I’m kinda stumped.
Do they go in before or after glassing / sealing (microballoons)?
Even as far as what parts stay and what parts get sanded off I’m at a loss.
I’m not just new to shaping, but to anything to do with fins (rental boards don’t take much setting up)
Some specifics…
I assume that I remove the bar that crosses the box in this picture in order to fit the fin. (Like I said - new to ALL of this) So if I take it out and then fit the fin I’ve bought to use in it, I can use that to get the fin box at the proper angle?
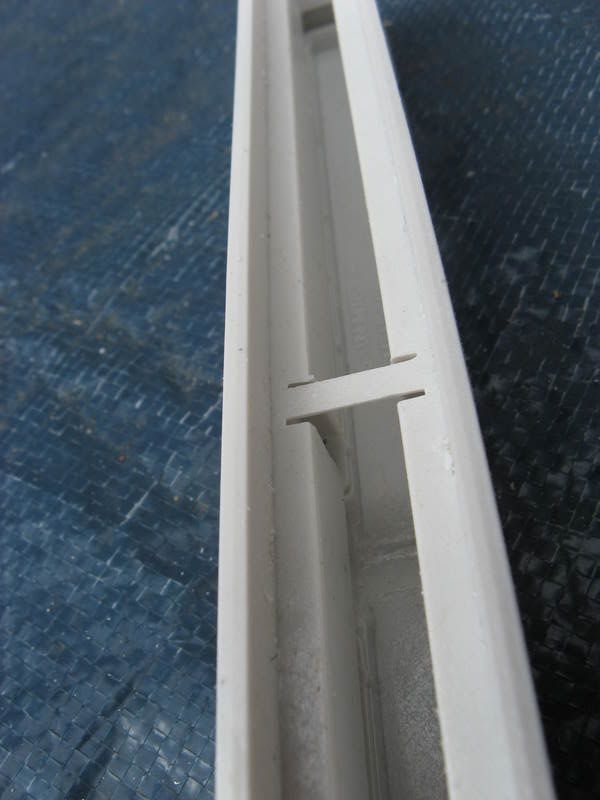
Is the bar functional in some way that I shouldn’t take it out before installing?
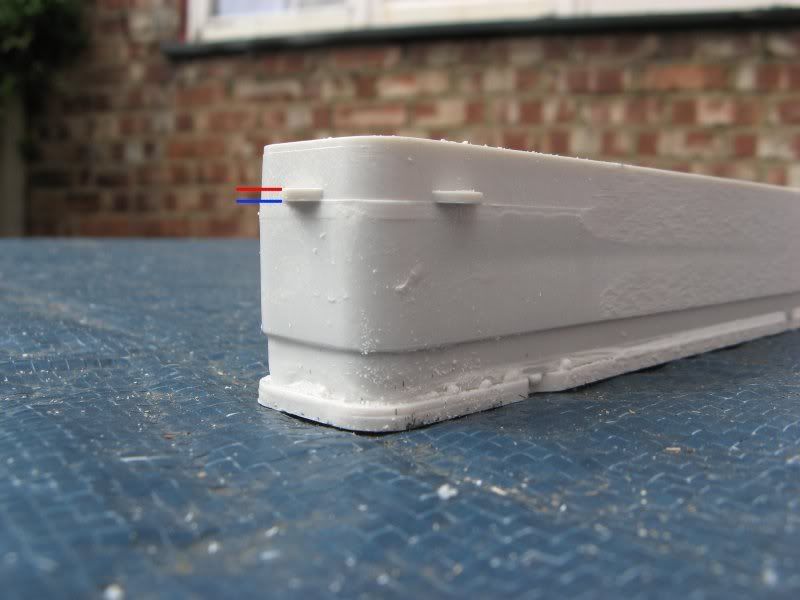
Also, am I right in thinking that the lip around the box will be sanded down all the way?
Does it get sanded down to the red line leaving the tabs in place, or to the blue line sanding them off?
I hope someone can shed a bit of light on this before too long as I really need to make a start on anything that needs doing before glass asap. Otherwise I’m going to have a bit of a problem getting started with this.
Cheers folks.

