Low Tech Vac Bag Stuff...(paging Keith, ResinH,GDaddy,Bernie,all SD people)

So....I'm having this off line discussion with Keith about Vac Bagging.....So many hassles......well,  I can't phost photos on a pm.....

...Yes... I have stated in public and in private that I'm over it.....what I gain vs what hassle I go through is not worth it....

but.......I see what the High Tech guys are chasing...and I have less than $20 invested into the whole thing.....The pump, the bag, the veneers and the cervex all have been donated to the Low Tech Lab....So I'm moving forward......having fun....Thought I would post up some stuff for people to look at and debate.....and I just scored some Vector Net...but I'm going to do a hand lay up with that......

The Joe Wood worker vac pump that got donated to the Lab is overkill.....A few weeks ago I was down at Keiths place playing around with $5.00 vac pumps......GDaddy told me he uses a fish tank pump.....a simple air fitting on the Joe Woodworker pump cut the noise in half.....Honest...we went from ear plugs to Soft Rock.....


The clamps......I did not buy the clamps....they showed up with the bag...

It's a cool set up when you learn how to use it.....the clamps I have are pinky finger size...the clamps Swied has are much more manly....Thumb sized!


Mr ResinHead does not use the clamps....he's got some top secret two sided tape going on.!!!!!!

...and is 23 good vac? Because I never really cared...I guess I still don't care much...but I might Have a deal going on some veneer so I might want to do it right!!!!

Have fun! Go surfing!  work hard...it will pay off..............Stingray................


This is my vacuum rig - just add the bag.    Aquarium pump with the diaphragm reversed and the plastic top off a cheapo plastic condiment bottle that I trimmed down.  I do have a 1/8">1/4" adapter and a short piece of 1/4" tube going to the fitting.  

No guages, no electronics, no reserve tank, no mac valves, no multiple connections just waiting to leak - nothing.  Plug it in, leave it on for the duration and walk away.  This thing will pull between 11# - 12# all day long and you literally cannot hear it running from 5 ft away.     I don’t even want to pull more vac than that on a wet lam.


Here’s a link to the how-to I used to convert the aquarium pump.  


 http://www.instructables.com/id/Vacuum-Pump-from-Aquarium-Air-Pump/

P.S.   I’ve done a bunch of veneers with this rig, too.    You don’t need to draw 20# for that.


Gimme a call when you want to do a veneer.  I’ll come over and walk you through it.  This is a much simpler process than laying down a clean hand lamination.  


That's funny...today I was doing this board and took a picture of it..I sent it to Keith so he could marvel at the science of it all.


 Here is the complete set up. I did all this for about $75 dollars.  That's pump, roll of bag, sticky 3m double sided stuff, valve stem system, scotchbrite pad, wax paper...and vac hose.

I think I'll stay with paying a bit more for the set up, and stay away from a fish pump....there's just too much going on to risk a malfunction over some cheap ass tube, a $5 fish pump, and a mustard bottle???

This set up is really cheap, and it works...and keeps working like my old truck.  It will pull 25mmhg, but i run it at about 15-18 on flats, and 20mmhg on compound curves etc.  25 mmhg will bend 1/40 veneer around a pencil.


What the hell is vector net, and what does it have to do with a surfboard?


Well I don’t know what you are ‘pulling’ with 23 for starters but if 23 means… represents 23% of  atmospheric pressure … That’s not real impressive. I’m 'pulling 3mm cedar and if I get anything under 70% I’m dissappointed.


But then my vac machine cost me $1800  over a decade ago. Still going strong. She was made in Millwalkie.  I wonder if they too have left for China ?


You get what u pay for  I guess.


cheers. 


When it comes to vacuum bagging, maximum atmospheric pressure is at sea level, 14.7 lb per square inch – the weight of the air column over one square inch.  So the max pressure that can be applied to an object in the vacuum bag is 14.7 lb per square inch.  The pressure applied decreases as altitude increases.

Gdaddy, love the aquarium pump vacuum system.  Now that is a simple low tech approach.

Edit:  Looks like a Whisper air pump.  Which model number?

I used a vacuum guage to test the capacity of this rig when bagging a 7ft board.  The guage said 11" HG and that was including the reserve tank it was attached to  (a modified 5 gallon compressed air tank from Harbor Freight)  That 11" is less than half of what I was getting out of the 2hp industrial pump I was using before.  

It’s all good.  I still have an industrial vacuum pump and reserve tank setup on hand for “backup”, if you want to call it that.  I did my first few veneers with that rig.  But it’s so loud it drove me to distraction.  It was kind of a nuisance to set up, too.  More pieces and more connections to seal and more chances to leak.  Those are the main reasons I switched over to the simpler and quieter setup.


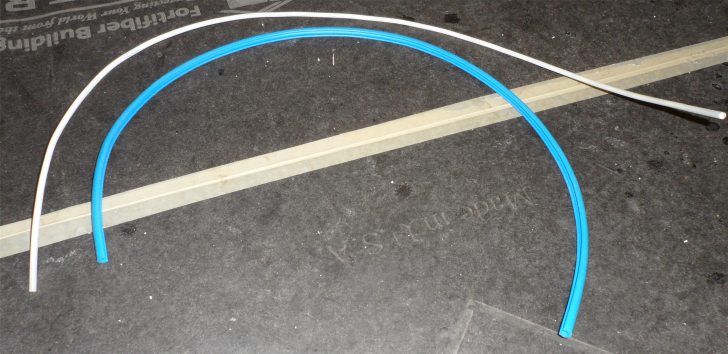
Just a pump, a length of tubing and a 1-piece fixture that can’t leak for piercing the bag.  Add a little spray adhesive to the top side of the fitting to tack the bag down over it and seal the edges with some tape - that’s enough to hold the vacuum there.  These aquarium pumps are designed to run for at least a couple years 24/7 with zero maintenance.  The only pieces that can wear out are the rubber bellows, a replacement kit sells for something like $5. 


ACP Composites sells the same type of dual bellows vacuum pump that has about the same specs as the model I’m using except theirs has a metal industrial looking enclosure for the pump instead of the plastic one used for the consumer grade aquarium pumps.  If you guys wanna feel more pro you can spend twice as much for that one instead - I’m sure it will work just as well.  


I reckon there’s more than one path to the top of the mountain.  I am not suggesting that anyone should dump their pro-grade vacuum rigs to go lo-tech.  I’m just saying that a backyarder who wants to try vacuum bagging on the cheap can start out with something much cheaper and simpler by making a trip to your local pet store.  You don’t need to go running around to Ebay or to industrial supply stores or get involved with wiring switches or gluing up reserve tanks or making enclosures or any of that.  No need to go rooting around to source used refigerator compressors or worry about keeping the pump oiled.  No mufflers, no bothering the neighbors with a 3-hr run of a pump that sounds like a commercial leaf blower.  Intermittant or not the noise is a PITA.   These bellows style vacuum pumps are so quiet that if a TV or radio is on in the room I have to pick the vacuum pump up to make sure it’s running.  

I set up a small vacuum table for clamping plywood onto G-10 panels and for glassing fins using this rig.  Actually, my “table” consists of a 18"x18" piece of rigid ABS panel with plain old masking tape laid down for my “mold release”.  I tape my bagging material to the “table” using plain old masking tape.  That combo seems to be enough to get the void-free lam down.  I just wet my cloth down on a small wetout table (piece of plastic drop cloth taped to a panel of plywood or other flat surface), lay it on my fin panel, tape the plastic film down to the table and draw vacuum.  The film smooshes the resin for the no-sand finish and I dispose of it after I use it.  I have also used the large-sized zip-loc plastic bags for vacuum film, too - cut the zipper and seams off.  One of those zip-loc bags yields two lengths of vacuum film, each big enough to vacuum over 3-4 fins.  


I’m thinking about using this setup to try resin infusion over a fin panel.  


As for whether 11" from this one pump is enough vacuum, it was enough to clamp a heavy 2mm oak veneer over an 8ft mini tanker without a problem.  As I said before, I really don’t want to run too much vacuum anyway, especially when I’m bagging a wet lam.  I wanna clamp it in place, not suck it completely dry.  Greg Loerh said a couple times not to run full vacuum on 1# and 1.5# EPS otherwise you can collapse the foam.  And add twist.  He was saying 7-8" for 1# and no more than about 15" for 1.5# EPS.    I don’t use 1# EPS so I reckon 11" is enough.  

I clamp from the reverse side of the board - i.e., from the bottom when I’m clamping a veneer to the deck.  And I use a layer of cheap plastic film (painter’s drop cloth stuff from Home Depot) between the veneer and the bag so as to avoid splinters from the veneer piercing my bag.  That keeps all the resin off the bag and makes it last longer, too.  No extended breather or expensive peel ply.  Clamping from the reverse side means I can smooth out 100% of any wrinkles in my bag - including around the rails - because I’m not putting the intake directly on the veneer or wrapping a breather over the rails.  I usually wrap my veneers pretty far over those rails, too - I usually only leave a “lap” line of 1/2" or less.  


Anyways, I’m just putting the alternative out there.  The pros should definitely invest in good tools, but lo-tech works okay too.  

hey Ray

the problem ii in the cycling

without a switch you can burn out the motor pretty quick

if you have a good bag with no leaks your pumps probably would cycle every 5-15 minutes.

when i started i used heat shrink wrap poly tape, packing stretch film and my shop vac.

then i saw what Roarrocket was doing with a little hand wine bottle vac pump some thick vinyl bags and a one way valve to bend multiple layers of rock hard canadian maple into a curved skatedeck

seemed like you could do the same for a board so i started playing around cutting out valves from those space bags you see on tv and attaching them to my vac bag and using my shop vac.

eventually gave in took a vacuum bagging class from Charlie where I shaped and bagged balsa around a Gemini twin (probably the most challenging shape you could bag ever), Which ended up as a christmas present for my brother in 2004.But I learned allot about epoxy, balsa and bending and blending it around the rails noses and tails. Charlie had already been doing it for 10 years back in 2004 so he knew all the time saving tricks a production shop would face.This was all before we discovered EPS cores.

anyway that’s when the fever started as you realize you could make a pretty strong and decent looking wood covered surfboard out of nothing but some wood strips and flat sheets of foam from your local hardware store and that was both an eye opening and amazing discovery that took the whole myth out of that whole “you got to do it this way son” we were spoon fed as groms.

anyway i started with an ACP pump (per MrJ and shwuz) and migrated to a hospital aspirator that Charlie found in the bottom of the dozen or so hospital bedside carts he bought from the surplus store to store his supplies. The biggest thing I learned from Charlie and Joe woodworker was about having a good reserve cannister and bag with no leaks(hence the stethoscope all pro baggers seem to have in there possession). Most build theirs from PVC piping but I just bought a 10 gallon air tank from the hardware store but you probably could use those portable propane or party ballon tanks as well.

Wish I still had it but I think I gave it away to some young espiring bagger in florida years ago, but the simplest contraption is those little reverse flow adapters you attach to your compressor which creates a vacuum from the outgassing of your compressor pump.

one secret Charlie and I discovered years ago (I think it cam from paul or jarrod) was to seal the bag 3/4 of the way and stick a long skinny shopvac nozzle into the opening touching the breather then blast it  till the bag compreses down most of the way, usually takes seconds. Then we yank the nozzle out seal the bag and turn on the vac pump alreay plugged into the bag. Puts allot less strain on the pump and still lets you stretch out and adjust the bag before the final “lock” takes affect. Neat trick that saves allot of time and your pumps motor. 

Veneers are neat and pretty but I just a soon use something else these days that’s less expesive and not as much a headache matching up and sanding. 

I only expect more exciting news from the low tech lab in the near future.

I bought a Tetra Whisper Air Pump 150.  It’s designed for use with aquariums up to 150 gallons.  This model is a dual bellows design with a single outlet (which becomes the inlet when switched to vacuum).  They make a larger one (APS 300) but that has 2 outlets and I didn’t want that. 

I think I paid $45 for it (new) at Petsmart.  It came with the 1/8" hose so I bought a 1/8">14" adapter ($2) and a short length of 1/4" hose ($1.50).    I got the condiment bottles - 2 for $1 - at the local 99 cent store.  I also use those bottles for my hardener.  Great for accurately pouring hardener in small amounts (like to the gram) when mixing with a digital scale.   I’m into the whole thing for $50, not counting the vacuum bags and clips from ACP.  If I had been thinking about it I would have scrounged Craiglsist for used parts instead of buying new.  


The 23 he’s talking about on the gauge is a vacuum measurement in inches of mercury.

2.036 inHg equals 1psi.   So at 23". you’re applying adout 10 psi to the laminate.

It doesn’t sound like much but when you think about it that’s a fair bit of clamping pressure… Enough to crush some lighter foams out there.

VH.

Looks like the Whisper model numbers have changed since I used them.  Pretty sure I used Whisper 800s for my 50 gal aqaurium.  I’m an aquaculture specialist and have been playing around with Whisper air pumps and homemade undergravel filters for large fish/shrimp tanks for several decades…  Definitely no chance of burning up a motor etc.

Your simple tech is enough to interest me in a few vac bag experiments.  Are you pulling down the bulk of the air volume with a vacuum cleaner first?

Yup, I do it exactly the way Oneula describes above.  Since I aim for the no-wrinkle clamp I like the fact that the lower volume mini-pump takes longer to really cinch down.  You can still move the bag around a little up until you get to about 5" or so.  Sometimes I have to break the seal and let a little air in to loosen the bag up to clear all the wrinkles.  With some patience you can completely wrap the rails all the way past the bottom side lap line.  Then run the pump to cinch it down and leave it running for the duration.    

I’ve got stuff to do this morning but later on I’ll see if I can post a pic of my “fin table”.  You guys will crack up.  

Heres a tidbit for you new to the vac bagging...or you that continue to have leaking rails, and stained wood. etc.

One of the big deals about vac bagging skins to a foam board is it's ability keep the veneer edge smashed into the foam.  if the pump doesn't keep a consistent pull the entire length of the bag you have a woobly veneer edge.   It's most inportant that the wood veneer is pushed into the foam (like a cut lap).  if you don't do this then you end up sanding through that high edge or almost sanding through and get a leaker board.

If you do it right then you can put all the glass under the wood, and just cover the top with a 4oz glass job.  But the only way to get this right is to have a perfectly flush veneer to foam edge.  And you can't get that if your pump won't suck.


We’re engaged in an exchange of ideas here and I’m not disputing anything you’re saying about the importance of drawing a solid and dependable vacuum.  

But just to clarify, I have used the high capacity pumps as well as the fish pump so I actually have experience using both setups.  So far I have never had a problem with getting a flush edge with my veneers or with getting full adhesion.  To date, none of my veneers have delammed or bubbled.  Or broken.   And like I said before, I almost always run my veneers to within 1/4" or 1/2" of the template outline, which is further out than what most people do with veneers.  


I have had leaky rails once before but that was mostly because I didn’t run my cloth all the way out to the edge the first couple times I did it (under max vacuum, BTW); and because I screwed up my rail glue up leaving unnnecessary gaps that enabled the water intrusion to freely flow.  No more Gorrilla Glue or sloppy rail glue ups for me.  Poor makemanship on my part.  Lesson learned - I now back all my veneers with something and I bring that backing all the way out to the edge.  

Here’s a close-up of the wetlam I laid with the fish pump a few months back.  My first wetlam under vacuum.  3 layers of 2.6oz volan + deckpatch + 1 layer of 2.2oz innegra on the deck.  Everything wrapped all the way around the rails.  Cutlap with no pinline to cover.  My corners came out immaculate.  I had one minor wrinkle on the first side I laid due to an error with the release film on my part.  It won’t happen again.  

I didn’t use any breather or peel ply with this one - I just laid the lam fairly dry and used a layer of the poly film painter’s drop cloth as release film (only).  So I didn’t draw out any extra resin and I did get a few minor surface imperfections where little bubbles formed between the unvented release film and the lam, but then again the finish only required about 1/3 of the sanding I normally do.  So there’s definitely room for improvement in my technique, starting with switching to real peel ply.  I was still pretty stoked with the results.  Not bad for the ghetto rig.  


Excellent “tidbit” RH.

I’d like to add that if you laydown a lenght of this plastic vacuum infusion grid on top of the veneer / cork / HD foam or whatever, it ensures that the vac bag pulls evenly alone it’s entire surface by allowing air to circulate through the grid and prevent the bag trom sticking in certain areas causing the bubbles and bumps you speak of …

BTW…That’s one nice looking PP 1250… I’ve never seen one in blue… Cool !

I know a guy who knows a guy that owns a PP 1320… He’s a pretty shy dude so he doesn’t flaunt it…

VH.


A word of warning!!!

If you use the fish tank pump system, and use a pump designed to operate at low load, with little to no resistance, and plug the inlet with a vacuum bag, two things happen.  The pump over stresses, and then over heats!  What happens when a motor overheats?  If your shop or worse, your house burns down, that would be your most expensive build ever!

There is a good reason for those mac valves, and pressure switches.  be safe ; )