I have learned so much from this Forum about surfboard construction I thought I would Document my next board in detail so anyone with interest could get some inspiration. I make boards with 2 lb. EPS from a block I bought from Insulfoam in Dixon, CA. So I need to make templates for the hot wire cutters I have built. But, these templates would work for Poly blanks even easier since there would be no need to copy them to masonite. I use Boardcad to design my boards. I bought some heavy 8x14 paper to print them on at a “paper” store. They didn’t have it at Office Depot. It was about $25 for the ream. I am using 67 lb. paper. 8x14 makes it easier since there are less joints, especially for boards wider than 21 inches. don’t forget to put the Legal size paper in the printer preferences.

I use a paper cutter to trim one side of the margin. sometimes a flashlight under the edge of the cutter helps to align it just right and magnifying glasses are a must for me. Then I tape both sides of the joint where the template is. Carefully cut along the line(s).

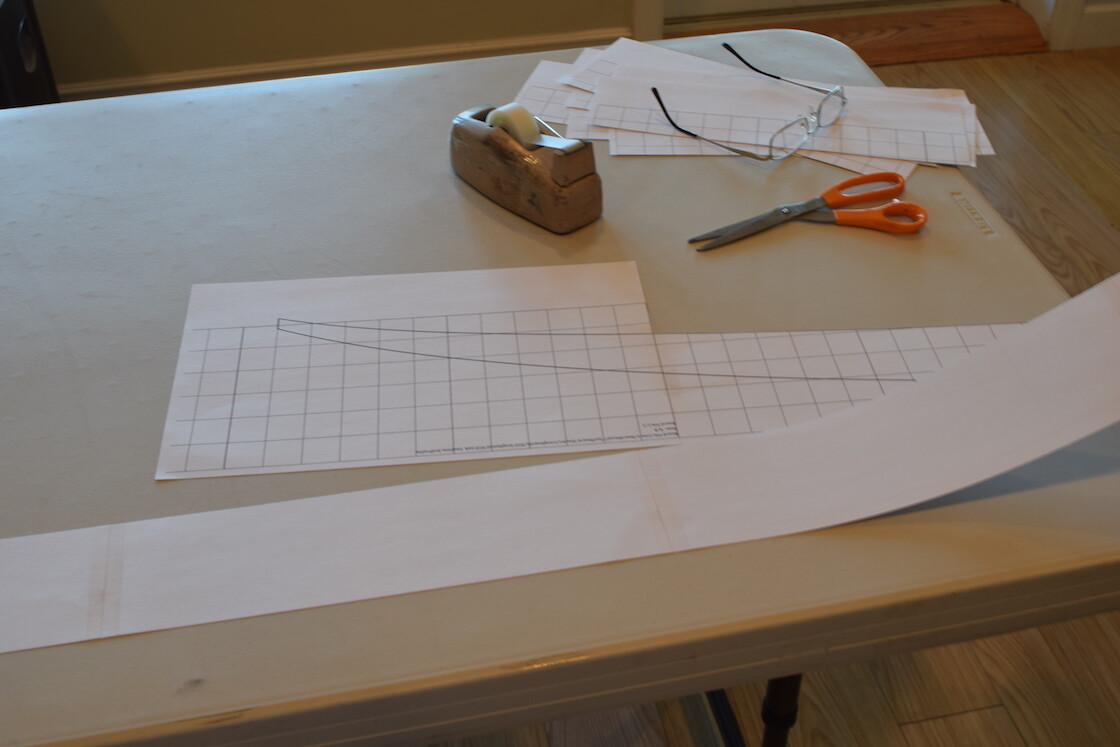
I cut a full length piece of 30" wide butcher paper straight off the roll. Fold it in half lengthwise, spritz a little spray adheseive to get the halves to stick together, then spritz the outside on one side and use the crease for my centerline. Lay the pages from the Boardcad printout directly on the butcher paper- the spray adhesive holds them in place. Tape the page edges and the template outline itself, then cut it out and open it up. Full template that basically can’t be misaligned from one side to the other.
Mataco-thanks for posting, looking forward to the rest of the build thread.
GDaddy-nice tip.
I tape my template sections to a sliding glass patio door while taping them together, creating a light table of sorts. Sometimes I take a spool of thread and some tape and make a taught line down the template to see if the grids are lining up sheet to sheet. If I am drawing the template without a grid then I include a horizontal reference line across all the small prints for checking alignment during re-assembly.
Both good tips
I outlined the paper template to the Masonite. I Butt joined this piece with some scrap cloth get it long enough to make bigger boards. I rough cut the outline and tack it with thin headed nails so it won’t effect the jig saw too much as I cut. I bend the nails over on the bottom to hold them when the wood shakes.

I always put the bottom of the board towards the edge. This makes it easier to cut and shape that edge of the template. I cut the double layered wood on the bottom only. I hang the wood over the edge of the table and put some weight on it so I can sand it smooth before cutting the other edge of the template.

I use the pictured flexible sanding board to smooth the bottom edge. This is the right tool for many jobs in board making. I would recommend getting one if you don’t have one. It smoothes the template really quick. I use a level as a straight edge and rock it along the edge of the template to find any small flat spots. It will clunk and get caught if there is a flat or bump that needs more sanding.

After the bottom rocker is done then I cut the top edge. I straighten the nails and nail the templates to the side of the table to sand it. When using the flexible sanding board on the bottom I put my hands at the ends of the board. When I sand the top edge thats concave I put my hands in the middle and let the ends bend up.

Before you separate the two pieces be sure to mark the ends of the board on them so they register evenly when you cut the blank. I make the templates oversized so there is a place to rest the hot wire before you begin cutting.
Thanks for the reminder, repeat offender here.
I just went and added another inch or so to each end to the ones I want to use this week.
Otherwise it would have been stir sticks and hot melt glue.