Probox Removal

Well it had to happen .........

Major board bender with a buddy in the water on the weekend resulted in lumpy shins all round,  FCS Plugs and fins that humainly had to be put down, multiple dings all round and two Probox's with about 1/16th of side ways movement ..... have to come out !!!!

Absolute carnage and the probox system and fins all intact...... gotta luv em ahhhhh!!

Anyway, anyone ever have to extract probox's or know how to do it without butchering the board in the process

Thanx in advance

W


yup.  you can remove with a router (faster), or a dremel tool with cutting wheel (slower).  In either case remove the set screws first.

Put a couple of drywall screws into the bottom of the box...at least two.   Tie 2 or 3,  20 ft  #250 lb mono to the box.  Secure surfboard around tree with bungees or better yet old belt or braided dacron rope ( fin box out perferable)  Now attach the 2 or 3 #250 mono leaders to wife's SUV.   Now run inside house and tell wife you just got done banging her sister, and that her sister isn't as fat as she is........................start running down street screaming "COME AND GETA ME TUBBY!!!

That fin box will be out in no time!


[quote="$1"]

Put a couple of drywall screws into the bottom of the box...at least two.   Tie 2 or 3,  20 ft  #250 lb mono to the box.  Secure surfboard around tree with bungees or better yet old belt or braided dacron rope ( fin box out perferable)  Now attach the 2 or 3 #250 mono leaders to wife's SUV.   Now run inside house and tell wife you just got done banging her sister, and that her sister isn't as fat as she is........................start running down street screaming "COME AND GETA ME TUBBY!!!

That fin box will be out in no time! [/quote]

 Wow, I thought I was gonna be a creative smartass and say use a hammer and chisel. Resinhead takes it again!

i just removed replaced 4 Proboxes... Larry told me to:

1)remove the screws.

2)set the jigs

3)set the router so that it will only remove 1/16"-1/8" of material.

4)when you go to plung your router, set it up on one of the edge's of it's base, get it running and let it tip/hinge into the hole. HOLD TIGHT! route through the center of the box lengthwise leaving 1/16" of the box at the front and rear. careful to not go too far as the bearing won't hit the jig, the blade will hit the jig.

5)set the router 1/16" - 1/8" deeper and repeat step 4.

6)repeat step  4 and 5 until your router depth is at the standard probox install depth and your router bearing guide now will hit the jig. route front to back again, this time go all the way until your bearing hits the jig front and back.

7)now take a chisel or something similar and tap the 2 sides in towards the middle and pull them out. the quality of bond that the original install achieved will decide how easy this step is to do. (for me, this didn't work so well. or maybe i was a little squeamish using a hammer on another guy's board that i was repairing... see step 8)

------------------------------------------------------------------------------------------------------------------------------------------------------------------------------

8)i ended up setting my router depth to take off about 1/8" of material and routed around the inside of the jig. i eyeballed it so that i didn't hit the jig with the router. i left about 1/4" between the cut and the jig all the way around.

9)set the depth 1/8" deeper and follow my previous cut. go slowly, you really don't want to route into your jig. EDIT: it's critical (i learned) to only set the bit to take off 1/8" of material or less. any more and the bit wanted to grab and pull into the plastic and, at this depth, you don't have the bearing protecting you from going right into the jig.

10)repeat steps 8 and 9 until i was at the normal probox depth. now i shaved around and got the rest of the material. be really careful on this step. i was using a full size router and when i would shave at the walls of the cut, the router wanted to grab sometimes and pull into the walls. hold on tight and go slow...

11) after i finished routing out the holes, there was a THIN wall of the plastic box all the way around the inside of the holes. i don't know how this happened... different sized bearing on my bit? different sized blade? hmm? anyways, i went with a box knife blade and sliced/shaved behind the plastic wall all the way around until i got all the plastic out and had bare foam. this worked pretty well.

12) once you get all of the original box out, it's install like normal.

hope that helps and i didn't bore you to death... looking back at it though, i think Resinhead's onto something... definitely quicker
resinhead may have found the quick fix, but I’m glad you opted for the 12 step method above. rides great - thanks again chris!

right on knick-knacks, glad you're happy with it... yah, that board was a steap learning curve... ha! you're a bum though, living where you do, i'm jealous... after we left your place, we went and looked at the point. only chest to head-high but perfect and i was surprised, the crowd didn't look that bad. glad you got some

oh, anothing thing Foamhead, run the router at top speed all the time.

when i say go slow, i mean cut little bits off at a time... running the router at less than top speed seemed to make it "grab" more.

HTH

Yeah...I had a vision of that plunge router hogging out the box in one full plunge.  Probox comes shooting out the side of the rail with the jig attached to a 10 x 10 chunk of foam.

Be careful with the replacing a broken box this way.  The method above is for a box that is firmly attached and a retro refit.  Any loose material from damage, ie, resin, plastic foam...is going to  come flying out no matter how shallow of a cut. Eventually something is going to break free, and either rattle around in the hole at best, or worse....Just think of what stringer material does sometimes...  (wear eye protection).

My tried and true method is if the box is loose...just yank it out making the least damage as possible.  repair the hole with foam, foam & cab/epoxy or resin mix.  Glass, re route hole, set as usual. On the re-route it's pretty amazing how little hole fill material is left....plus you don't run into any shards of plastic or resin flying around.


I"M COMING............TUBBY!!!!

Hey Chrisppyyyyyyyyy,

Lots of thanx for the trouble you've gone too ...... much much appreciated !!!

That will get me thru the drama in a tidy manner !!

Resinhead your a worry mate ....... mental picture of your eye's glowing bright green as your thinking up your reparation process ..... Hmmmmmm

Thanx for adding thoughts Keith !!!

W

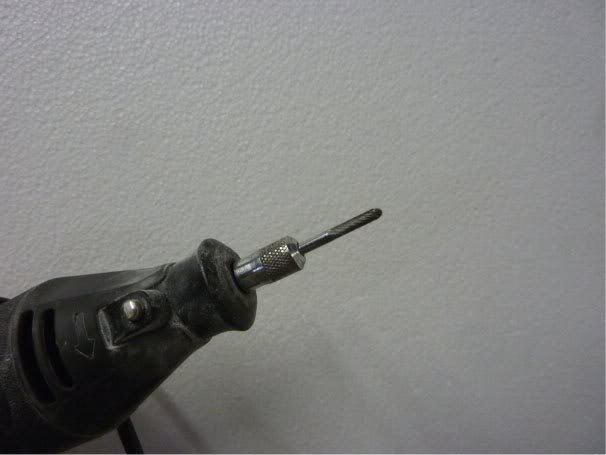
For those a bit wary of using a router (I'll be the first to admit I'm scared as sh*t to have a router jump and take one of my body parts with it), you can cut the center line of the box with a Dremmel and one of their little end mill bits. Then carefully pry the halves out of the hole.

I've removed Proboxes this way from using too much white pigment in epoxy and it was rubbery. That's how you learn sometimes...

~Brian

www.greenlightsurfsupply.com


glad to help Foamhead... bye the way, i began this project with a healthy fear of routers based mostly on reading Resinheads stories from another thread... the guy has a lot of experience and knows his stuff.

Larry put a thread up on how to repair a Probox but I don’t have the link sorry. As for routing out the box, stay away from 1/4" routers would be my advice on that one. They’re bad enough with a thin layer of fibreglass and foam let alone hard plastic.

maybe this could help, couple months ago I took some pics while doing a Lokbox removal & replacement, a first for me. did it with a trim router & the install jigs without too much drama -

http://www.808surfer.com/forum/viewtopic.php?f=7&t=6541&start=0


Hey Bud ..... good to hear from you old mate !!!!!

Thanx for slide show on great repair

Butttttttttttt,more importantly all this talk about routers is making my teeth grind

Only a couple of weeks ago my right ring finger was pulled into a router's spinning blade, (my own stupid stupid fault), and to date the shaping bay walls still have blood splatter spots stuck to them (&^$$^&*(_($#@)

Luckly the bit I was using only had tip cutters and not cutters all the way up the bit.

My finger got smashed but not severed offfffff .............. nothing can explain the absolute instant and speed that everything happened, not to mention that even in that instant expecting to see your finger fly across the room and hit the wall ....... man o man ... still shake my head at the thought of how much damage can happen in a split second

The absolute joy I felt while in agony at still seeing my finger attached to my hand... phew

Great this thread has touched and reminded everyone about routers ..... I still clamp my jaw everytime I start mine now

Again many thanx to all ....... but please don't take routers lightly

W

Your ring finger?   Don't tell me you had a ring on when you were using power tools?


That's like wearing a neck tie when operating a tree mulcher

lol lol lol

No ...... no ring on the ring finger

W


Man - I love the router.  I have a 2 hp Ryobi plunge router.  It is really the only power tool I use.  I don’t use power sanders or planers - too easy to make a wrong move. 

I have a nice table for my router and I also use it with jigs for fins.  On the table, when I go to cut somthing, if it snags, my hands are already in the air letting the piece fly…  Sometimes you have to redo - to me that is ok - , but I am terrified of touching a blade turning at 20k rpm…  I am not sure of what happens if you do, but one thing I am sure of is that it is not pleasant.

1/4" router by any chance?