Project Frog (*warning 56K...lots of pictures)

Dang it Chip! That’s it… I’m calling you out. Can I get a moderator in here or something? How long does it take to get to West Oz from NC?

hehe.

In response to your questions though:

  1. Yes, I agree that project egg is a misnomer. Figure 8 is simply not familiar with the nomenclature. The board is blunt and oval, hence he titled the thread accordingly. I have since scolded him and ordered that he devote his workday hours to the reading of swaylocks. This weeks assigned readings are EPS/Epoxy Construction Primer and Greg Loehr’s Theory of Pitch. There will be a quiz afterwards.

Hey, at least he didn’t post one of the ubiquitous “where should I place my freaking keel fins” questions.

  1. Clearly, he is unware of low esteem in which members of this community regard me and my efforts.

Who wants to fight me?

Actually, this kind of reminds me of a Hicksy/Chipfish thread.

Yo janklow:

As far as the surface is concerned, with 1lb eps and spackle, the board is about as good as it gets. Or at least as good as I care to get it.

Glassing a swallow tail is tricky for a beginner. I’ve only done 4 swallow tails so that is what I am for sure. I just do the best I can. The cut down the middle is not a relief cut, it’s straight, but there will stil be an area that is not lapped on the deck. I tried to accomodate this with my tape line, but not perfectly. The deck glass will cover this area as well though.

Take a look at some swallow tails with resin tints and cut laps and you’ll see the different ways glassers deal with it. Some flip the board over and do a tinted patch on the tail. THis is how one would get a lap line of even width, even through the tail. Others don’t even lap the bottom in the ‘crack.’ I think Oldy’s quad is like that–you just see his rail laps at the tail.–Correct me if I’m wrong Oldy. On this board, we’re doing neither of the two. The lap will taper down to nothing in the crack. This may not make sense until you simply try it. Hope that helps.

Quote:

two things confuse me

1] why it’s project egg , when i think it looks more like a ‘fish’

2] WHY anyone would tell the world hunter is their friend [with that sort of courage , you will be doing paddle ins at ‘Jaws’ soon enough]

…but then again , I only look at the pictures . [You may have explained all that stuff in the filler between the pics ?]

pictures good , typing stressful . [sung to the tarzan tune “me tarzan you los boyos”]

ben

[…for the “newbies” , I am an aussie . That is my excuse , and I’m STICKING to it!]

Ok ok I’m sorry for the “Project Egg” title. :slight_smile: You are right…it should be named something else. I used to ride a board with the same shape and everyone that asked me about the board called it an “Egg” …so I just assumed it to be true. Then again I had someone tell me that it wasn’t a “fish”…but was considered a “Frog”. So I think I will rename the thread to “Project Frog”.

I know the information between the pictures is stressful, but so many times I’ve read threads on a topic and wished there was more information rather than vague bits and pieces…so I decided to write a lot. Hope no one minds! :slight_smile:

And I wish we had some waves over here like they are in OZ…but Hurrican season is here and we’ll probably get some good sets soon enough.

"project food’ …

should take care of the egg , the frog , AND the fish that way !

" Dang it Chip! That’s it… I’m calling you out. Can I get a moderator in here or something? How long does it take to get to West Oz from NC? "

where the HELL is NC ?

is that the planet near uranus ?

it will take you LIGHT years to get HERE , Mr. Turd ,

but by then it will be to late …sways will be full of hicksy chippy threads and martians will rule your surf breaks .

ben t

Methinks its time for you to go to bed Ben.

" oh …O-K-A-Y , thennnnn…"

“…sweeeet dreams , every body …”

bwahahaha bwwwaaaaahahahah

'night !

bent

Bumpity Bump for some more updates with pics…

Had a good look at this thread, great work, got any more piccies to show us???

BTW someone’s nicked your boat…

hahahahhhh

shows what a deep , zen-like state shaping puts some people in , eh ?

while concentrating so hard out in the back garden , in they walk through the front door , park the car out front , load 'er up , come back for the boat , put IT on their own trailer [so it doesn’t look "too suspicious " ] , then leave you to wash off all the foam dust in the shower , which they thoughtfully left there for you …

Hi Figure8 nice board! Well done for a first try!

I’ve got some questions… Do You know what density Your foam is?

Nice try on doing a tint. I haven’t seen anyone trying this on EPS before so thanks for the pics!

What about the tape You used, Why did it stick so heavily? Did You check to see if the resin acually bled through or under the tape? Or is that blue tape so incredibly sticky?

Anyone else had this happen when cutting and pulling their tape on an epoxy cut lap?

hi frog shaper and turdyman !

just a question / suggestion …

Any chance you could also post this thread in the archives in a photo thread section …

something like “making a resin tint eps fish” or something , please ?

I ask , because I reckon this would be a good resource for the [sure to be future] threads asking “how do I tint with epoxy resin ?” or “what do tinted epoxy cutlaps look like?” etc.

Also , alongside 'Oldy’s polyurethane / polyester tinted fish , it provides and illustrates both options .

…just a thought , mate/s

cheers !

ben

[I am using these …/ … nowadays , as it seems that the lines through my posts DO fairly consistently appears when I type this …[s] , after a word[s]

testing testing , didithappenagain ?

Quote:

Had a good look at this thread, great work, got any more piccies to show us???

BTW someone’s nicked your boat…

STOKED !

it’s miraculously returned ! …

…or maybe , like me ,

it just goes for walks around the garden , when it gets bored ? [being a boat , it doesn’t get the opportunity to type crap on swaylocks too often , I guess ?]

Quote:

I’ve got some questions… Do You know what density Your foam is?

Nice try on doing a tint. I haven’t seen anyone trying this on EPS before so thanks for the pics!

What about the tape You used, Why did it stick so heavily? Did You check to see if the resin acually bled through or under the tape? Or is that blue tape so incredibly sticky?

Anyone else had this happen when cutting and pulling their tape on an epoxy cut lap?

Erik -

Thanks! I’m not positive on the density of the foam. I will try to find that out and will update you. I was definitly stoked about doing a tint. The batch of resin only needed about 2-3 drops of tint to get the color we made. It does not take much at all. The color came out really good and a lot of the little indentions were filled in with the color, so it gave the board a very light green with slightly darker speckles. It looks really good in person.

As far as the tape, I assumed since it was masking tape used with painting that it would not stick so much. However I believe it was the tape glue that caused it to pull a little bit of the foam up. There were no leaks anywhere on the board after we pulled up the tape and newspaper, except one little spot in the crack of the tail which was hardly noticeable. You can see in the pictures where the foam started to pull up a little. I went back last night and filled in the spots very cafefully with some more spackle. Looks fine now and you can’t even notice that any foam was even missing. I pay a lot of attention to detail so its hard for me to leave something looking “ok”. But I have come to the conclusion that the blue tape is definitly more sticky.

Had I used regular masking tape, we probably would not have had any problems.

Chip- I have no problem with moving the thread to archives. I’m a little unfamiliar with it so I may have to get theboys to help me out. I know this thing keeps growing with pictures and I hope its not bothering anyone due to the time it takes to load up all of the pics!

MATERIALS USED: from Fiberglass Supply

I wanted to add a list of everything I ordered from www.fiberglasssupply.com including prices and product codes in order to make my board. The amount/number of each item reflects what is needed to make one board. The 1.5 gallon kit is around $100 and can make roughly three boards if you do not waste and work efficiently. So, if you plan on making more than one, it might be better to get the 1.5 gallon kit. Otherwise, stick with the 3 quart kit if you are doing one board. Here are the items orderd for my board:

Resin Research Epoxy Kit 2000 w/ 2100 Fast Hardener

Amount: 3 quarts

Item Code: G02-0130

Price: $52.48

E-Cloth Fiberglass Fabric (6oz X 30")

Amount: 12 yards

Item Code: C06-1308

Price: $45.12 ($3.76 per yard)

Additive F (sold in pint/quart/gallon)

Amount: Pint

Item Code: G02-0250

Price: $15.75

Sailboard 5/8" Retrofit Vent w/ Thumbscrew or Slot Screw (your choice)

Amount: One

Item Code: R62-5120

Price: $1.77

Grand Total: $115.12 + shipping

**These were the only items I ordered from Fiberglass Supply. Everything else can be obtained from your local Home Depot, Hardware Store, and Craft Store.

EDIT: 8/4/06

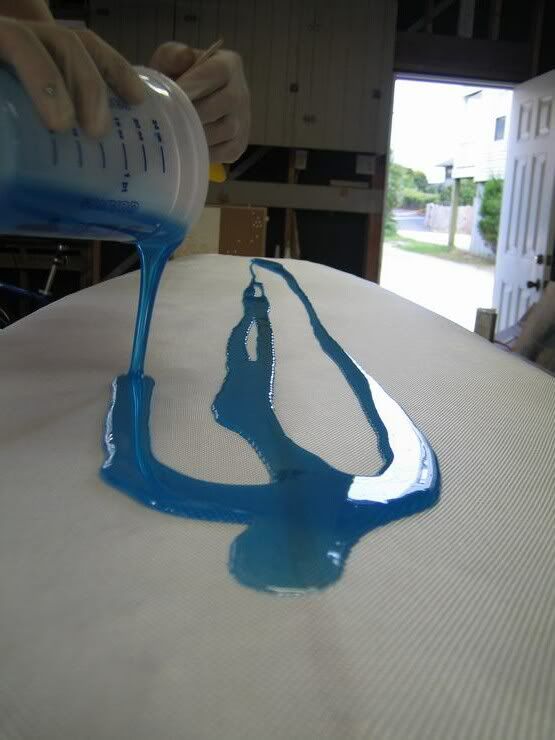
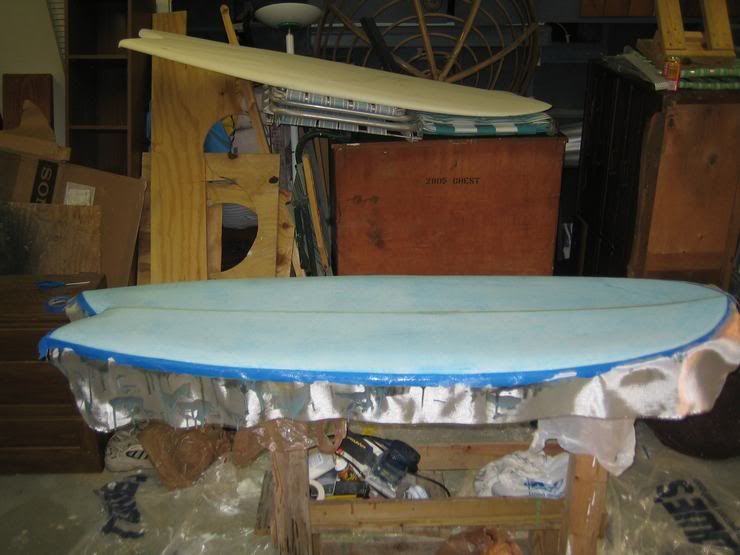
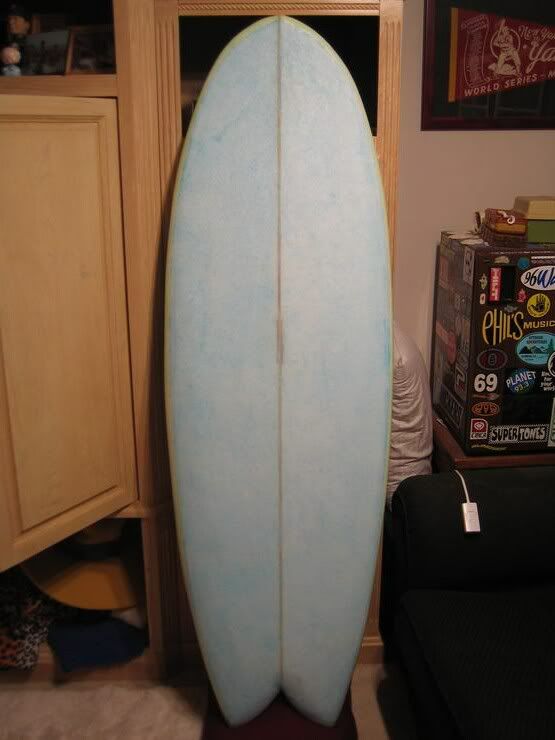
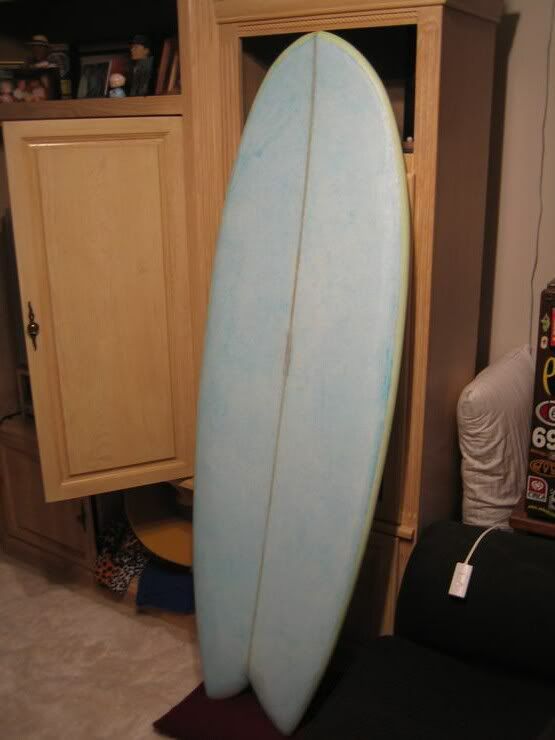
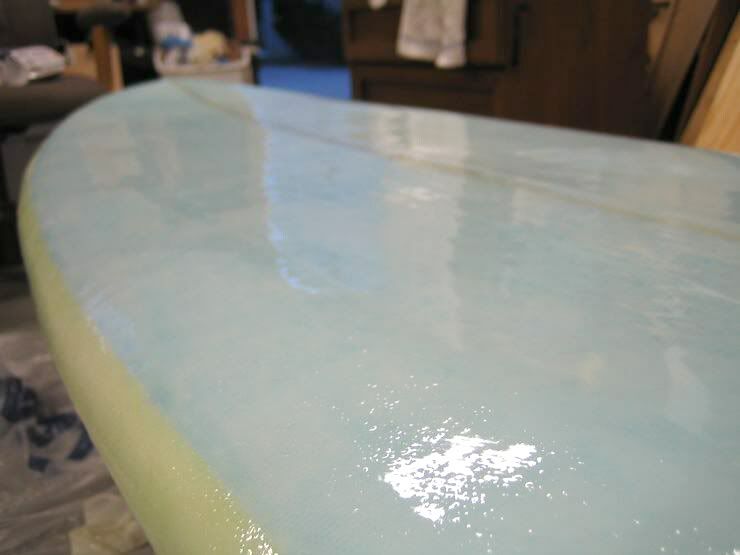
So we worked on the top today. Attempted to do a tint inlay. Decided to go wtih a light blue, mainly so I could see how it turns out for future projects.

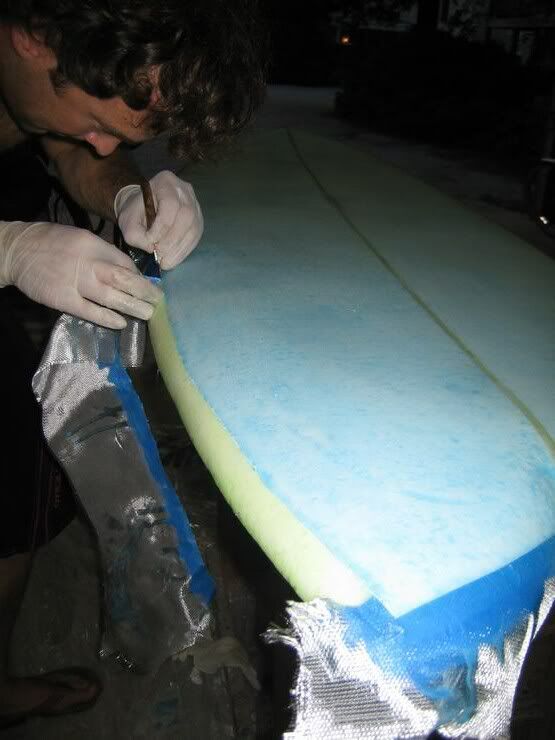
First, we taped off the rails. Do a good job on this so there are no leaks. Also make sure you leave enought tape hanging down off the rails so that if it drips over the side, it won’t get on the bottom of the board. Learned that the hard way. We covered the board in one layer of glass and cut it to the length of the board. No trimming this time.

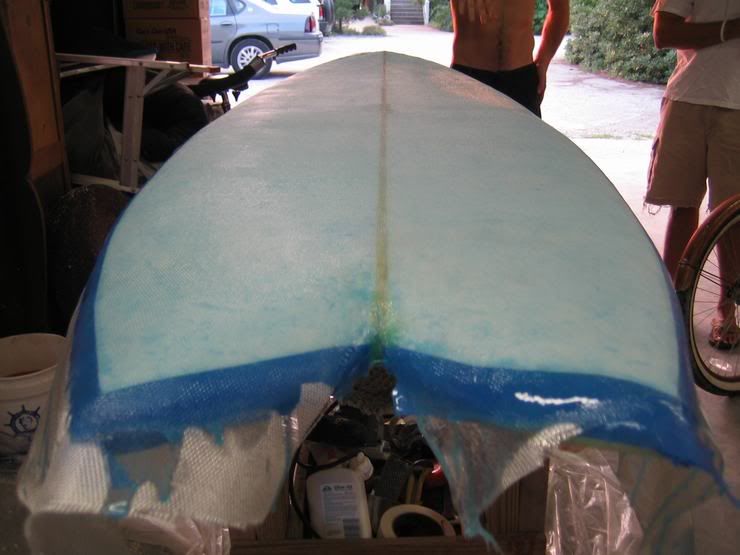
Mixed the tint into the resin and pretty much did the same to the top as we did on the bottom.

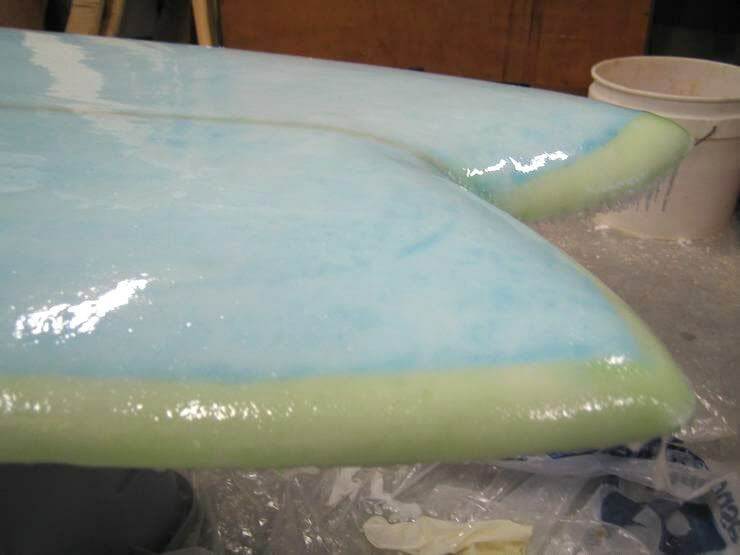
As you can see, the resin dripped down the side and got on the rails just a little bit. Make sure to have tape hanging off far enough to prevent the resin drips from getting on the bottom of the board.

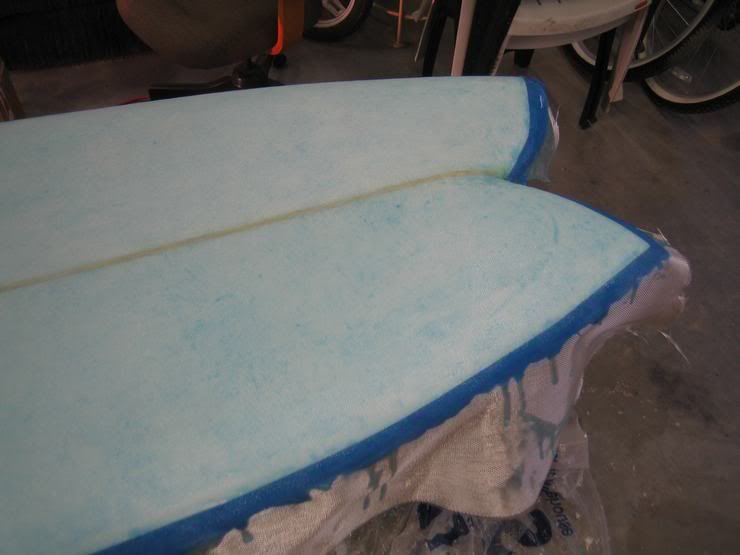
Next up, we cut the lap lines. Pretty much the same as the bottom. Very Carefully.

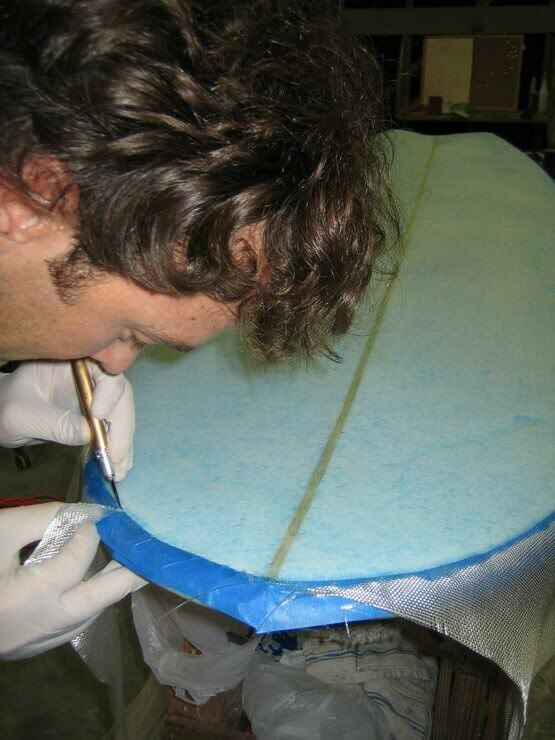
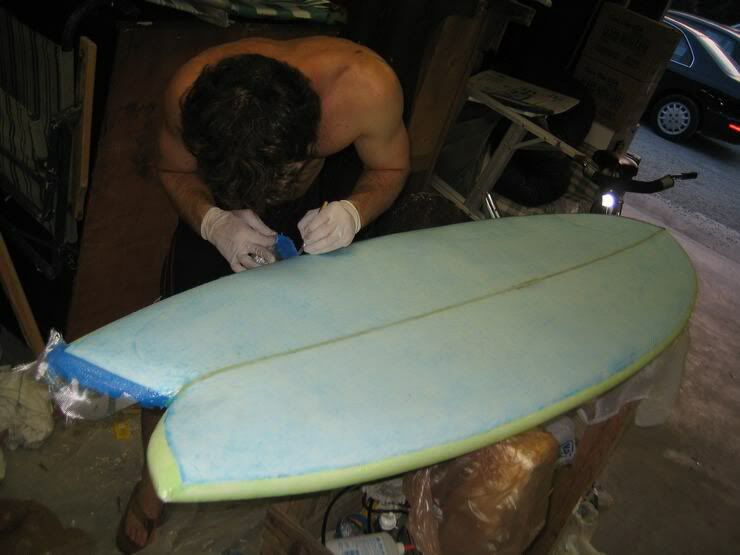
Its starting to shape up nicely!

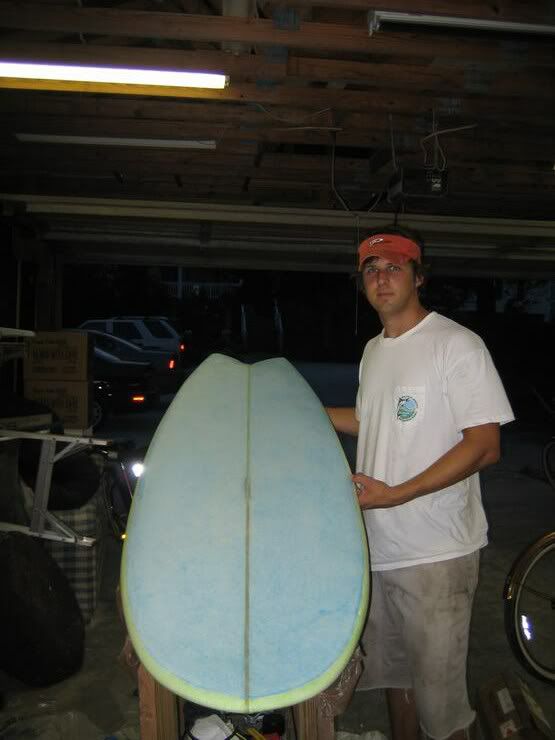
Hunter is amazed at his abilities…

EDIT: 8/7/06

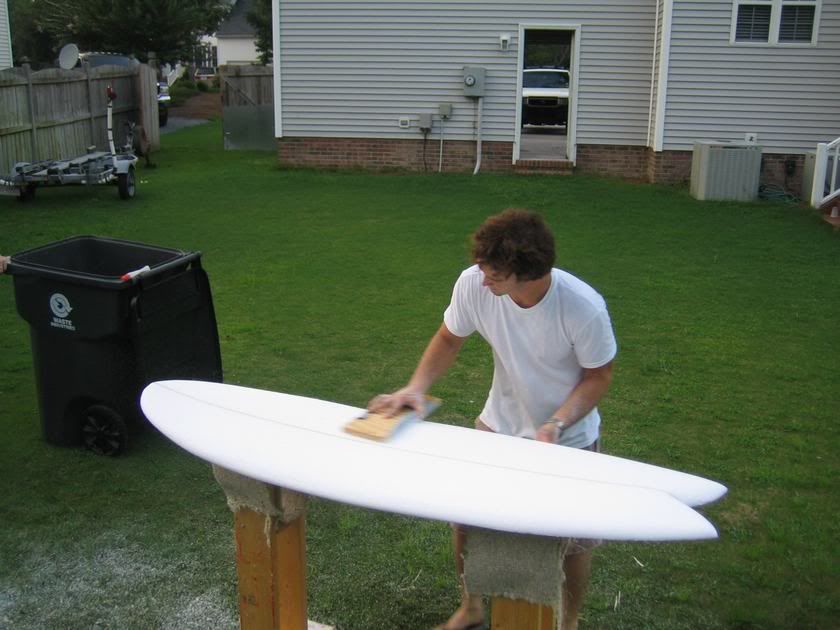
Tonight we put the final two layers of glass on the top of the board. Since I waited more than 24 hours to do the next top layer, I had to sand the deck and rails to “scuff” up the board which helps with the bonding process. Apparently when you let the board sit for over 24 hours after the first layer of glass, the chemical bond is no longer prominent and you have to go with a mechanical bond. (correct me on this b/c I don’t think I am accurate with this process) I scuffed the board up real good using 60 Grit Sandpaper, and cleaned it off with "Denatured Alcohol.” This will setup the board for a better bond and a clean look.

Had I not waited 24 hours, I would have just scuffed up the rails and sanded the line where the bottom and top laps meet (green meets blue). However, by waiting, I had to scuff the rails and the whole top of the deck, as well as clean it off with the denatured alcohol to set it up for a better bond.

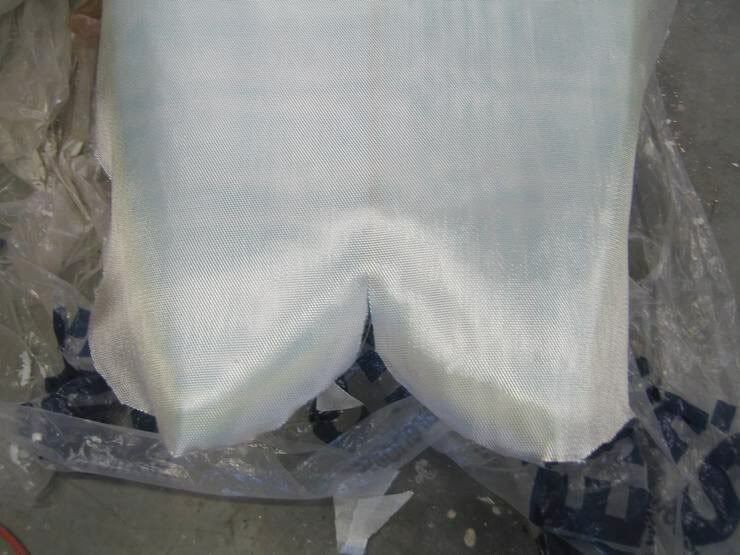
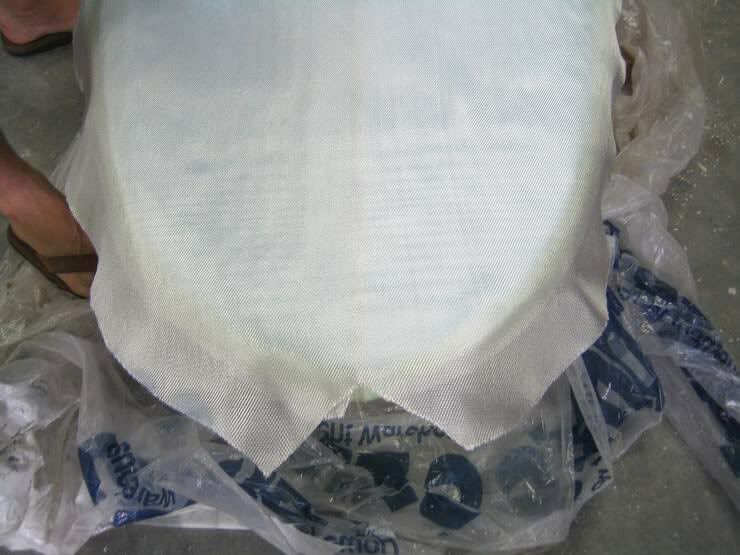
After the board was prepped, we moved to the glass. The 1st layer was trimmed to match the shape of the board, leaving enough fabric to reach the bottom of the rails. The 2nd layer of glass was trimmed about “a thumbs length” hanging down from the rails. (see pictures) We wanted some big honker laps to make this thing tough.

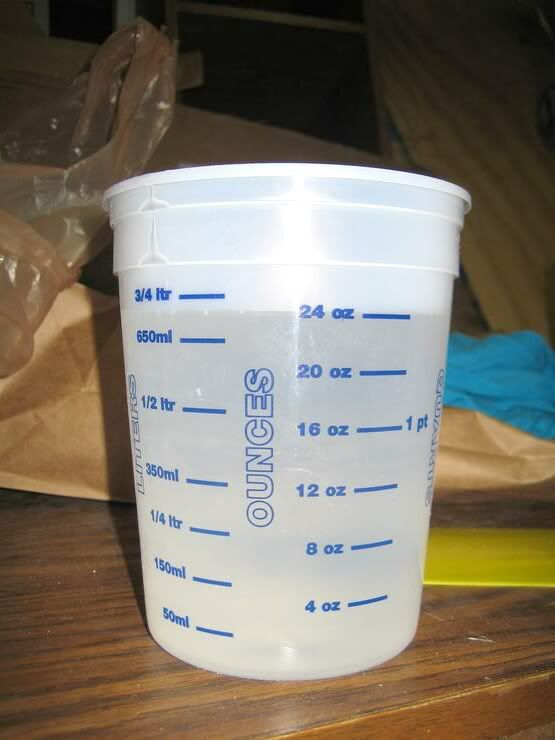
Mixed up a batch of resin using 16oz of Resin, 8 oz of Hardener, and roughly 8 cc’s of Additive F. Once they are all in the mixing bucket, take note of the time and begin mixing for 2 minutes. Stir it semi-fast to make sure everything is thoroughly mixed. However, if you mix it too fast, air bubbles will become trapped in the resin and you will get a milky color to it. Just a good thorough mixing.

Here is a pic of the 3 times before mixing (16oz, 8oz, 8cc’s)

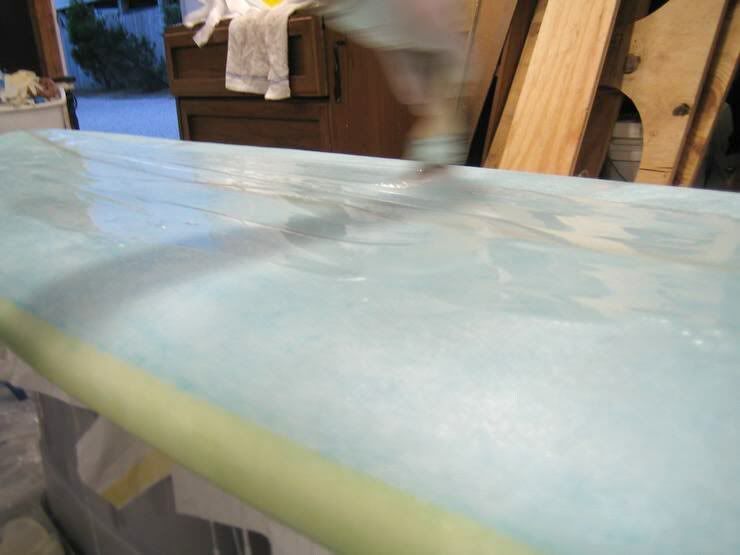
We covered the two layers really good, starting from the middle and working our way out with the squeeges.

After the middle of the board was good and saturated, we began to move the resin towards the rails, soaking the overhanging laps (**Note: I was unable to take pics of this process as my hands were full so the pics go straight to the 2nd coat of resin).

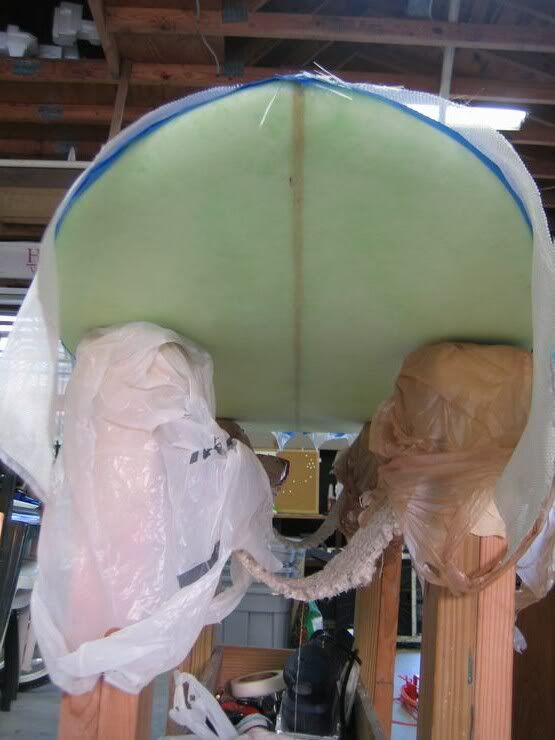
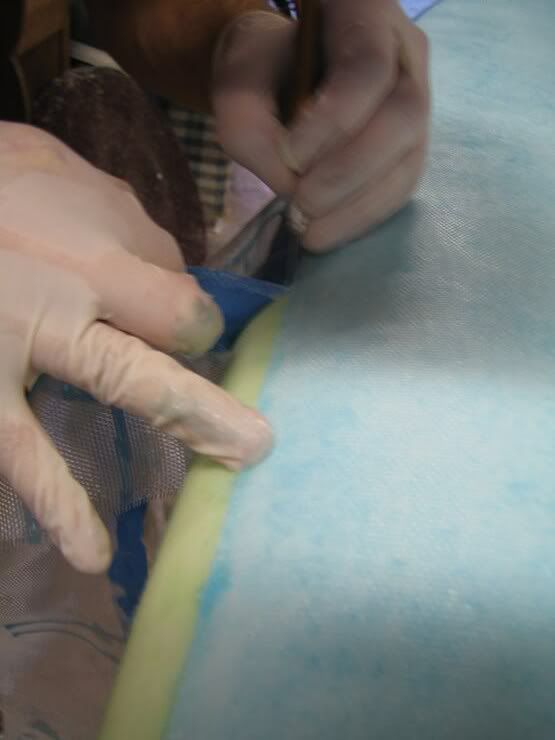
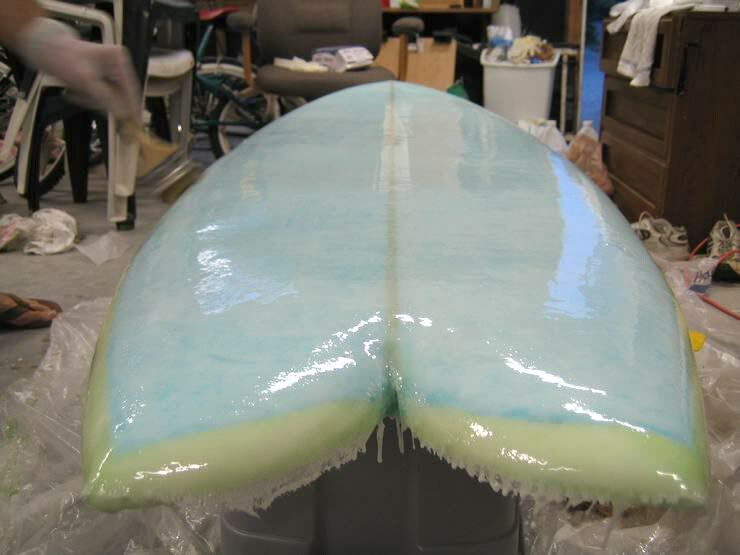
We folded the laps under starting from the middle of the board and moving towards the nose and tail. Here are two pics showing the size of the laps we used.

Keep the fabric good and tight. Scrape the resin from the stringer towards the rails. This way it keeps the glass good and tight.

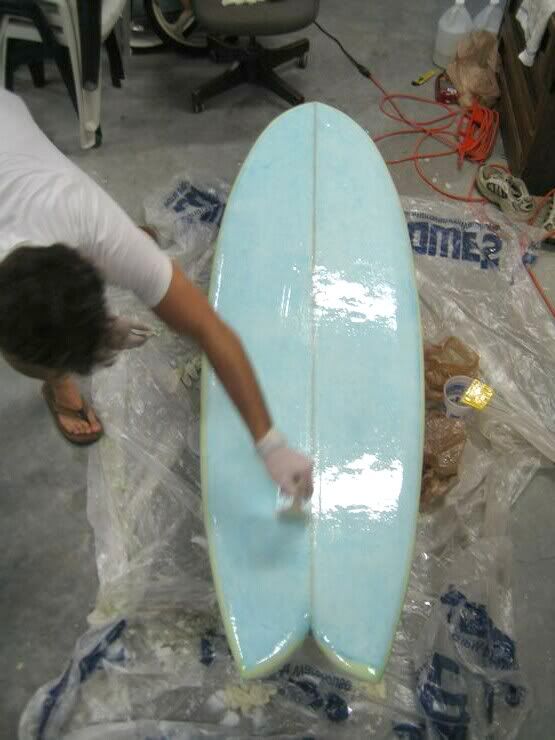
After saturating the glass cloth and making sure there were no lumps, we let the board sit for about 45 minutes until it became tacky. Took a break to go eat. Came back and mixed up what would be considered the “hot coat” even though there is no extra hardener used….basically just another layer of resin mixed the same way, but painted on with a brush rather than squeegees. Here are pictures of the 2nd coat of resin going on after the first layer had become tacky. Note: the resin has a “milky” color due to being mixed a little to fast. Note to self: do not mix the batch too fast or air bubbles will become trapped and give the resin a cloudy look. We were too excited to get this thing done and got a little carried away on mixing. :slight_smile:

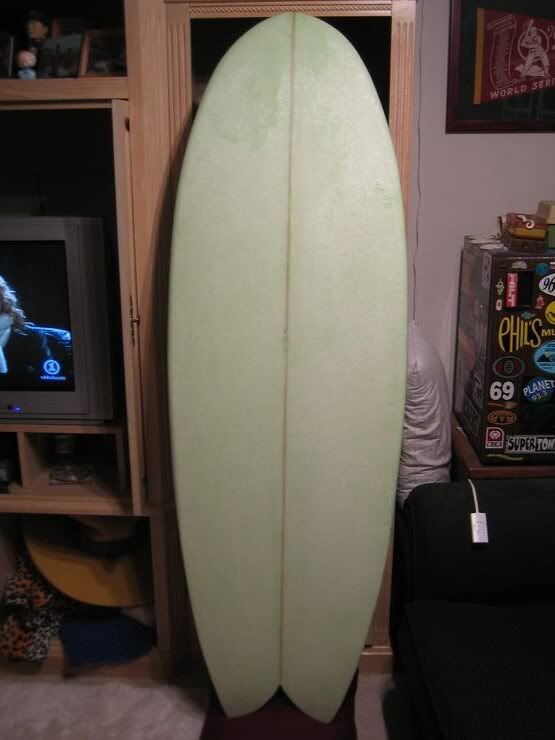
Its finally starting to look like a board. Not too much longer…

Next up…fins!!! Went up to the craft store and bout a 12" X 12" piece of 3/8" thick plywood - $4.99usd. This will be the start of the fins.

nice !

but, one thing …

put a shirt on hunter , or you’ll have rubberlove pm’ing you asking you out for …er…wetsuit or other rubber “measure ups”

cheers

ben

Great board man, I bet it will ride great. It’s addicting isn’t it?

That’s nothin’, our neighbor has dementia, yells at us, our neighbors, and the people across the street, and waters everyone’s yards plus the gutter. You can have her too.

Quote:

Nick, super job :slight_smile: My first real Sways contribution 2+ years ago was also a Home Depot blank… pro? I’m not even close.

Hunter, I’ve got a crazy neighbor lady who shop-vacs her front yard in a housedress & rubber boots almost every might just after dark. Send me a plane ticket and I’ll give her to you. I’d love to get her out of the neighborhood for a while :slight_smile:

hi mate !

so , what is the fish in the background in this shot ?

your last ?

your next ?

The fish in the background was my neighbor’s old board that broke. He stripped it down and practiced using a planer (i think i mispelled that) on it. It needs to be thrown away. Anyway thanks for the compliments. Its not the best looking board but it seems to be coming together nicely. Considering its my first board, I’m pretty happy!

Hi figure8

Nice board, very nice and clear explanations, put on some fins and let us know how it rides.

Can’t wait to see the photo’s!

I feel the same with my boards, just want to get them in the water

Ciao from Soul

Thanks! We are doing the final glassing this evening…then possibly working on fins. Our guesstimate is that it should be complete within two weeks. I’m very excited about it. Slowly but surely. Thanks for the compliments!