Pros and cons of different rail methods for HWS

Sorry I hope you guys don’t mind another question on wooden hollow surfboard. After much research I think I need to have a go building one myself. I’ve been debating how I should build the rails.

As I see it there seems to be three rough methods.

Solid rails, either gluing solid strips onto the side of the board once both top and bottom decks are glued on, or having the rails as part of the frame of the board. This seems in someways the least complicated, at least at the glue up stage. I wonder how much extra weight this method adds, it seems the rails are one of the heavier parts of the build.

Strip methods, either building up strips chamfering them as you go or using bead and cove strips. Seems a bit faffy, especially getting it ready to put the top deck on.

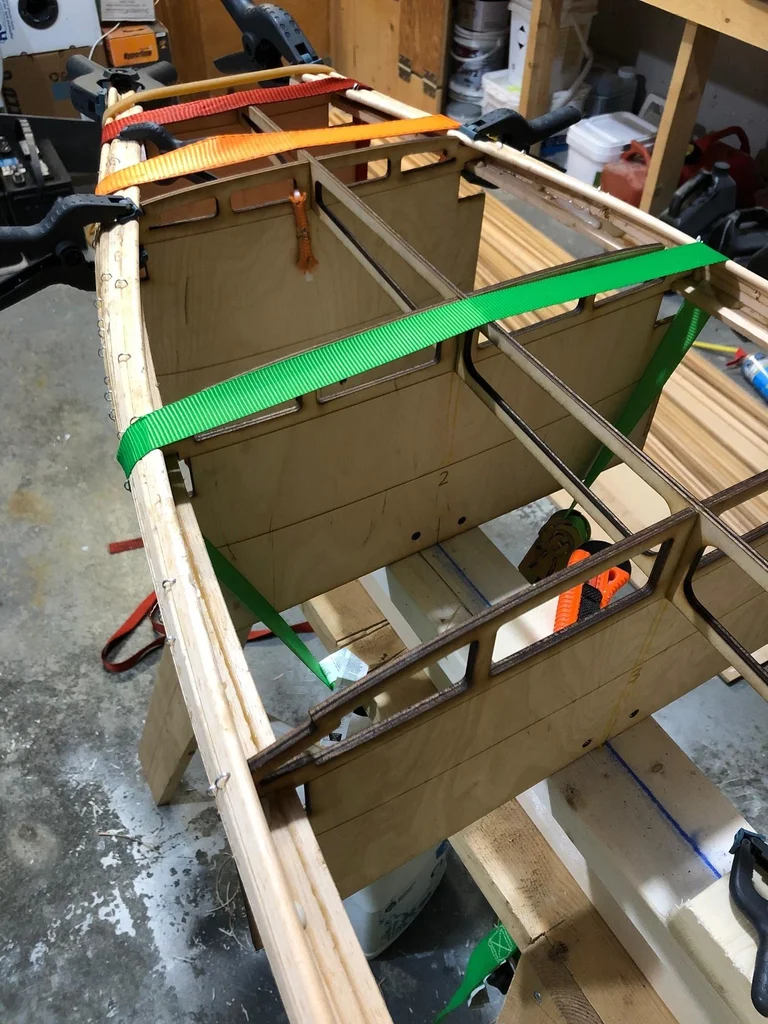
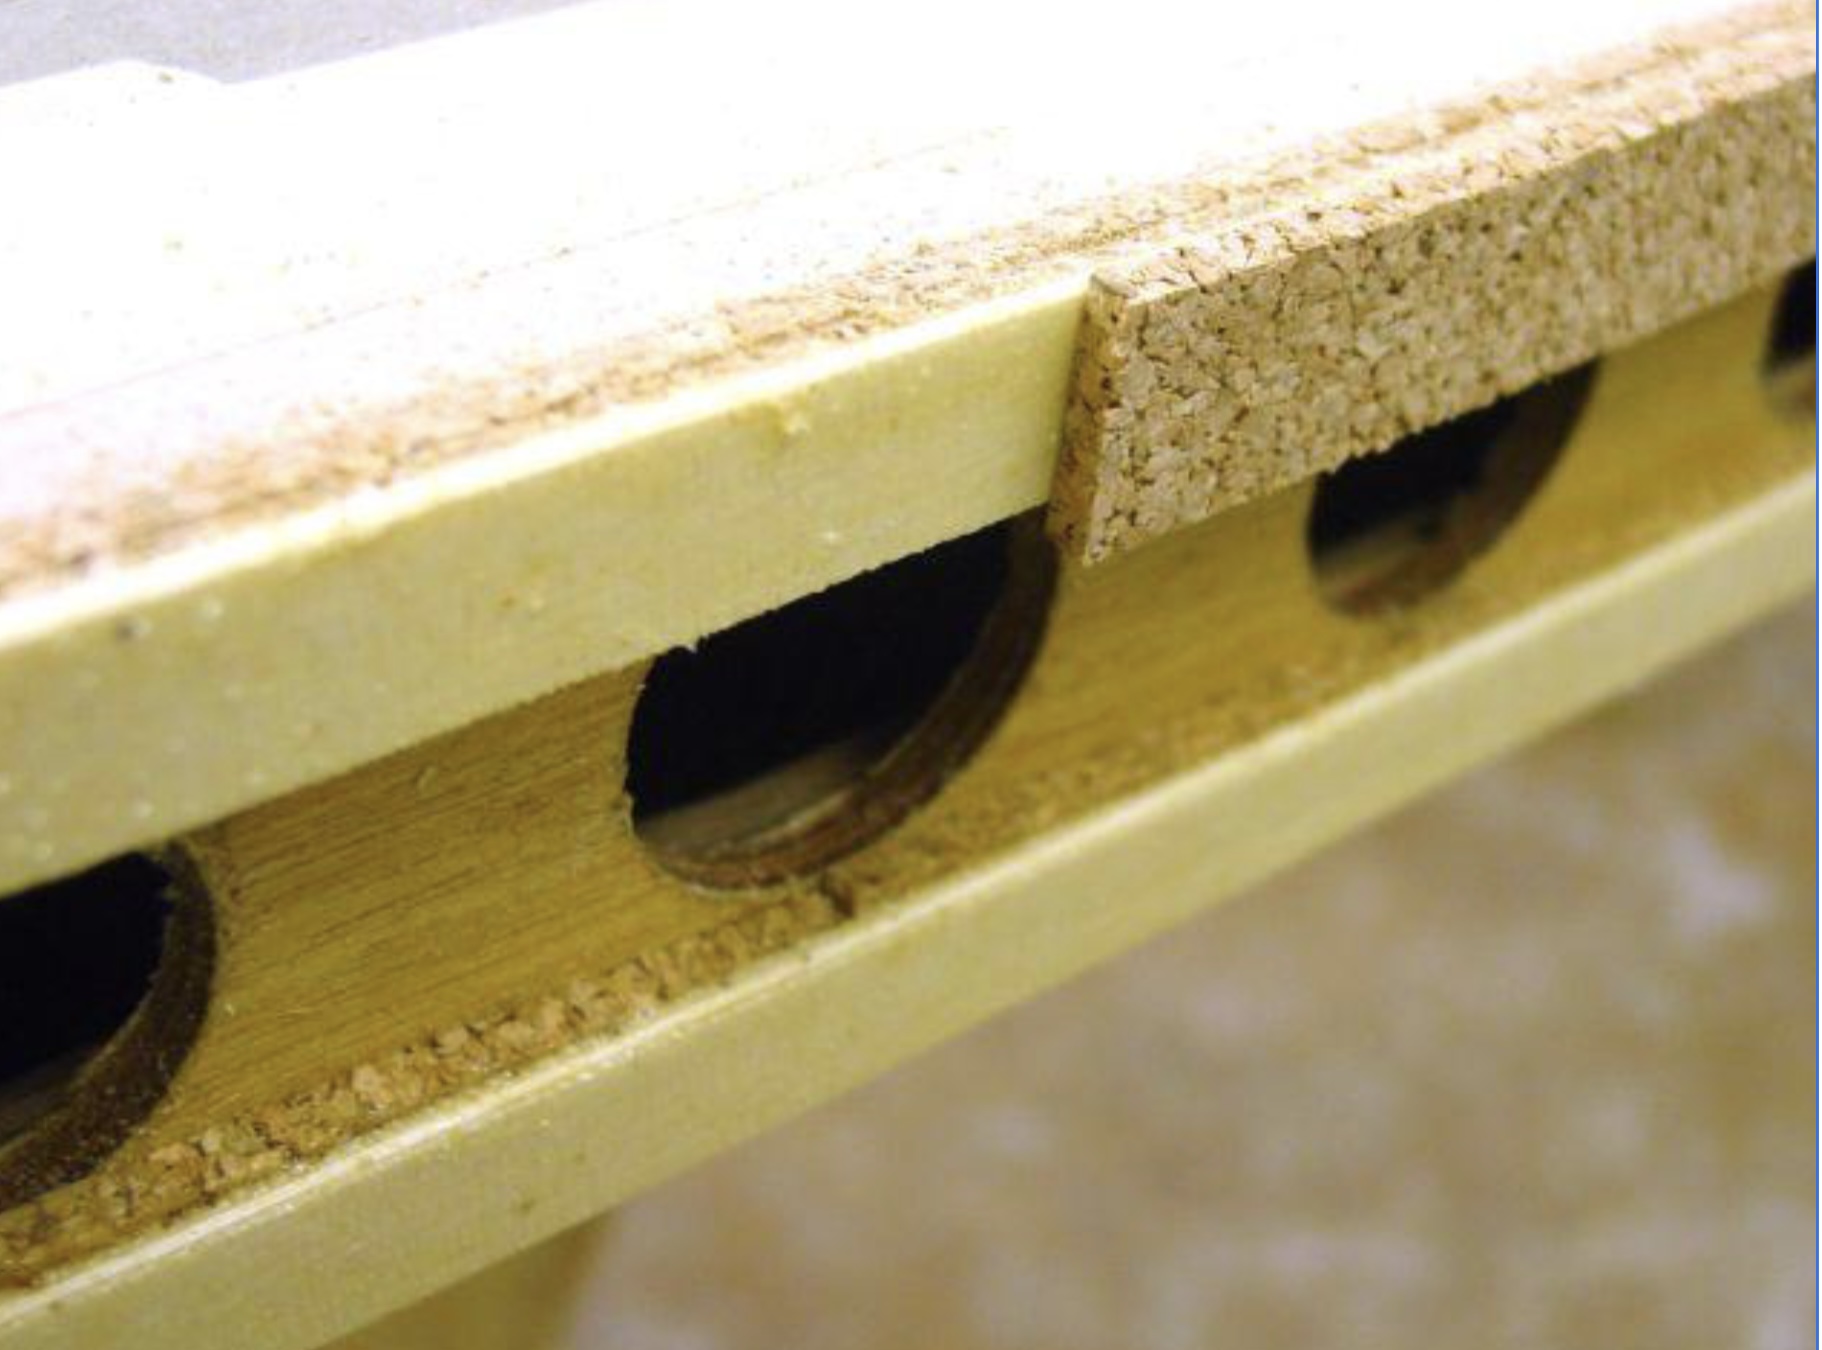
Hollow rails, seen a bunch of cool methods building up hollow rails. Seems like you get the best of both worlds, light but you can shape them yourself. They all look quite complicated to do. Was looking and how Wood_Ogres done his rails, seems like Paul Jensen does similar unfortunately I cant find pictures for his guide anywhere.

Would be interested to hear the pro’s and cons for each. Why you guys choose one over the other.

Would be stoked to see any pictures of your methods.

1 Like

Here is my brothers rail method (starts around 2.30 mins) build up the rails, bevel the top of rail, the deck skin continues out over the top of the rail.
Making hollow wooden Paulownia Egg Surfboard Slideshow.wmv - YouTube

Here is the rail strip method I use.
Seven 5mm strips equals 35mm (1 3/8’‘).
Deck skin gets glued on first, then the deck outline is shaped.
Next step make a nose block and glue.
Rail strips butt against ribs and deck skin.
Rail strips 1 (15mm) and 2 (25mm/ 1’‘) sit on the rib notches.
Rail strip 3 (35mm/1 3/8’') doesn’t need to be full height.
Rail strips 4,5,6 and 7 are full height pieces and butt onto bottom skin.
This method is more complex than Paul Jensens method (bottom skin stops in line with deck skin and all rail strips are full height, if I remember correctly).

Here is an important tip.
Before you assemble the spine and ribs, trace the spines rocker curve onto one of the rail strips then plane and sand, this will be a reference template for getting the rail rocker curve to butt neatly against the bottom skin. You will discover that the rail rocker will be slightly different to the spine rocker.

Here is an example of the rail at midpoint.

This pic shows the rail strips butting up against the nose block.

1 Like

Here is pic of Paul Jensens rail method, cork and thin ply.

Perhaps we can summon @PaulJensen

Another Paul Jensen board showing the rail strips on the underside.

Thanks Carvin Marvin for the pics! Nice knot inlay.
My first HWS was close over 20 years ago and Hicksy, fatlardbass, and Roy Stewart were all in the same pack of boards too. Lots of luan ply going on there for a while…

I did my last 4 boards with cove and bead rails. And recently I have transitioned to a method where I make fixed-height ribs that are then fastened onto a strong back like a canoe build. I find it a lot easier to keep the ribs and other components trued up, and I don’t need to make rocker tables. (The build wasn’t on Sways as it was on that awkward Discord stage, but I posted a link to the full build there.)
• My Stringer is slotted into the ribs, and then I build the rails first completely. These are 1/4" x 3/8" cedar or basswood.
• Top of the rails is faired down to flush with the Deck with a planer.
• Deck skin is glued on and then feathered in. I’ve used both cabinetry ply and solid wood for the deck, and both work.
• The board is freed from the strong back and the ribs are trimmed down on the bottom side.
• It is then decked on the bottom that is feathered down to the rails. Then final sanding happens.


Back to the heart of this thread. Here is what I see as the pros and cons for the three main rail methods, as well as the two main rail to skin junctions. Those of you who have built HWS before, please copy paste and add to these lists in your own post!

Rails:

Cork Rails - Pros - Fast, minimal tooling beyond a sharp razor knife for the layup. Cons – Weight, softness, hand shaped profile.

(Disclaimer: My very first HWS I did this method, but with only the cork. I did not like it because I found the cork too soft and spongy feeling, even under lapped 6 oz glass. Too easy to get rail dings. But with the interspersed layers of plywood I would think that is now no longer as much of an issue.)

Solid wood strip rails- Pros - fast, readily available materials, overall board strength, resilience to rail dings. Cons – Weight, hand shaped profile.

Cove and Bead rails – Pros – Overall board strength, resilience to rail Dings, least weight, rail profile naturally follows the rib shape. Cons - Time consuming both in milling the materials and layup, super tight profiles are difficult.

As far as the junction from the top and bottom decks to the rails, there are two main methods for that as well.

Top and bottom skins feathered over the rails. Pros – allows the rails to be completely built out before skins are laid. Cons - Does not work well with sheet goods, as the inner core layers will be exposed. Does not easily allow for fiberglass underneath the skins. The extent of feathering in can completely change the rails shape and hardness.

Top and bottom skins butted against the rails. Pros - Thin sheet goods can be used as skins. Skins can be fiberglass or carbon fiber underneath for strength. Cons - skeleton must be fully complete with both top and bottom skins before rails can be applied.

On my next board, I am planning on doing my rails like shown. I’m making up the method as I go, so I am calling it the “Apex Dogbone” for now. My plan is to take ¼” x ½” strip and run it four times with the bead router to get the shape. This would be the very first piece to go on the entire length, and it would be glued to the ribs at the apex of each curve. Then build out towards the deck, and build out towards the bottom. Top and bottom skins would get feathered into the rails.

Previous to this I used the “Foundation Strip” method I learned from Clayton at Sliver, where I had one foundation strip that started near the bottom and I worked my way up around to the deck. Towards the ends of the boards as the profile gets slimmer and the curves get tighter I found that it created some really tortured and complex bends. Particularly when the strip would start on the bottom of the board at the tail, but by the time it gets around to the nose, it is on the top. Had to do a lot of steaming in order to make those, and I still ended up with some that cracked and had to be repaired. I’ve been getting better at it, but I still feel like it is a fundamentally difficult method. By using the apex dogbone I am hoping to avoid that sort of torture on the wood strips.

I usually do solid rails, balsa, cork or a mix like Paul‘s. Yes you get a lot of weight if the board is thick and if you need wide rails due to complex rail contours.
But thick rails give a lot of protection too, most vulnerable parts of a board are usually rails, so a little bit of meat there max be an advantage, and if out of cork it may dampen an impact.
My actual build has very thick rails with a lot of weight, actually I would have liked it lighter.
My cork rails are not really soft, i glue them with epoxy paste, which hardens between the bands.
Pic shows new build prior to sealing, at 9,4, 23,5 width and 3,25‘ height, volume is about 83l and final weight will be between 18 and 19 lbs.
The board is heavily influenced by CJ Nelsons Apex, with a convex bottom (with a concave in the front, and rails going from convex to 60:40 to sharp in the tail


She’s a beauty. How is your deck done? section of plywood joined or veneers over substrate?

I could see how the epoxy would stiffen cork rails. I used flooring cement on mine, that stays flexible.

The basic hws is balsa, deck and bottom veneered, outside will only be sealed, not glassed anymore.
You can follow the entire build under:

This is a 9‘2, now gimmicks and the rails were solid, but quite small. Total weight about 14lbs only…


I do not see a big advantage in the striped or hollow rail method. Finally they need to be thick too, or heavily glassed to make the impact resistant. And building those is much more complex…


Welcome back Paul! I was hoping you’d show up.

I’ve been lurking…

Site is looking good…!!!…

How are you doing…???…

Yeah. I’m pretty stoked. The best SWAYLOCKS yet???

Just surfed the fore runners of hurricane Lee. So guess I’m doing ok??

1 Like

Here’s a trick that I used for doing the bead and cove method. You can make dozens to extra “clamps” from cutout sections of a PVC pipe. Note: It was very time consuming to build up the rails with this method.

I built one with Paul for a bday present, my favorite part of his rail method was that spray glue that came in what looked like a helium tank. I remember the rails going on crazy fast with that. We maybe did the rails in a night and it only took a few dark stouts worth of time.

The board now hangs in the middle school woodshop class I teach. And not to worry I surfed it a few weeks ago too, still works.

Darren

I build my rails up from the bottom skin in strips, then shape them back down to match the cross sections supports before gluing the deck skins on.