question about retro fish

Hi everyone

New to shaping I would like to shape my own retro fish, I have looked around the data base but I am kind of lost with all the design, rail shapes…

My question is about the rails, what kind of rails does a retro fish need.

50/50 at the nose, 60/40 mid section the last 1/3 of the board (tail section) will be a hard rail.

What about the section of the rails, I need to consider them as boxy, rounded rails?

What about the shaping of the swallow tail.

Do I have to start the shaping process of the rails before shaping the tail or the other way round?

I have checked the pdf file showing the Steve Lis design where the rails section are shown but I am kind of lost.

I don’t know how to handle the bevels, I know how to draw the lines with the marking gauge but how many bevels should I have for the bottom and deck?

Regarding the bottom do I need tucked under edge rails?

I am a rookie and I am aware the answers are to be found right here in the data base but I am kind of lost since there are so many things to consider.

If you feel like helping me out thanks for doing so.

Im only quite new to this myself ( i’ve shaped 3 boards, second one a retro style fish ), but dont get too hung up about numbers. My rails on my fish are boxy, in fact even a little too square, but i ride it almost every surf and love it to death, it works fine. As far as rails bands, honestly, i do one, that’s it. I mark on the flat rail how high up i want the rail to be, then on the deck, i mark where i want the rail to end. Then i just join those two lines. Might not look like a pro job, but it works fine i find.

Anyway, again, im very inexperienced, so take that into account when considering my advice.

…the old fishes doesnt have 60 40s rails

they re down rails

but I tell ya that is better to do a fish than an old type

I suggest viewing the shaping 101 video from Carpenter. He shows you how to make navigation points to guide your rail bands and do the tucked under edge. It’s good to shape the tail last. After the board is almost finished. There is less chance of snapping a tip then. Mike

If your new to shaping, here are some “shaping for dummies” thoughts:

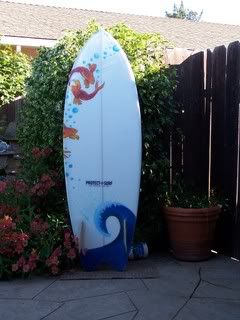
Yea…retro fish have down rails, and it’s true that a 60/40 rail is a “down rail,” because the apex is lower than half way from the deck to the bottom. You have to blend the rail radius into the bottom, so you have to have come kind of “return” curve into the bottom, but there doesn’t have to be an edge if you don’t want it to have one. Leave an edge if you want… round it off and smooth it in if you don’t.

Once the blank is templated and foiled to thickness, make dots along the outside, vertical plane that will be your rail half way between the bottom and the deck. This is a basic reference point. Then, put the blank on the rack bottom up, and use either a Fred Tool or a pretty agressive abrasive, like dragon skin or something like 36 grit, and round off the bottom edge into the the shape you want the bottom of the rail to have, keeping the vision of the finished rail in your head, and using the dots as reference points. Don’t bother even touching the front or back 12 inches (or more, especially in the back). Save that for the finish shaping stage. The less you take off the bottom edge, the fuller the rail will be, and the lower the apex. If you take it all the way to the dot, you’ll have 50/50 rails at best, or up rails (you don’t want those on a traditional fish). When you have the bottom curve the way you want, flip it over and do the deck side rail bands. For sloping, angular, down rails, you can do one rail band with the planer, then blend it into the deck and rail radius with a surform, then dragon skin or 40 grit on a padded block, then 80 grit on a padded block. If you want more of a “modern” rail, do two bevels with the planer, then blend them into each other, and into the deck and rail radius, with a surform, then 40 grit, then 80 grit. Once you’re at the surform stage, go with a really light touch, and only take down the “corners”. Then go to your padded block to do the true blending. With each successive tool, walk the blank from nose to tail and back, sliding along the corner the entire way, several times, until it’s a smooth, blended curve from the stringer, around the rail, and onto the flats of the bottom.

Shape out the nose and tail rails by hand/eye with the hard side of the block with 80 grit, skipping the dragon skin and surform. Finish with 100 grit on the foam side, or use foam pad abrasives.

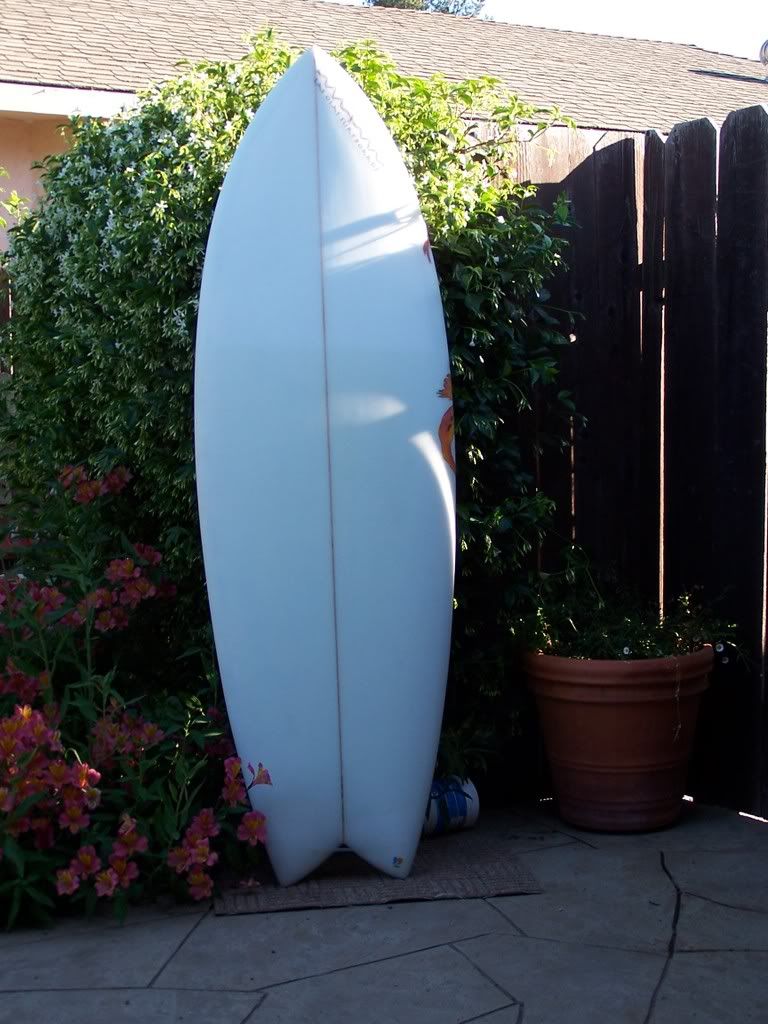
Swallows should be cut at the very end with a coping saw, then blended with sandpaper. It helps to trace the tail onto heavy paper, fold it in half, make a template, then unfold it and trace the pattern onto the foam.

Leave the tail until last. Fish tail points are delicate and if you do them first there will be more chance of an error that breaks the point(s) off. As for how many bevels, the fewer you have the less chance of getting one of them wrong. Try two at 30 & 60 degrees for tucking edges under. As for crowning the deck and turning the rail down, I’m still sussing it myself, but two for crowning the deck and one for turning the rail down seems to be the go for me. And as for rail shape, I don’t think you would want to be going low on a fish, but I could be wrong.

this is one i just finished today, it is 2 7/8" thick at it thickest point about 8" or so ahead of center. i gave it the more retro, “down” rails and a beak nose.

the rails were cut using two bands or bevels off the deck and a “fred” to do the tucked under edges. the bands were cut by making a series of marks along the outline of the board (i do one every foot but many people just make them arbitrarily, or dont use them at all) and planing the 90* edges to meet the two points. i use two rail bands and change the width of them depending on the style of rail i want. for this board the i measured 1.25" up the side of the outline (from the bottom) and then 2.25" in from the outer edge (toward the stringer). planing the foam between these two points creates the first and main rail band. for the second band i measured 4" in from the outer edge (1.75" in from the top or inside edge of my first band) and cut the foam from the top of the first bevel until it meets the second mark to create the second band.

dont go too heavy with the fred or surform when rolling under the bottom edges in order to keep the apex of the rail low. also, the distance up (and amount of foam cut) from the bottom of the board toward the deck will change with the foil of the board, make your measurements smaller as you get closer to the nose/tail- for example only measure up 1" or .75" as you get closer to the ends of the board in order to thin out the nose/make harder rails in the tail.

i hope this makes sense and helps you a little, i know there are much more knowledgeable people who have more experience than i, but this rail formula seems to be working for my fishes. i got most of this stuff from the carper video: “shaping 101” and a lot of trial and error. just give it a shot, try something out and see what works and what doesnt, its fun either way.

Here’s an underground oldie… thin down rails in tail, thicker up front. About 2/3 up from tail is the softest tuck on the underside - maybe 70/30 at that position. Soft beak at the nose. Note “Pipeline '74” ('79?) inscribed on ding repair. Heavy stress cracks on bottom (see ding repair pic) indicate that this one had some intense sessions. I think I have some other pics of this one if you’re interested.


That looks like the fish I remember, I think a lot of people are under the mistaken impresssion that the original fish were thick and blocky.

Nothing could be further from the truth. They were kneeboards first, and the ones I saw were the thinnest surfboards I’d ever seen back

in the early seventies.

When the design spread, a lot of shapers ‘‘fixed’’ it by adding bulk and boxy rails. Those boards didn’t work, and the design faded. Best advice I can give anyone shaping themselves a fish is to go as thin as you dare.

Any advice for rocker? I was thinking of lifting the tail to 1.5 inches of tail rocker. A flat 1.5 inches that is.

Rockers on fish are all over the place. If you’re going the thick, blocky, flat bottomed route, more rocker is good.

Thinner fish with softer bottoms and rails go good with flatter rockers. It’s all related.

1 Like
Quote:

That looks like the fish I remember, I think a lot of people are under the mistaken impresssion that the original fish were thick and blocky.

Nothing could be further from the truth. They were kneeboards first, and the ones I saw were the thinnest surfboards I’d ever seen back

in the early seventies.

When the design spread, a lot of shapers ‘‘fixed’’ it by adding bulk and boxy rails. Those boards didn’t work, and the design faded. Best advice I can give anyone shaping themselves a fish is to go as thin as you dare.

I agree…I was making fish as early as '72 for people and they were originally kneeboards with scooped decks and some angular down rails. People started standing up on them. They were commonly in the 5’2" to 5’6" range with twin keel fins that I laid up the glass panels and foiled. Mine had pretty deep cuts in the split between the tails…probably more like 7-1/2"+ versus cuts of 5" in. Aome were flat while I experimented with single concave for lift. Some guys got quivers and asked for a semi Greenough approach so the tails on those converted to the characteristic “crown” tail that George was using…

Funny, just saw this thread after shaping a “retro fish” yesterday. 5’7"x20-1/4"x2-3/16"with 15-1/2"N and 16" tail…tail tips 12" apart. Single concave thru bottom with vee just at cut (5") and accelerated at tips.

Thanks for the backup, DS. Some of the ‘‘fish’’ I see now are no more than high-volume crutches best suited for going

in a straight line, IMO. The originals were designed for breaking new performance ground in some of SoCal’s best waves.

Yup, Nuuhiwa rode them well along with a few others…emphasis on few.

Now that we’ve hijacked the hell out of this guy’s thread, let’s return it to his question.

OP, if you’re ‘‘new to shaping’’, it’s likely your first fish will be a little on the thick side, because you’ll probably

be afraid of taking off too much foam. A flat bottom is also going to be the easiest for you to shape. I’d advise

softer rails forward going into a hard railed tail. But if you can manage to thin the thing out in the last foot of

the tail it will help the rideability a lot - just ask some of the other DIY fish shapers on here: most common mistake

is leaving the tail too thick.

MD.agreed…probably the hardest part of a surfboard for the novice shaper is to “turn” the rails. Boxier more square rails are pretty often used in the tail of today’s surfboards. If you use a good piece of wood fashioned into a sanding block you will have more control over what you do and how well the job will turn out opposed to a surf form.

IMO surfforms are viable tools for blending planer cuts and chops but the often feel ‘craftsy’ to novice and intermediate (and even then some) shapers…this is when they become a crutch tool and surf forms are famous for riding right over dips and peaks. OTOH, a sanding block will help maintain lines and intended flats (even on a V plane) helping you to level those lows and highs out.

I have a strong rep for being able to dissect a so called magic board in less than 15 minutes worth of data gathering. This includes tools that are beyond you right now but one of the tools you might be interested in is called contour calipers. You can get these at Ace and other hardware stores. This tool will help you with symmetry of each rail and helps you envison how far you need to good in forming a rail. The tool has many small wired spines that are held in a clamp of sorts and when pushed against the rail of an existing rail shape that you like, it then forms that shape of rail. You can then trace that actual sized trace to paper or whatnot for later reference.

It will help you to think of shaping as a “reduction process” meaning that you are starting with a given volume and always taking away from it. I once had a guy ask me if I could make the rail “fuller” (thicker)…so I squatted down and picked up some foam shavings from the floor and dropped it onto the rail. The truth of the matter is, that the only solution I could have realistically done to grant his wish is to make the board narrower to access still existing thicker foam.

When making you rails think obtuse and acute angles. If your rail is very pinched and tapered, you must lose considerable volume from the deck to create the rail. If your rail is obtuse (boxy and thick) The deck is frequently flat on boxy railed boards and experienced shapers frequently adjust overall thickness for the consistent cross section of volume for such boards. For a board with a flat deck and boxy rails I might make the maximum center thickness 1/8" thiner overall.

Although I also use a rocker stick religiously as a hand shaper, you are probably fine by just following the blank you selected. Those of us that have been around for quite awhile know how to ‘read foam’ and to select blanks that save us the most grunt work. In the days before ‘close tolerance blanks’, many of us learned how to restructure blanks while creating the rocker and foil that we ultimately desired. Foam was also less uniform in cell structure which also played a big part in our approach to shaping.

Hope this has helped you. Take a little of at a time. Don’t get in a hurry. Look at and feel a lot of boards…burn it into your brain then get in there and go for the gusto.

Picture please?

I’ve never posted a pic on here yet…I’m also jamming on some rush orders…PM me with an email for you (I noticed you didn’t have one listed and I’ll send directly to you pronto…

then later I’ll figure how to post on here…

As an inexperienced backyard shaper, you hit the nail on the head for me DeadShaper, especially the “turning” of the rails part. That was a great post mate thankyou. Im also a bit of a fish lover too, so i will be coming back to this thread a lot ( now im doing a hybrid/mod fish style board ).

Quote:
Best advice I can give anyone shaping themselves a fish is to go as thin as you dare.

How thin can one make the tail on a fish?

What would be the reasoning behind a thin tail?

Where should the volume be kept on the tips, down the middle or to the outside rail of the fish’s tail?

Thanks in advance for any reply