Ive picked up this flexible tool from hobby lobby and it works real well. It duplicates the rail so you can make a rail template or nose template etc. i usually trace it out on paper, then move it to light gauge cardboard for my rail templates.
I do have some questions though. How can i figure out the measurements needed to result in the rail that is templated in the pic
To give an example on how I currently shape a fuller rail with a template that i had got from another shaper that had the measurements figured out.
I use a markinggauge stanley tools makes it. Replace the metal scribe with a piece of pencil lead.
lay your board on its deck and set the guage at 1/2 inch for the bottom start this 1/2 line at around 15-16 inches up and run it to the nose. So you shoud have a nice 1/2 out line of your shape on the bottom of the board. Next put your board on rail and run your 1/2 inch mark the same at 15-16 inches from the tail and run to the nose. For your next line set your gauge at 1 1/16 run it just like the others. And for your final line set the gauge at 1 5/8 and run it just like the others. this will give you a beafy rail for boards 2.5-3 inches thick. the half inch on the bottom is a refrence for your fred tool. As far as the rail markings just bring the deck down to the lines as they are on the rail. My question is now that i have a duplicate on my rail i want. What is the easiest way to find the number that work on my marking guage to fit with the rail template? I hope this makes sense-josh
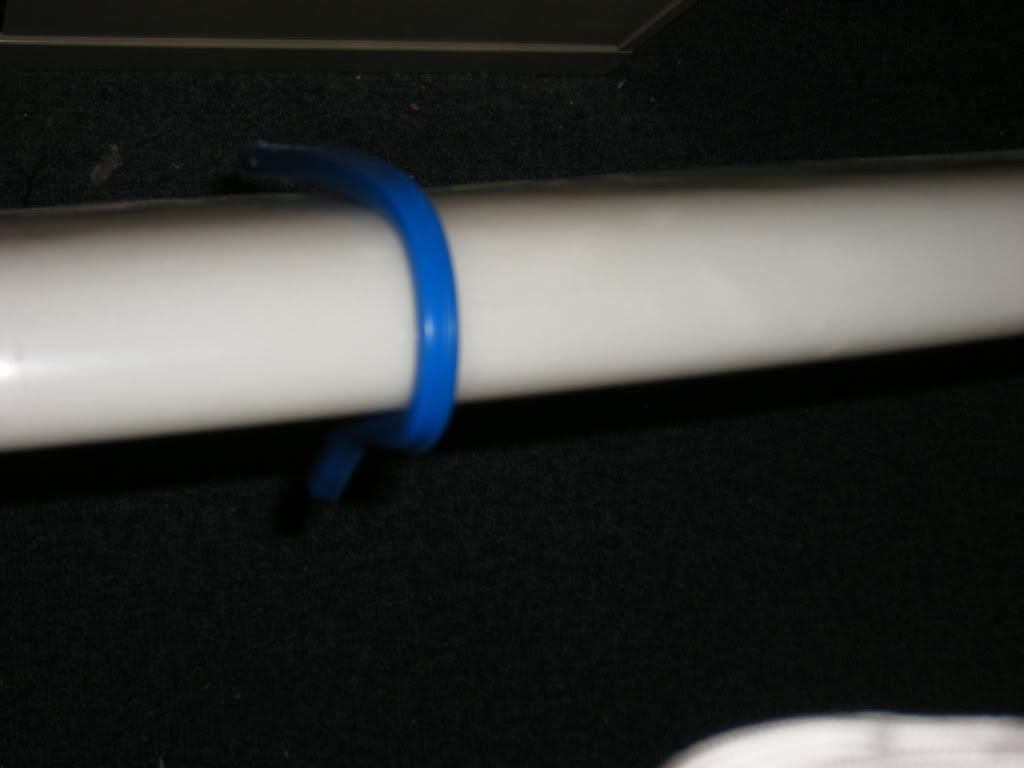
I’m using the inside curve of the tool to get my rail contour. Then i take the tool and copy it on to foam or cardboard.
like this.
Is there a formula to figure out what measurements will work to be able to duplicate the rail template made. the above pic is how i mark out my rail cuts,
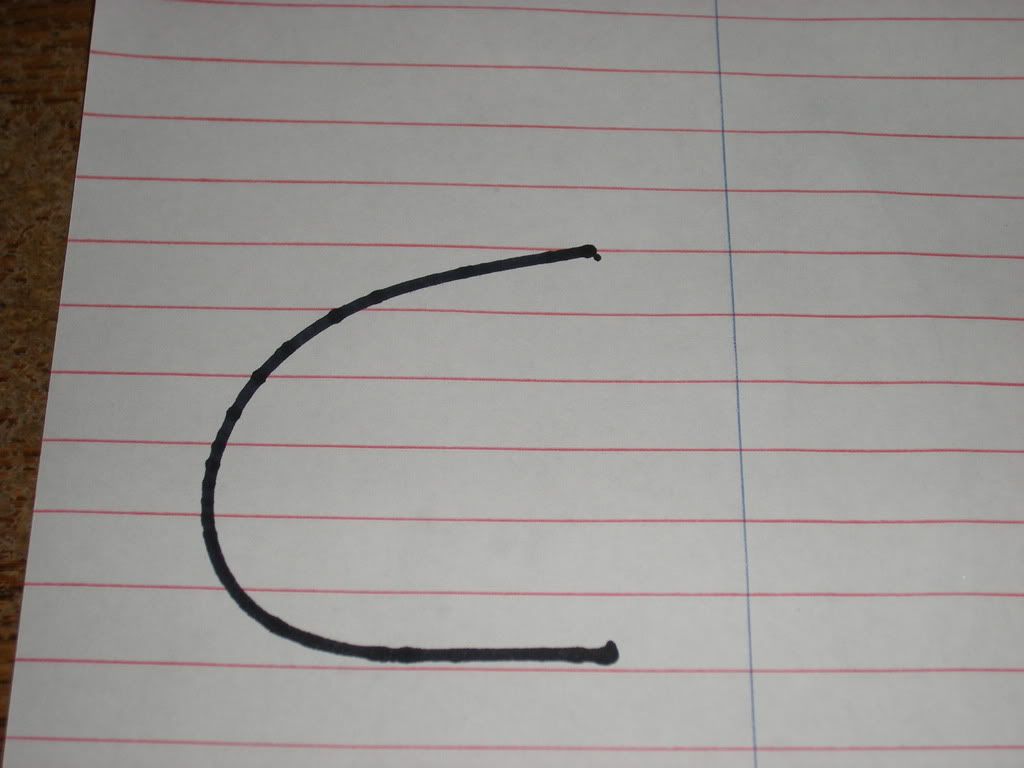
I’m using the inside curve of the tool to get my rail contour. Then i take the tool and copy it on to foam or cardboard.
like this.
Is there a formula to figure out what measurements will work to be able to duplicate the rail template made. the above pic is how i mark out my rail cuts,
Is this a little clearer-josh
http://www.millershapes.com/Second pic is a picture of my high$$$ tool and my dickbeaters. The tool is made from packing foam from a toaster box. Larry Pope gave me the idea years ago.
That’s the business mate, thanks for sharing.I’m gonna get one.
When I was planning my board ,I bought one of these
but it ended up seeming too difficult to use so I just winged it in the end.Which meant of course , that the rails didn’t turn out quite the way I hoped.Making and using templates never even entered my head !
But to have that drafting curve , man that’s a world of possibilities opened up.
Btw, as far as rail bands ( says he of one board experience), I’d just do what you’re doing with those tools but draw it all on paper instead - you know, trace rail curve then draw intersecting straight lines to fit around rail curve, then measure 'em.
Looks like you solved the problem. I do it similar to this way (although I seem to prefer having at least 3 rail bands, maybe 4) or MaxMercy’s way most of the time.
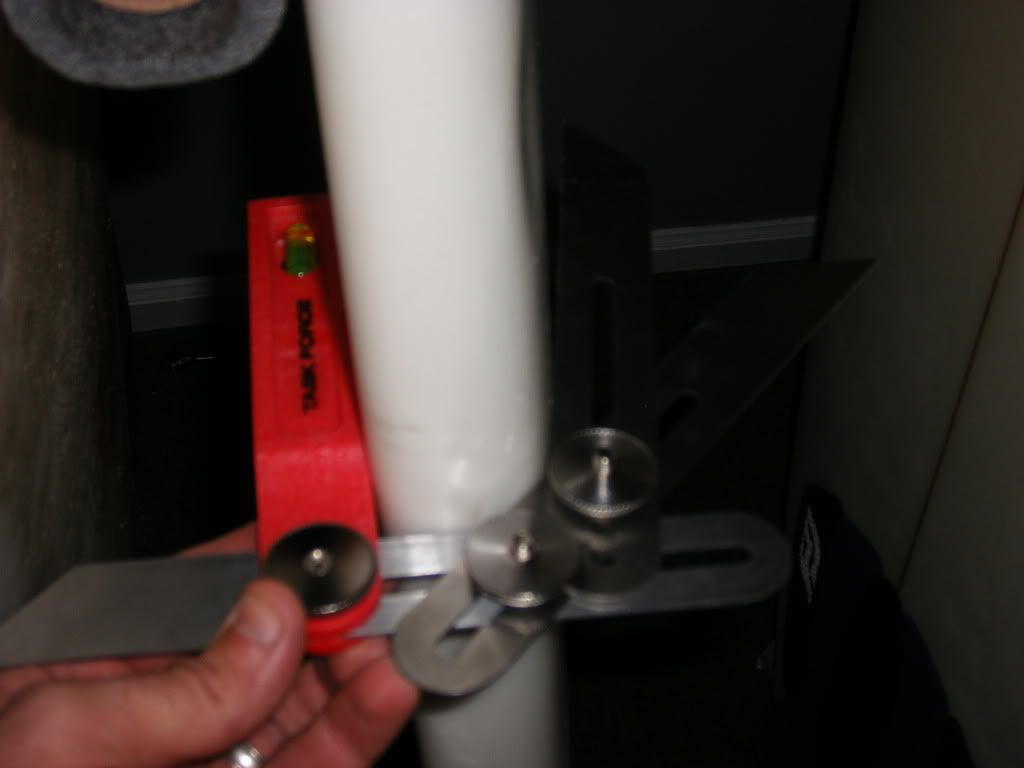
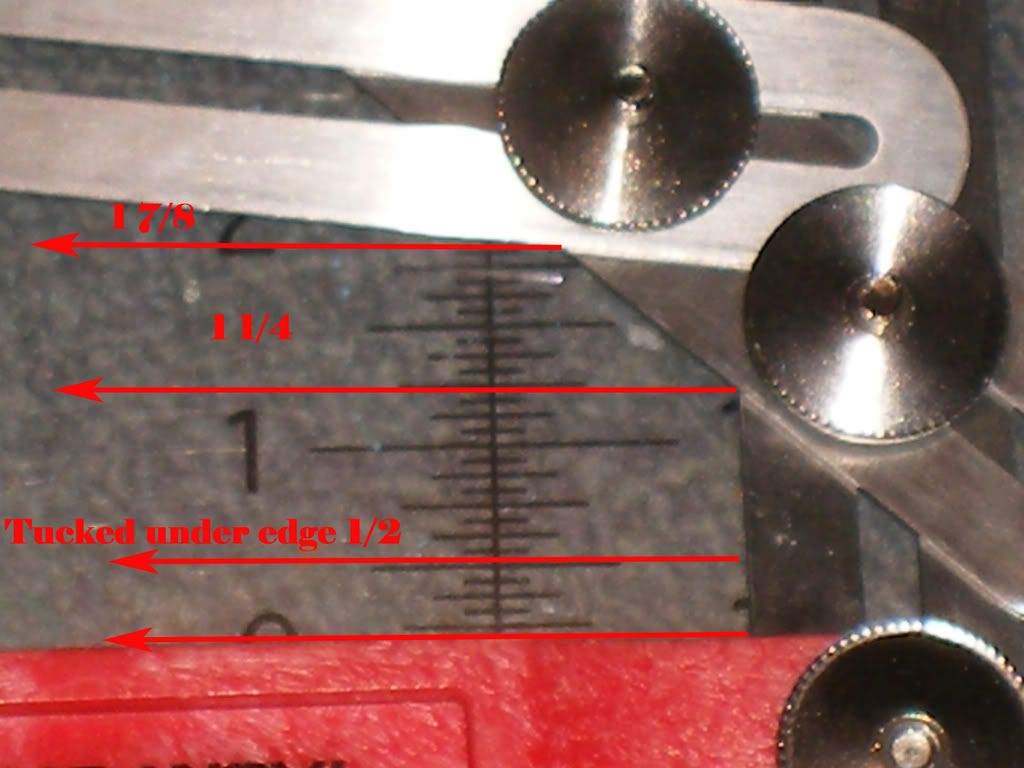
If I understood your picture, you can use the bevel gauge as you did, then compute the angles A and B and the length of the rail band in question, a and b (not sure how long you’d want b, that could vary, but a is clear).
I doctored your photo to hopefully demonstrate this a little bit. Once I have those numbers, I just set the angle of my bevel fence on my planer, mark the locations, and mow away until I’ve connected the dots. Seems to come out accurately.
I use both. The contour jig works well. It takes getting use to. In Shape 3D you can print out slices at different rail points and have scaled patterns to make your rail templates. Nose rail - Center rail - Tail rail
One set for {2"; 2 1/16"; 2 1/8"; 2 3/16"; 2 1/4"; 2 5/16"; 2 3/8"; 2 7/16"; 2 1/2"; 2 9/16"; 2 5/8"; 2 11/16"; 2 3/4"; 2 13/16"; 2 7/8"; 2 15/16"; 3"} for each model you make. That’s 17 sets of 3. Unless you want to go from 1 3/4" to 3 3/4" then you need 14 more for a total of 31 sets of 3 or 93 rail jigs per model.
Or you can just eyeball it and just follow the flow of your planer / surform / screen along your linear curves. No jigs needed. And pretty damn accurate every time… at least for me;)
I’ve assembled a variety of tools to check my shape but like Kawika, often end up eyeballing it or just grabbing both rails and checking by feel.
A trouble area for me is getting the thickness accurate… I often lay out a grid about 6" on each side of the stringer and check my deck thickness every foot or so using those Pleskunas calipers. The yellow gizmo? (my girlfriend brought it home from a garage sale - “TCL Products UK”) is cool for checking deck bevels. The homemade “Deep Throat” contour gauge is good for those spots I can’t reach by hand to check rail symmetry.
I eyeball most of the time as well. I was being extreme. There are a lot of guy’s that are hyper critical fot sure. Just showing how detailed you can be.
When you have to make ten or more of the same board the jigs come in handy.
Some of the worlds most sucessfull shapers use rail jigs. They do have their purpose in certain situations.
Sorry if that looked abrasive. If you knew me, you’d realize no harm was meant by that comment. I have been taken the wrong way quite a bit by the way my posts come off… I was just saying, “Hey… if you don’t have time for the gizmos, the eyes work too!”