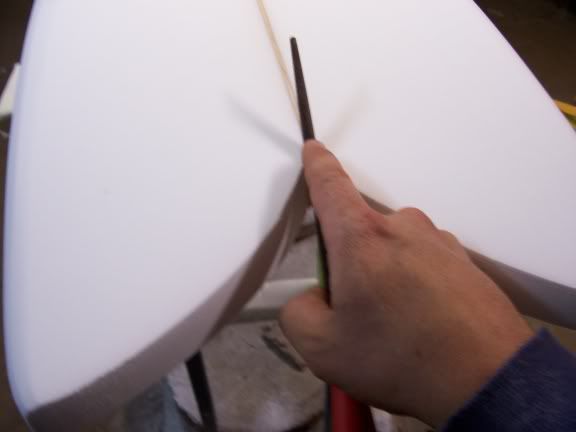
ok, i’m starting to shape… i’m on board number 8 but everytime it comes to taking down the stringer in the butt crack of a retro fish, it is pretty freakin hard to do…
i know that i take down the stringer with a block plane but i’ve been using a dremel tool to get rid of the excess stringer and it comes out looking extremely butchered…
it takes steady hands to do it with a power tool. I like the dremel but it’s easy to mess up. Some folks use a rat tail file or its modern equivalent, the small round micro-plane file. There is a picture of one here:
KM is right on… The butt crack a tricky area that needs special attention, and the right tool makes it a lot easier. I used to use a tiny round file, and still to to some extent. But the real deal is the round microplane. Butt if all else fails, you can always just fill it in with resin and sand it down to perfection.
I use a wooden dowel. I have a couple of different diameters and I either glue (spraymount) a piece of sandpaper to each end using different grits or hold a wrap of paper around the dowel for courser grits (36-60). I’ve used this to my satisfaction on stringers up to 1/2". The wee stringers are pretty easy this way.
Aloha! Same way I do it, except I use a regular round surform blade, cutting into the swallow. The micro plane blades seem kind of light to me, I like to carve in. Shape the rest of the tail with a flat surform, then sand and screen. Aloha…RH
I decided to bring everything to a crease at that point (instead of rounded) so I use a small triangular file. One of those jobs where you have to slow down and pay attention, sometimes asking yourself, “Why am I doing this?”
But after it’s all done and looking nice, you can stand back and say, “Oh yeah…That’s why.”
I don’t think anyone mentioned this yet, I put masking tape on the foam next to the stringer, it gives you a little room for error. Those slips can be unavoidable, and this way you have a chance to figure out your technique. And what everyone else says… take it slow.
I use a coping saw. I make about five small cuts with the saw held at sucessively flatter angles working from the tail edge to the flat of the deck. Then lightly sand. smug, I am.
Loehr uses a disk sander while everyone watching holds their breath. One masterful stroke from the flat to the crack. clean up with a sanding block.
The best tools for this are from Micro plane, stainless steel fine cutting surforms. I start with a triangular one with the bottom facing up. The reason for this is, you can see how close you are from the plan shape as you come from under to the bottom./ After this I flip the board over and use the half round where the swallow opens up more. For finishing up I go to the flat micro plane, as they don’t scar up the foam if you make contact. For a completely clean swallow, I mask off just to the side of the stringer and finish with a contour sanding block. Yeah it’s a little more work and takes patience,but isn’t a good job worth it.