Unofficial Hitachi Planer MOD

For those of you who were waiting for this, sorry for the delay as I’ve had some distractions.

I really hope this thread helps those budget back yard shapers who are curious of some simple mods.
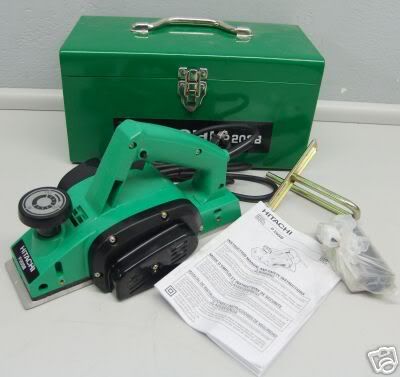
First off, this is the stock Hitachi and I found it on Ebay for about $60 + ship. Pretty good deal.

This has been the new generation workhorse power hand planer in the surf industry.

I did 3 basic, yet very fuctional MODz to this guy, 1.) Heavy Duty power cord install 2.) Base & Shoe resurfacing

and last but not least 3.) Handle relocation and positioning
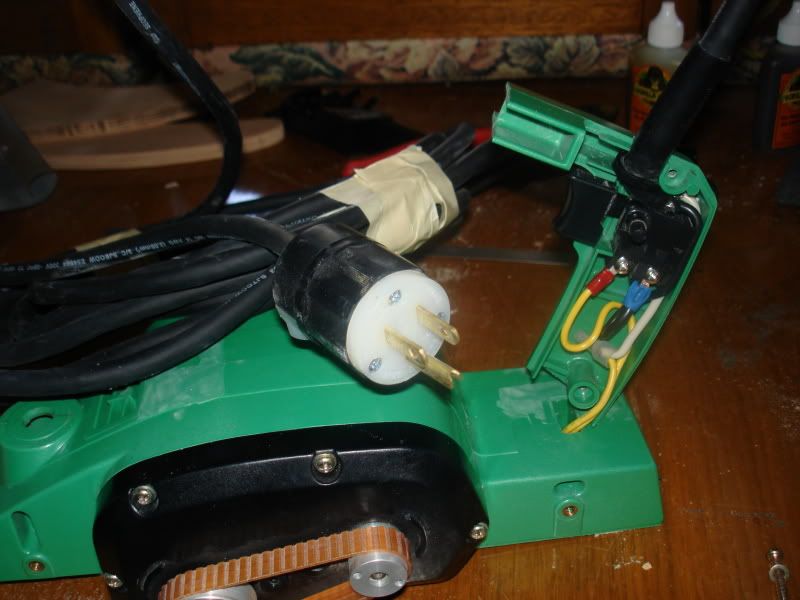
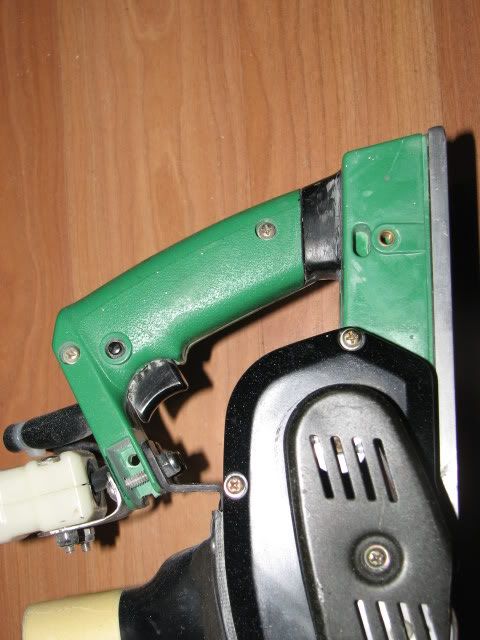
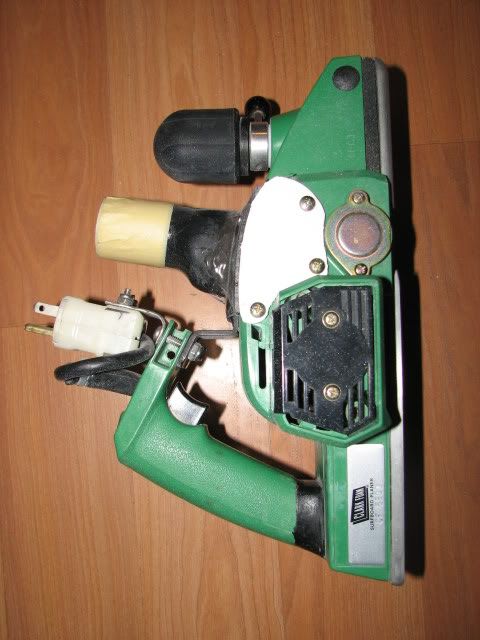
This image shows the handle already cut, and we’ll touch on that in a minute, but more specifically I’ve installed a

heavier gauge 3 prong power cord. To do this with the handle relocation, you’ll need to drill out a hole on the top of

the handle. Gauge the hole you drill by the thickness of the rubber collar on whatever cord you desire. Then re route

the power cord wire behind the trigger assembly(tight fit). If you wish to leave the handle stock position, no worries.
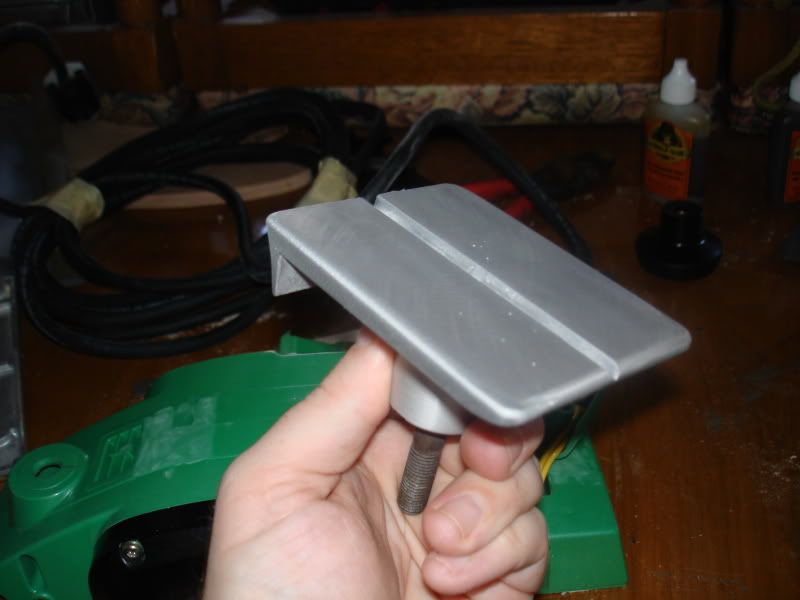
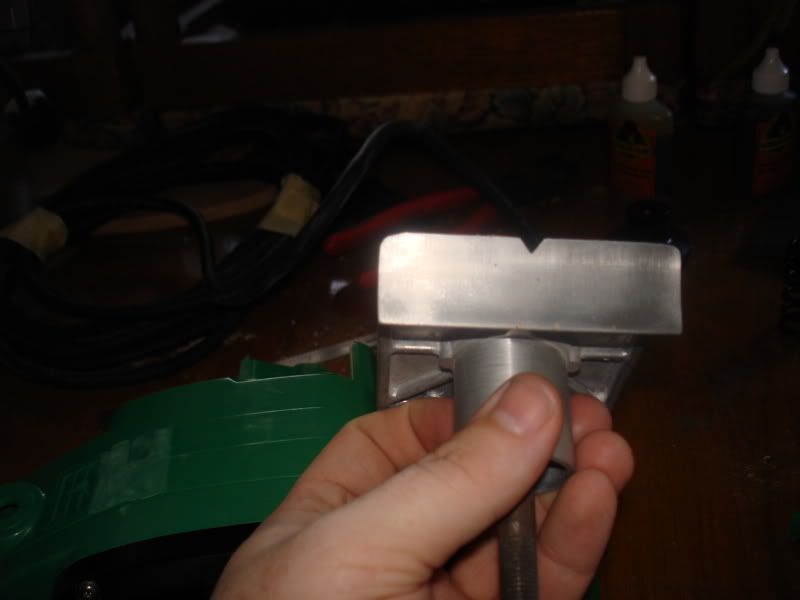
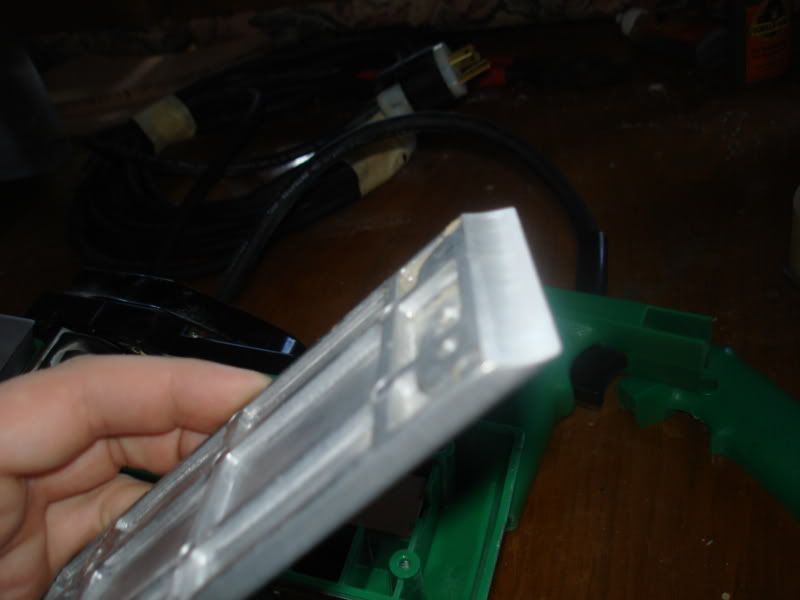
Front shoe has been modified in the respect of eliminating hard edges and rounding corners as needed to allow for

faster performance planing while minimizing the chance of gouging the foam with the factory stock hard edges and

corners. Also the blade side of the shoe has been honed out and smoothed and polished to help flow of discarding

planed material.
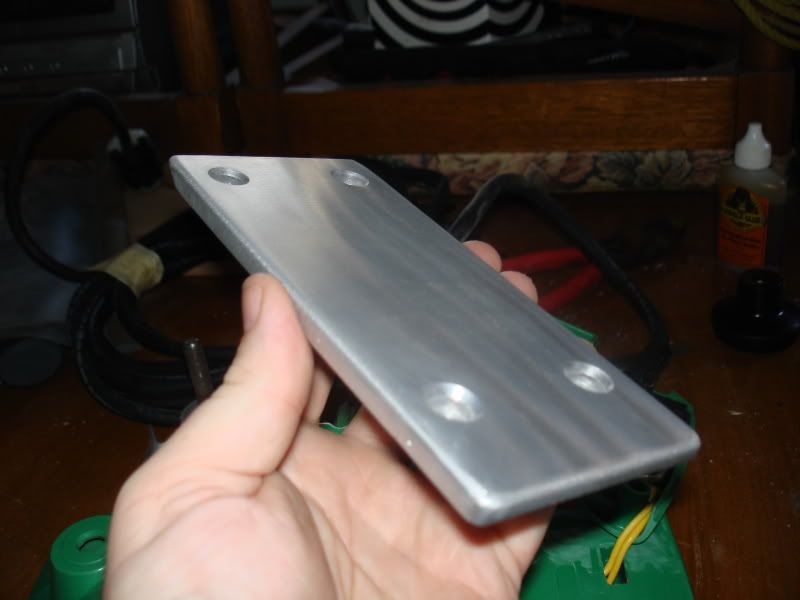
The same has been done to the rear base plate. This all was accomplished with a air powered angle grinder and

finally smoothed and deburred with a scotch brite attatchment to the grinder.
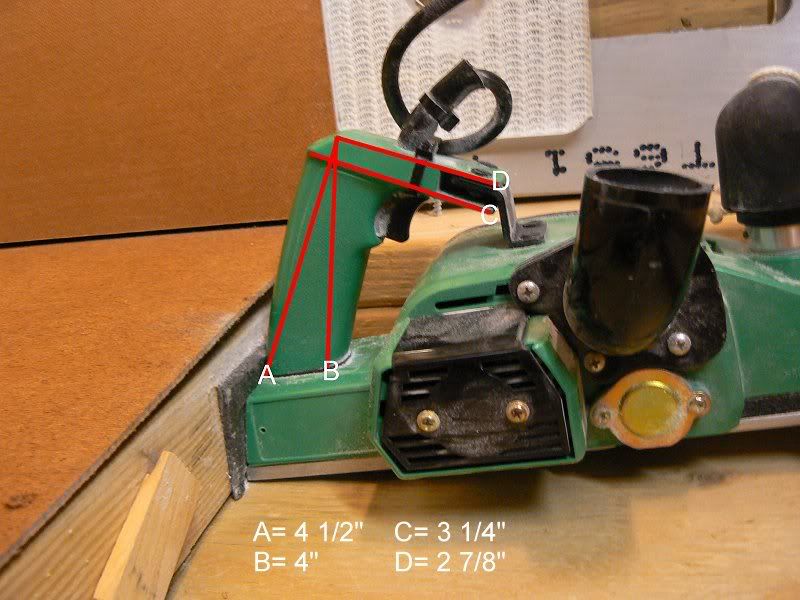
For the handle relocation, you’ll need these DIMS. Use these as a reference, as they were taken from a Clark Foam

modified Hitachi, but of course adjust as needed.
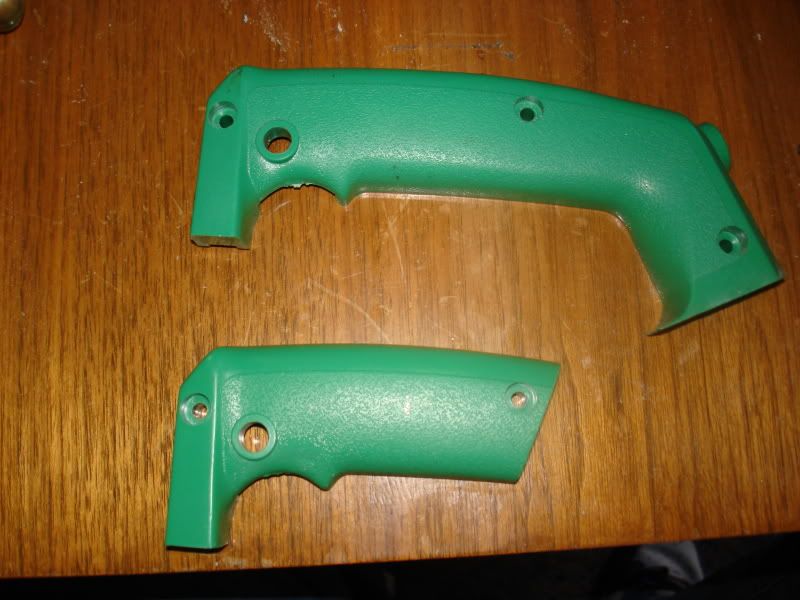
Stock and newly modified handles.

Finally I used gorilla glue to tack the modified handle in place, and then used a 2 part 3M epoxy bead around the base to hold it in place. Then fashioned a metal bracket and adheared the same way to ensure stability.

Overall the Handle mod made me the most nervous, but was very easy and is absolutely sturdy as one could possibly hope.

More on this to come soon.

I encourage other planer mods whether hitachi or not as feedback!

Tyson W Dougherty
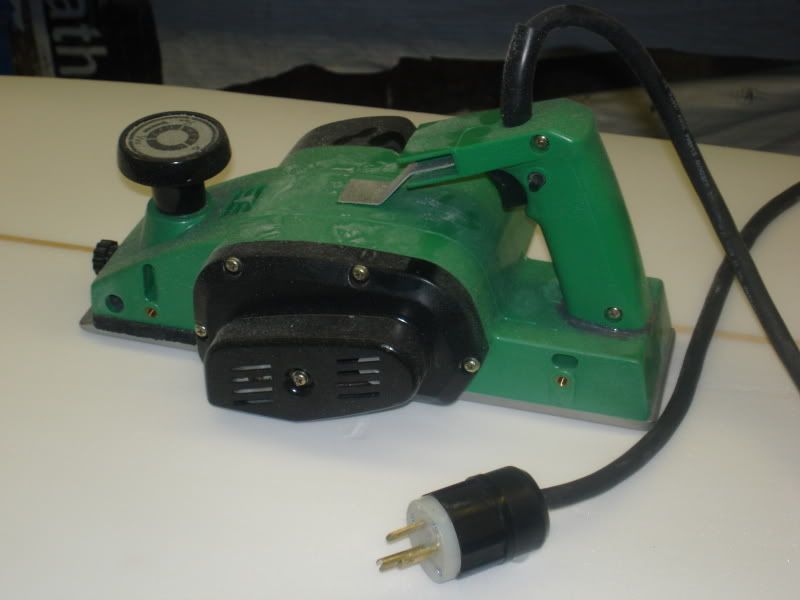
Finished MODs above and tested on its first board, and all is great. The heavy duty power cord is a great upgrade from the short stiff stock cord. This planer

is primarily my skinning planer. It stays set in pretty much the same cut depth.

‘On the Fly’ adjustment I’ve also been playing with, but the machining and tools required to accomplish such a feat are not for the faint of heart, but is very possible. In he

near future I may reveal some dims on this.

One mod I didnt show that I highly recommend is to replace the stock bearings with high performance sealed bearings. Only spend the time to do this if you’re willing to

invest some money, good bearings are not cheap.

Also, I’m working on a exhaust attachment right now. Anyone who has made their own for the Hitachi, I’d love

to see what you’ve come up with.

Did you cut the bottom off the belt-drive cover? That helps to keep the tool level,

with the stock cover it can ride up and ‘‘tilt’’ the tool.

Good advice on the bearings as the standard ones are worthless. The only way to

completely ruin one of these planers is to overheat the bearings and melt the plastic

seats.

There are several ways to do crude-but-effective depth adjustment mods. The Clark

tech is a little beyond the means of most DIY’ers. You probably already did the search

on here that would show some examples of DIY-friendly methods of this mod.

No I didn’t, but I’ll look in to it.

And, yes, I did see what others have done to achieve the quick depth adjustment.

Hey. This is good stuff. Thanks for putting this up.

Any idea where to find the sealed bearings?

originalsin,

Great thread! I have included some pics of my modified 03 Clark Hitachi. I raised the handle even higher to fit my hand and added a vacuum port centered over the body. JB Weld is the bomb for making the mods. The vacuum port idea came from an older thread. I also have one of the original small Clark Hitachi’s (S/N 84) and I modified the handle likewise on it. I have the power plug mounted on top of each planer so they are interchangeable on the Clark vacuum system. I also have the big Hitachi and a Skil set up this way as well. The original small Hitachi with a spiral grit drum is my favorite. Note to Mike Daniel: what’s the PPP’s (Planer Purist Police) take on grit drums on Hitachi’s?

Dave_D

Great work on the mod instructions.

I got an old beat up Hitachi for $25 just for the body so I could experiment with the handle mod.

I have done the base plate mods using an angle grinder to start, then finishing with a fine hand file.

It has worked quite well for me.

I also filled the center groove with epoxy as I have seen on Clark mods.

I could actually feel a difference in how the planer passed over the blank with that one and it kind of surprised me.

So I certainly recommend that one as well.(for whatever that’s worth)lol

I have one of the old Clark’s with the depth adjustment mod. WAY to much for me to do.

I would be interested in other mods of this type if anyone has had any success.

As far as the exhaust chute…I just spent the $35 and got it from FoamEZ.

I just figured it would have cost me more in time and effort than it would to just buy it.

Just my 1.359 cents

LOVE the top mounted exhaust chute!!!

That may be on of the coolest mods I have seen…and I might just have to steal it. LOL

Do you find the planner easier to control with the top mount?

Or do you find it to be the same either way?

Oh yeah…Anybody have a line on where to get drums that don’t cost 5X more than the planer?

Quote:

Note to Mike Daniel: what’s the PPP’s (Planer Purist Police) take on grit drums on Hitachi’s?

Step away from the planer, Mr D, and keep your hands where I can see them! You’ve been reported to the PPP for using a ‘‘grit drum’’, in violation of Statute 109.7 (part B), which states: ‘‘Grit drums produce excess heat, which can lead to overheating bearings and bearing failures’’. You have the right to remain silent, or you can just put blades back in there as God intended…

SynergyTodd,

There is a very early thread when the vac attachment and other mods were detailed. I can’t remember the name but it was by a shaper in HI. I believe this is what led to some of the mods on the 03 Clark model. IMHO the vac hose coming from the center along witht the power cord seems to balance the planer and doesn’t hinder keeping it flat on the blank.

Mike D. I stand guilty as charged. Now you are making me nervous so I think I’ll check my bearings.

regards,

Dave_D

Daved and originalsin

           How did you mount the little metal bracket to the top of the planer  ?  Epoxy or glue  . 


                                                                      thanks james

JT1,

The planer in my pics is the Clark modified one. I just raised the height of the handle by attaching the bottom front to the top of the Clark bracket. Clark attached the bracket to the planer body with rivets. On the older one I modified myself I used self tapping screws. Epoxy like JB Weld may work if you rough up your bracket and the attachment point. If you use screws make sure to double check that the screws will not interfere with the internals. Use short screws and be very careful when drilling. Put a piece of tape on the bit to mark how deep to drill. Again measure, think and think again. I can take measurements from the Clark planer if needed.

Dave_D

SynergyTodd,

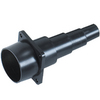
Forgot to mention this. There is an adaptor pictured below that is sold in the Shop vac section at most Home Depot and Lowes and other stores that will work for a vac attachment. Cut the big end off below the flange and cut the top off to fit your hose. Attach it to the planer with self tapping screws and drill a hole (with hole-saw or Forstner bit) into the dust exhaust area. You will need to make a plate to block off the original outlet and your set.

Dave D

Crap! I had one of those and I tossed it after trying to use it on a couple of other things with no success.

I love that idea. I think I will use it on that beat up Hitachi that I got as I experiment with the handle mod.

I’ll keep everybody in the loop as I do it.

The whole reason why the Clark model planer has epoxy filled in the groove on the front shoe is to fill the hole

that is created after drilling out the long metal threaded stud that the stock adjustment knob connects to.

Thanks for the reply originalsin

I did not know that at the time, it was part of a set of mod instructions that I got before I found Sways, but for whatever reason I do seem to like the feel of it better.

A buddy of mine has a Hitachi that I use when I shape at his place. It doesn’t have the groove filled in.

Maybe it’s just psycological, but I prefer the feel of mine.

Technically that is the only difference in our machines.

I will be doing the handle mod soon. It will be interesting to see the difference in feel after that.

Q: hypothetically, couldn’t you replace metal stud on the front shoe with one that has a lower thread count

effectively making a larger movement per turn? Or would that be just as much trouble as the kind of mod on the Clarks?

Q: hypothetically, couldn’t you replace metal stud on the front shoe with one that has a lower thread count

effectively making a larger movement per turn? Or would that be just as much trouble as the kind of mod on the Clarks?
Quote:

Yes, definately. I had thought a lot about doing it, but never got around to attempting this. All you would need to track down and match is the desired pitch threads on similar bar and a knob that fits it.

If I don’t get around to it, I hope someone else gives it a whirl. I think it’d work great.

Daved and originalsin

           How did you mount the little metal bracket to the top of the planer  ?  Epoxy or glue  .  


                                                                      thanks james
Quote:

I used Gorilla glue, and very little of it. Around the base of the handle I tacked it on with G-Glue and then went around the base of it with a 2 part epoxy. I’m sure you can use whatever kind of two part epoxy you want, the trick is getting everything aligned properly.

Be sure to post your mod pics!

Tyson

Here is the hillbilly version of the modified vac port. I sliced through the top handle and slide it over a bit and then epoxied it down. I shove about a 1.5" vac tube into the hole.

I also moved the cord to the top of the handle- you don’t have to splice and dice if you move it to where I have it positioned either. Ive though about rewiring the cord to a heavier gauge however- I think the motor is a little

strained with the stock cord even when its on a really short extension cord.

I’d like to redo the bearings. Do you have the part number/price on the good ones?