Hello, I am new to this blog --- and look forward to hearing from the more experienced builders. I have built two hollow wood surfboards -- and I think they turned out very good -- but I want to add a little more contrasting color to the deck design. I have seen boards that have a white 3/16 inch or so accent strip around the board. It does not look like wood -- it is very white and consistant in color. Does anyone know what can be used for this? Thanks, Bill
Are you considering pinstriping the board?
Acrylic, board sanded to 180 or 220 where the strip goes, brush acrylic color on, allow to dry 24 hours, check for complete dryness, then just gloss over with resin.
Oh, tape it off before applying acrylic color.
Use 2 day cure blue contruction tape, so the glue doesn't stick to your board.
Also, white over dark brown is a tough cover, might need two coats.
Thanks, LeeD. I am surprised that it is just paint. I would have thought it was an inlaid piece of something like wood that could be glued in place, then sanded flush with the deck and then glassed.
On the two boards I made -- I wanted a dark accent and used a strip of walnut as the first laminate of the rail. I thought that that was how the white was done, but I did not know what material to use.

Man, that board is a labor of love, with the accent on labor, and of course, love.
A good airbrusher can almost duplicate the patterns and color in about a week’s worth of labor, but yours is for real.
What’s it weigh? How long, wide, and thick?
Must have taken you a month to make that baby.
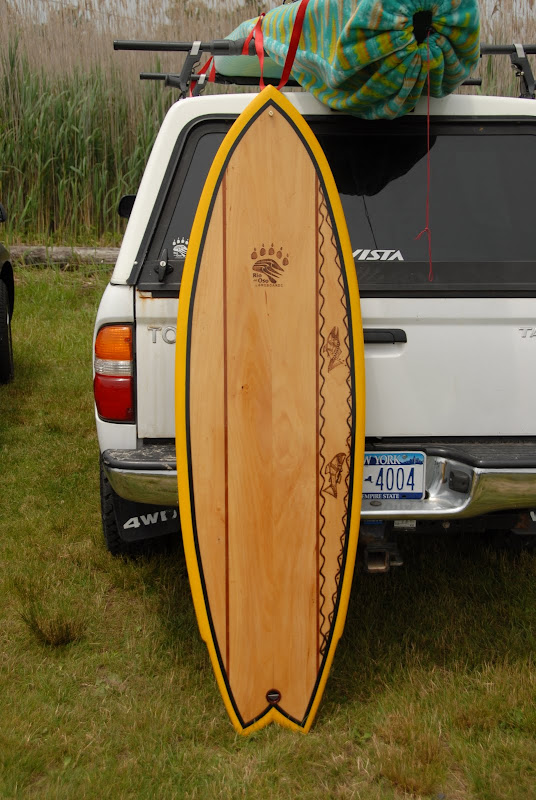
I think some guys have used sheet PVC in different colors in the rail strips to achieve a pinstripe effect. I used a 1/4" strip of cherry in mine to get a pinline type effect. The wood is paulownia and the other dark colored wood is walnut.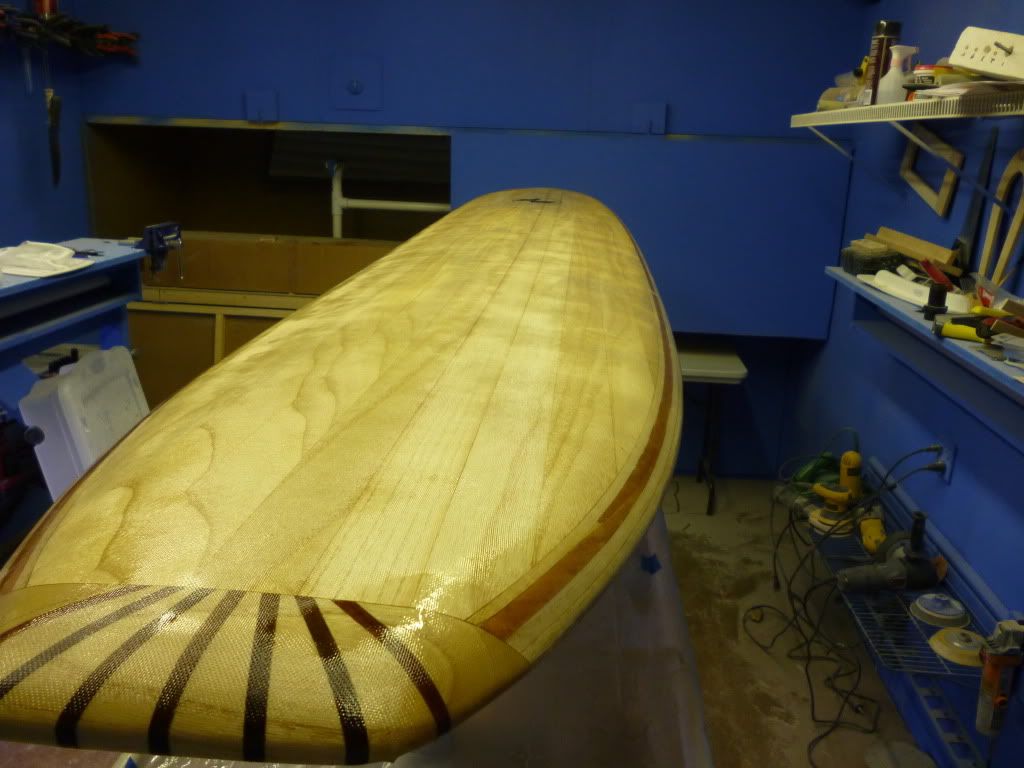
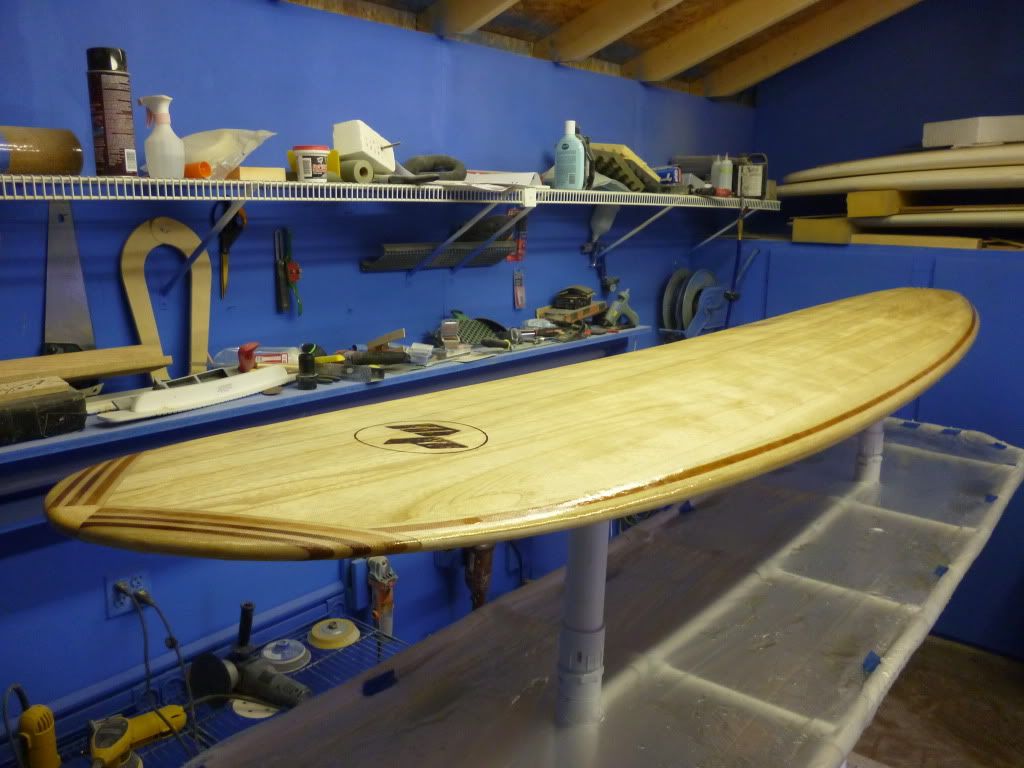
All my “accent stripes” are done as acrylic pinlines as other folks have described above (the cork rails, on the other hand, have either gotten a pigmented glass layer or colored hotcoat or acrylic spray [don’t recommend the colored hotcoat route, hard to get nice even color]). Here’s a couple examples. If you do spray or posca pen your pinlines, buy good tape (3m 233+) and press hard, particularly at intersections. I like to use a thin tape to space out my thicker masks…helps me keep my edges parallel and the pinline consistently sized.


Thanks, LeeD,
I saw a board at an art show and decided to make one -- since I was really making it as a table I did compromise the design some. As you can see I have very little rocker and no domed top -- in fact the top surface is flat from about 18 inches from the nose - to the tail.
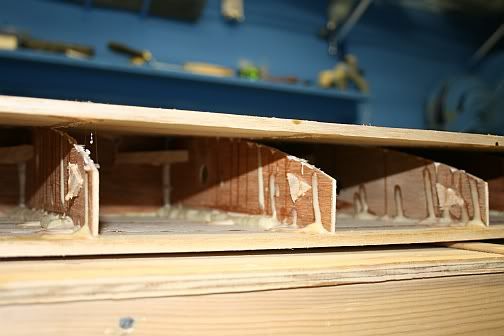
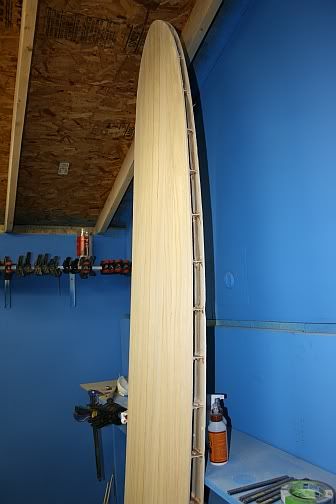
It is 6 foot 4 inch long, 21 inches wide, 2 1/2 " thick and weighs 28 lbs 10 oz. I built it using the tried and true methods for hollow wooden surfboards as detailed in the Wood Surfboard Kit Assembly Manual from Wood Surfboard Supply EXCEPT that I built it all --no kit involved. The internal structure is made of 1/2 inch Baltic birch plywood center beam and 3/8 inch Baltic birch plywood ribs spaced 8 inches apart. The deck (1/4" Plus) and under surface (1/4") are made of alternating pieces of beautiful dark Walnut and Poplar crafted together in seamless surfaces. The rail is made of a dark piece of Walnut as an accent and then 5 laminates of poplar for a strong nicely sculpted boarder. The fin is permanently attached into a reinforced internal structure and then fiberglassed for waterproofing. The fin is made of dark Walnut and Poplar also. The entire board is fiberglassed for rigidity and waterproofing and it is polished to a very high reflective shine. The stand is made of the same dark walnut and poplar and designed to compliment the shape of the surfboard. It took me 40 days to complete it.
I am nearing completion of a second one -- about the same size but will weigh about 22-23.
Thanks, CycloXslug and Wood1962 for your comments. I will try the paint the pens and the PVC --
I glued up a piece of sheet PVC between two wood pieces --- after two days -- i applied twisting pressure and the glue came apart at one of the PVC-wood jionts. I was using Titebond II glue.
I will try the paint route next. What about auto pinstriping? Will the Poly resin cover it nicely? What if it is under the cloth?
Try another sample with the clear Gorilla Glue. Thats what many of the EPS guys use when they glue up PVC stringers. I used titebond on several elements of my HWS that would not hold either. I ended up with Gorilla Glue on some parts and 1 min epoxy on the others. The 1-5 min epoxy may be another good way to go.
Hey Woody. I am surprised that titebond did not hold… i have used titebond 3 on a good amount of wood glue ups and the wood always breaks before the glue line. which parts on your hws did not hold if you dont mind me asking?
Yeah it actually did tear out little chunks of wood when it let go! I think part of my problem in consulting with some of the other HWS builders was that my "porous surface area" was too small. Maybe if I had added surface area to the ribs it would have held. The deck side "dome" was clamped with straps for 24 hrs. When I released the straps it Popped. Sounded like a firecracker when it let go!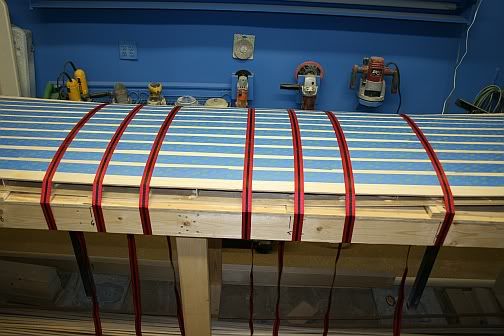
I think that maybe the problem with titebond and PVC is the PVC is too slick and needs more of a chemical bond. I solved my problem with gorilla glue on the bottom of the ribs and 1 min epoxy on the deck side to hold the dome.
Thanks woody, i do wooden fin glue ups and swear by titbond 3 now. but i also have 1/4" - 1/2" area for the glue, so that is probably the problem with the ribbing to little surface area. Also how fast did you take off your straps/clamps? i know it says 30 min time but i leave mine over night and then remove clamps. Just interesting how it works and reacts in different elements. Also yes the PVC i would imagine being an issure with not enought texture to create a good bond.
Yes, agreed. Wood to wood with good surface area the titebond sure did it's job. The deck and bottom skins were made by gluing them with the titebond and even after all the flexation..none of those joints broke. The straps were in place for over 24 hours. In retrospect the surface area just wasn't there for the titebond on the ribs. The gorilla and epoxy kinda wrapped around those thin luan ribs and added additional bonding area. I didn't want to rip the thing apart...had too much $$$ in the paulownia to risk ruining it. I think if I had to do it again I would have made the ribs out of something else. Good news is the board turned out great and I have committed to building 1 HWS each winter as my "cabin fever" project. I used the "instant" wood superglue to build up the rail strips. The kind that you can use the spray on accelerator. Wow! that stuff worked well!!! Really well!