I’ve always enjoyed the idea of riding a selfmade board and with an upcoming flatspell, i decided to start on my first project.
The board will be made out of EPS 200 (1.87 lb/ft3) from a local insulation distributor (dims 2000x1000x100). With a center stringer of 4mm plywood. As this is my first project I will only be using basic, easy to get, materials.
The template I made is based on a Mctavish Sumo. A high-volume, midlength board, with a wide nose and not to much rocker for easy wave catching, in small surfing conditions (Holland) which are most likely beachbrakes, not higher then chesthigh. Dimensions 6’4 21 1/2 2 3/4 (about 45 ltr).
I will be using a homemade hotwire, probably going to use a car battery charger but i still need to experiment with length and thickness of the wire. I might also try an old modeltrain power supply with adjustable power (yes i have already been digging through swaylocks on info). EPS coming in by the end of the week. Already started on cutting out the rocker template on paper and preparing the stringer.
This is the template I made, like said, based on a Mctavish Sumo. I only use the profile and outline.
Any comments guys?
As for now i haven’t considered any concaves in the bottom. The rails will be somewhat 60/40. I will not be making my first project any more difficult then neccesary
I got my EPS today, but no bigger car availlable at the moment so this was the outcome.
Finished the 4mm plywood stringer today and made two rough copys on hardboard. Attached the hardboard on either side of the foam.
The hotwire i used is powered by a car battery charger. I did some tests with different lenghts en thicknesses of TIG welding wire and the smallest one works perfect on 6v 8A. (Don’t ask me why). It takes some time to cut but the ‘wire’ surely is not going to break.
After hotwiring, i glued the stringer in and putted some weights on top. Tomorrow i will continue!
Thanks
The type of the wire is ER 316 LSi. I don’t know the thickness but its the smallest out of three i tested. It all depends on your power supply, length of wire and material.
Both sides of the foam are glued together with the stringer in between. I did stack weights on top but somehow the glue didnt bond that well on the nose, so i putted some extra in and pushed it back together.
I printed out the outline template on full scale and used this to trace the outline on the board. I started cutting with just the handsaw but i found out this was kind of stiff. So first i started with an electric saw, but this didnt go all the way in depth, then continued with handsaw. Piece of cake!
As for now i have to wait for the glue to dry in the nose before i cam cut the entire outline.
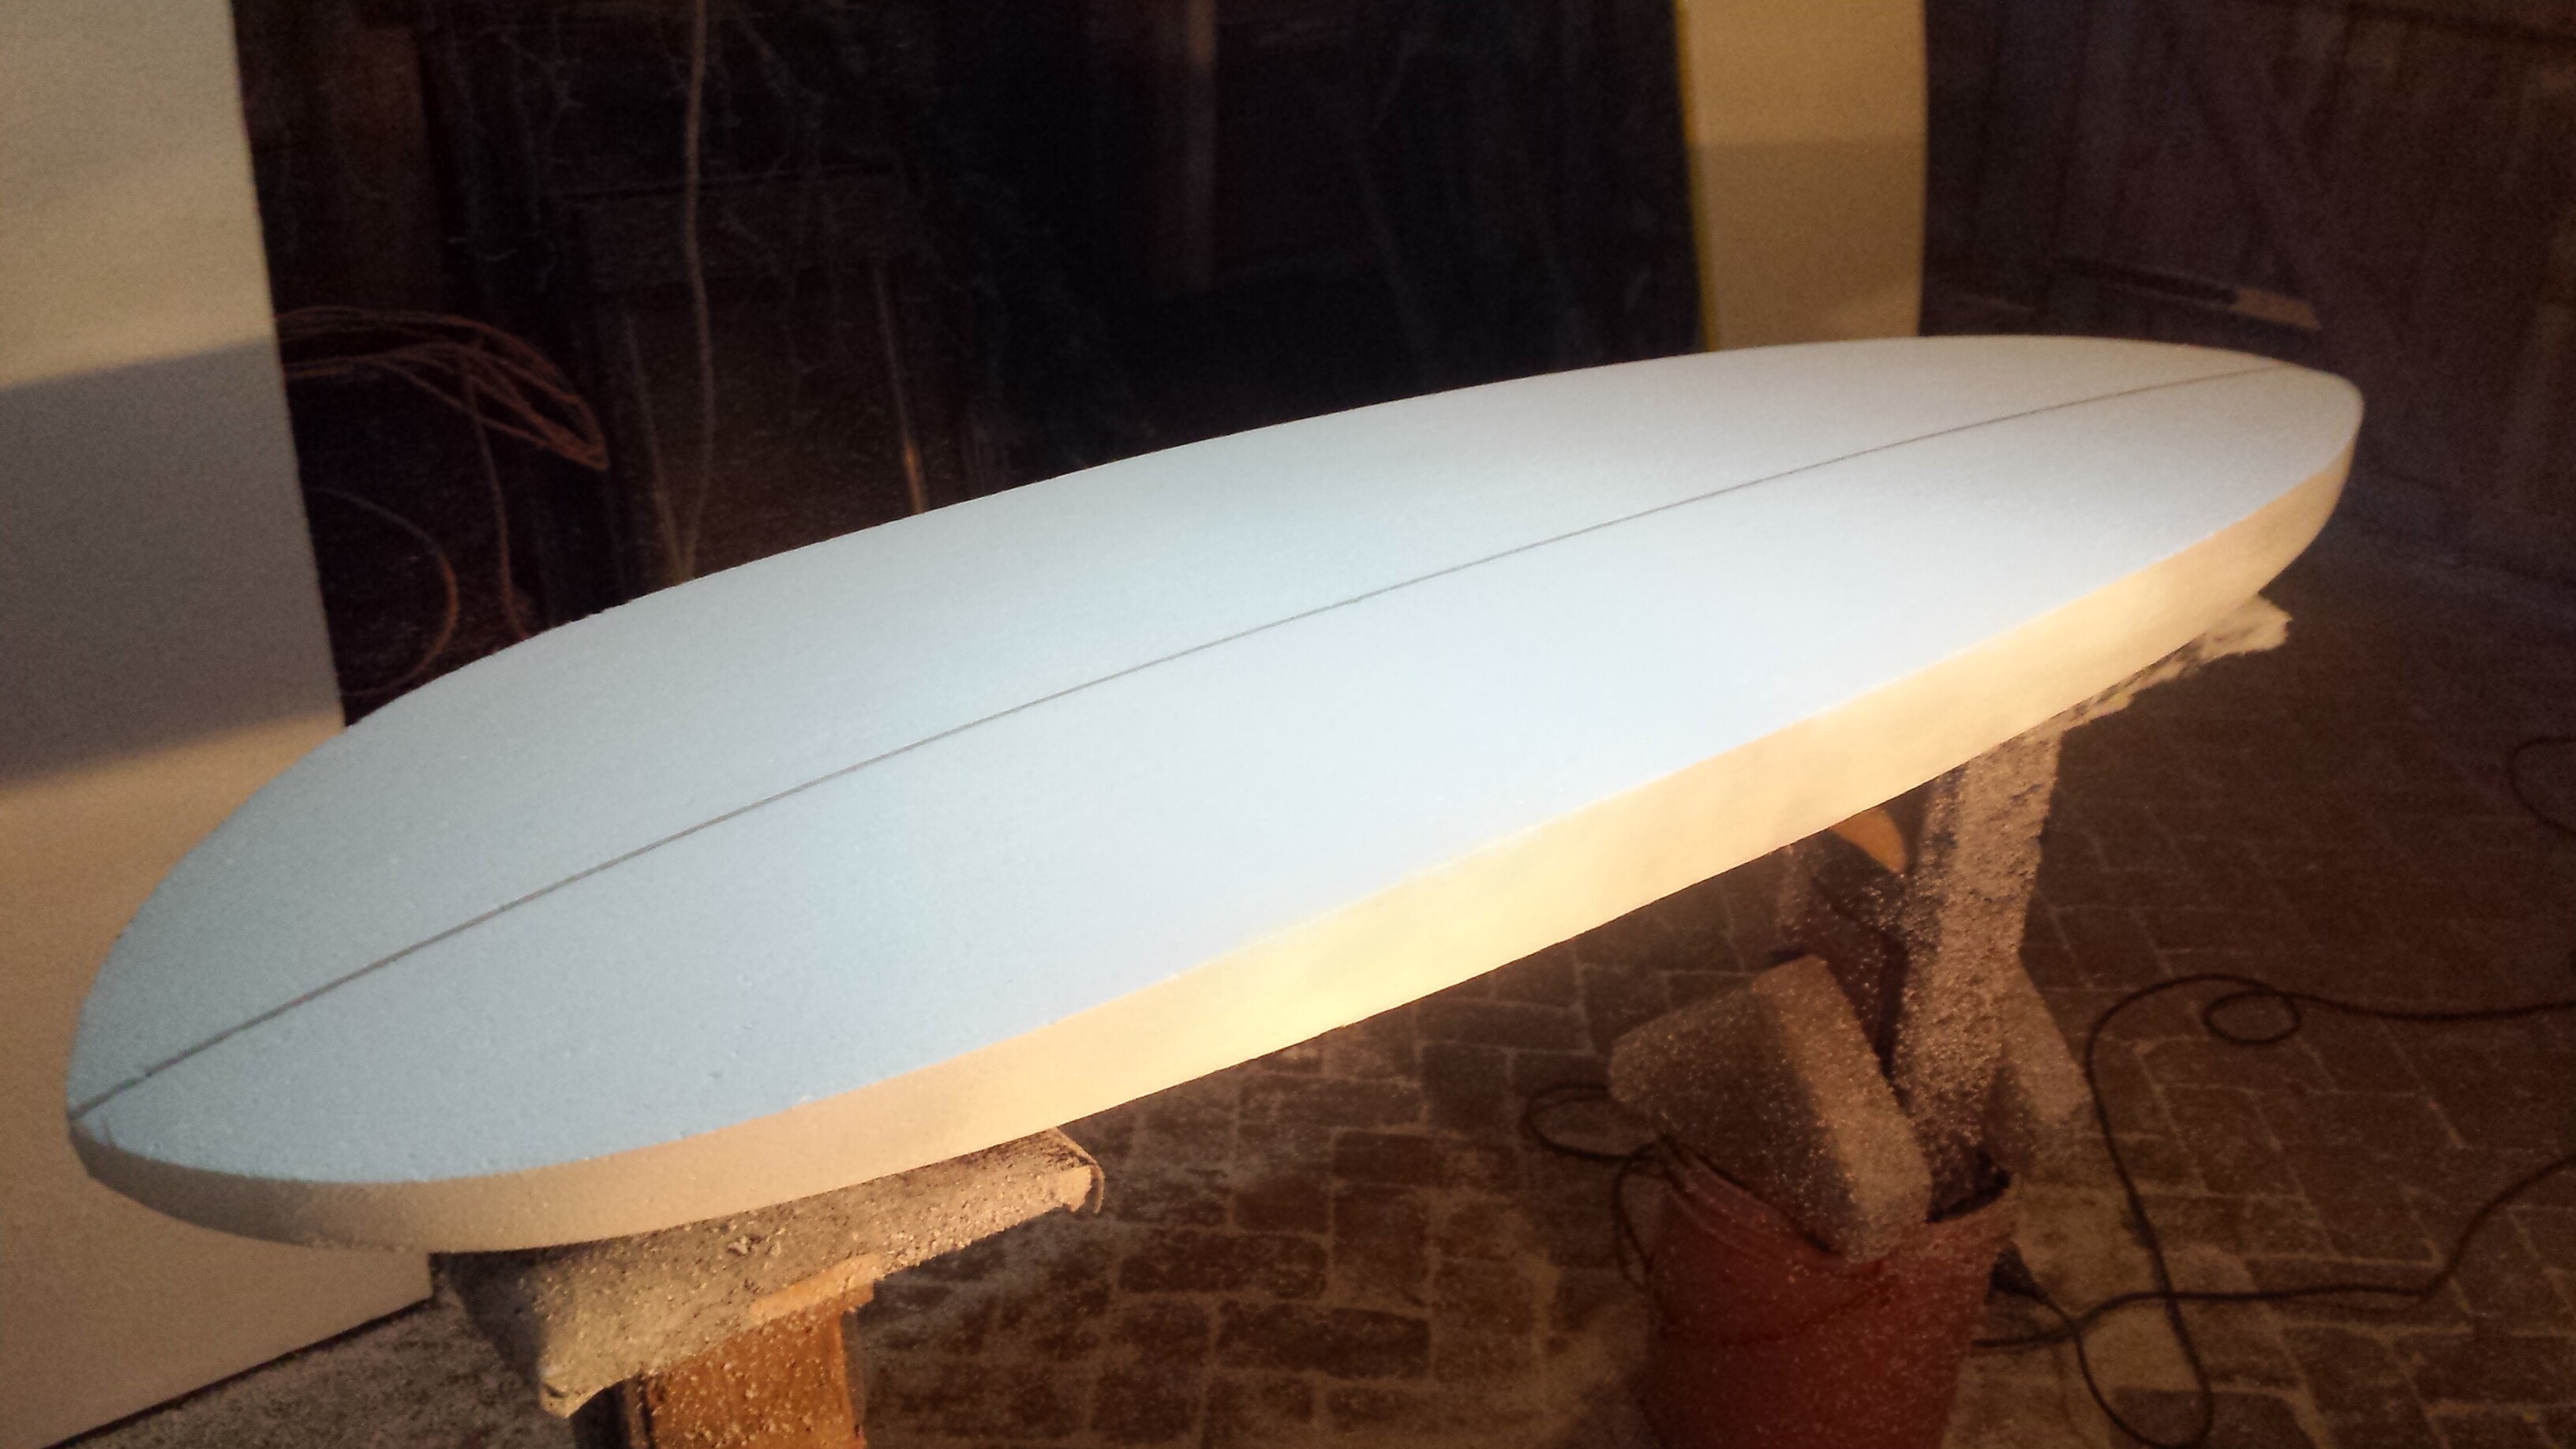
This is the progress so far, pretty pleased!
Glue dried well. Cutted the entire outline and sanded the rails flat. Then i started on sanding the bottom down to where the stringer is. First with a planer and finished with 60 and 120 grid sandpaper.
Today i sanded the deck down to final depth and formed the rails. Started out with a planer to do the rough stuff. I did do a lot of reading on rail band widths and all but as i am just doing 50/50 round rails. Figured i could do i it without any marks. Probably not the best idea on your first board but luckely it did came out well enough to make me feel satisfied.
From what i understand it is best to seal the EPS blank with spackle to avoid possible delamination?
looks fun dude…the board is spackled to keep the foam from absorbing a bunch of resin, to fill in some chunks that are quite common along the stringer, and to give a clean white surface. go to ace and get DAP fast n final lightweight drywall spackle. thin it out with filtered water…tape off the stringer and spackle away. dont drive yourself crazy trying to get it perfect. it dries pretty quick and sands easily.
Thanks guys. I have to look for something similar like DAP here in Holland, if anybody has any experience please share!
I thought about making this board a single fin. As it would look cool on the design. And i figured, one fin has less drag then 2. As this board will be used in small choppy surf mostly.
What finbox would you recommend for a single fin? I know glassed in, handmate fins would be kickass but maybe on my next board. I really want to minimize the screwups on this.
I’m already sooo stoked about the results so far. To be able to surf a board thats made by my own hands, from scratch up… thats sick! I’m already thinking about what i will be shaping next. Keep the stoke!
I used a bahne box for my first 7 boards and just did a glass on my 8th board,a 7’6’ board like yours. I made the fin out of a wine crate and fiberglassed it. It was easy and fun.blendinging curves .com has fin templates too. you can do it!!
That woodlook is sweet, especially on a single fin. I might consider going for the glassed on. Got some reading up to do! For sure there is some good info on that on sways
While i’m learning more on how to make wooden fins and how to glass them on properly, i’m getting more enhousiastic about the idea of making the board from scratch for the full 100%. I do have a couple of questions which were not answered by reading topic after topic.
As Tinderloin Tom mentiones, Blendingcurves.com has great templates, but i wonder if these templates can be used for single fins as well? As there is no difference being made between thrusters, twins, quads, singles… I can imagine these all have different specs and shapes… I’m looking for a lonboard style fin with no to much sweep, that will fit nice on the 6’4 i’m building. Can i use ‘all’ of the typical single fin templates on Blendingcurves for a single fin?
I know i still need to do the laminating and finshaping and all, but i might have an idea about strenghtening the fixture between fin and board. I only read about glueing the fin base up onto the bottom glass after laminating, before hotcoat. And then securing it by aplying multiple layers of cloth over the fin and board, and so on.
But how about lengtening the fin base in depth by an inch or so, like a solid finbox. And then router out the depth through the epoxy and cloth, into the foam. Then install the fin as it was an actual finbox (although the finbox and fin are from one solid piece of wood). Poor epoxy in the empty box, lay soaked cloth over and press the fin into the box. Let this dry, sand edges of dried cloth flush to deck and then proceed as you would normally glass in a fin, with a few layers of cloth over the fins etc.
I cannot think of any negative results, except for adding a bit of weight by the extra finlength (finbox). On the other hand, you might be able to reduce the cloth on the fins, as you already have enough strength from the solid fixed ‘finbox’
Please tell me if i’m totally wrong, as this idea is in my opinion no Rocket science.
When spackling, i guess i need to spackle the entire board, including rails?
And what grid sandpaper should i finish with? I only did 60 and 120 for now, all by hand… I like the handcraft in all this, not to much machining. I can understand the bond between epoxy and EPS is stronger with a rough(er) surface.