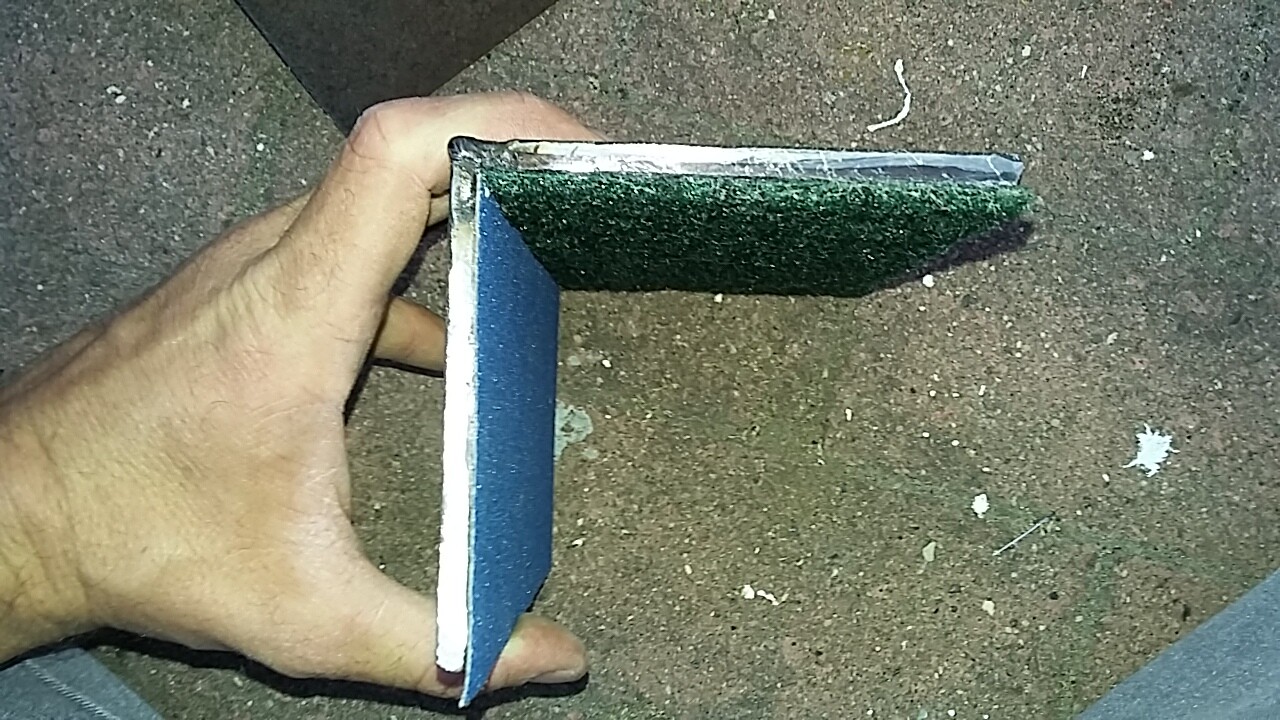
3/16" x 4" flat stock welded on a perfect 90* angle. Some Hi Strength 90 Spray Adhesive, a scrap of outdoor carpet, and a piece of 80 grit belt sandpaper… for truing up outlines. Guaranteed 90* rails.


Nice one! I should post up my ruler with holes drilled in it for a pencil at set lenghts for my rail bands. I love low budget tricks and tips
Cool!
Post it up Tom!
I’d like to see it
I have a very similar tool made out of wood. I have a roll of adhesive backed 80 grit sandpaper that I cut the wood to fit. Works like a charm for truing up outlines and getting perfectly square rails. Having perfectly square and true rails before you start cutting rail bands is key.
You can also feel and fix any kinks in your outline with this tool on your final passes. If your outline is not fair you will definitely feel it.
I think one made out of wood will glide better over the foam than one with outdoor carpet on it. You really want the tool to glide.
Nice weld!
Cool! I’ve got one made fom scrap pieces of mdf and use double sided tape to stick the sandpaper on. Spray adhesive would probably be better.
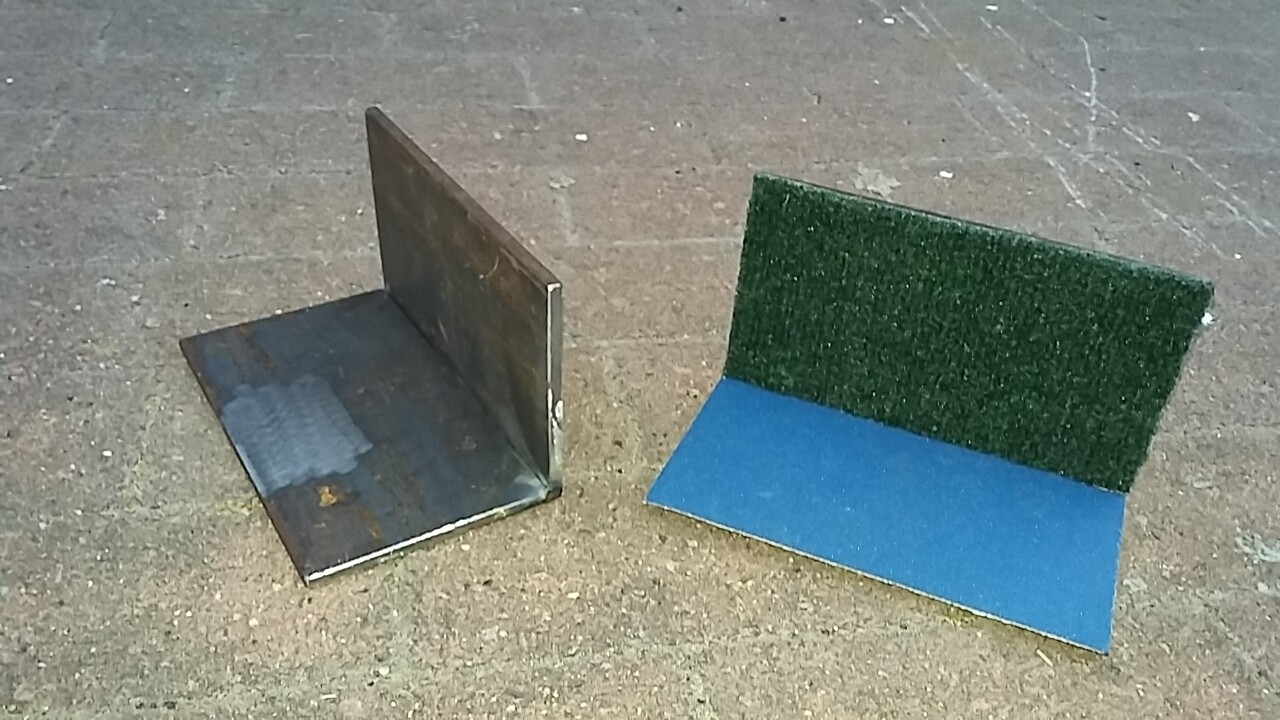
I may ditch the carpet and just let it slide on the smooth metal… I may also drill holes in the sandpaper side for dust to escape…
We’ll see. Have to try it out first
here it goes .a ruler and holes drilled,nothing fancy . I just put a finger vertical on the side and slide it for some guild lines
Hey Crisp. I plagiarized mako’s design and use it all the time. I think that carpet stuff or whatever it is is going to drag and grab. Use something smooth. Even a nice sanded piece o wood. Mike
Hate to be a naysayer but I think the carpet may have too much give in it. You may find that it makes things a bit inconsistent - it depends on the depth of the pile, I suppose. I would go for a nice smooth surface.
Also, for the sandpaper side I wounder if a thin bit of cork gasket on the metal would be a good idea. I use some on my disc sander to make things feel nicer - I know it keeps things flat as the primary use for it is getting two flat surfaces to match but now it doesn’t feel so harsh to use. I don’t know where you’re located but if you think you’re going to be changing sandpaper fairly frequently then you want a lower tack - I can’t get it in the UK but I know that feathering adhesive is good for being tacky enough but also easy to remove!
…then add a vacuum hose over those holes. Then replace the grit paper by a router with a pencil bit and a 4D articulate arm. Connect to your PC and… No, forget it. (Kidding, of course…) Nicely done.
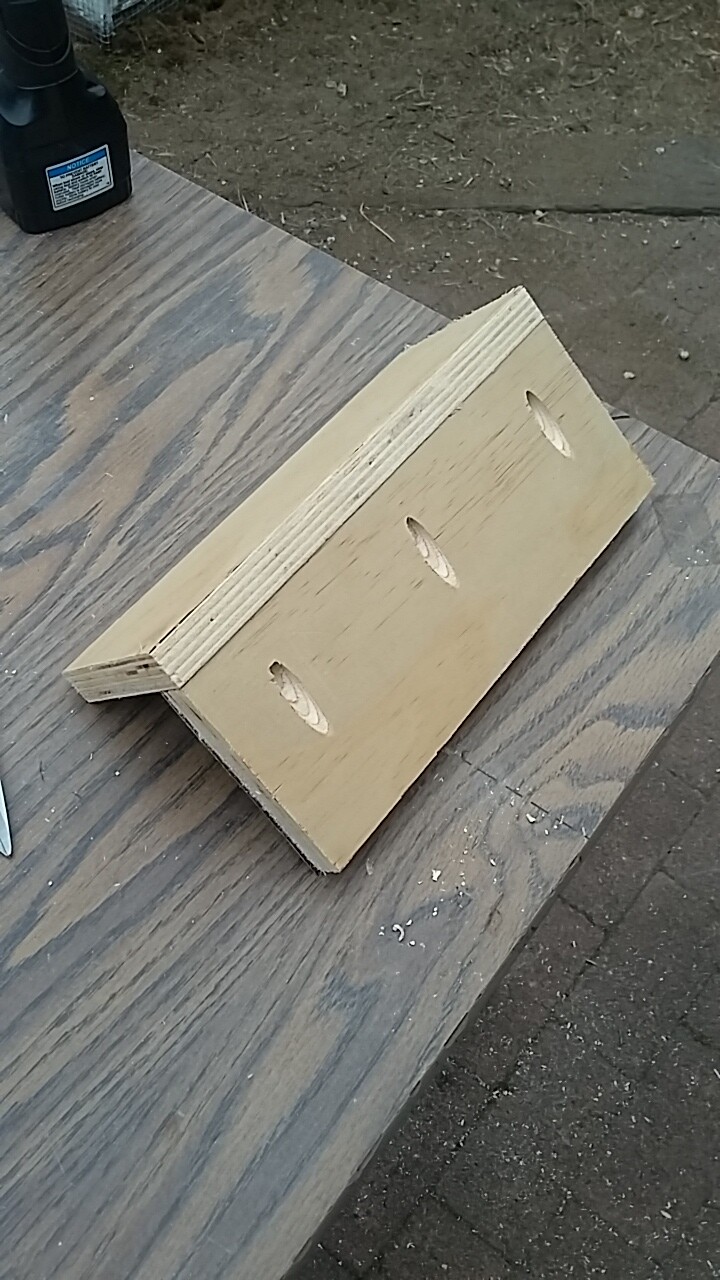
You guys were right. The carpet is no good. Also the steel is pretty heavy. So I remade it in wood using three-quarter inch ply and my Kreg Jig. I like this version much better but I have been noodling on ways to add either grooves or holes on the Sandpaper side to allow the dust to escape. Also, I need to use rougher grit sandpaper


Ha! Ha! All that welding. Buy a “Fence Post Level”. At any Ace or Lowes. $3 or $4. Glue a piece of 1/4" Masonite on each side. I like to put the smooth side out on one side and the rough or back side out on the other. Choose your grit. I use 60 or 80. Glue the paper to the rough side with spray adhesive. Wa-La!! The smooth side goes on the Blank. sandpapered side trues your template. Always good to clean up the edges of the Masonite with sandpaper. I like to cut my Masonite a little bigger than the flat sides of the square. Say six inches. The square is only about four. This is another Terry Senate originally. lowel
I’ll try to get a pic of mine when I get outta Gardena and back home. I bought one recently from Surf Source that is essentially the same tool. The plastic is a nicer color than the yellow fence post square though.
Any chance I get to play with the welder is time well spent. I need all the practice I can get… ![]()
I had to Google search what a fence post Square / level was but that looks perfect!

Really wish I had learned. A few regrets in my life that being one. Probably still not too late. There are lots of schools and classes up here. Used to watch the “Old Man” mock up semi trailers and tack them. Then he would hire one of the oil field welders to come out on the weekend for cash and lay done some nice beads. They have so many nice inexspensive machines these days. Even plasma cutters have gotten cheaper.
I hear you!
Lots of respect for folks who are good at it.
I plan to take welding classes in the next few years. I want to learn all of it. Stick, MIG, TIG, OXY/ACET, braising…
At the very least, being proficient with stick and Mig would get me through 95% of the projects I have bouncing around in my head.
That fence post level is the ticket. Another Sways pearl.
Took a nighttime welding class at the high school vocational school several years ago. Once a week (3 hr) for 6-8 weeks. Covered several methods, including MIG and TIG. We got to do a personal project at the end.
If you don’t weld regularly, you lose it fast. I lost it…
Solo MIG on pieces of a small bike frame was much tougher than I expected. The instructor had to give me major assistance with my project:


You can get into the welding game for $200-$300 USD. I’m 58 and just started a few years back. Had a well versed friend that gave me a few short lessons and have Sloooowly built upon that. It’s not pretty, but sufficient for my needs on The Hill.
What are you doin over there Chris???
Flip the planer on its side and done. Tune it up with a flat block, if your changing the plan shape from top to bottom with a little tune up, we got bigger fish to fry hahaha
Ohh and I met one of your driving buddies yesterday (Greg if my memory serves me correct)
