Thanks Bill. In retrospect I probably should have given you a chance to ponder this offline before asking via the forum, my apologies. Looking forward to working on this more this week as weather outside is going to be rain and snow…
No worries.
I look forward to seeing what you do this weekend.
Forward progress has been slow, nice weather getting me outside for other projects. We had rain and snow this weekend so I went after the bottom tuck with a homemade ‘Fred’ or ‘Railrunner’ type tool. Blank is a bit beat up between how wire twangs, CNC machine issues (channel blips) , and numerous dents from my clumsy handling. The dents can be steamed out for the most part, the rest will need to be filled once I get the board closer to final shape.


3 Likes
My latest design – CAD work by Jim (@jrandy). I call it the Paipo HP (HydroPlane). This design is all about “speed” (with decent control/responsiveness provided by the channel).
Jim’s CAD work is truly gifted. The transition from my mental image to data and then Jim’s 3D images is magic.
Now I need my guru in Idaho to work his CNC wizardry.
3" x 22" x 47"


2 Likes
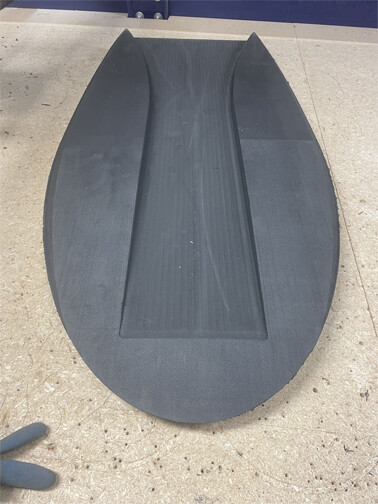
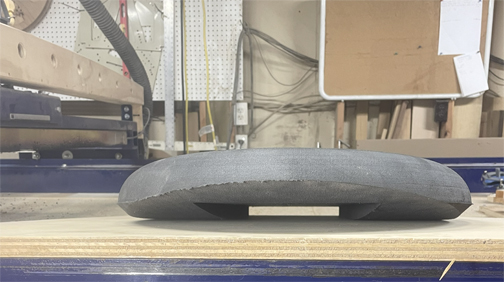
The Paipo-HP is a design concept to bring air (rather than water) into the channel while planing. The foam on either side of the channel functions as sponsons. (Think hydroplane boat, images below.). The channel flare creates foil effects on both sides, to improve turning. Without nose rocker, the channel would extend from tail’s end to tip of nose.

Ghost in the Machine
Apparently, everything was going well in Idaho until the final 10 minutes.
Then the CNC machine went rogue.
(Close but no cigar.)
If at first you don’t succeed…


1 Like
I hate when that happens!
CNC code issues are usually visible in simulation, true machine glitches can be tough to diagnose and solve as they are often intermittent.
Looks like the machining turned out nice with the one exception.
Perhaps not a wall hanger, but seems like it could be patched and rode as proof of concept?
Thomas ordered a new piece of foam to replace and re-shape — without me asking.
The nose rocker wasn’t fully completed on the gouged board.
Trying to work out anything beyond that could complicate the situation.
So, I’m hoping the next round goes better. Too late for me to get it to test it on the NC coast now.
1 Like
Cool and wet weather is keeping me away from glassing on my next boat project and created an opportunity to sand some on my channel fish. Not done yet, I see some areas in the pictures I did not see on the stands…
It’s hard to admit, but I seem to have ‘forgotten’ some stuff in regards to shaping process steps, so I have been watching YouTube videos to try to bring some of it back so to speak
Today’s work was with the shorter homemade sanding board with finer grit and a used 80 grit sanding disk adhered to a random piece of packaging foam, the pool noodle type if that makes any sense. I put a dark sheet and lightweight blanket over the greenhouse to reduce the overhead ambient light from the windows.
I need to figure out a glassing schedule and whether what I have on hand for cloth and epoxy will make it.

3 Likes
It’s funny for me when I see anyone shaping or drawing/designing this type of channel bottom. I remember reading a newspaper/magazine type thing that I used to pick up at a marina store in Maalaea. It was a boat Marine oriented newsprint that came out monthly(I think). It was full of fishing reports, stories, adds etc. for local boat builders etc. I remember one boat builder that ran an add with a drawing of this type of channel hull. It was a hull design that they manufactured. First time I ever became aware of the design. That was probably 2004. My thinking is that the design as a boat hull probably was older than that, but not widely used.
If you have pictures of the boat hull channel you mentioned, I would love to see them.
“Tunnel hull” boats have been around for a good while. The tunnel hull boat channels I’ve seen are a bit different.
The curves (bottom and sidewalls) in this Coanda Channel are fairly specific. They are derived from a fluid dynamics curve that minimizes flow separation and drag. Slopes, depths, lengths and ratios are fairly specific too.
Looks like you’ve made good progress Jim.
For stringerless, I was thinking 6/4 deck and 6/4 bottom.
1 Like
This looks very cool. One thing I discovered in shaping surfboards is that you can tuck the hard edge at the tail in a little, i.e. you still have a hard edge for release, but moved in from the rail a little bit. This makes for a cleaner transition from tail to rail, where you go from square edge to normal rail.
I don’t know if this applies in this case or not, but just putting it out there. It was a big help for me, as that transition was always an awkward spot before I knew this.
The back end of this board still messes with my head a little ![]()
That is a good idea @Huck, will think about that some.
@Stoneburner I was also thinking 6+4 both sides. I might do the deck first as a cut lap and flip and vacuum bag the channel side.
@OSS1 Back to boats, I was made aware of a ‘catamaran skiff’ form the other day. Some maintain the ‘toons’ all the way through, some transition into a single hull towards the back.
You may have trouble pulling the cloth down tight into the sidewall 90-degree angles with vacuum.
I plan to use the method below for the channel area — taping off the channel area first, pull the tape when the curing seal coat resin has hit desired stickiness, then tack the cloth in the channel area independently. Then laminate.
I’m looking at 2 approaches: glass the channel with pieces of FG or do it all at once with one piece. Thinking I’ll do a test channel first — still have the unglassed XPS Pink Panther, C-Channel blank.
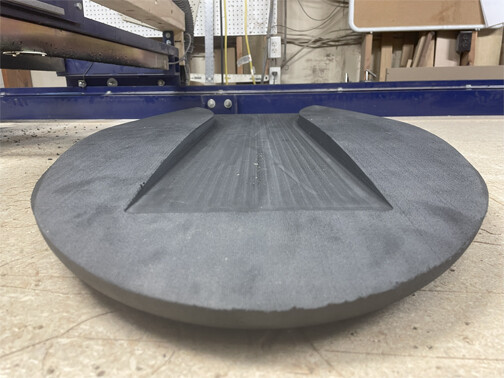
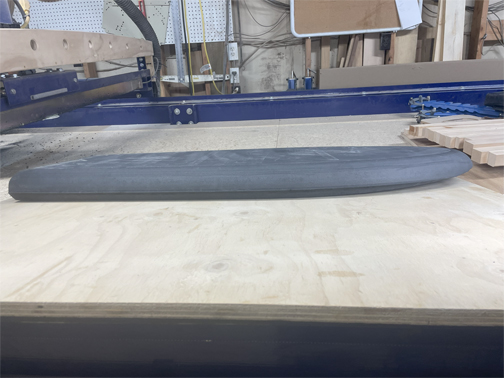
Thomas finally exorcised the demon from his CNC machine.
With a little clean-up sanding, this Paipo-HP surfcraft will be ready for launch.


First cut – before the demon was exorcised
2 Likes
Looks cool. Is it glassed?
No. This is the 6-pcf XLPE (cross-linked polyethylene). The foam is small, closed cell — doesn’t absorb water. No glass is needed. (Besides not much bonds well with XLPE.) At a uniform 3” thickness it is fairly rigid with just the right amount of flex. On this one, the long channel thins the center of the board. It may have a little more flex than the previous designs. The supplier now offers the same foam in 8-pcf, close to balsa density. May try a build of this design in the 8-pcf density for a model option with less flex.
1 Like