Then my advice is to do it clear…
There’s enough stuff that you ARE going to mess up without throwing a whole bunch more complications in the mix.
Then my advice is to do it clear…
There’s enough stuff that you ARE going to mess up without throwing a whole bunch more complications in the mix.
One last thing, just take your time!!! Can’t stress it enough. Everyone gets over amped and ends up rushing their first several boards. You end up having to look at the thing and the mistakes end up bumming you out. Just take your time, do your best, learn from everything, and most of all have fun…it is a surfboard afterall.
fiberglasshi, I think that’s what I need to focus on the most when I get around to glassing. Surfing is supposed to be fun, and yeah, I may be making mistakes, or maybe I’ll make more later, but at the end of the day, as long as the things flaots and I can catch a wave, that’s all that matters.
I am the king of mistakes and a master of regrets. Trust me when I say this: you’ll get your boards done faster by slowing down and doing each step as best you can the first time. Repair work after the fact is very time consuming. 1/2 hour extra on the front end to get it as right as possible can easily save you a couple hours in repair or cover up mode on the back end.
[quote="$1"]
just glass it.
just like that
you can put a dotted pinline over the top of it
and dedicate it to the aniversary of your dads
mis-approp you will look fondly on it for years
to come . you could even use it for gettin
a set wave from him almost weekly
for we all will know it's his contribution
to the perpetuation of physical evidence
of the human flaw.
[/quote]
Ambrose you're a funkin' poet.
Okay, a little update for you all.
I glass my board today, and I know I’m gonna get criticism for not following SOME of the advice all of you were gracious to give me. Before I get started, let me say that the results I got were waaaay better than I expected. So that’s a good thing, right?
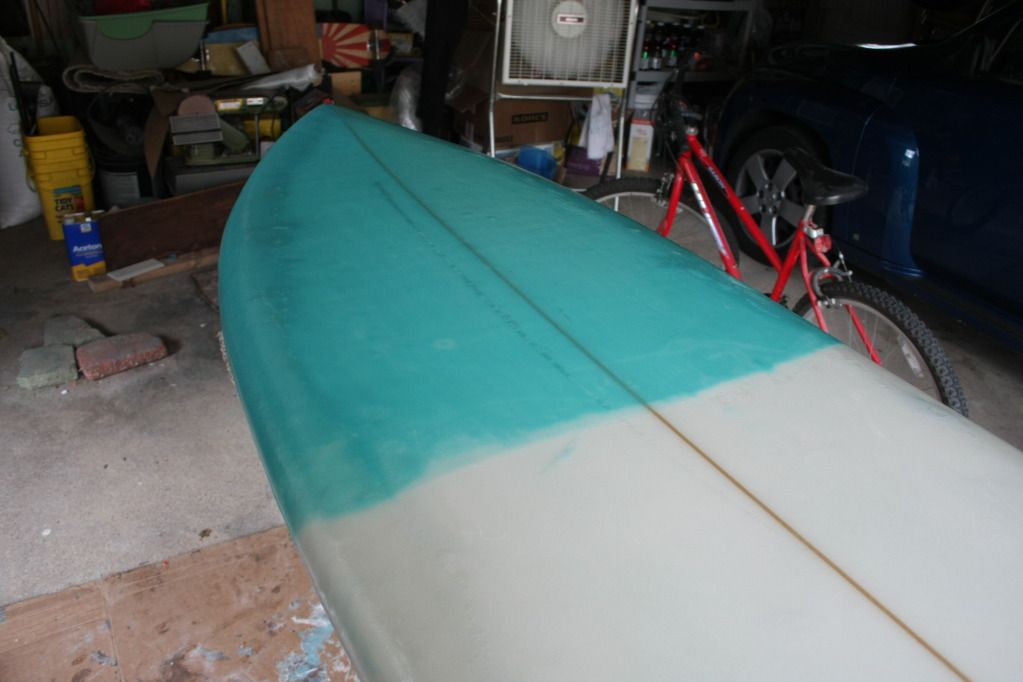
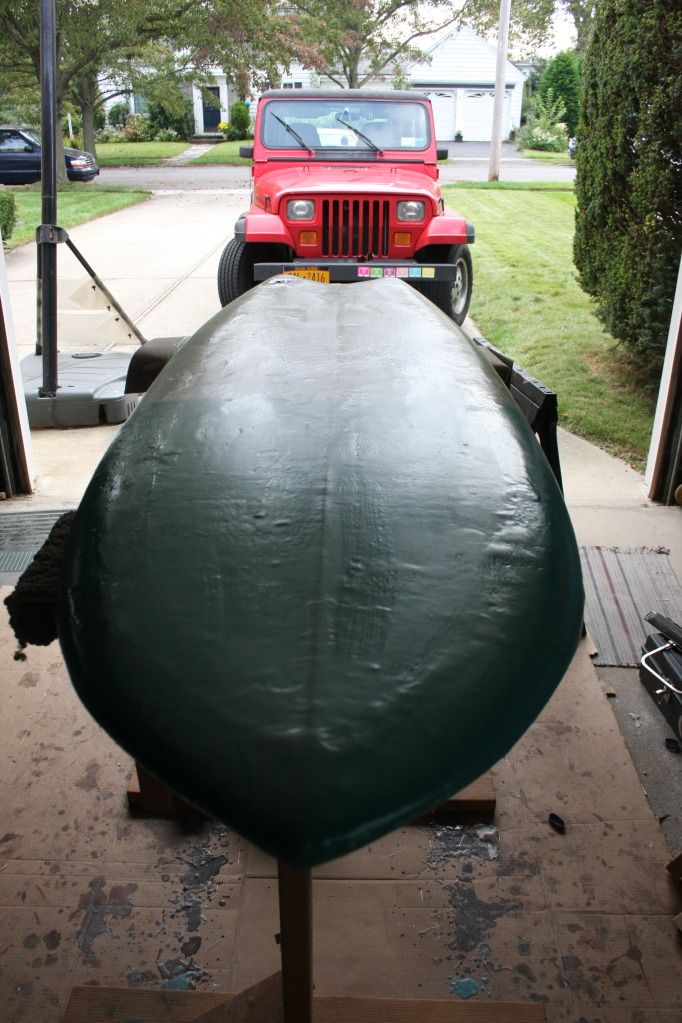
As previously mentioned in my posts, the original glassing idea was to do a kind of dip, with the front half solid teal, the back clear. When I mixed up my teal and started pouring it out, it wasn’t as opaque as I thought it would be. Regardless, it looked nice as a tint… That being said, I wasn’t expecting a tinit, so it was freelap. -_____- No worries though.
The nose on both sides of the lamination actually turned out the best on the entire board. It was the tail that caused all the trouble (DAMN YOU, SWALLOW TAILS. YOU SHALL BE THE DEATH OF ME). Pretty sure I have some exposed foam back there that I’m gonna need to cover up tomorrow.
Glassing schedule was 6/6 on top, 6 on bottom. Did everyhting with supposed “low odor, low voc” Solarez… If it was “low odor”, you sure could’ve fooled me. Stunk like crazy.
Got a few clumpy spots that need to be ground down, but I wasn’t expecting Rome on this first board… The freelap look actually turned out exactly how I wanted it. So I’m like… 95% pleased with the end results. A few qualms, however…
On the deck, where the top lam overlaps the bottom, there’s a few spots where there seems to be air bubbles… not sure if that’s exactly what they are… I really tried soaking in the resin, and even after the teal was done, I went over it with the clear. Guess I missed a few spots. Remedies?
Also, the bottom by the swallow is kinda clumpy a lot, obviously I need to sand it all down. But when I was working that area, the glass wouldn’t stick. First, I was using a squeegee, then a chip brush. Kept coming down. Kinda got aggrivating. Is the only solution really just to work it more, or is it possible that there was too much resin?
Sorry I don’t have any pics. Couldn’t find my camera.
Thanks for the read!
Also, what’s the shelf life on organic vapor cartridges? I’ve been storing them in a sealed plastic bag when not in use.
am looking at the board on the remote viewing channel
great job! a couple bubbles ‘’ Ain’t No Beeg Ting Bruddah’’
the bare foam is easily fixed with some glass scrapz…
oh baby in the water soon…work on it every day
do sumptin’ and before you know it — done .
start # 2 already…
oh baby! what a success…
dont waste time with the camera … finish da bugga
…ambrose…
yeah start the second
so it’s ready for the
halloween swell.
Thank you for the kind words, Ambrose! I’m super stoked right now!
entertaining read ,
points east !
cheers
ben
launch it and ,
as my signature says ....
Glass on my fins today, then proceeded to the bottom hot coat. Only got around to it at 5 or so, and the sun was low in the sky. Being UV cure, didn’t kick all the way, so its gonna have to wait til tomorrow for a full cure, then it’s onto the other side, then, FINALLY, sanding.
Question: how do you mkae fin rope not such a messy, clumpy, shitty mess? Wound up not putting that ‘nice little filet’ everyone talks about on the keels. Glassed with 3 layers of 6 oz on the outside, 2 6oz on the inside. Will that be strong enough?
Also, FINALLY got some adhesive for my medium power pad, loaded some 60 on it, and took the lumps out in the tail. UNF. HOW DID I DO ANY OF THIS WITHOUT THAT TOOL? Absolutely amazing. It’s the Harbor Freight 30 dollar one, in case anyone is wondering.
So, tomorrow, full cure. Come to think of it… I sure hope I added enough SA and mixed enough… I guess we’ll find out, right?
Also, on this day, I think I swore off from glassing all boards in the future. I think resin and fiberglass have a pact out against me… I’ll do the shorty, but that’s it. Almost went through an entire gallon on this board. Is that normal?
[quote="$1"] Also, on this day, I think I swore off from glassing all boards in the future. I think resin and fiberglass have a pact out against me.... I'll do the shorty, but that's it. Almost went through an entire gallon on this board. Is that normal? [/quote]
what's normal is to fight the learning curve on those first boards - like learning another language, fiberglassing isn't all that hard to do, but its hard as heck to learn, and harder yet to master
....do you have any more photos of your progress on the board , please , mr. pointy ?
cheers !
ben
As a matter of fact fins, here’s a bunch I took today just for you.
Freelap. Turned out just like I wanted, sorta… Had to deal with air bubbles tough where laps met. Sanded then patched. Still not perfect, but whatever…
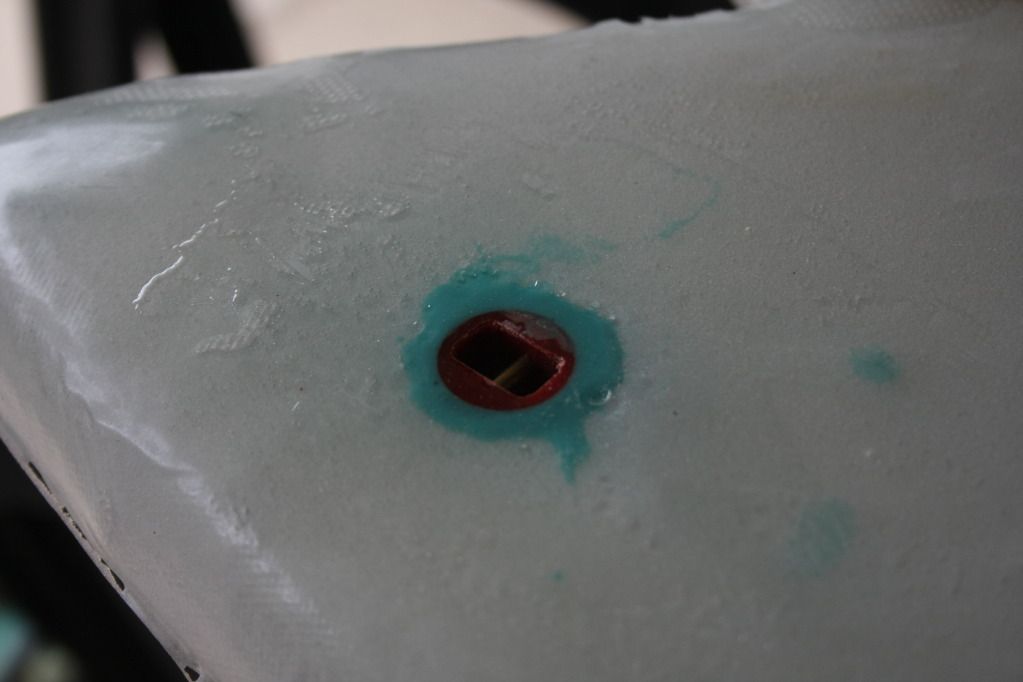
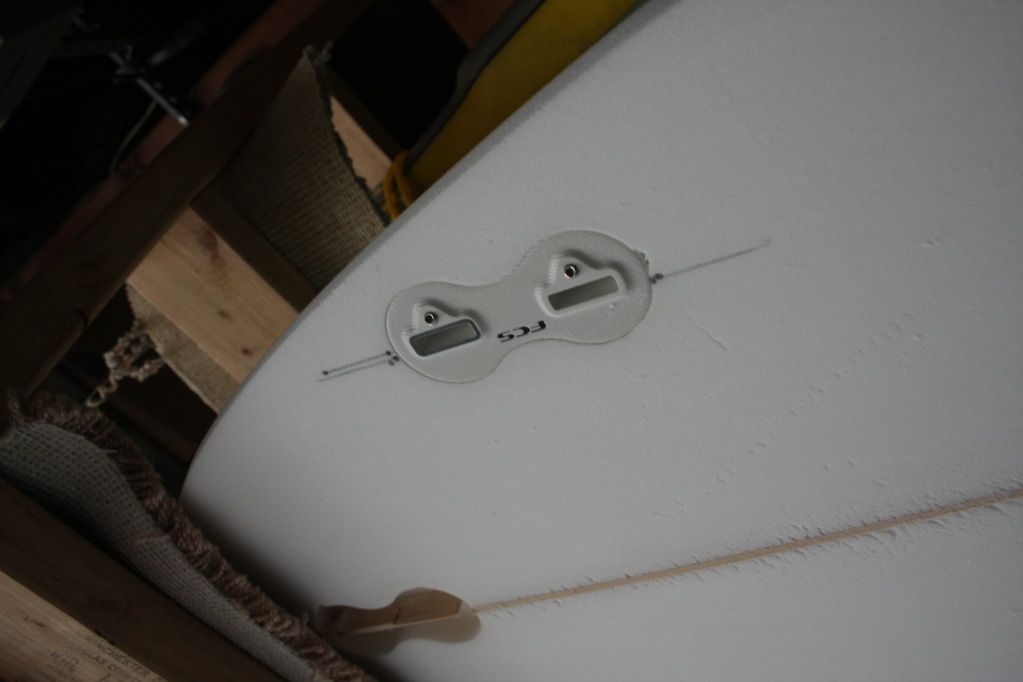
After the top hot coat cured, I grinded out the leash plug first, just to see the nice contrast. I’m saving my sanding for tomorrow, cause it’s gonna be 55 and rainy. -____-
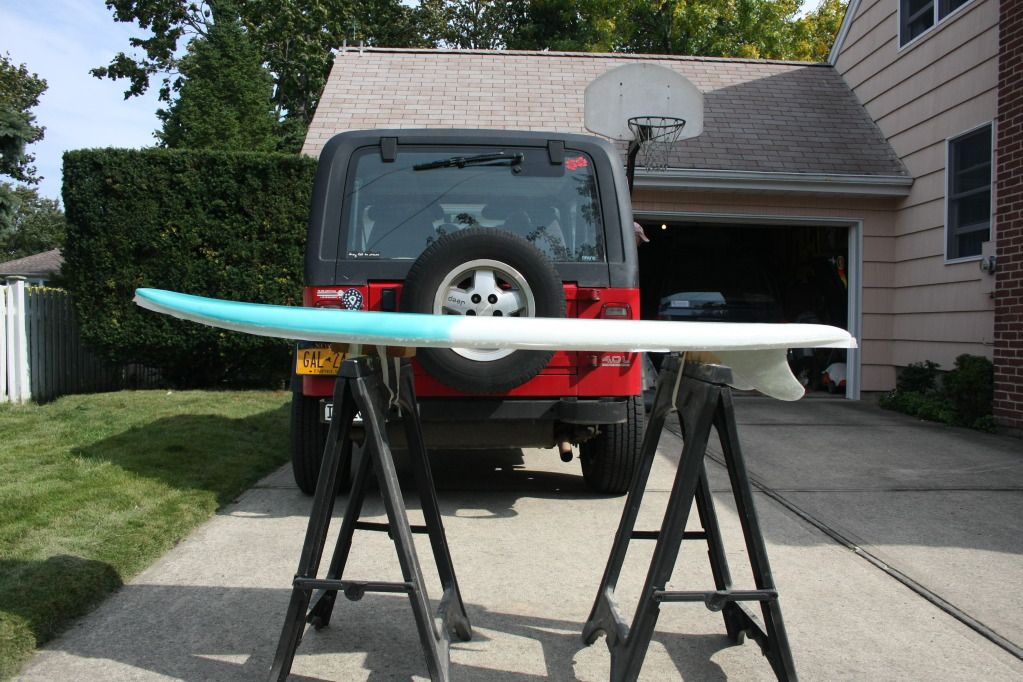
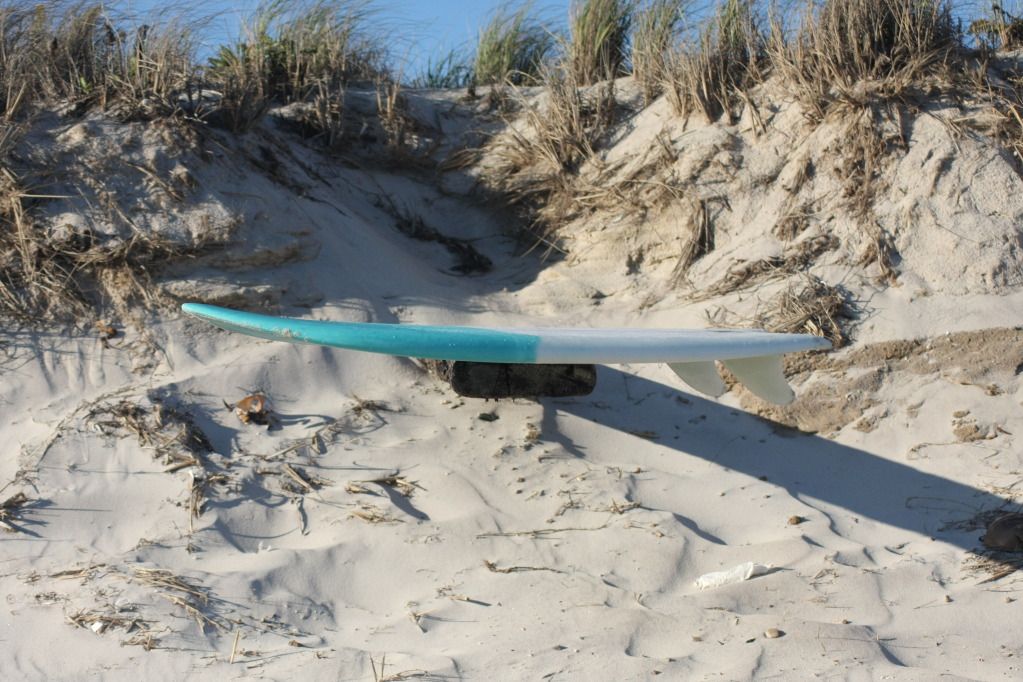
Here’s the rocker shot everyone always wants… Still had hot coat tape on though. I get a final one after everything is done.
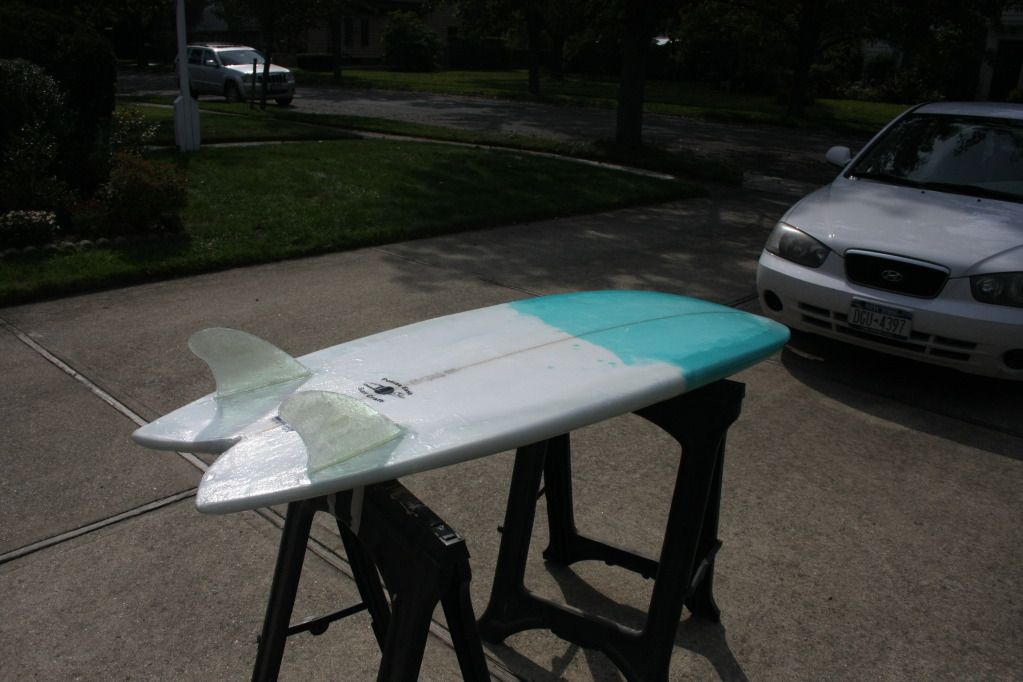
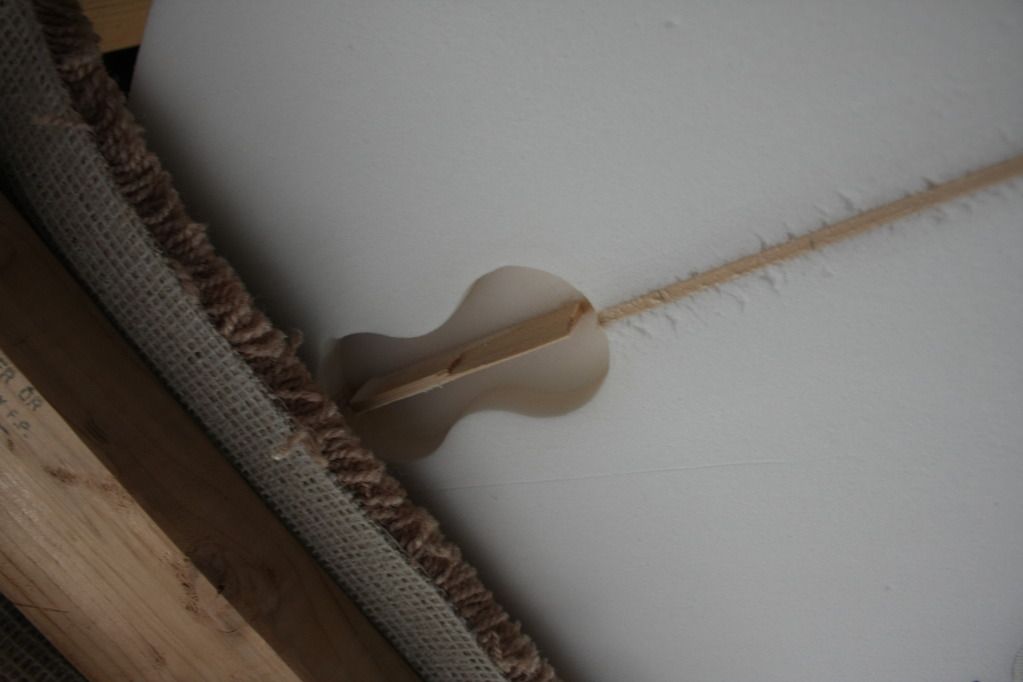
The fins are my favorite part. They look awesome on this board.
Ready for sanding.
While everything was baking in the sun, I took out the fusion tempalte for the shorty and went to town with my Harbor Freight trim router. Dry fitted the tabs. Gonna glue them in maybe tomorrow or Monday.
Router bit seemed to have trouble on the stringer. Didn’t want to force it and dull the blade already. Advice on getting this out? Chisel?
So, that was all today. Sanding is tomorrow. Maybe there will be some waves this week, but, knowing my luck, there won’t be. I’m going on a hundred mile bike ride next weekend to Montauk. This board will sure to be in tow (in a car, of course. It’s hard enough riding a bike there, I don’t need extra weight.
Enjoy!
Okay, so, I attempted sanding this morning… Got really frustrated, and did probably a not so good job, so I might go back to it tomorrow…
Anyway, I was using my medium 8" power pad with 100 grit for initial sanding. Now, I’m sure I just need to work on my technique, but on low RPMs, the sander was skipping a lot. Like, I couldn’t put it flat, or it would get angry with me and try to run away. So, I did the beginning of the sanding slightly tipped, maybe a 10 or 15 degree angle.
Then, the paper was gumming up badly. Worse than with the lam coat laps. I’m pretty sure I added the right amount of wax, possibly slightly more. Can this have a reverse action, choking pads with wax? Or am I simply not the chemical mastermind I thought I was, and added too little? It ried hard and tack free, that’s why i think it’s too much.
So I took our my FAVORITE Porter Cable random, and went to town with a 60 lightly over everything, then 120, then hand sanded 150, 220 and wet sanded with 320.
Erm… what to do with that sander?
From the looks of the hot coat it appears that you might have either not had enough wax, or you did one too many passes with the brush. If you look on the rails of the board towards the nose you can see some streaking which means that it’s probably more tacky in those areas than in the smoother areas. As far as the wobbling goes, you could have an unbalanced pad, slightly tweaked spindle, or just poor technique! Ha ha, don’t worry though, we’ve all been there and we’ve all learned that putting your pad on edge is never really a good idea because you tend to gouge, and create grooves, instead of sand. I’d say do a spin test on your pad, and see what’s up, don’t push so hard on the brush and try to get everything in the laminating stage nice and smooth before you do your hot coat. Otherwise, way to go, and keep on learning!!!
I love this place!
Great going PointsEast - Not sure if you mentioned if you had the opportunity to watch some skilled folk at work, but winging it off the internet is a wild task. I’m sure many a back yarder here got use to using tools, especially the sander, doing ding repair - great way to get use to working with glass, glue, and sanding the same…
Like many suggested - Take your time, and keep on going!
So, in keeping with Swaylocks tradition [or so it seems…], I christened my board today in 2 foot choppy stuff, breaking about 20 feet off the shore. That being said, I caught waves! And rode my first board, completely by myself. And it was awesome.
My first thought was “it floats!” Then, my second thought was “this should be interesting.”
The first wave was a little pathetic, and I stood up for .2 seconds.
I got a few good ones in though, and it brought a smile to my face. And as I was getting out of the water, THEN my lady shows up with the camera. Perfect timing. lolol
Anyway, got some TOTALLY RAD SURFER MODEL SHOTS FOR YOU GUYS, on my favorite giant ship beam spring board.
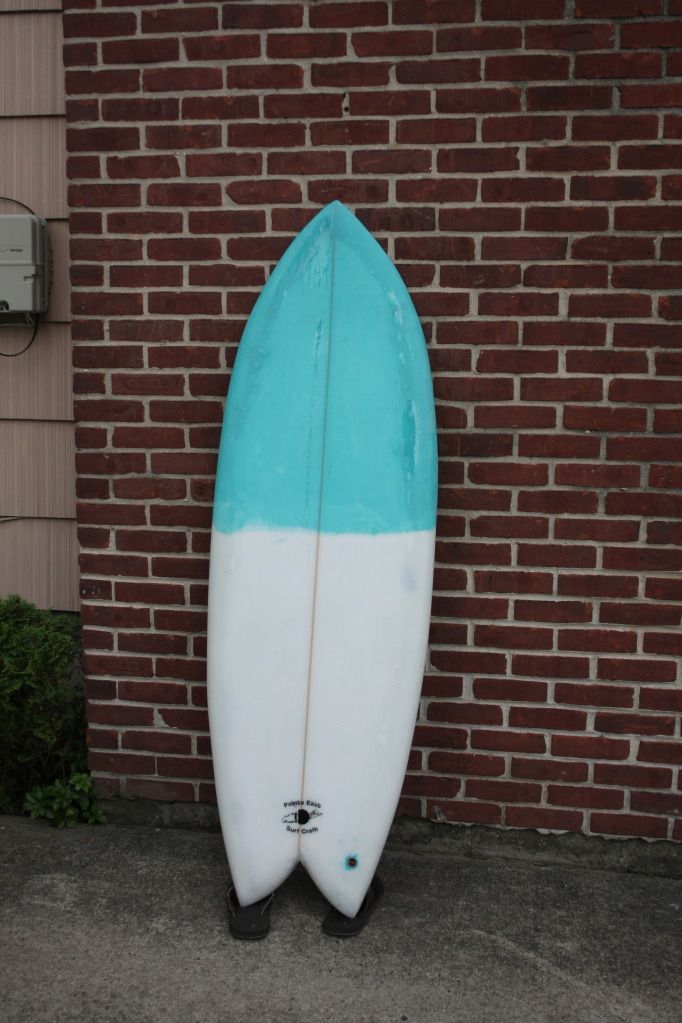
It’s done?

First waxing.
Rock on!
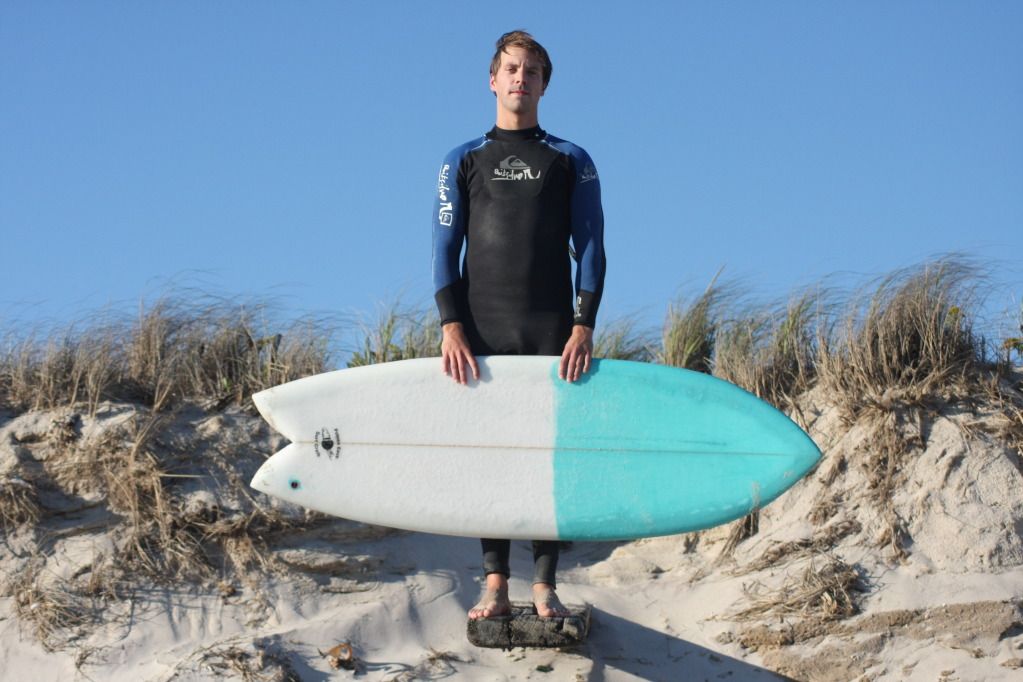
Trying to be cool.
Thank you for the tips everyone, and thank you also for the read. I hope you enjoyed the process with me. Stay tuned for more!
And the universe is better
now that you have ridden
the board of your psyche.
the bubble of true
understanding is growimg.
…ambrose…
thanks very much pointy !
I LIKE a surfboard build PHOTO thread
if you surf like me [see ' hahahaha , WIPEOUT' thread ] , perhaps you can be thankful that your lady was NOT there earlier ??
.2 of a second is a hard wave to photograph
most of all,
how STOKED are you / how GOOD is it , to ride a board that you have made yourself , eh ? best feeling in the world , if it floats ha!
keep up the good work , and from the things you learnt on board 1 , the next one will probably improve !
cheers , and keep it coming , mate !
ben , west oz