You have to be of the mind set of what can go wrong will go wrong.
As Huck says, you need to have the mental image of the finished piece, once you’ve chambered there is NO going back and start reshaping.
It becomes pure speculation as to where are the chambers and how close to the rails and skins are they.
Chambering only after ALL Machine work is done
listen to huck he preaches the truth and so does old mate below this.
Huck, Adam, Jim,
The outline overlay, expertise and advice is very much appreciated. I’m going to get the mental image figured out and into my brain. It’s been doing circles and squiggles trying to figure out how to fix this, but it’s coming along. And then gradually using the plane and sander, start to form these curves, including rounding the rocker. I had things mentally fairly linear hoping for more speed when paddling and forgot water dynamics of flow over the surfaces.
Agreed-no chambering till it is all completely formed and sanded.
I’ll keep posing progress pics.
Thanks again,
Greg
No one is claiming to be an expert, and we all just want you to have fun. If you have Instagram spend some time looking through martinshapes profile. Heaps of videos of him working on his chambered boards. Just have to scroll through.
https://instagram.com/p/BSg48N2AgUg/
This one shoes him doing the chambering. There is a whole series of him making this board from scratch. You just have to go far enough back in his profile to find them… go for gold son!!!
![]()
Digging the Instagram. Very helpful.
Going to be away for a few weeks to Yellowstone National Park. I think I have the mental picture figured out to smooth the board’s curves when I get back. I’ll post the progress as it happens.
Thanks again everyone.
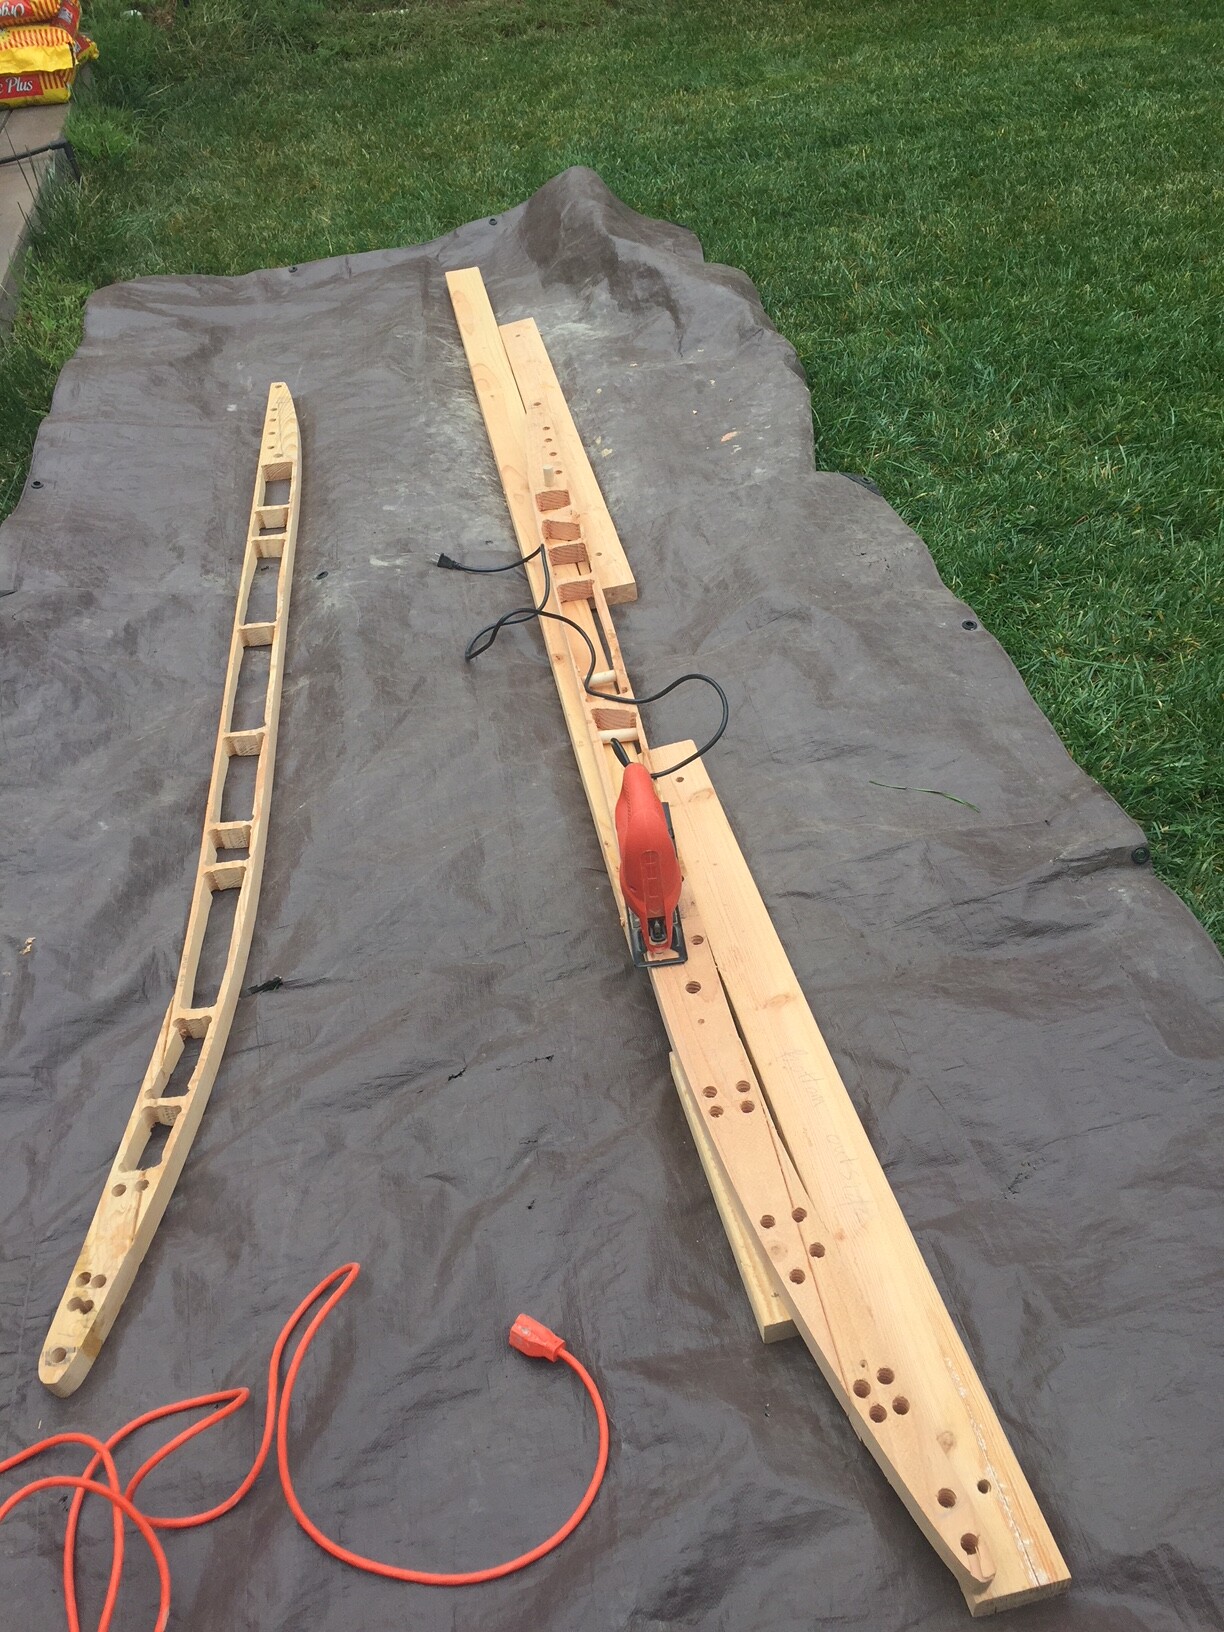
I am back at it, and it feels good. I had made a template when I first began and had been using it all along, but somehow forgot to put it back on the board ond jumped into shaping the rails. So I some corners once I got started on the rails. No problem, just back up a couple steps. I have a rocker template as well, and will slap this on the inside and smooth the rocker out some, too.
Here are the pics from today showing the angular tail junction before and the more smoothed out version now. It was tough to get a true curve with a flat hand plane, maybe a draw knife would have been better, but I think I can make fine adjustments with the belt sander in a couple weeks. Today’s efforts took about 3 hours. I mention this, because in reading posts, I always wondered about how long some of the step take.
The plan is next week to smooth out the other side, then go see the Eclipse, then start smoothing things out and reform the rails.
Thanks again for all the advice and encouragement.


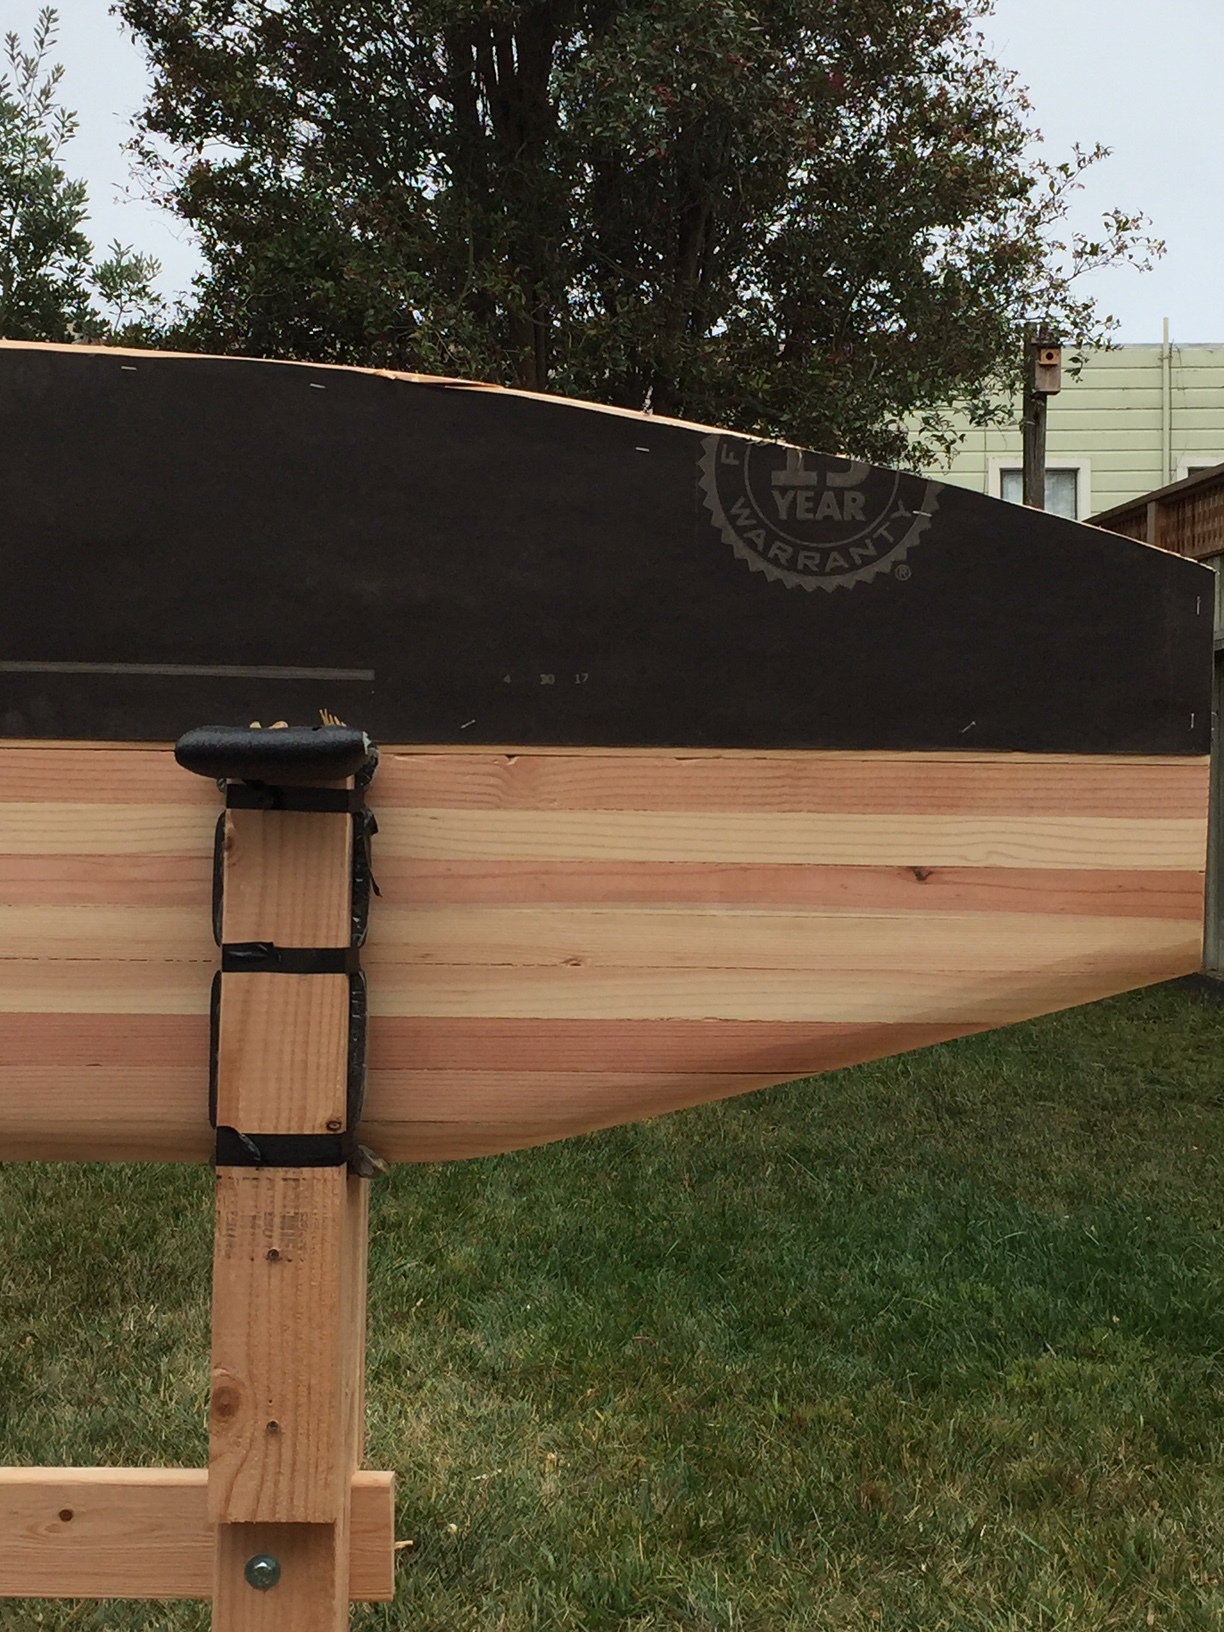
Thanks for the tips on board curves. The sides are a bit more curved than they look in the picture.
Good progress today. Reworked the hips and angles and smoothed things into more of a flow. Not perfectly symmetrical, but pretty close. I do not have the skills to make it perfect, and I think I had better leave pretty close as good enough (perfection being the enemy of good, and sometimes knowing when to stop is key).
The hand plane sung all afternoon. It cut curls perfectly all day, so that was nice. Because of the cool humidity here in San Francisco, this thing is absorbing water and still weighs close to 100lbs. I’ll get an exact weight in a couple weekends before breaking it open to start chambering.
Now here are the new famous last words - I am going to leave the final sanding till after chambering. I know. Why ask for advice then not follow it, right? The main reason is that I just cannot lug this thing around the shaping stand. I need a second person just to flip it over. It almost fell on me again, today.
If it were balsa it might weigh under 40lbs and that is more manageable. Partly for personal safety, and partly so I can flip it back and forth while finish sanding, I think I will chance it. So, against my better judgement and sage advice, I am going to sleep on things for a week, go see the eclipse (or be stuck in traffic trying), then if it feels right, unscrew the boards, mark out where the fins will go, and start chambering.
The plan is to chamber one board at a time and glue it up the same weekend after chambering it. I am planning on leaving one side rail off so the insides are exposed and taking the whole thing to a friend’s house in Sacramento to let it bake in his garage for a month to dry the wood before glassing it.
Thanks again for the encouragement and tips,
Greg
Sunset (also a hoax) Beach, San Francisco

love the “hoax” reference…
Go you good thing
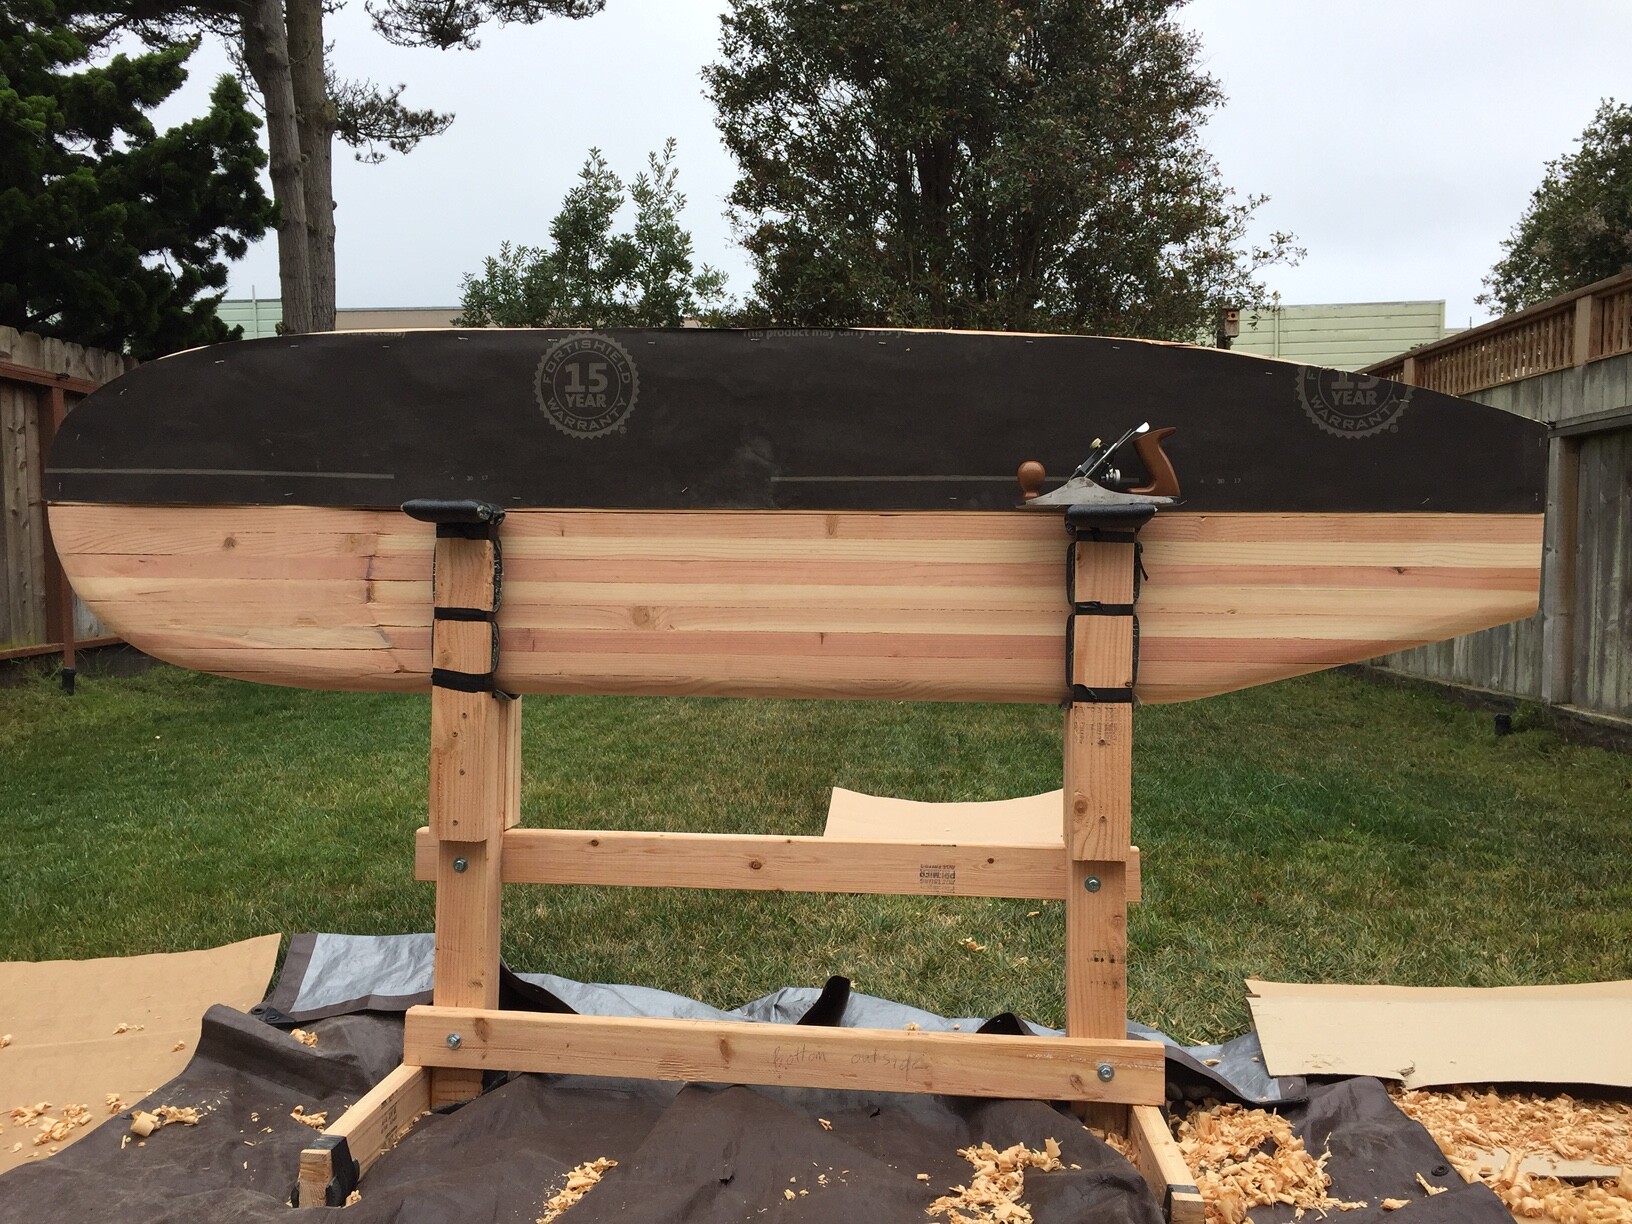
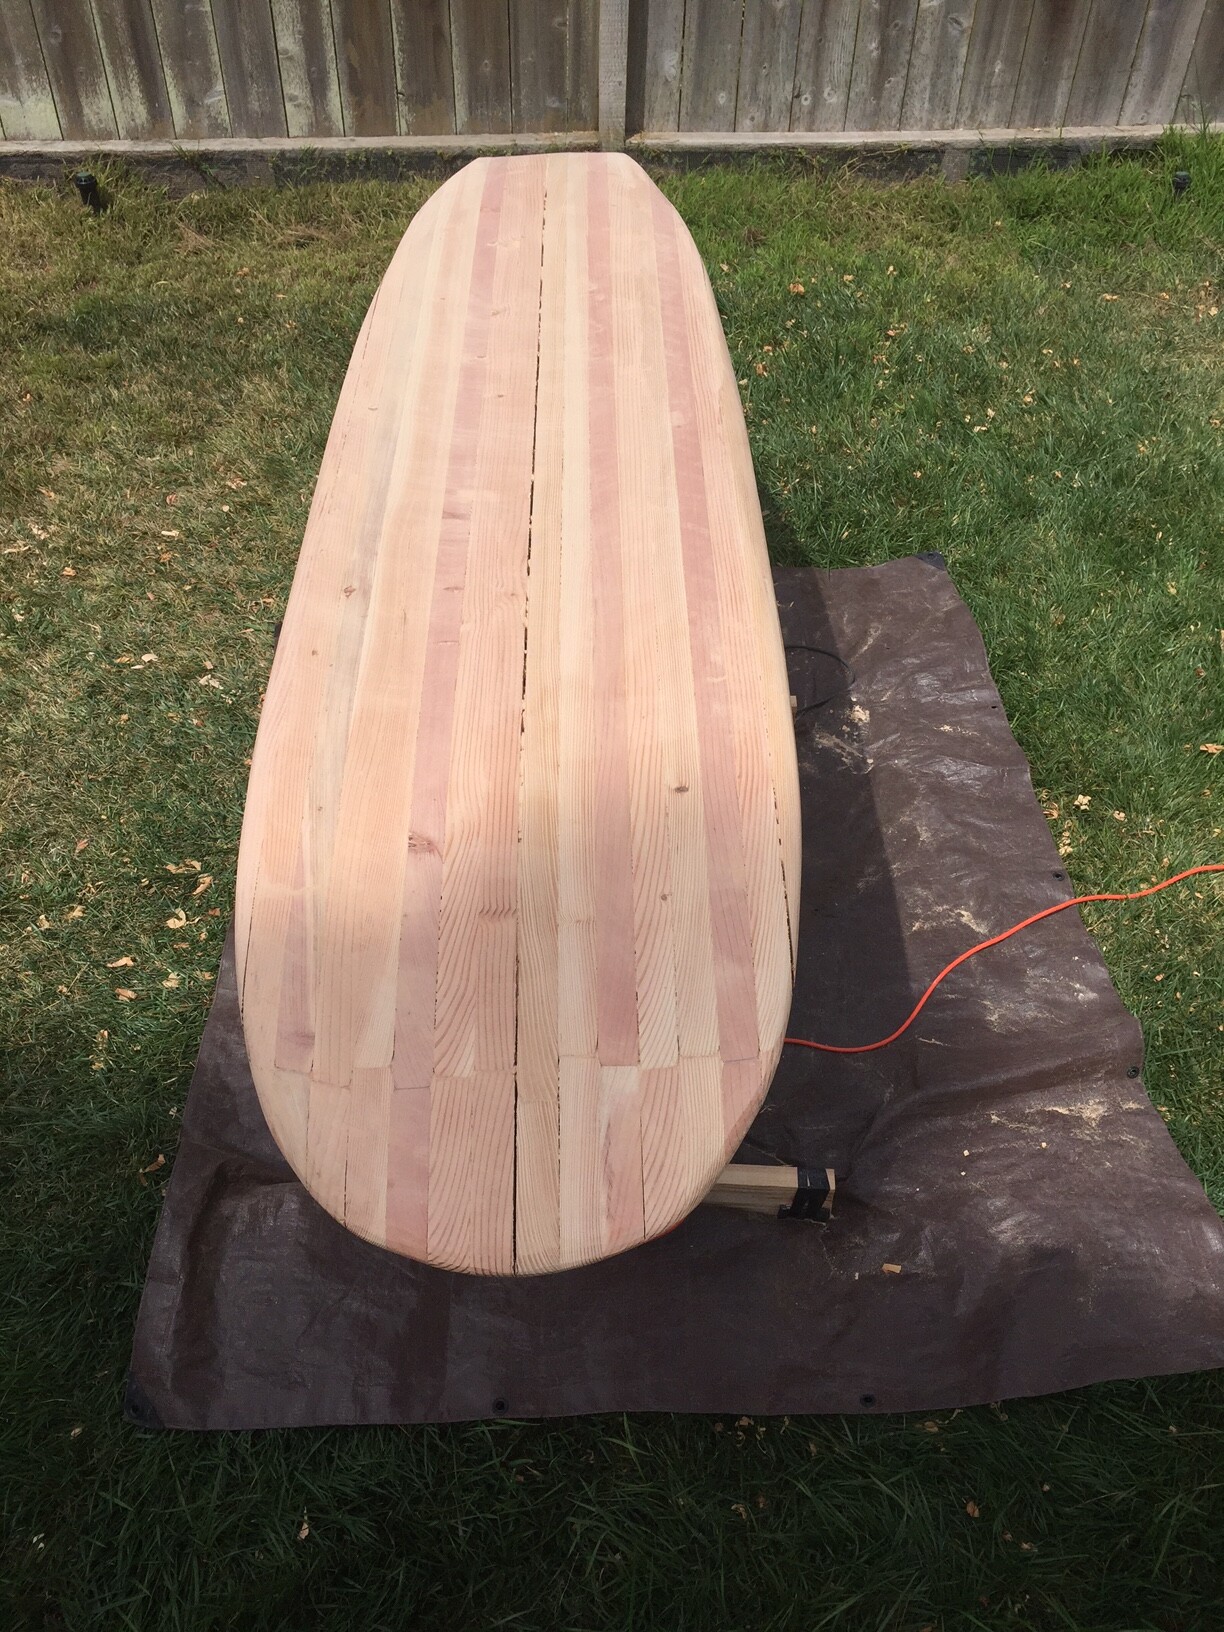
After seeing the solar eclipse and reflecting on the universe, gravity, hydrodynamics, and the nature of good advice, I decided to do my best to smooth out the bottom rocker before taking the board apart for chambering. Hand plane and belt sanding did the trick in about 3 hours. There are a couple of small 1cm tear-outs along the side of a few boards from me planing at a 45 degree angle. I plan to patch them with wood strips glued on then sand them flat once I have the boards apart.
It is not a show-piece board, but I am liking the look over all. The rocker is much more continuous. it should perform much better than it would have otherwise. Thanks everyone for the encouragement and guidance.
I have ordered fins and will next figure out where to place these, so that I can leave solid wood in these areas. I am going for a 2+1 set up, with a 10.5 inch longboard box, and FCS plugs for the side fins. Any sense of how far from the tail the longboard fin box should be? I was going to go with about 5 or 5.5 inches, or just copy the fin locations from the board I used as a template. And any sense of where to place the side fins in relation to this, or just copy the set up from my template board?
Next week, I’ll get the weight before chambering and begin the chambering process (after marking the fin locations).
Greg
BTW - great day today at Ocean Beach, San Francisco

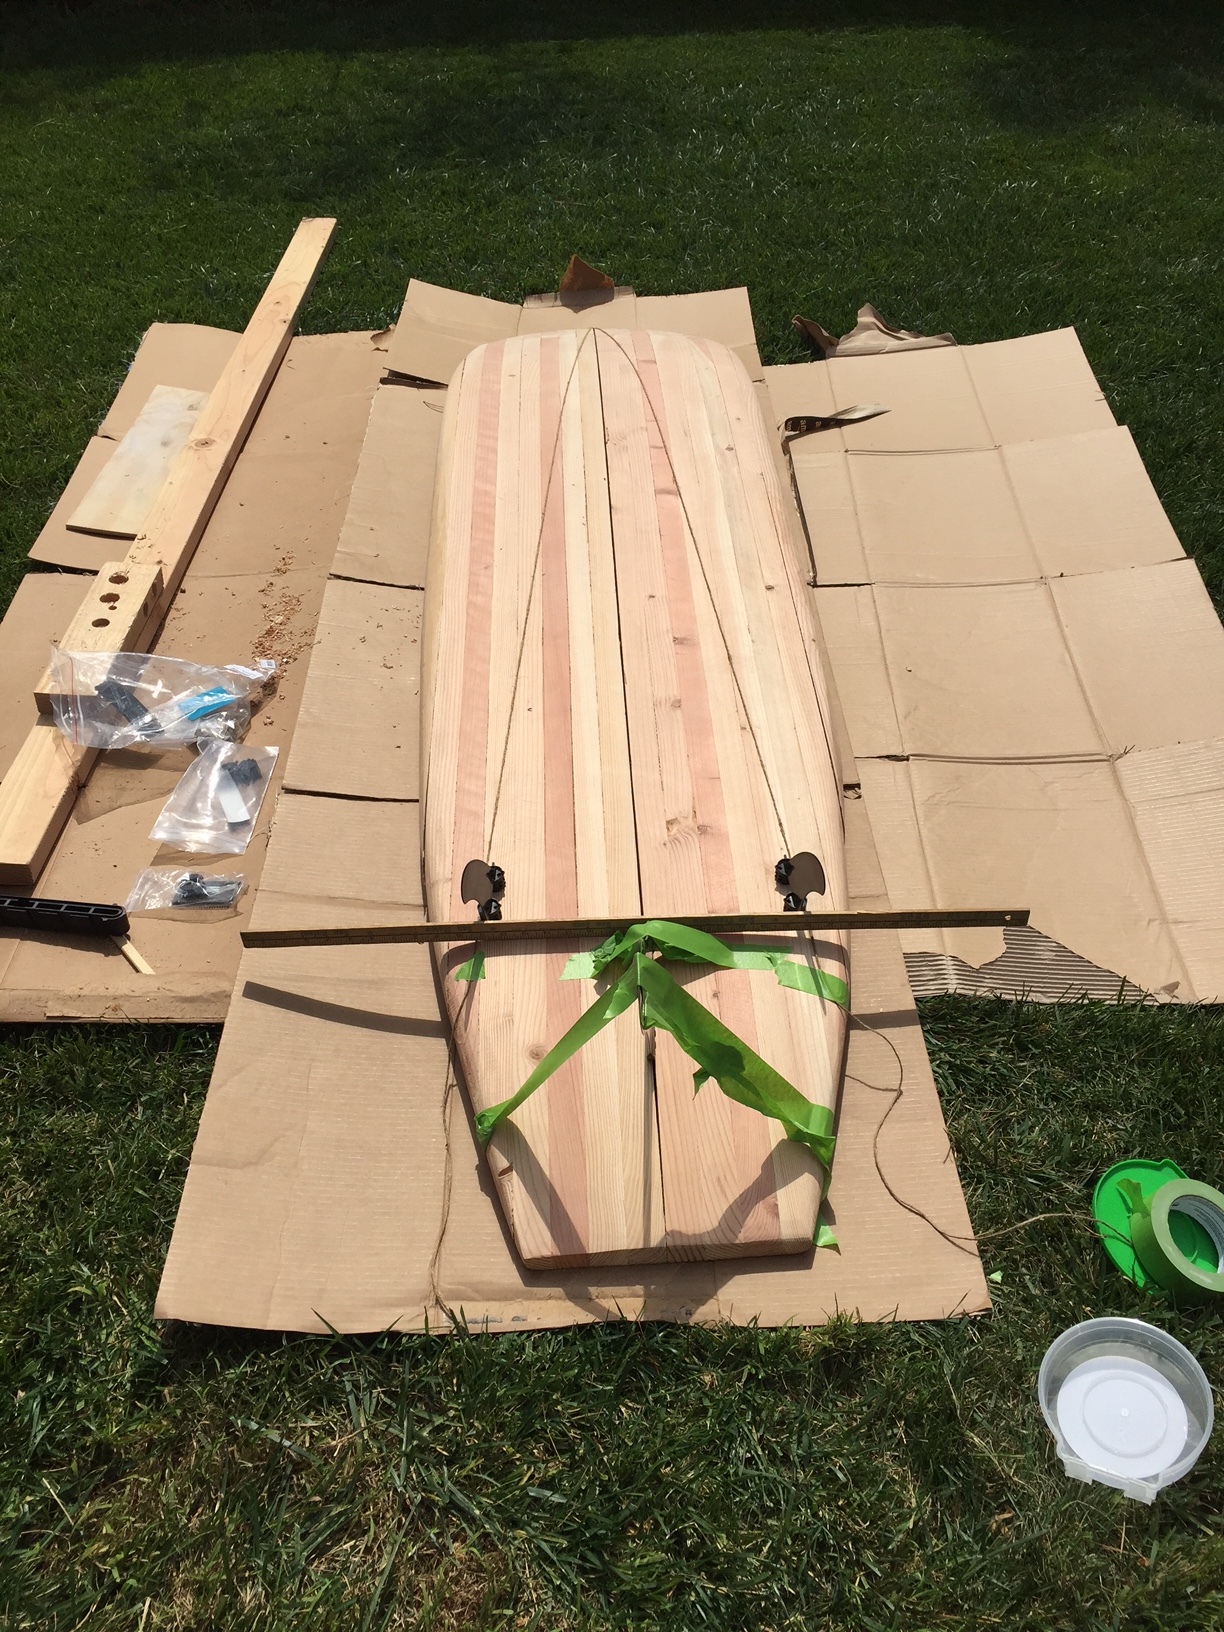
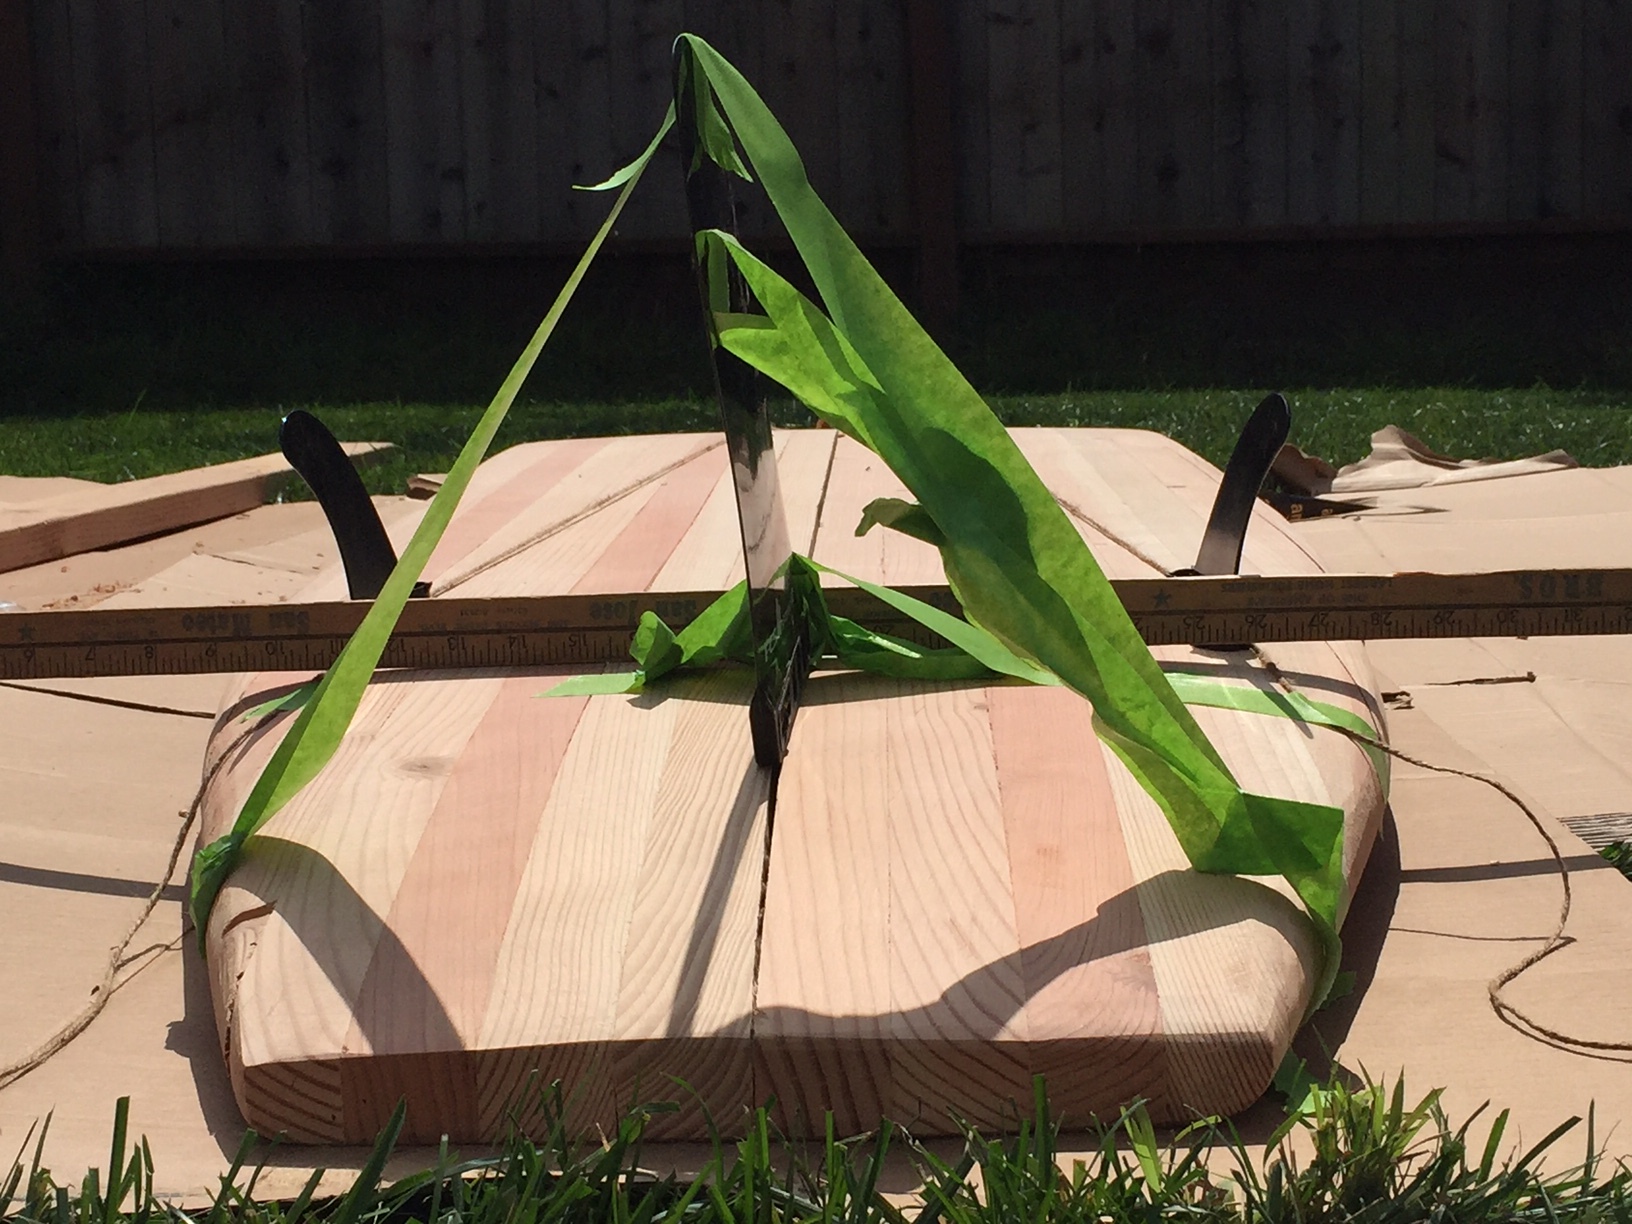
I have finished the machining work and am ready to start chambering. The question I need some advice on is fin placement. I am going to use FCS-plugs for the little side-biters and a 10.5" longboard box with an FCS-II 9" center fin so that I can move it back and forth easily.
Because I need to leave solid wood into which to epoxy the fin box and plugs, I need to designate their placement now. I’ll drill the holes out after glassing and install the box/plugs.
The placement of the board I used as a template for its thruster setup looks quite good to me. The toe-in on the side fins scribes a line exactly to the center of the tip of the board, and 5" from the tail for the center fin seems pretty common. I was thinking about 4" from the tail, to give me some leeway in both directions of placement, and I am not looking for a particularly loose maneuverable board (more a cruiser, particularly given its likely final weight).
Pics show the template board set up and measurements. Do these look reasonable to everyone for my first wood board (and should I go with 5" or 4" from the tail or something else?)


So the official pre-chambering weight is 106lbs, or 48kg. I am optimistic about trimming this by 80% or so. Maybe a sub-20lb board is possible. I am also still planning on taking it to a friend’s garage in hotter and drier Sacramento for a few weeks once the chambering is done to drive out even more moisture. I’ll keep everyone posted as things progress.
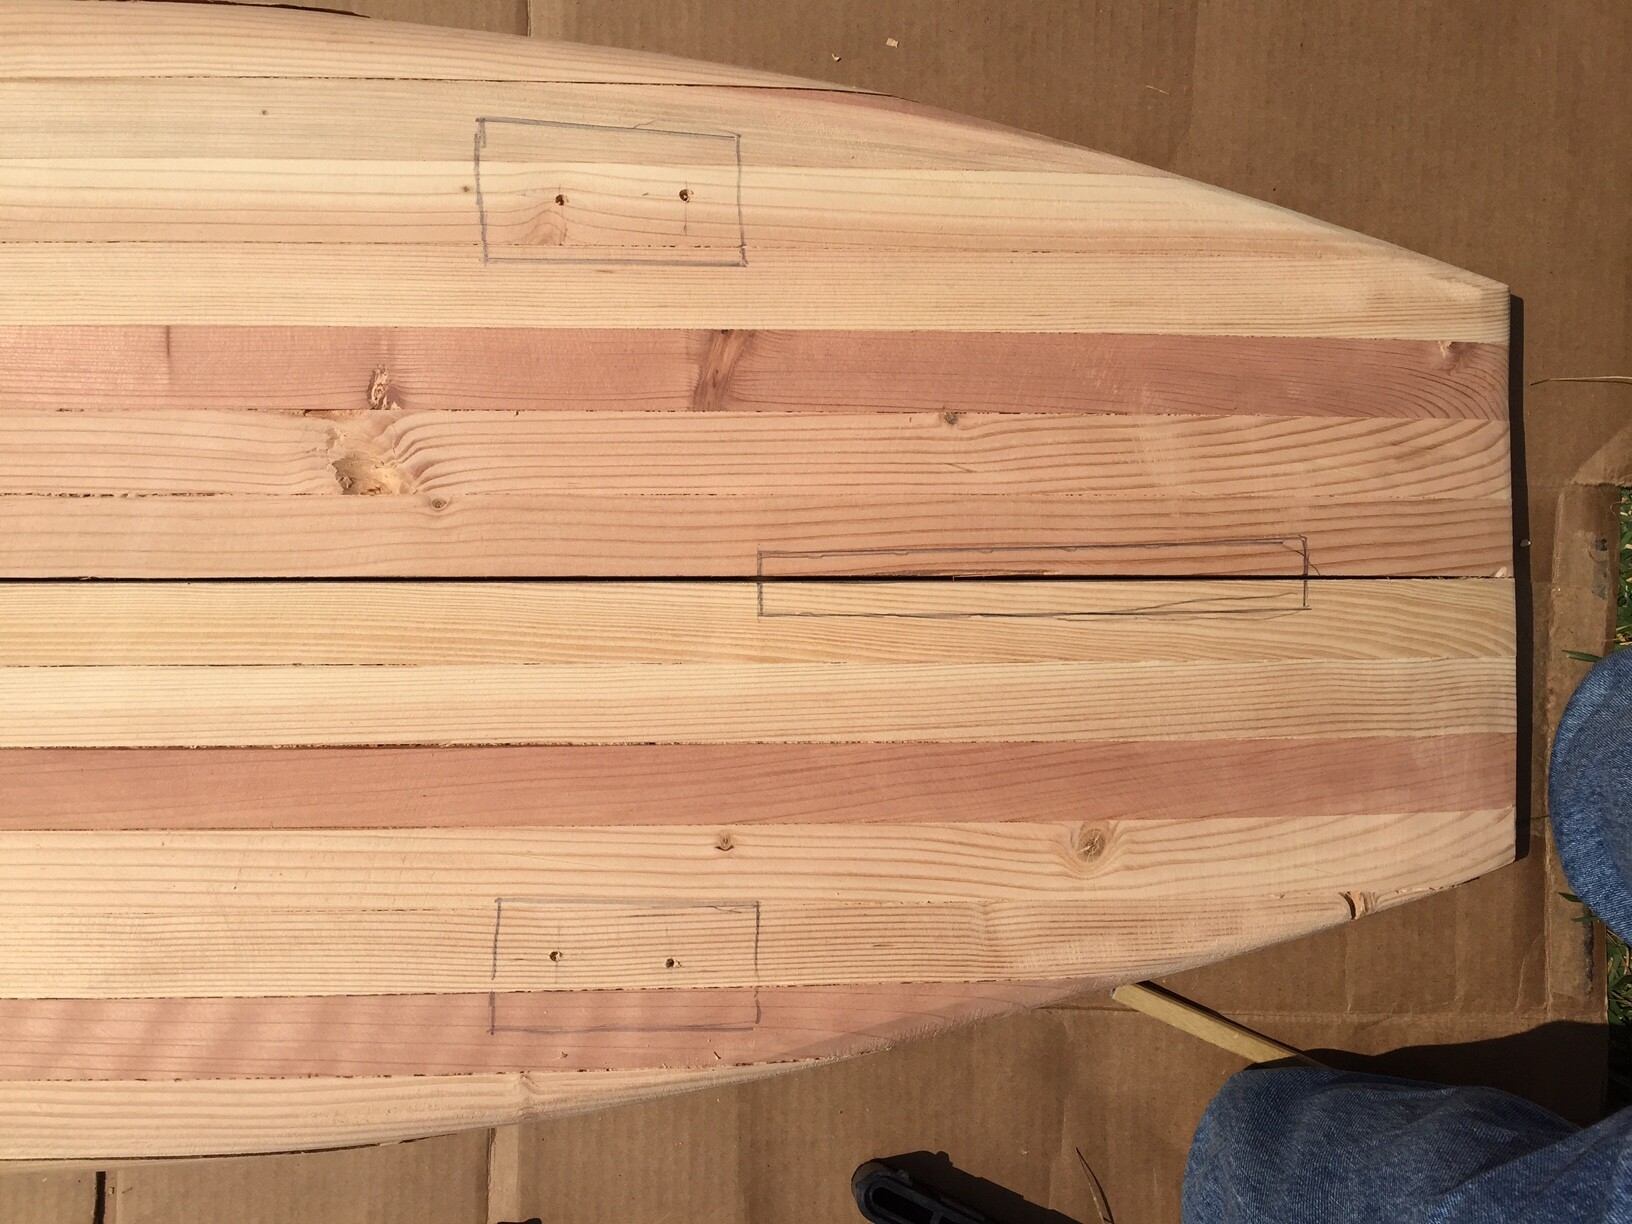
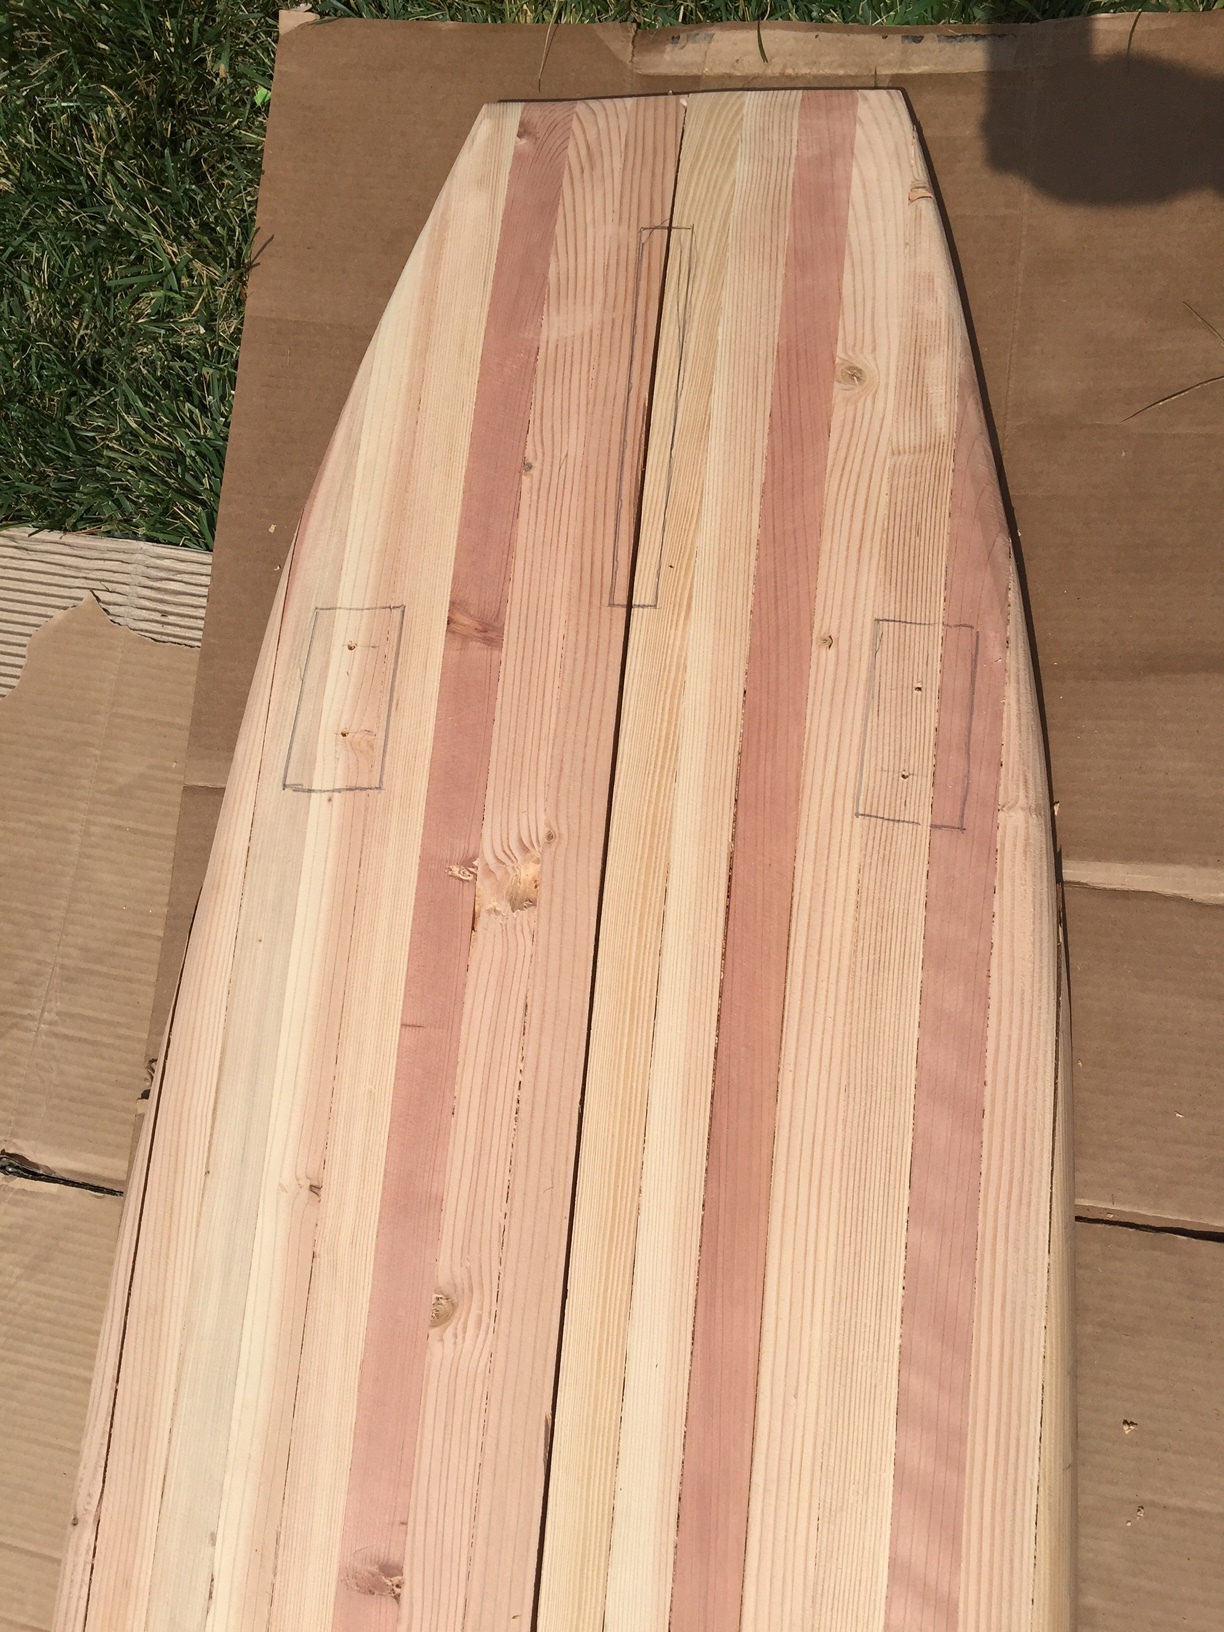
The fin box placements are finalized. I followed a few principles:
- Copy the template board
- The side fins trailing edge should be ahead of the center fin’s leading edge
- The toe-in should scribe a line to the tip of the board
- Symmetry (of course)
- The cant is built into he rail FCS plugs. It looks to be about 5 degrees
The center fin i the pictures is paced at its most forward possible location and in the 10.5" inbox can slide backwards about 5 inches.
I’ve marked out on the board where I will leave solid wood blocks, unchambered to support the fins. I had not counted on this added weight when I began the project, so I will have to be more diligent in my chambering to reduce the overall mass.
*** Just took a break and looked back at fin placement information and tips. Looks like I have these about an inch too far inboard. So, I’ll adjust the locations by about 1" outboard and re-mark the fin block areas. One short step backward in the process, but better to have figured this out at this stage. ***
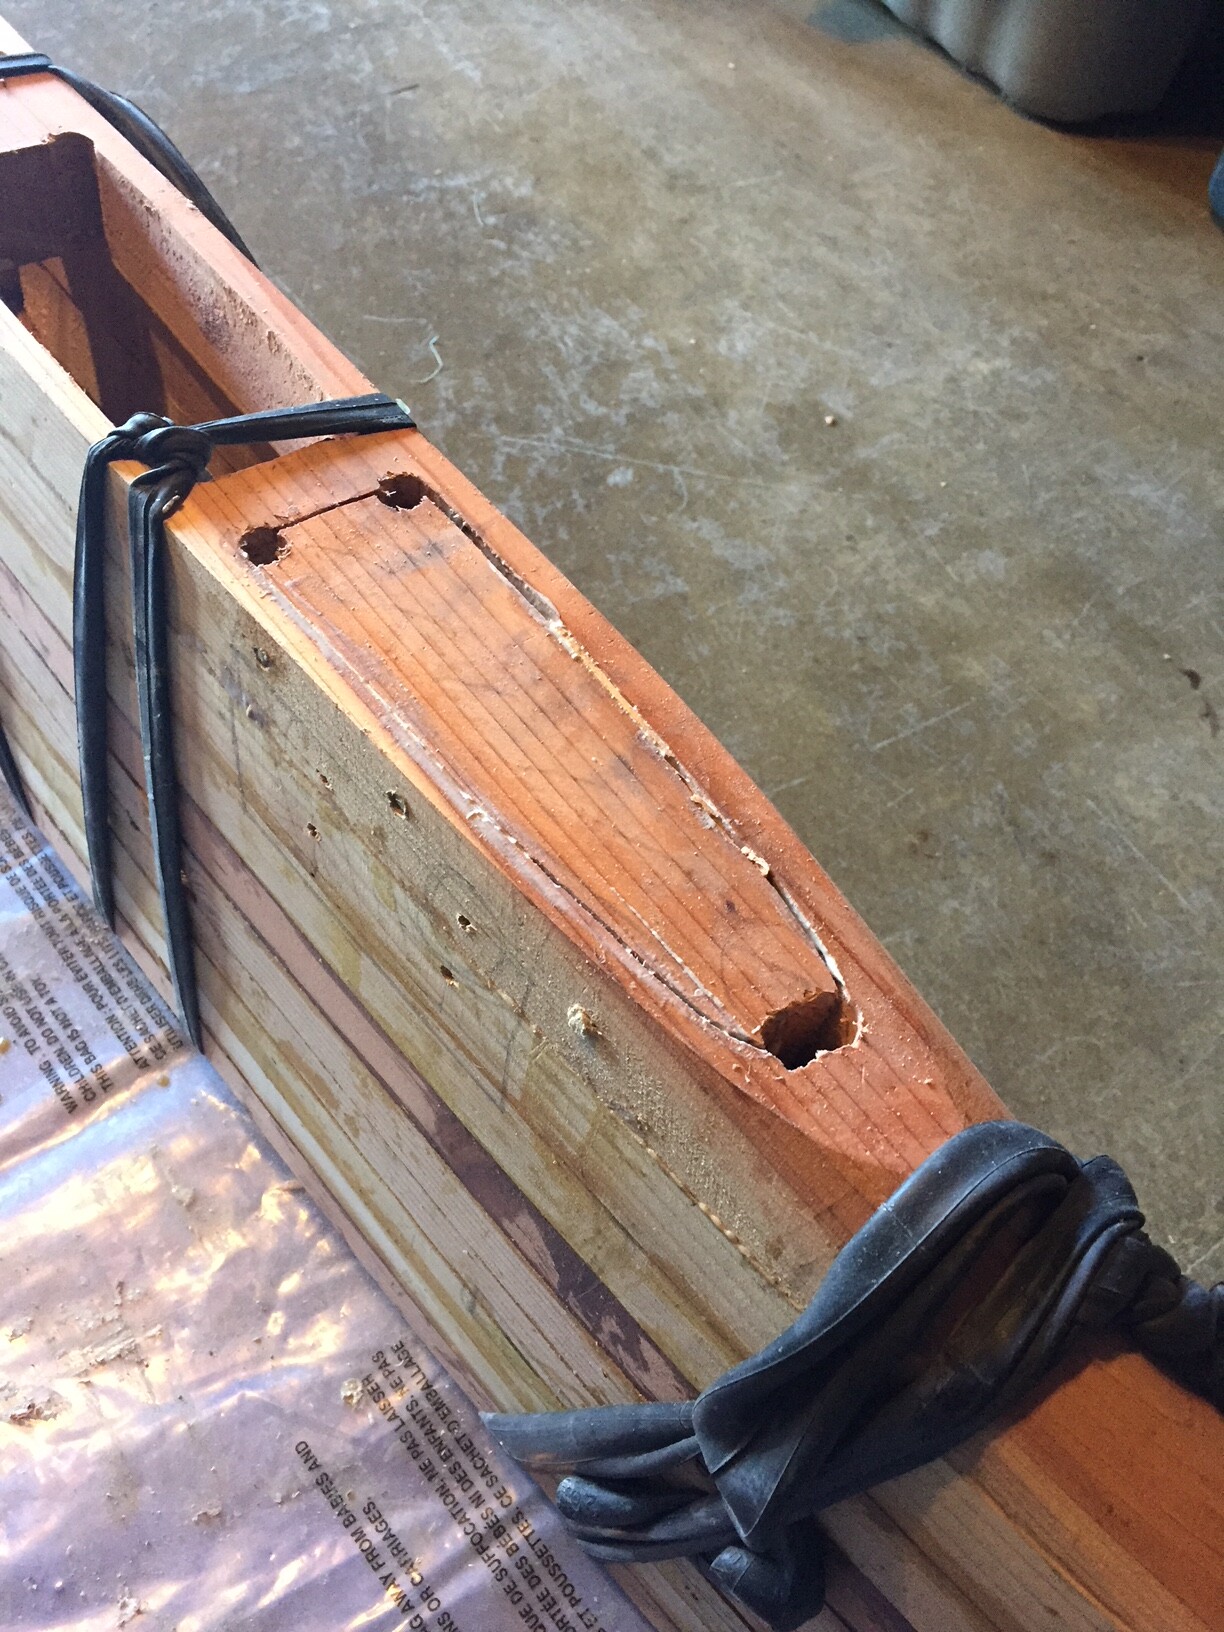
I am using a solid brass vent screw. The parts are pictured. I’ll add a small rubber washer and it should work fine. The plan is to counter sink it near the nose and add a small leash line to it, so it doesn’t drop to the bottom of the break when I open the vent and the screw cap slips out of my fingers.
Chambering will have to wait a week till I get my garage back. A separate home renovation project has it filled at the moment. Everything seems to be moving right along.


I made a pine board once. Weighed about 30kg when I was done. Surfed it once, chopped it up and threw it in the garbage.
Back at work on the board. Finally got the garage back from the crew doing some home renovations, so I can begin gluing the chambered ribs together inside, as the evenings get damp and cooler now.
A bunch of lessons from today.
- Always wear gloves with fir or pine. Too many splinters otherwise.
- Use a sharp jigsaw blade. Duh. Well, I began with an old one and cut through the deck twice. A dull blade will bend more and it makes the thickness of the deck difficult to predict from one side to the other. I have seen the great mirror set up online, and that is way smarter than my eyeballing it. I’l probably still eyeball it, as I am trying to keep everything super low tech, but lesson learned.
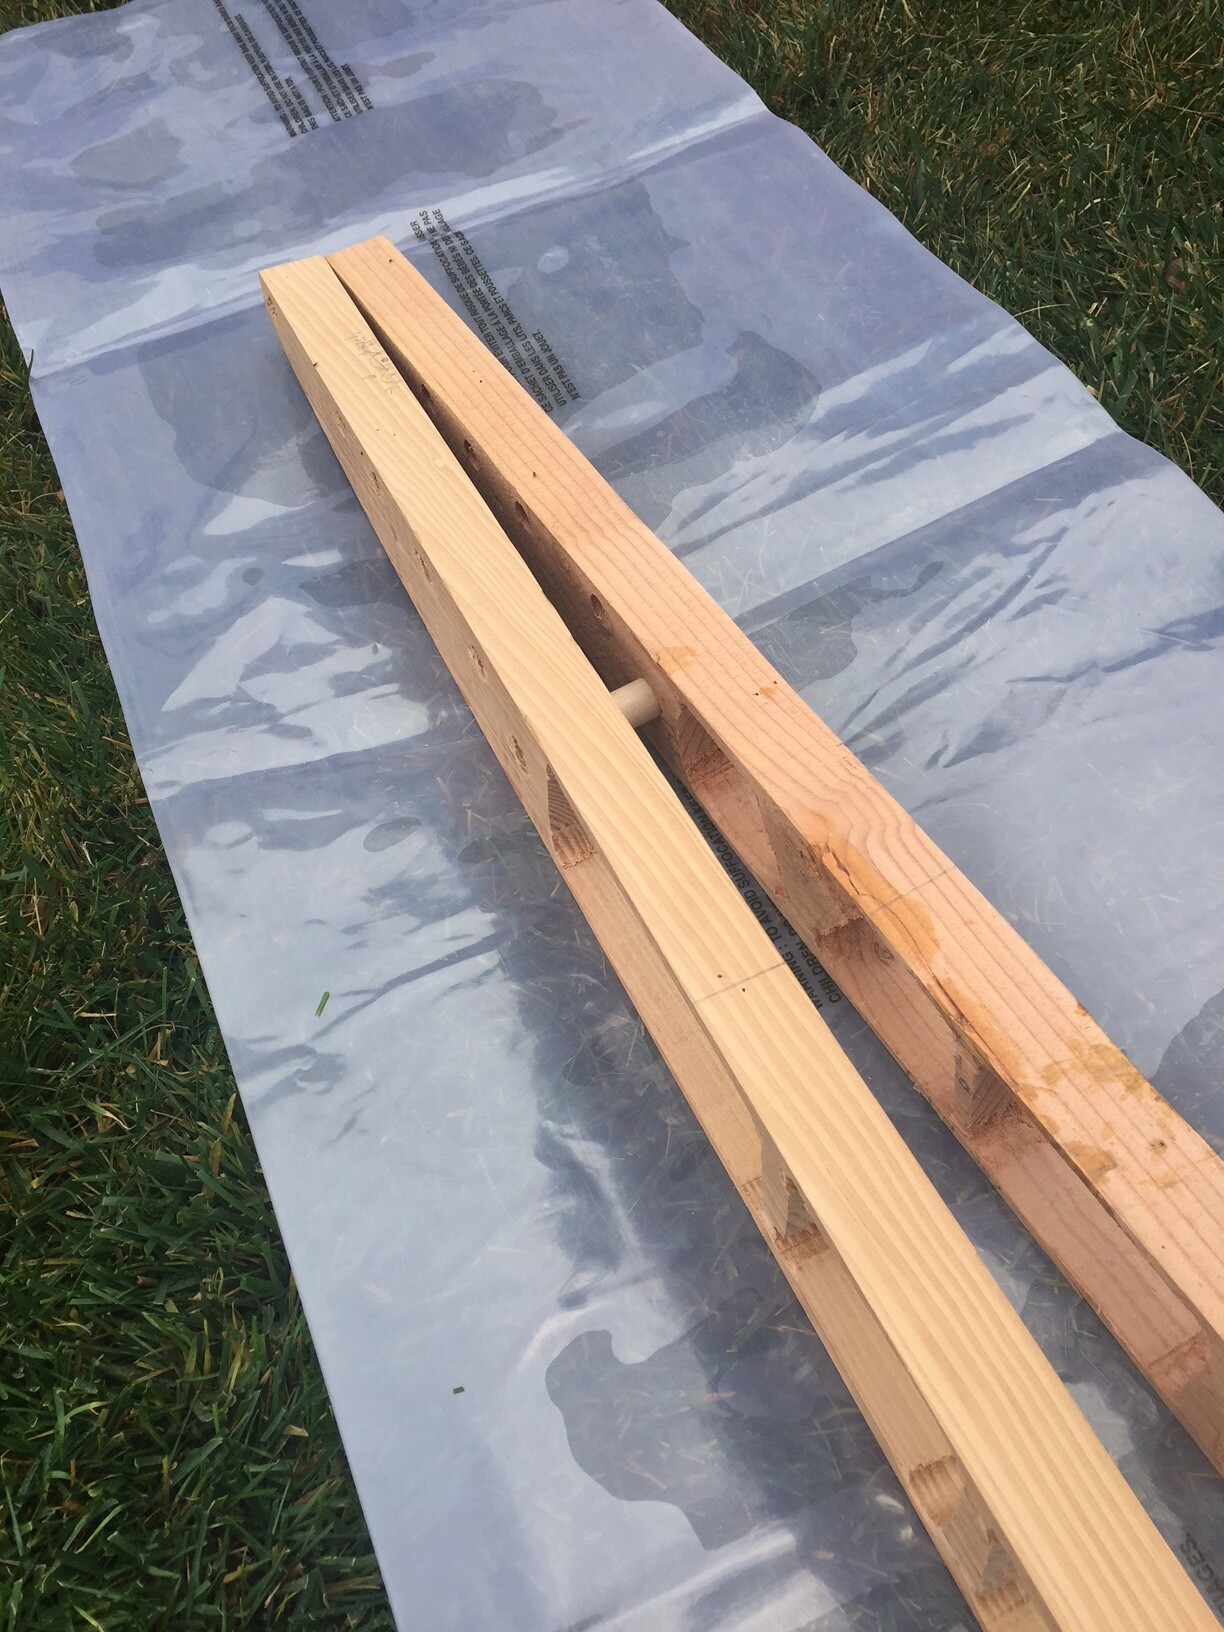
- Wood can be patched! What a joy. When I cut through the deck, or made the deck too thin, I simply added some wood and a support dowel, and we are back off the the races. I am not trying to make the board pretty or perfect, as I do not have the skill to do this even if I wanted to. So patching will likely be a big theme going forward. I am thinking of using cedar shingles so the patches stand out with nice red wood color. “If you can’t fix it, feature it.” mentality.
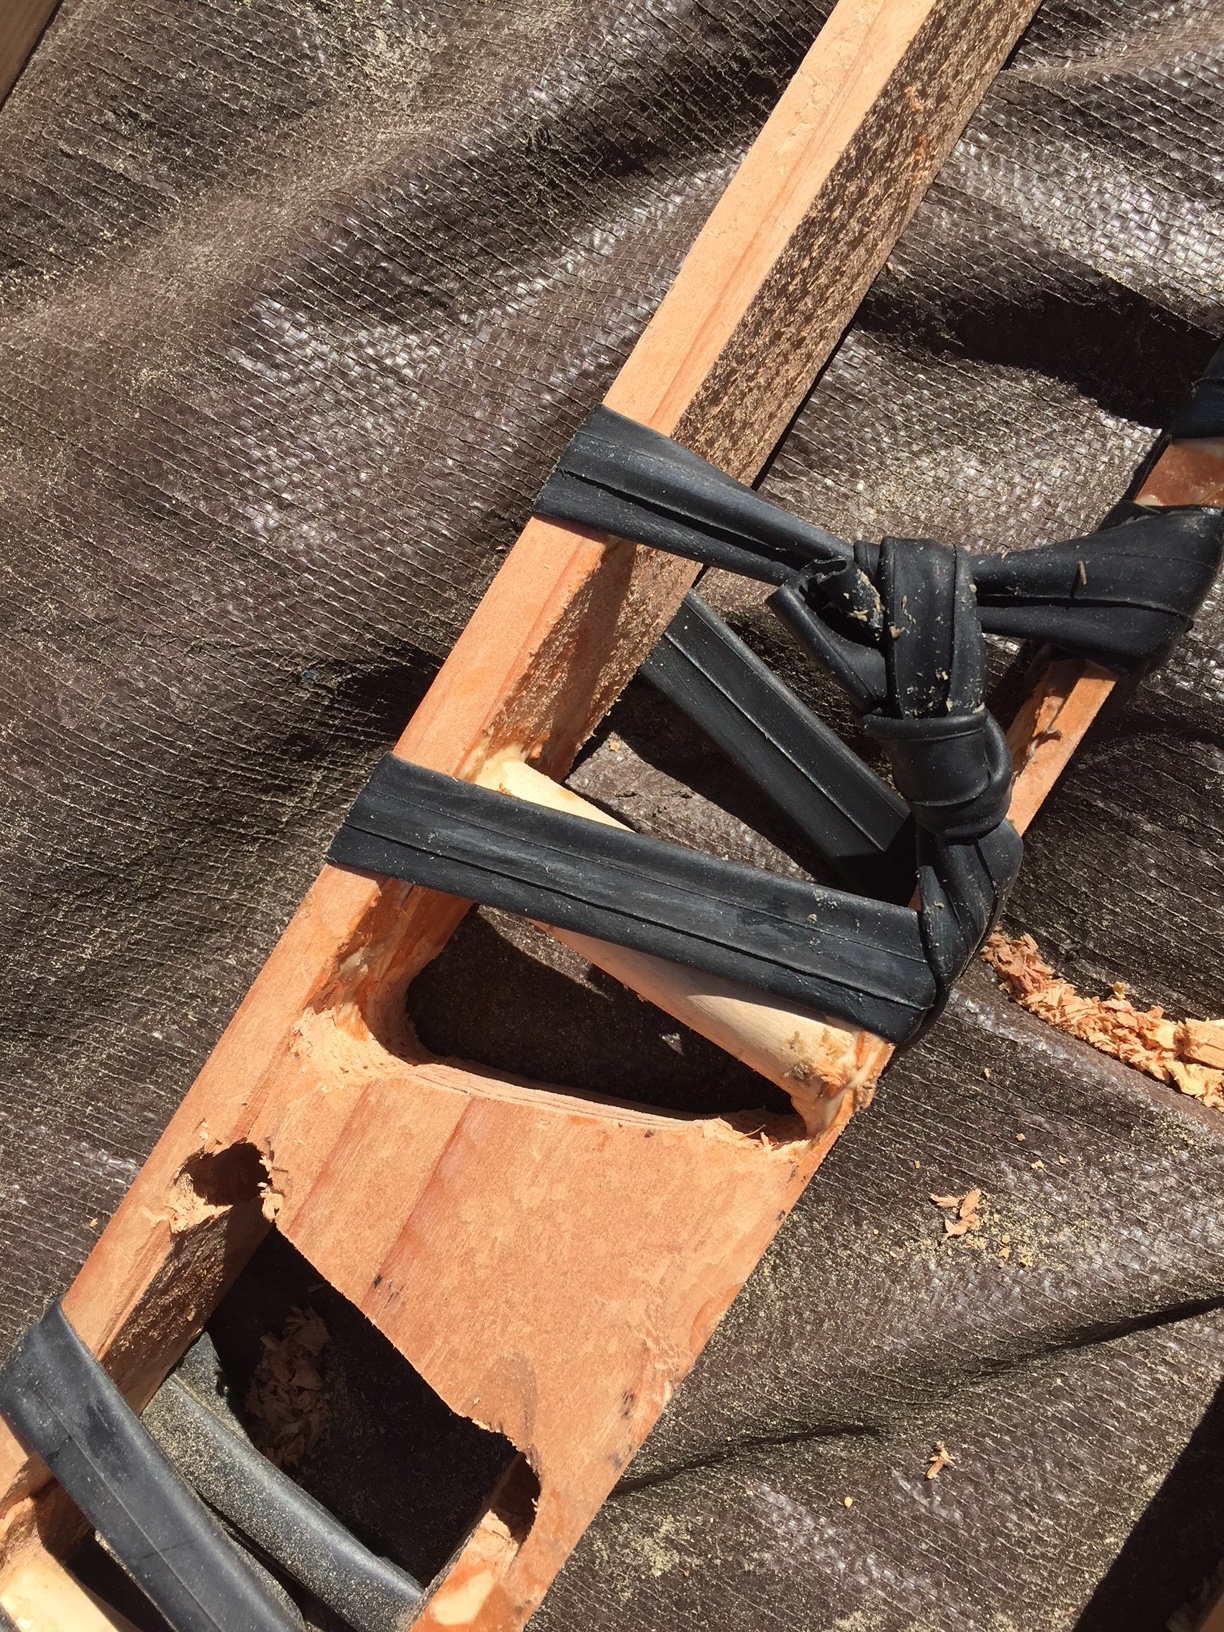
- Bicycle inner tubes work great as clamps.
- Take your time. I snapped of the nose of one rib as I was in a hurry to drill the holes to lighten it. Now I have to wait till later this week for the glue to cure and then finish the chambering of the ribs and glue them together. Could have been done today, but oh well.
- I am planning on installing the vent in a countersunk hole off center and about a foot from the nose. I was going to put it on the centerline, then when I lay down on the board in paddling position, I realized the nut would be right near my forehead, and that seemed like a bad location for it.
- I left the section for the fin box and leash plug mostly solid. I would have liked to lighten it more, but I can see myself skidding onto he shore and cracking the board at the fin location. I am planning on keeping a couple “struts” between the chambers on the neighboring ribs to glue up against the center fin box sides.
- If I could do it again, I would have run three 1/4" dowels trough the entire set of ribs near the nose, center, and just forward of the tail, so that I could have threaded the chambered ribs back together nicely. I have seen this done on the web, but did not have the long drillbogt or precision to do it this time. These dowels would have given it a lot of lateral rigidity. Next time, eh?
Here are a few pictures from the day. Next time out - sharp jigsaw blades, more leeway on the deck thickness (remembering it will need some final sanding anyway), and take a couple seconds more on each hole and cut.
Thanks for the encouragement. I’ll let everyone know the final weight.

Good day’s progress and some more lessons learned.
- Use sharp tools. Jig saw blades and drill bits need to be replaced. This made a world of difference today.
- Dry wood works easier than wet. Mine is mostly dry, but the summer is over and moisture is being absorbed. Also Redwood is way easier to work than Douglas Fir, but it is twice the price.
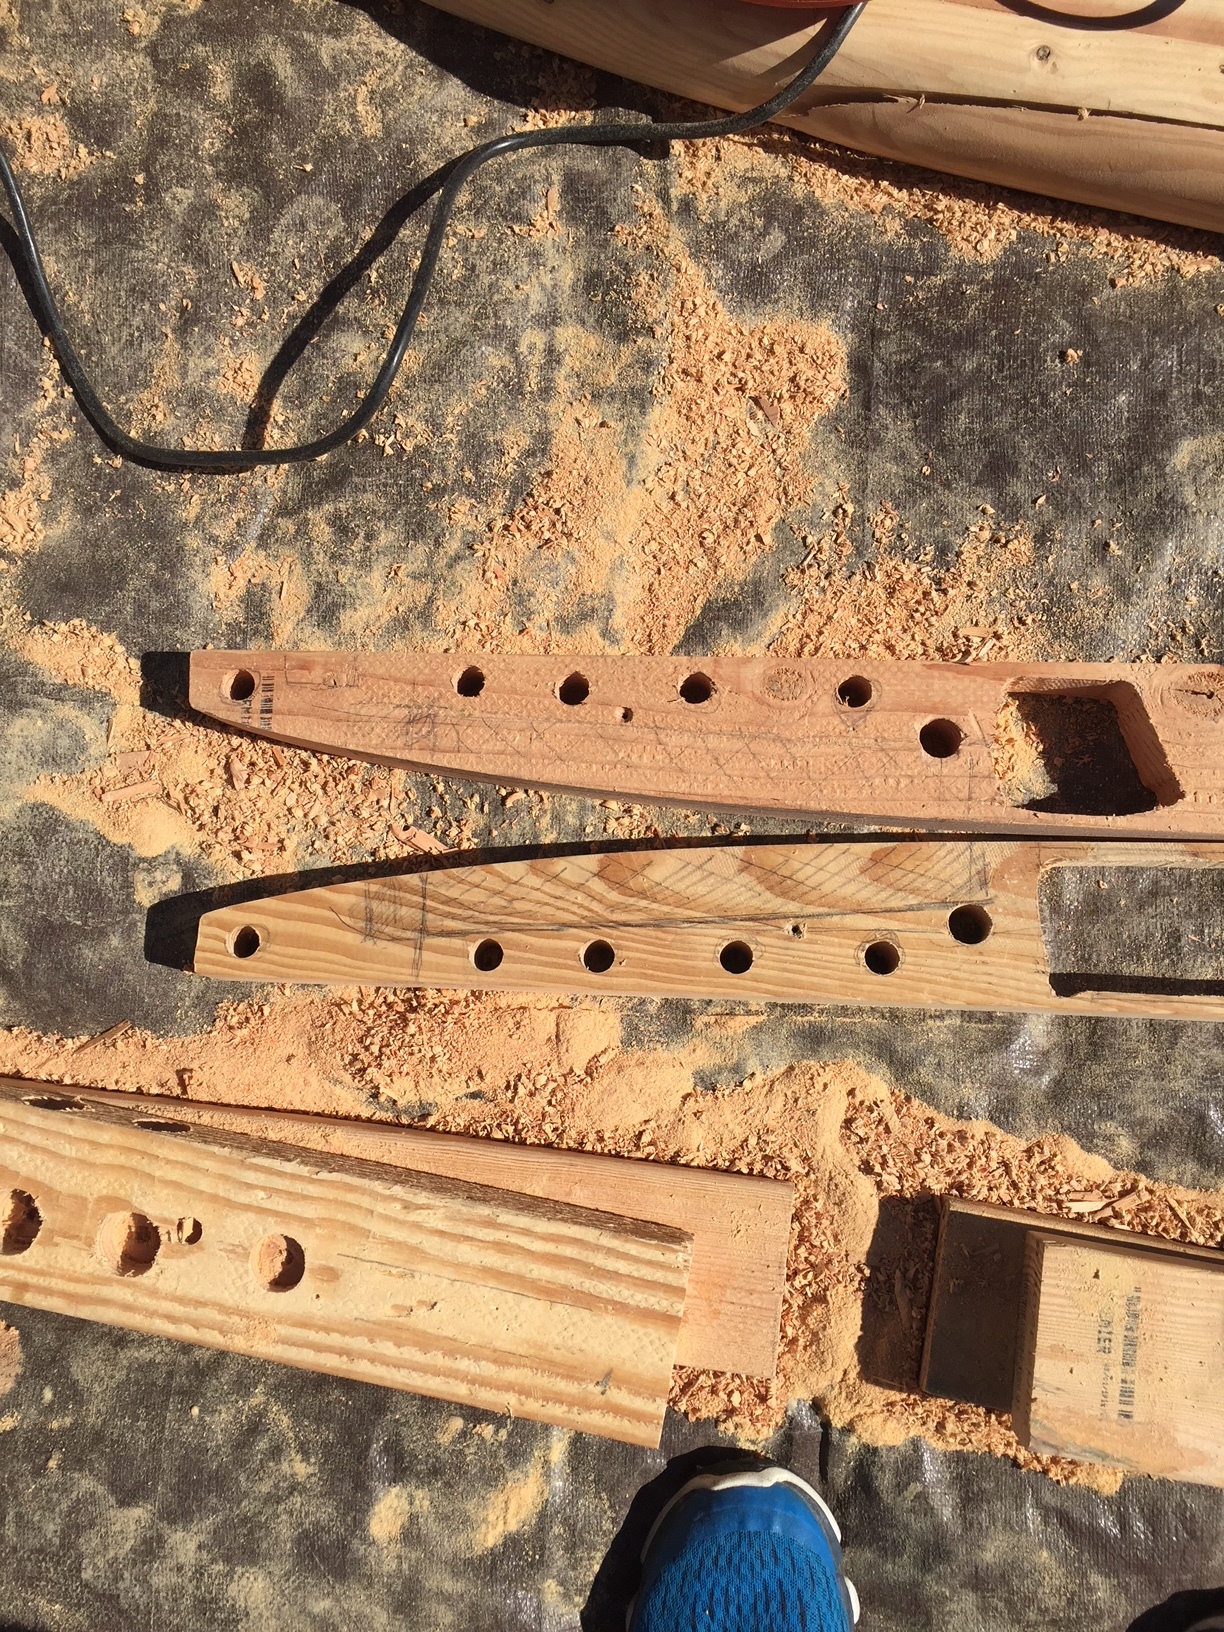
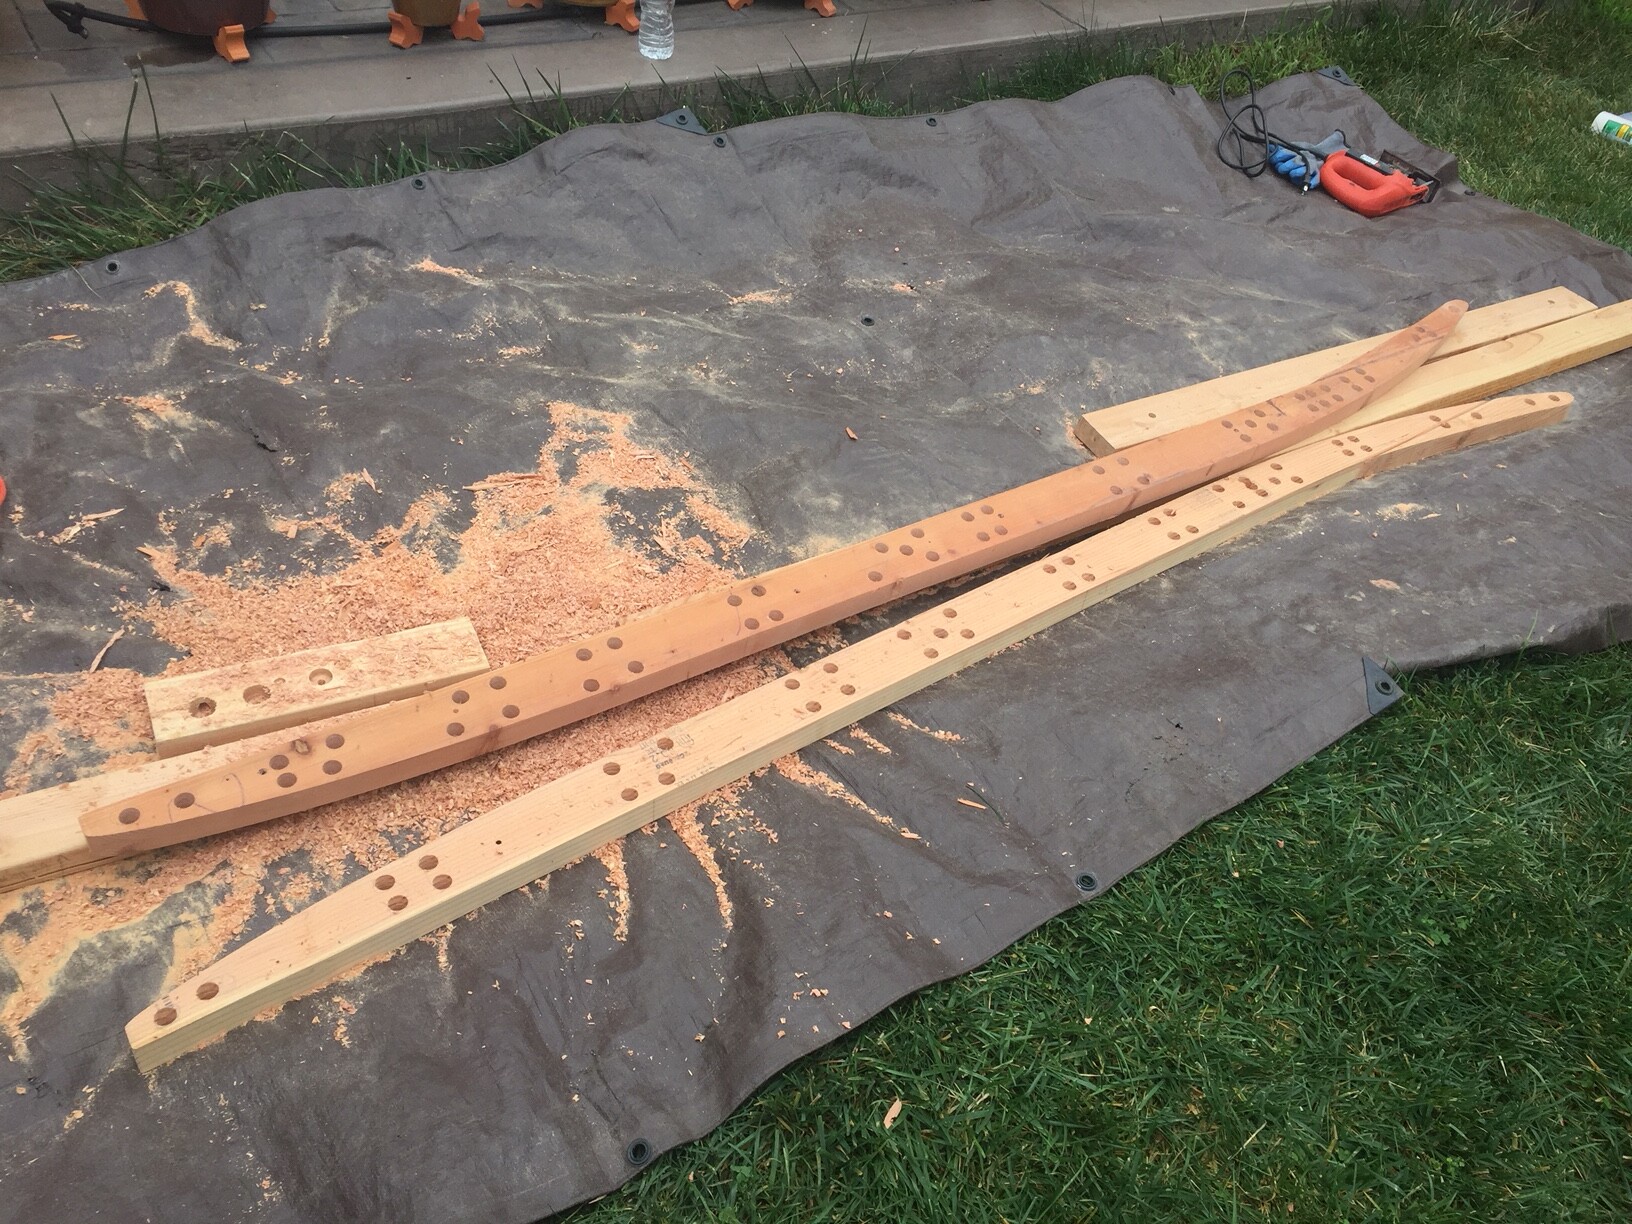
- Don’t be too aggressive with deck thickness at this chambering stage. If I had made the first two boards a bit thicker on the decks, then they would be stringer glued side-to-side and I would not be so worried about sanding through the decks. I also would not have cut through the decks, as I did. Additionally, it was way faster to chamber the next two, once I gave myself a bit wider margin of error (see pics)
- The boards will not always meet up when glued. No big deal. I bought a couple packs of redwood shims and will glue them in to patch the deck once everything is back together, then sand them smooth. I am planning 4oz fiberglass and epoxy at the end, so waterproofing and strength should be OK.
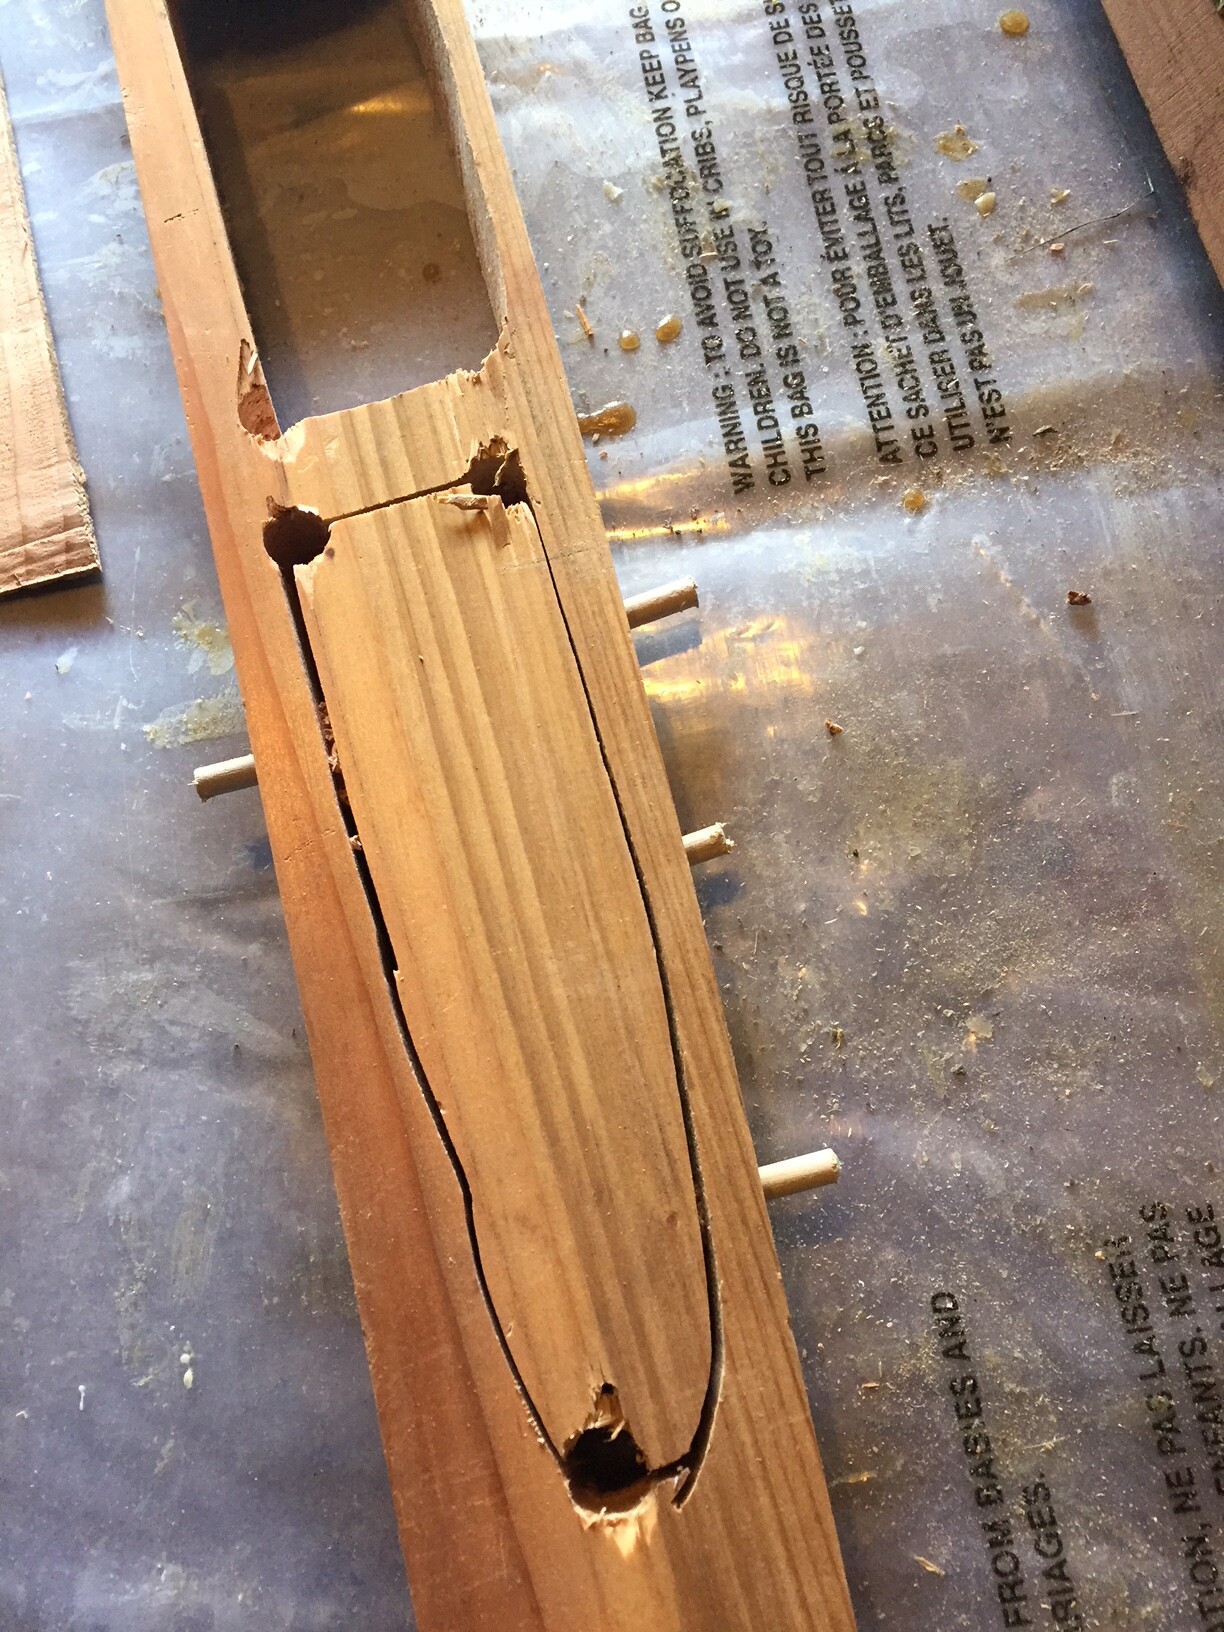
- I just started using 2 dowels to connect and line up each set of ribs. it should add some strength, but mostly it allows me to line the ribs up for gluing. No need to drill trough the entire board, just two or three (three would allow for staggered connections and bracing between every rib). If I could do it over again, I would have used 1/4" dowels for this and done it from the beginning when screwing the rough ribs together.
- Bike inner tubes work fine for clamps. I guess proper clamps would bring more of the sides exactly tight together, but I am OK with filling in the deck with shims, and I am trying to keep cost down (and I never do any wood working, so I would not have a use for the clamps later.)
Here are the pics. The center two ribs are glued together, and the next two are ready to glue-up tomorrow.
As this is a low-tech process by design, so everything is drilled and cut on the ground, elevated slightly by 2X4s (two of them are from my shaping stand.)
Thanks for the tips and encouragement,
Greg

Recycling.
Just a note on chambered boards’ “waste” wood. I am putting all the shavings and sawdust in the compost and burning the blocks that come out of the chambers in our fireplace (then placing the ashes in the compost). Given that this is Douglas Fir and Redwood the cost of the lost wood is not very high, and the circle of life is maintained by composting and heating our home, or at least providing a romantic fire ![]()
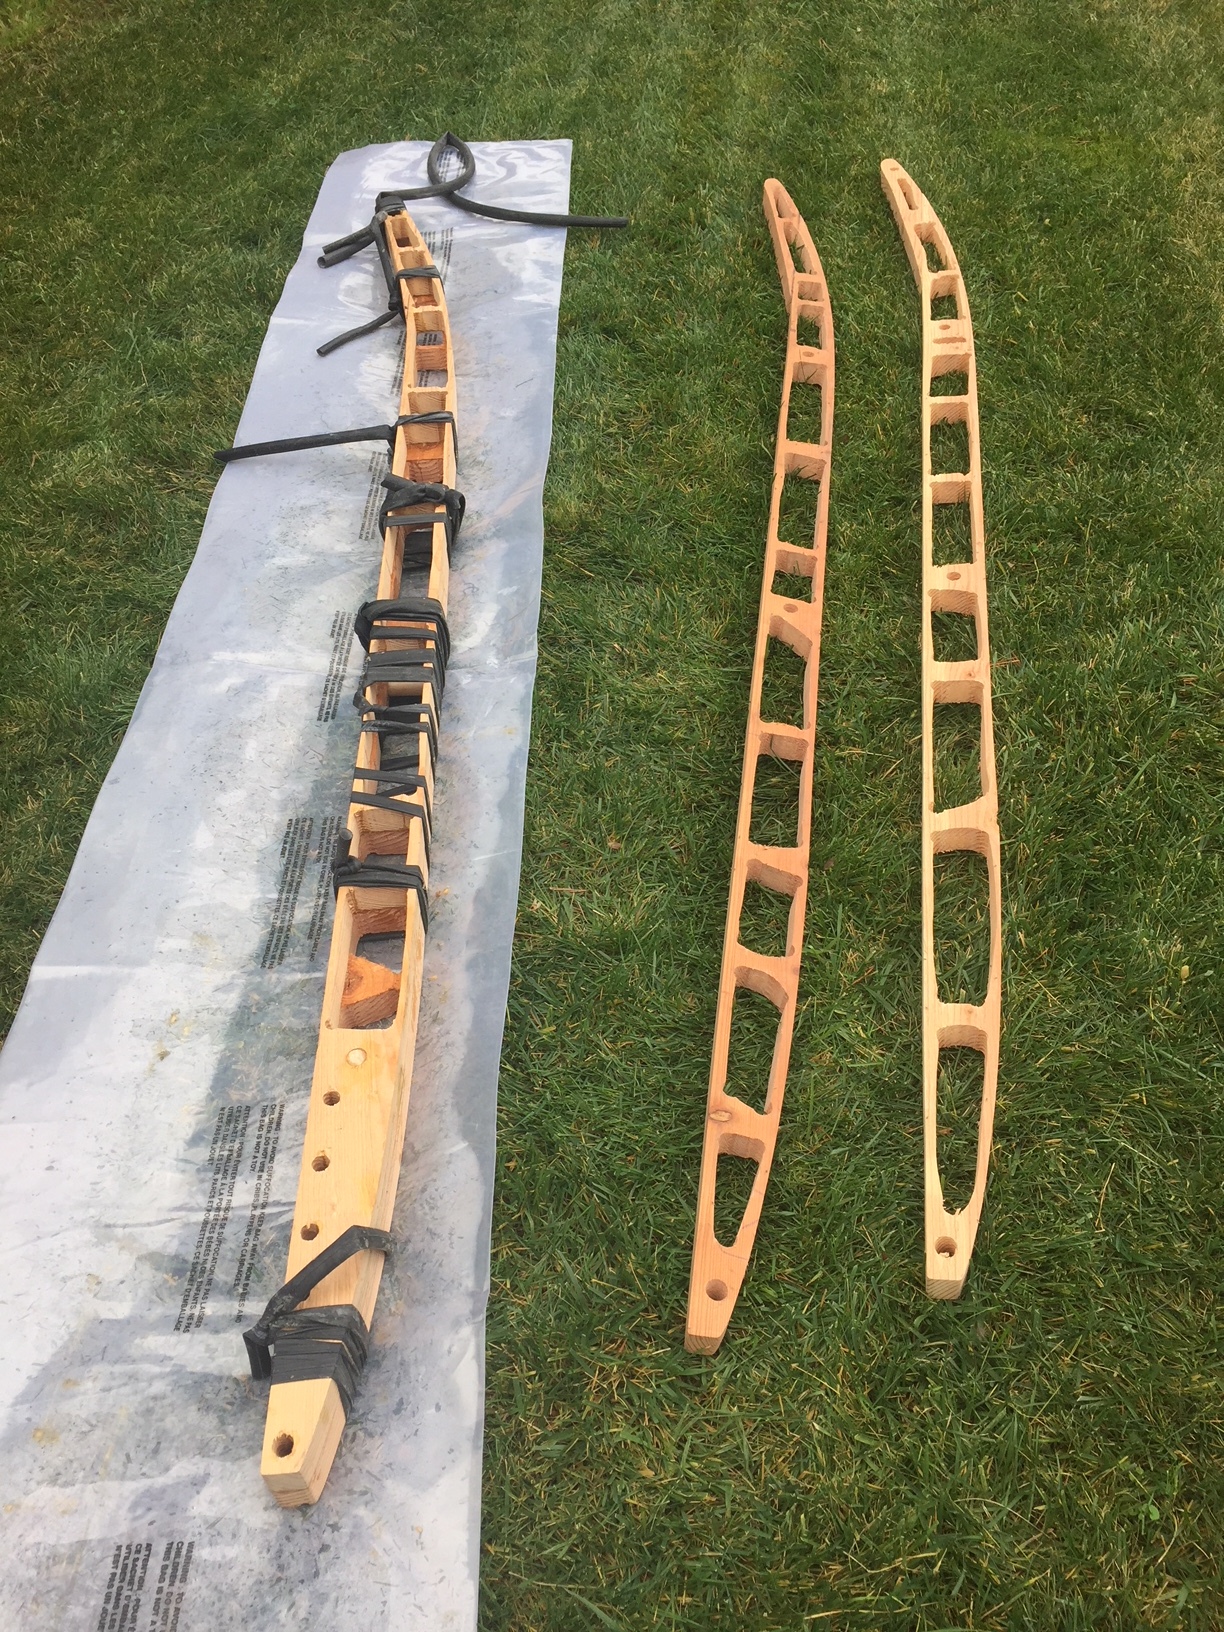
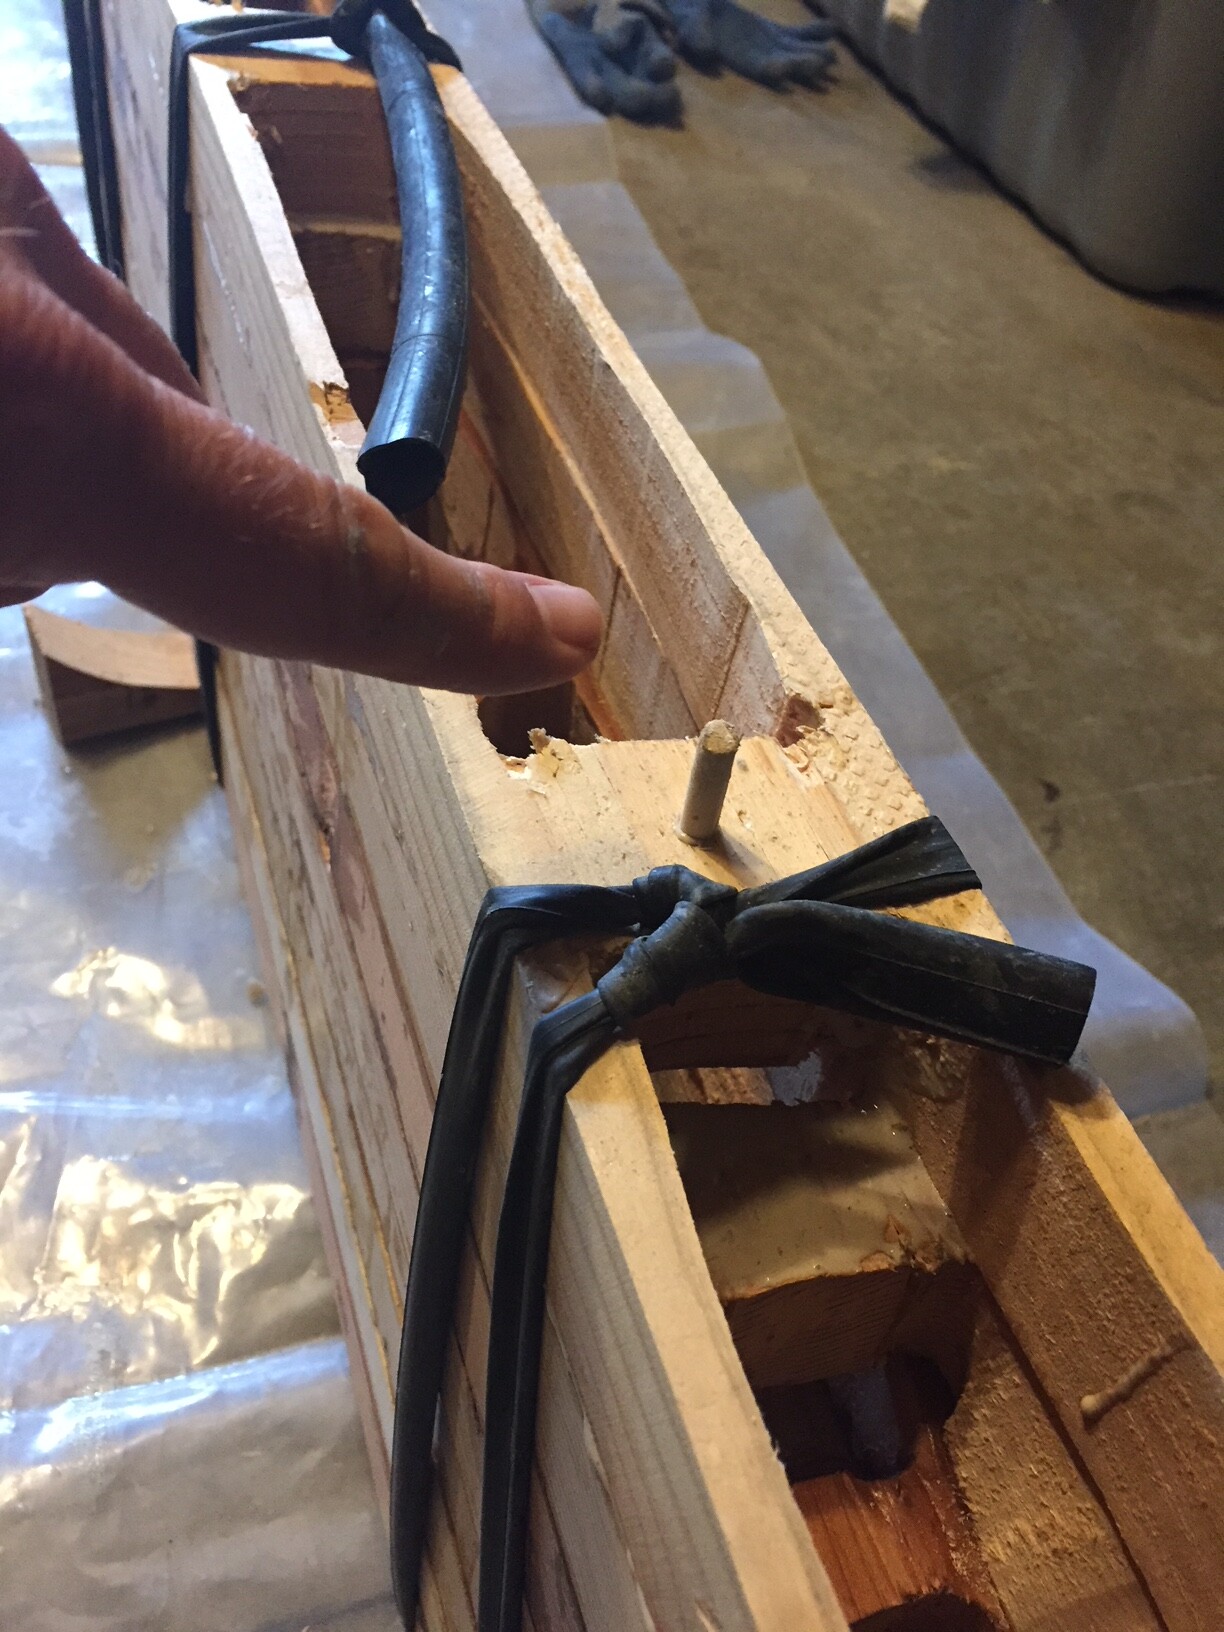
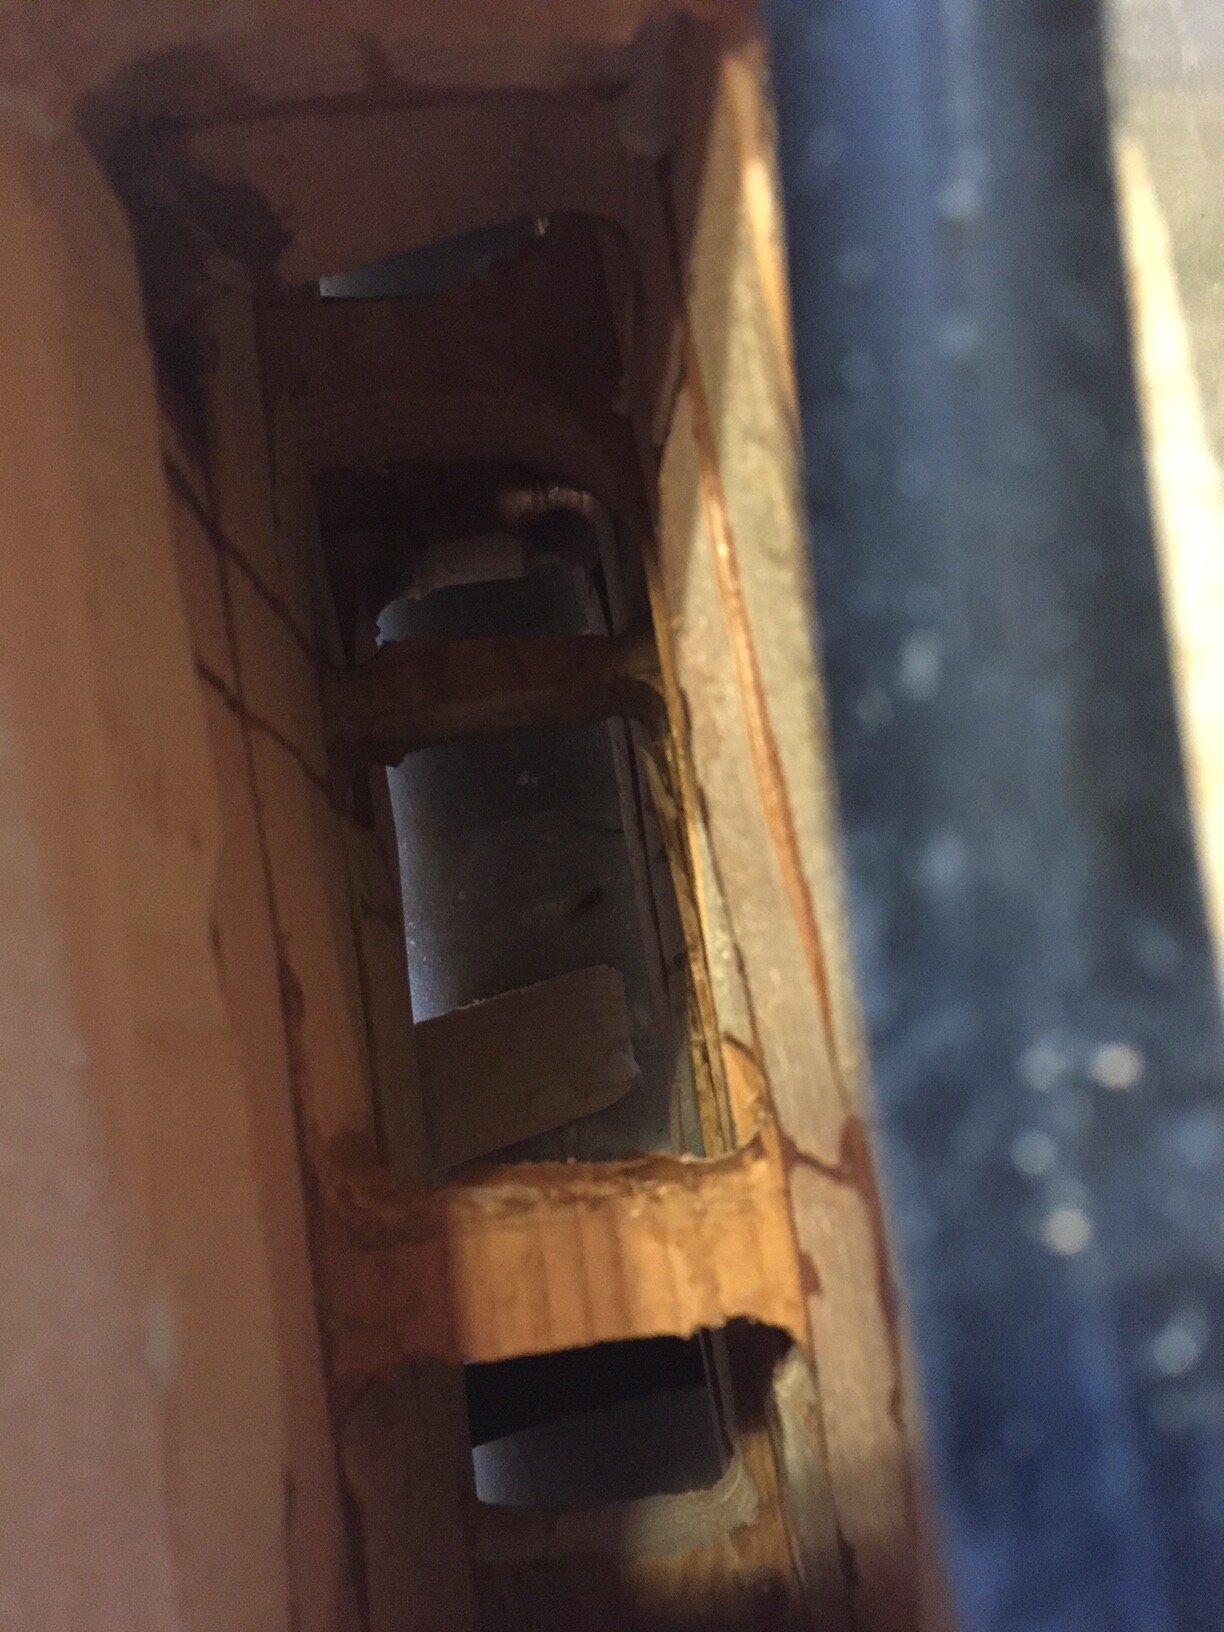
Nearly finished one side. A few more things I have learned:
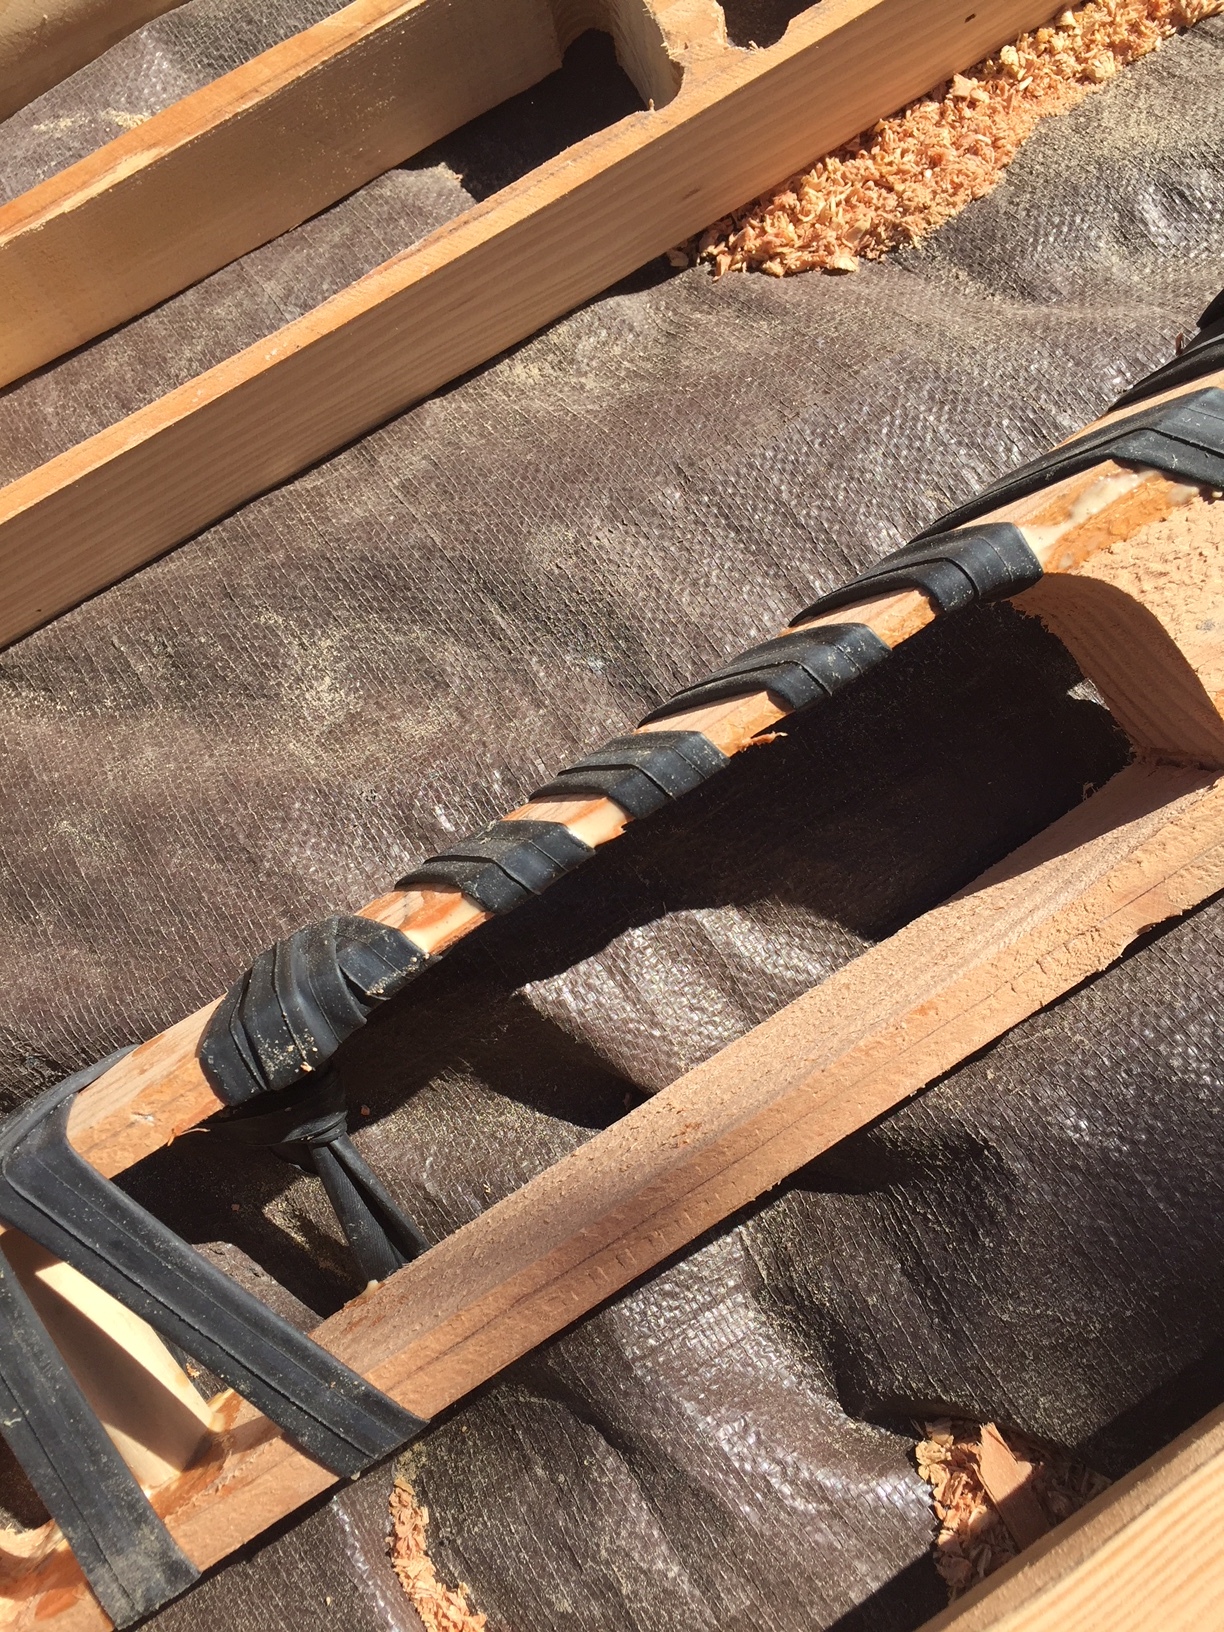
- Drilling small 1/4" holes and using dowels to line up each rib is wonderful! It makes the glueing so much easier and keeps the alignment perfect.
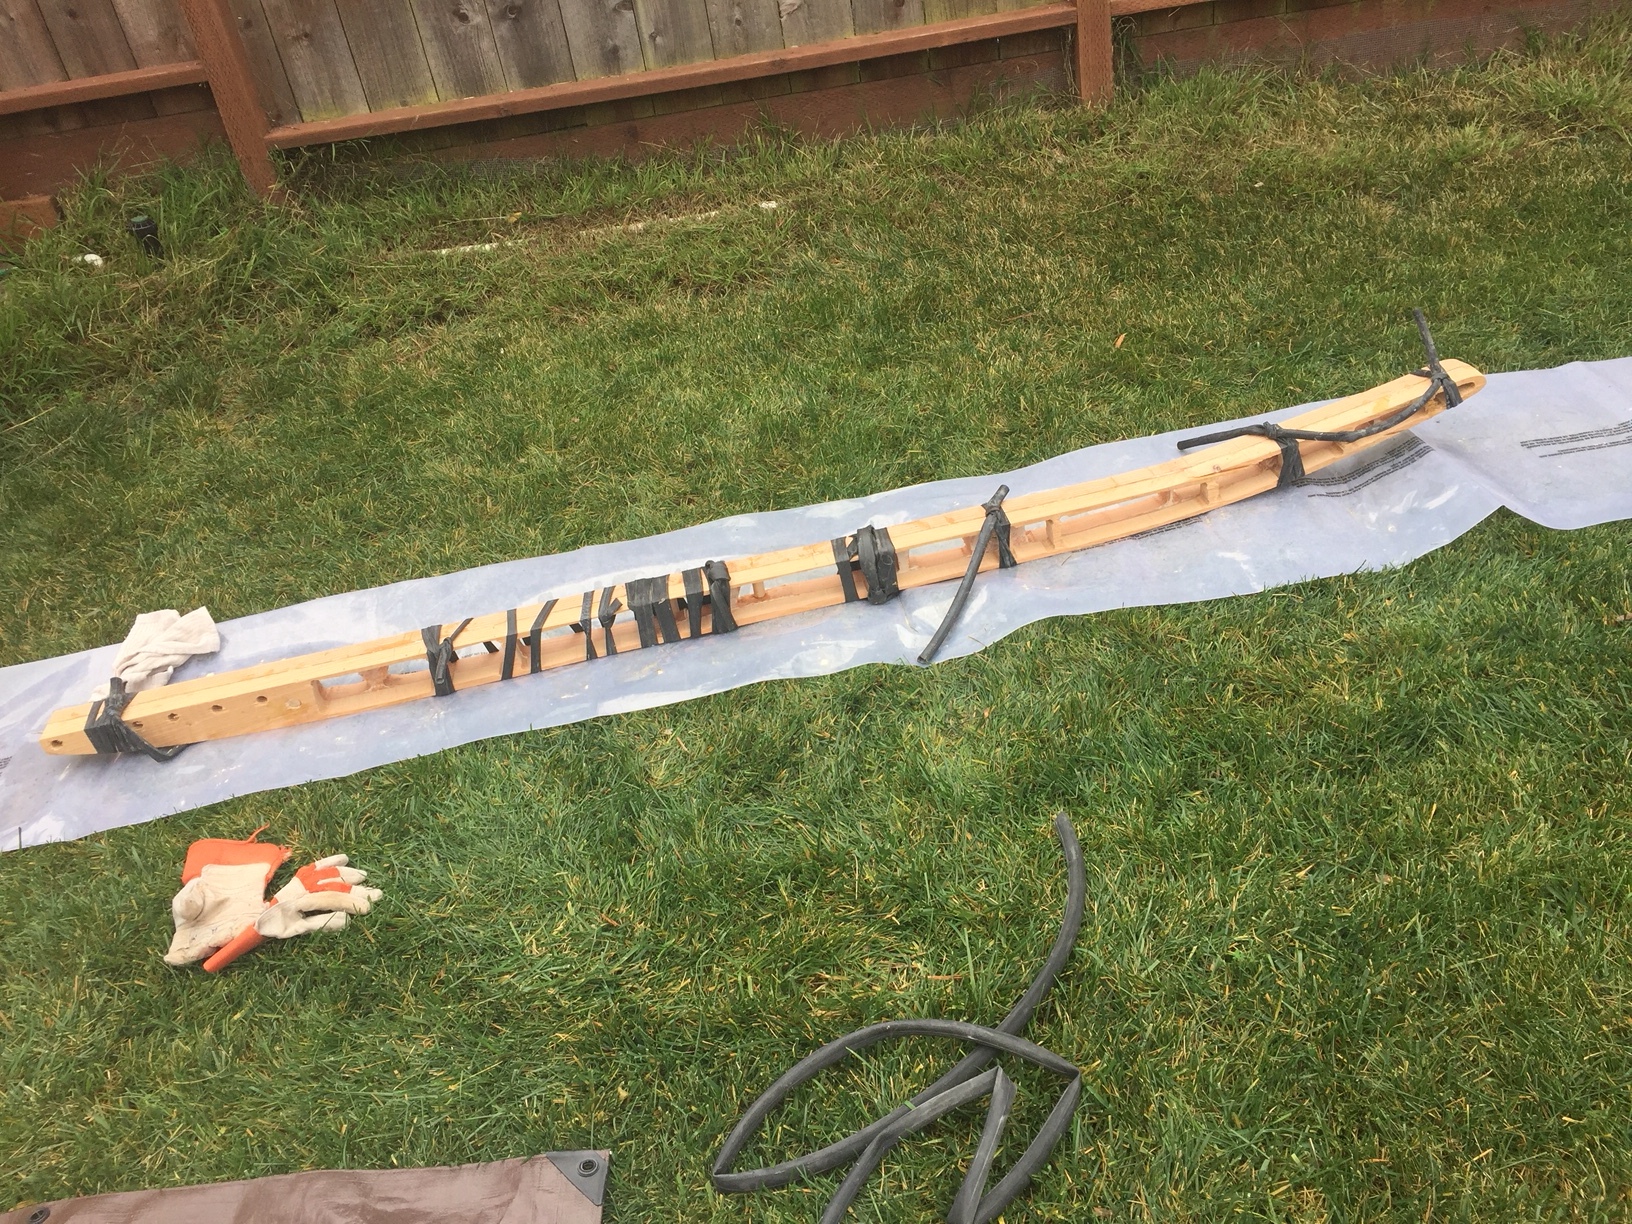
- I am completing the entire project without any clamps. I picked up used bicycle inner tubes for free at a local bike shop, and the seem to be working great. Just tie off the first loop, then wrap them around a couple times and tuck the loose end under a previous wrapped loop. Holds just fine.
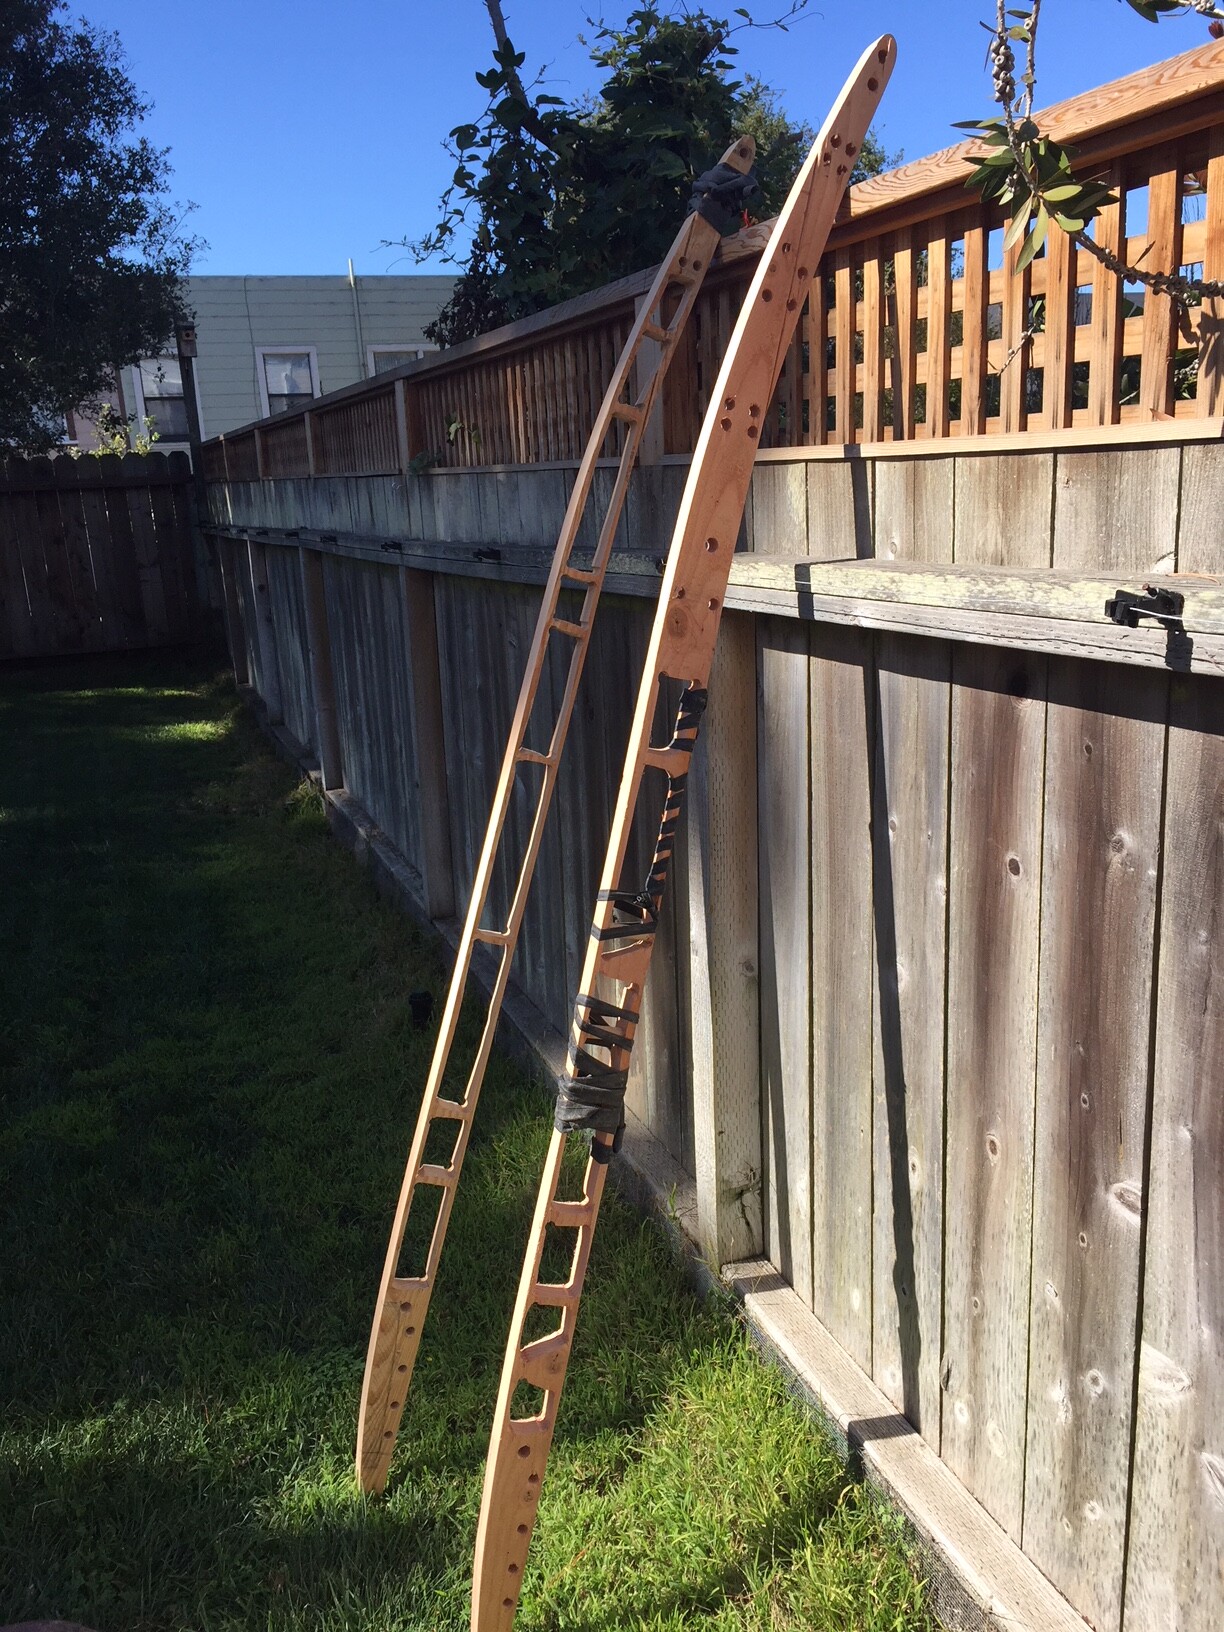
Here are a few pics: The project so far, the alignment dowels, and chambering.
The next step is fitting the vent plug on the other side ribs and continuing the glue-up.
Having a great time here.

Good thing wood can be patched. I forgot about the side fin boxes and cut out a chamber right where the fin plugs will go. No big deal, just used some dowels and glued the chamber block back in. Getting closer to finishing the glue up, and feeling good about it all in general.

Big day!!!
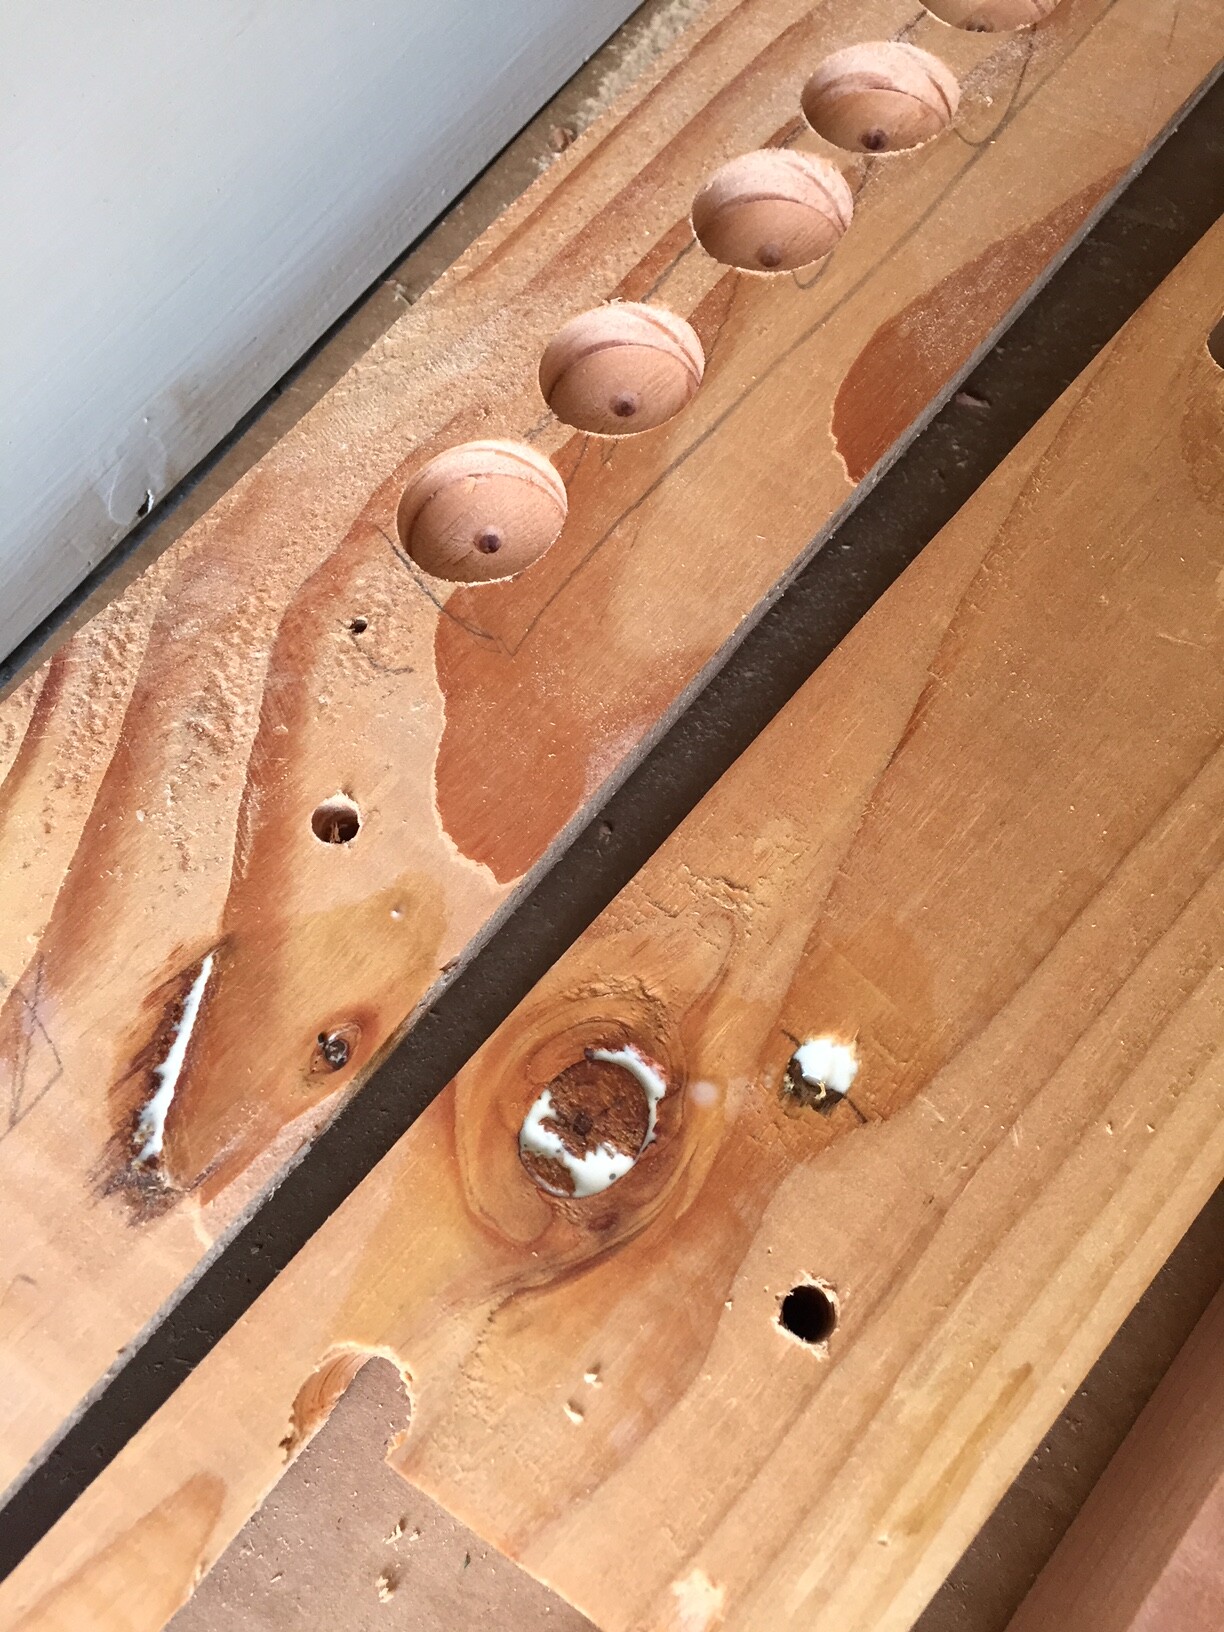
Finished all the chambering!! It could be much more refined and the decks could be much thinner, but my jigsaw bends at such an angle, and it is such a pain to patch the decks when I have cut through them. So, a bit of extra weight, but this is my first try, so I am cool with it. If I do it again, I’ll use all redwood (much lighter and easier to work with) and a friend’s router and workbench to cut the chambers. This project was intended for fun and to answer the question: Can a pine/fir board be built with minimal tools, no workshop, and by someone with essentially no wood-working skills? (So far, so good)
I used a Forstner bit to lighten the rails slightly (1" sized flat holes down the inside of the rails.).
To stabilize the knots, I dripped and squeezed Titebond III wood glue into them (pic).
So this week is finishing the glue-up, then begin sanding. Then I’ll try to find a wood kiln for lumber to give it a drying with one of the rails not glued on (maybe drop a pound or two). Then onto glass and fins.
Thanks for the encouragement. Once it is all glued back together, I’ll post an updated weight.