Summer Build 2012

So about a month ago I broke my daily driver. The day I broke it I remember thinking to myself how good the board was working.  
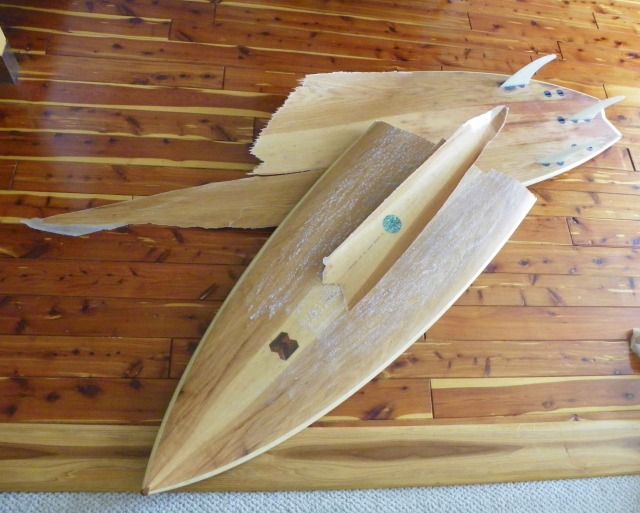
 

So now I’m thinking about it’s replacement.  Last summer at the Plaskett Swayholics gathering I was very impressed with the boards CJ made using innegra-  light and strong.  I know my product will probably not be as light and stong as his but I figured I’d try something new.  After having made 10 variations of wood compsands, this will be my first non timber product.


I got a 2 oz innegra sample and wanted to start testing.  The only piece of 1.5 lb EPS I had lying around was a remnant of the the wood joint-
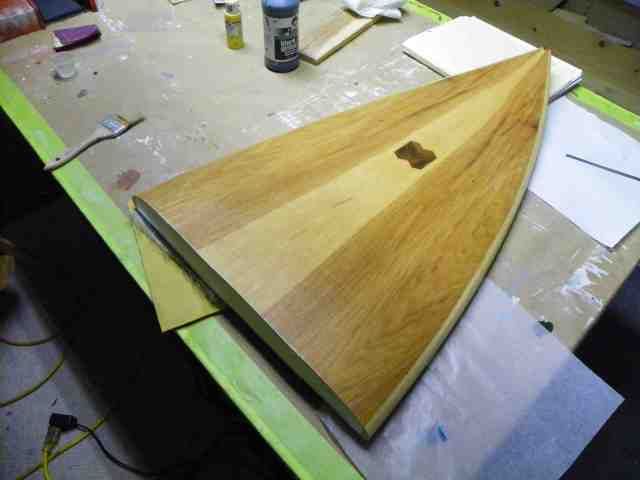
 

So I stripped the glass of the back and I’ve started my little practice tests in miniature-
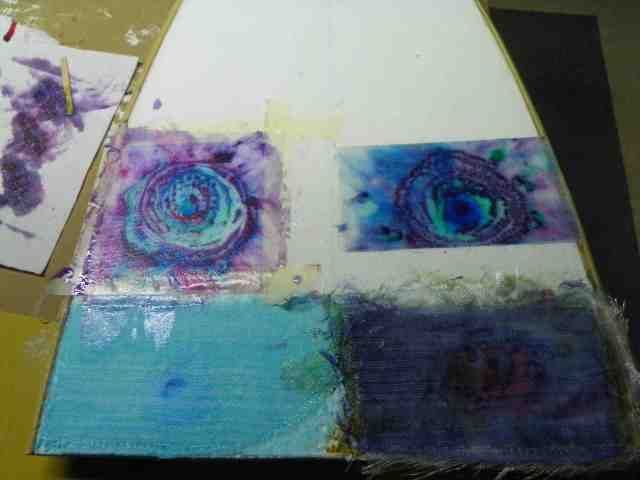
 

What you see here -

bottom left, first test - 2oz innegra with 4 oz over.  This was not very strong.  Failed the thumb test.  Also, I didn’t like the tint.  The weave shows too much.  But it was easy to cut, really easy.  It wet out easy.  I’m not sure why most everyone insists you have to use a vac bag with the stuff.

bottom right- 4oz under, 2oz innegra, 4 oz over.  I tried to do a little swirl and it just got all muddy. It was very strong.  Infact it semed like over kill.  I could feel the foam giving way under the glass though.  I started to believe whatmany had written- that you can’t do a good swirl with epoxy…

top right- 2oz under, 2oz innegra, 4 oz over.  OK.  This seemed strong and  lighter than the above schedule.  Also the swirl came out much better.  I was trying to get the effect of paua abalone.  This might be the schdule I use on the deck…

top left- just 4oz.  I wanted to try a swirl with two layers of 4 oz, as I’m thinking the bottom will be two layers of 4.  This was the first layer.  This one starts to look like abalone…
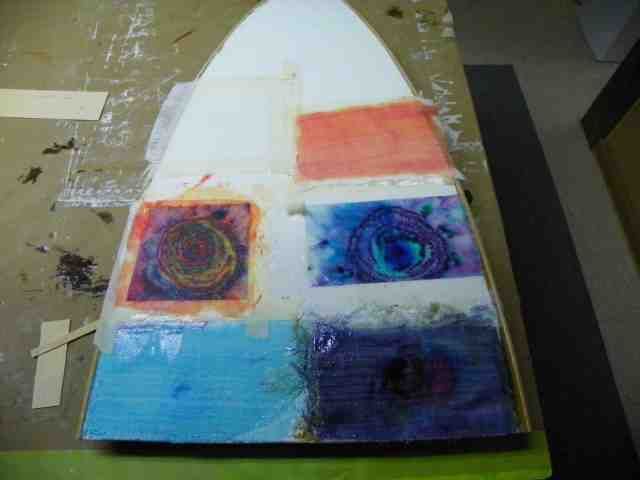
Now on the middle left is the second swirl added, this time with red and yellow.  I don’t like it.  I think not having foam to soak into made the second colors a bit muddy.

On the top I tried again using 2 oz and 2 oz innegra with tint.  didn’t like it.  So I mixed another batch thinking to add white tint.  After I realized I didn’t have any white tint.  So it’s just clear…


Anyways, all these tests I’ve done mixing 3/8’s of an ounce of resin, 1/8 being the smallest amount I can measure.  All of it very rough (usin the same little cups over and over- sorry Ray).  And squeegeeing it as dry as possible.  Really scraping every last bit off.  I asked CJ how he goat his boards so light and he said “Use little resin.”  I want to try to hand lam everything…no vac bag this time…


Then I put a ittle hot coat to see final strength and the hot coat didn’t adhere well to parts of the tint.  I wanted to try the next test with add F but realized I don’t have any.
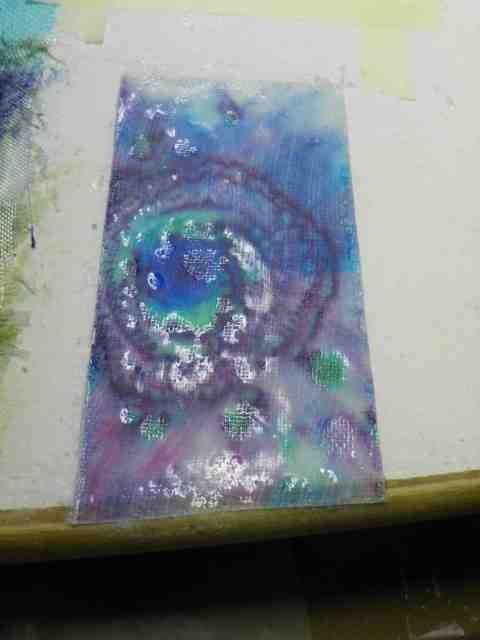


Testing will continue…

I should add that my insistance on trying an epoxy swirl was inspired by Stingray’s board…

hey lilibell

were those fisheyes from your finger prints?

Ken, that was my first thought.  I had been doing my thumb tests.  And I did not wipe or sand or anything.  But they seemed to be related to the tint- in some areas where the tint was really dark (not all ) the resin separated.


ps the glass/innegra cut fairly easy as you can see…

Hi Jeff...keep in mind that I've never done a proper "swirl" with epoxy. I'm really stoked that you like my work. The Resin Research KK is the game changer.....About a year ago Swied left a stack of 3oz Medicine Cups at the Lab. The cups are made by Sweethart. There's marks for TBS and ML and OZ and something called DR. I'm almost out of 3 oz cups so I did an internet search and found lots of people that want to sell me 5000 cups.....I looking for a local supplier that will take cash for about 250 cups.

Small amounts of resin with a 2/1 mix....I'll do 10 ml of resin with 5 ml hardener. Stir for 3-4 min. Then pour small amounts of resin into Dixie cups with tint or pigment...then stir some more before pouring onto cloth....Fun stuff!


Ray

I've been fooling around with the abalone look myself. I found that when I add clear resin to the swirl it gets closer. Also, I'm still playing with pearlescent powder. Works in progress.

I add the colors first and then introduce the clear to get the blend.

Hey Jeff,

This is a laminating schedule I’ve been playing with.  4 oz cloth, 2 oz nylon veil, 4 oz cloth. Lay out your bottom layer of cloth, then the nylon on top of it.  Wet out like normal.  Squeegee like normal, but don’t draw off all the resin.  Lay the top layer of cloth dry on top of your wet laminates.  Cover with Home Depot 20" wide shrinkwrap, and smooth out.  Put the whole thing into the vacuum bag.  ****

**NO PEEL PLY.  **

Peel ply will wick off epoxy, and if you did everything right, you will have just enough.

When the layers are compressed under vacuum, the epoxy is forced upward to the surface.  At the surface, it will saturate the top layer of dry cloth, and because the smooth shrink wrap is on the surface, it will flow level, making your cheater/ hot coat. 

Peel off the shrinkwrap.  After the lightest sanding, apply a thin final coat.

By applying vacuum, you end up with 8 oz of cloth, 2 oz of Nylon, and a thin hotcoat, using the same amount of epoxy as a normal 6 oz cloth only.

Without vacuum pressure, synthetics will soak and swell, using more epoxy than necessary.

Using fiberglass cloth only, vacuum has marginal benefits.  Using synthetic fibers, vacuum’s effect is huge.


Fiberglass Hawaii here in Ventura sells the little cups in a couple sizes…I think it is something like 5-6 bucks for a tube of 25 or so. I just bought a bunch in different sizes…nice for making small batches for fin layups.

**Hey Ray.  **I have some more cups for you.  The new ones are plastic instead of paper, but they still have the DR measurement lines.  I think DR stands for Drams.  A Dram is defined to be 1/8 of a fluid ounce.

http://en.wikipedia.org/wiki/Dram_%28unit%29

We’ll have to meet up again soon.  I have some eps blocks, and I need to hotwire out a couple of kiddy board blanks for my boys.  Is your hotwire harp still functional?

Jeff:  Have you thought about using cork on your next board?  I know cork boards are kind of brown and dull looking, but I’m sure you could make one that looked good.  I think cork can be stained, right?

Since you are already used to bagging, I think you’d end up with a better board doing the glassing the way everysurfer said to do it. Keep to your standard build with the wood rails and you won’t need a rocker table.

There are videos online showing how to laminate carbon that seem to be the same process, but not with shrink wrap. Bernie and I have done a few lams with peel ply and the stuff that soaks up the resin that gets sucked out of the lam. Ours always had a bit of wavyness in the surface, but we didn’t try it the way everysurfer said to do it. I think the key is smoothing out the wrap real good before you get it into the bag. You’d want to use a real slow kick epoxy because it takes time to do
all that. Over here most of the slow stuff we have kicks in about 20
minutes because it’s really hot in Ewa Beach. We work in temps over 80 degrees F.

Hi Jeff..did not mean to highjack your thread...but....

Cycloxslug...thanks for the tip, I'll be in Ventura next month and then a few times this summer. I was planning on checking out Fiberglass Hawaii for some tints and pigments....cups too!

Swied...send me a text or pm...hot wire is collecting dust waiting to be used...the door is open...

Shark....temps over 80*F !!!  No need for Kwik Kick...need a helper and a way to slow everything down. :)

are you guys jokeing about the 3oz cups??????

you can get those at CVS or super market for like 3 bucks for a plastic bag full ,, like 80 count

I think I have some F here…and your polishing pads…and a vacuum/bag

[quote="$1"]

are you guys jokeing about the 3oz cups??????

you can get those at CVS or super market for like 3 bucks for a plastic bag full ,, like 80 count

[/quote]

I'm looking for little cups that are marked with ml. I did not see them at Target or the super market or at CVS. I got a blank stare from store employees when I asked. The best tip I got was "go to Amazon.com". I can buy small paper cups all day long...I'm looking for Medicine cups with CC or ML markings. I am a cash guy so something in San Diego would be nice....Sorry to highjack the thread , I will bring PPG mixing cups to Big Sur for trading...................Ray

[quote="$1"]

[quote="$1"]

are you guys jokeing about the 3oz cups??????

you can get those at CVS or super market for like 3 bucks for a plastic bag full ,, like 80 count

[/quote]

I'm looking for little cups that are marked with ml. I did not see them at Target or the super market or at CVS. I got a blank stare from store employees when I asked. The best tip I got was "go to Amazon.com". I can buy small paper cups all day long...I'm looking for Medicine cups with CC or ML markings. I am a cash guy so something in San Diego would be nice....Sorry to highjack the thread , I will bring PPG mixing cups to Big Sur for trading...................Ray

[/quote]

oh,, those cups,,, find neighbors with kids,,, the cups come in the kids cough syrup packs.

they maybe hard to get in large qtys

NO PEEL PLY.

Peel ply will wick off epoxy, and if you did everything right, you will have just enough.

When the layers are compressed under vacuum, the epoxy is forced upward to the surface. At the surface, it will saturate the top layer of dry cloth, and because the smooth shrink wrap is on the surface, it will flow level, making your cheater/ hot coat.

Mark. I’m easily confused. Did u mean that the top layer of cloth will wick off the the epoxy? Thx

Hey Greg.   Peel ply, if used,  absorbs epoxy, wicking it up from below.  That can do two things,

  1. Leave the cloth with too little epoxy to saturate. a weak and pourous lamination.
  2. Waste the epoxy that is soaked into the peel ply, and discarded when the peel ply is removed.
If you use the right amount of epoxy when wetting out, and don't squeegee off too much, and then add a dry cloth layer, and squeegee it out, leaving that top cloth layer just a little bit dry, when you cover with a **non pourous surface** and place under vacuum, that top layer of cloth will end up saturated, and a thin layer of smooth epoxy covering it all.  That will save you about 14 ounces per side of hot coat epoxy. **That's 1 3/4 pounds per board!**

Why do you think those vacuumed boards are so light!

Update-  just got some more Resin Research epoxy, no Kwik kick this time, but CE with both slow and fast hardeners.  I’m going to move out of my comfort zone and bag a lam.  I ordered my Innegra and some Skinz.  I am going down to pick up a blank from Surfding next week …and then the shiite will hit the fan.  I can’t wait.  I don’t have time to do boards all year so when I do it’s like Christmas for me.  I’m making two this year- one to replace the 6’-3" that broke only this time I’m going to try 4WFS.  And then I’m going to drink the erBB kool aid and make a sub 6’ x wider, twinzer…  

ps- Knowaloha, if you’re out there, I will soon start pestering you for fin placements…

I bought and use cups like that from Fiberglass Supply.  Quantities less than 5,000 available.

[quote="$1"]

Update-  just got some more Resin Research epoxy, no Kwik kick this time, but CE with both slow and fast hardeners.  I'm going to move out of my comfort zone and bag a lam. 

[/quote]

Be careful or you'll start something.