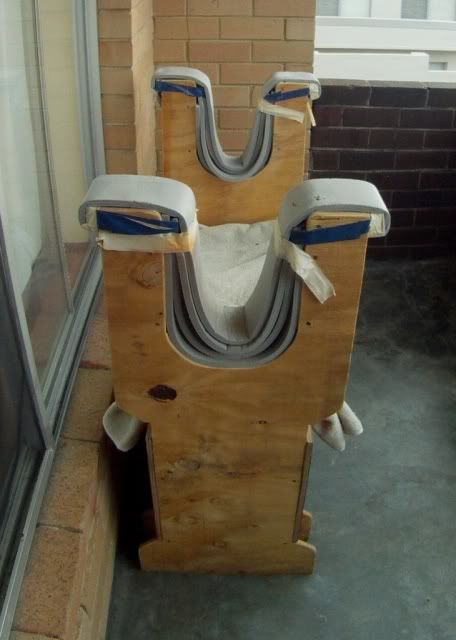
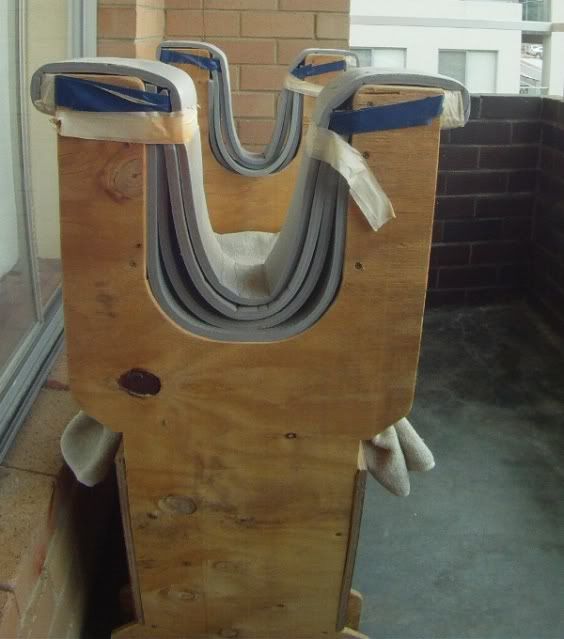
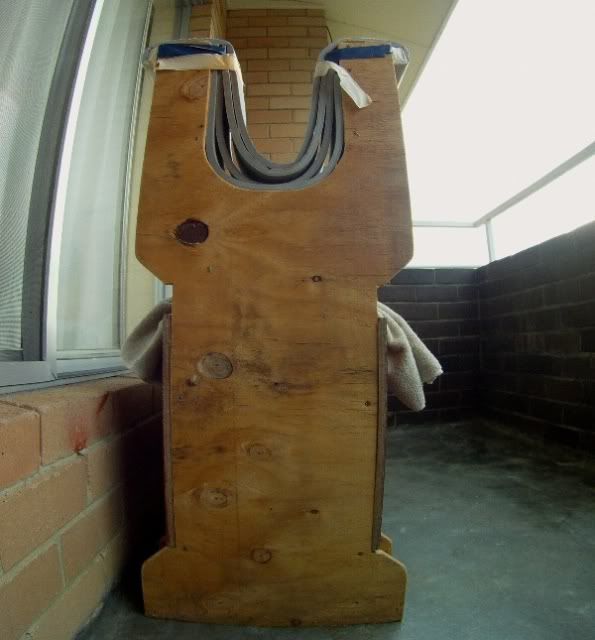
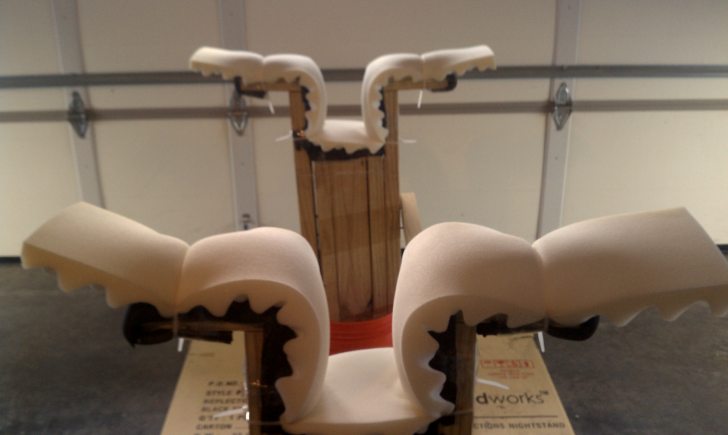
Woody, I’ve used PVC to make several things in the past and what I have done when I want to attach plastic sheeting to the PVC is to make some clamps out of the PVC connecter in the size of the pipe.
So for example, it looks like you used 1-1/2" pvc, I would take some of the straight connectors and cut some slices around 3/8" wide. Then you cut an opening so it looks like a “C”.
You stretch your sheet over the pvc and then snap the C over the sheet onto the pipe.
Might be a quicker solution to the zip ties.
Not sure if I explained it well, but it does work nicely.
Woody, I've used PVC to make several things in the past and what I have done when I want to attach plastic sheeting to the PVC is to make some clamps out of the PVC connecter in the size of the pipe.
So for example, it looks like you used 1-1/2" pvc, I would take some of the straight connectors and cut some slices around 3/8" wide. Then you cut an opening so it looks like a "C".
You stretch your sheet over the pvc and then snap the C over the sheet onto the pipe.
Might be a quicker solution to the zip ties.
Not sure if I explained it well, but it does work nicely.
[/quote]
Excellent! That's why I love this place. I was was just thinking...shit I'm gonna have to tape the holes from the zip ties! What was I thinking! Thank You MPM!
Hey no problem, I usually lurk here soaking up info, glad to be able to provide some small help. I haven’t even shaped a board yet. I am planing on doing a HWS - longboard soon.
Excellent - looks really good. I like the fin and how you described how you did it. I am probably going to forgo the rocker table and go with the single strip method as I have seen others do i.e. Brad Tucker.
How is the Paulownia to work with? I was going to try that or cedar.
The paulownia was awesome. The Cherry sucked! Won't do that again! I like the cedar idea for sure. Next winter I think spanish cedar/paulownia mix is how I'm gonna go. Hopefully get mine under glass this weekend. Good Luck!
first build your racks (with a blank on them) to suit your height / work ergonomics. then place your lights. you can move them up/down to get the light/shadows how you want them before you screw them down.
generally speaking your lights will be somewhere around belly to nipple high.
most have blue, green can be nice. i have black in mine now - it really highlights any bumps in your shape.
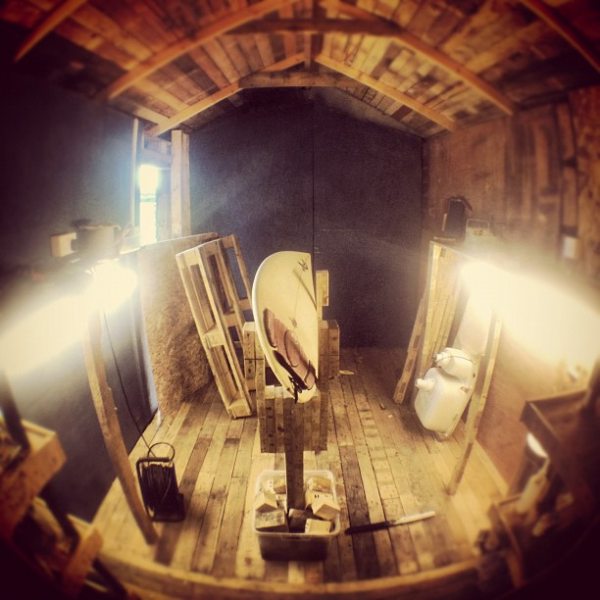
I’m pretty much finished building my own bay out of… pallets and reclaimed wood and bits. Total cost is under €170 , for screws, a few electrical fittings etc…
It just needs a door (in progress), some wood protection on the outside and a clearer blue inside and a couple more pieces here and there but it’s fully functional now, dry and water tight
[img_assist|nid=1068251|title=working on some fins|desc=|link=none|align=left|width=640|height=427][img_assist|nid=1068249|title=asdas|desc=|link=none|align=left|width=640|height=480][img_assist|nid=1068248|title=shed|desc=|link=none|align=left|width=640|height=480][img_assist|nid=1068247|title=shed|desc=|link=none|align=left|width=640|height=427]
[img_assist|nid=1068246|title=shed|desc=|link=none|align=left|width=640|height=282]This is my litte shed which i play around in.
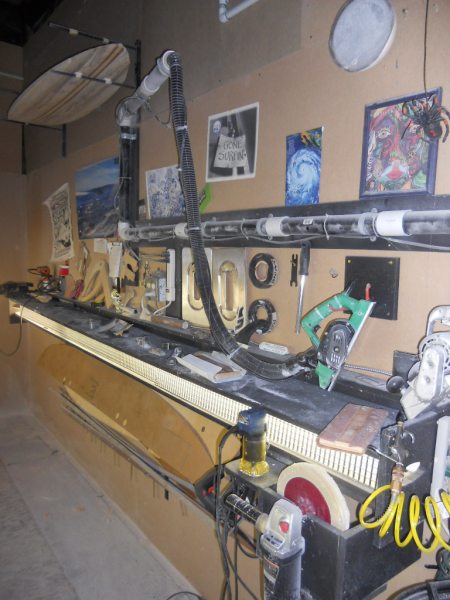
New Shaping room photo featuring a new nose rider I just shaped for a friend. 9’6" Stetson Model Nose-Rider 18 1/2 x23 5/8 x15 Thickness 3 1/4 Soft chimed ralis with scooped
concave in nose area for stabilized nose ridding to displacement hull
for easy turning and maneuverability 60/40 soft rails with nose and tail
blocks. This shape works extremely well in large waves that are well
over head as well as great nose ridding ability in smaller surf.
— at Wavecraft Shaping Room.
love the shaping shack pics. i was trying to tell if the side lights were set back into the wall or if you had built a combination house/shelf for the lights and mounted it to the drywall. my guess is the latter. either way it looks really good. the white paint seems to throw a lot of light
many many thanks to 'Thing' ( the fellow swaylocks man , whose hands shaped and glassed the resurrected board , the 'orange stub' [.... three years ago now ?! ] )
I scored his stands , some cloth , some bamboo veneer [... make some fins , yay !] , kevlar , carbon fibre ...as he is moving east .
THANKS VERY MUCH , mate !
....it WILL get used , rest assured .
All I need is four or five litres of resin now , and the half shaped blank from four years ago will become a rideable surfboard !
yewwwww , S T O K E D !!!
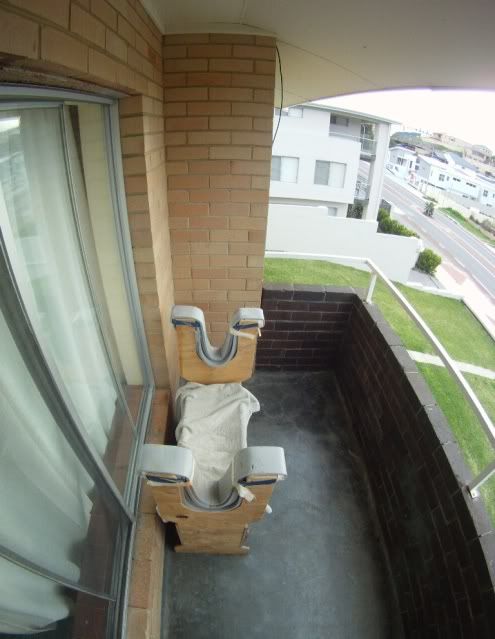
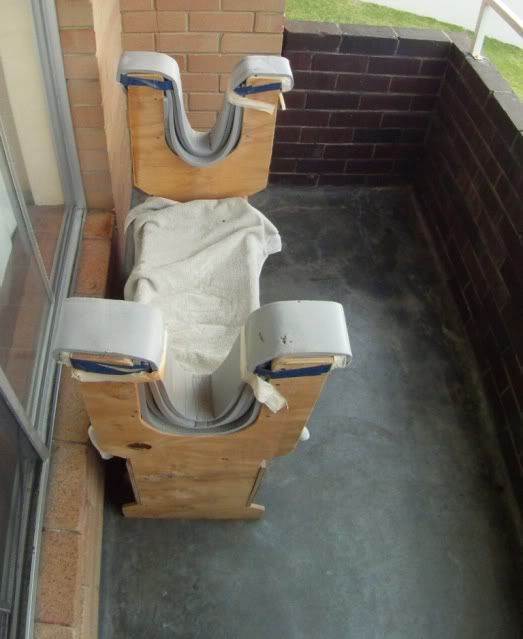
And ...location ...
upstairs , right hand flat ["apartment" ha !]
[ ....Including a bonus wideangled 'go pro ' distortion , at no extra fee :) ]
here is what i’ve been working on in my 1 1/2 car garage. this is my first step into the world of backyard shaping. i just finished up my first board with A2 and Brian over at Greenlight Surf Supply (amazing experience!). now all i have left to do is get a rail runner, a router, an fcs fin install kit…and then get my first blank and i’ll get going. any tips for things i’m missing that i’ll need for the shaping room?
…hello BarrySnyder, can you describe the specs of your vac cleaner? I ask due to the horizontal and long position of your dust chute.
thanks
Hey Fins,
I shaped my first board in my bedroom balcony in the downtown of a big city. All shaped with a broken in half file, that I used in my first High school year in the wood handcraft class, so I build 2 wooden devices, one for the long part and the other, I did a cavity in each side of both to place the rounded part of the file in one side and the flat in the other side, then use it like a block. Intense elbow grease and many hours late (I made it with a friend, my parents did not liked the idea-I should had studying for the Summer H School tests-he came by my home when he could and used a little stone or something to knock the bedroom to balcony doors, you know, second floor, and snake it in to my bedroom trying that the maid did not hear him…) due to very thick blank (no close tolerance plugs in those times)
Good times.
Thanks for reminds me that.
-to the new guys who put all the other non shaping stuff (glassing, painting, etc stuff) there, I suggest to put all these things in a box to prevent dust, etc that in the future would not be cool
good call on moving the non-shaping stuff especially the glassing & painting supplies. i have a work bench and peg board i need to install so i can get all that stuff out of the way. then when i start to actually shape my plan is to tape off with plastic sheeting to keep all the foam & dust contained in the “shaping shack”
North Oregon Coast - 2 shaping bays in progress. 1 - 10’ W, 1 - 9’ W both 14’ L with 3’ doors. 1 for my personal shaping and the other for rent or painting.