


Pictures are not very good but i will take more tomorrow.
6’3 x 21 1/4 x 2 3/4
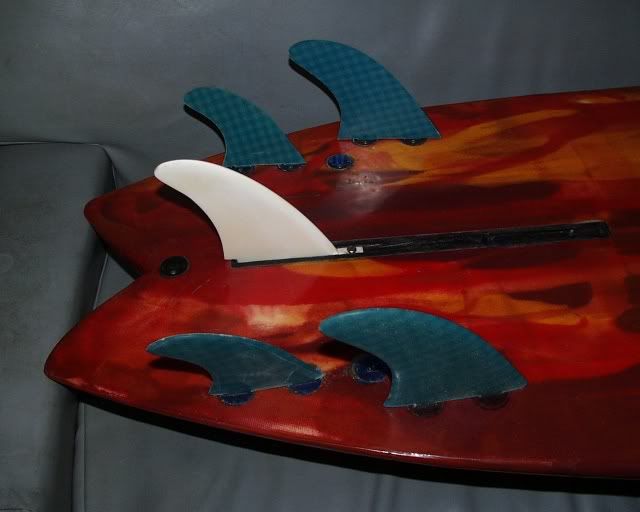
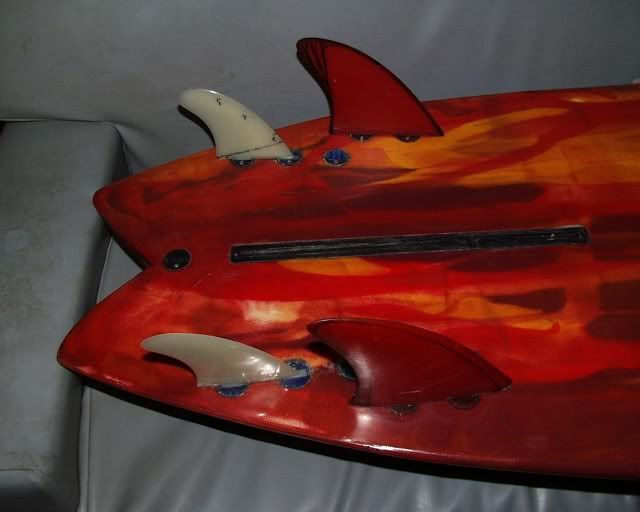
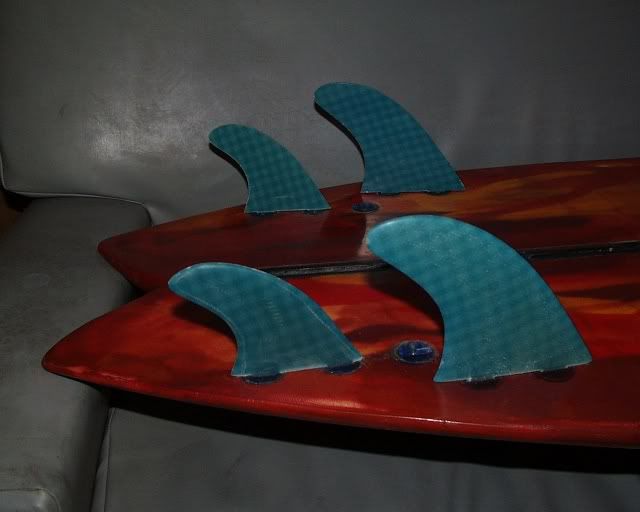
Need help with fin box placement for this 6’3" .
thanks
BOngo
Pictures are not very good but i will take more tomorrow.
6’3 x 21 1/4 x 2 3/4
Need help with fin box placement for this 6’3" .
thanks
BOngo
lookin good Bongo
nice rails!!!
Ok shes done with pinlines and gloss

JJJ

Hey Chip how do the red fins feel?, the ones with the tip foil on the flat side.
Boardbumps
This is my work in progress from my bay at home.
I was asked for some photos for my Japanese distributors blog and would like to share some of them with all of you.
EPS, Epoxy with a few added extras.
Its going to be a board for me. 5’ 10.5" x 18" x 2 1/8" glass on fins… I never grew up!
And so it begins…
Day 1
28kg per M3 block of Eps. VH grade. Blank
Outline.
Note the pencil lines on the outside of the outline, there a sector of a circle (Ark) with a 9.5 ft radius, the wide point is 2.75" behind half way. These lines are good guides as to where the hip and nose breaks away from the true curve of the Ark. Red lines are the fins.
Stay tuned for more.


Tail.
I don’t know if you can see in this pic but hip breaks away from the ark between 1/4 (17 5/8") up and in front of the side fins. This is also where I want the apex of my rocker to be… The other stuff is just me in a mind warp.
Stay tuned.


Day 2.
Putting bevels in the deck to keep a visual on the deck lines, deck roll and foam distribution.
Stay tuned.


Beveling of the square rail to form the rail shape and rounding off the deck bevels.
rounding off the rail bevels to form the rail curve.
Stay tuned.


Soft pad and shape finished.
Tomorrow ill start with the glassing and so on till im in the water.
See you tomorrow. cheers
My girlfriend took a photo of this. Its where I put my mask when I went in for a beer break… I was wondering where that got to…???


Man that is awesome great work have you had it out yet?
So, You were wondering…What happened to Resinhead? How come he makes no more of dem surfbords?. Well I bought a 20ft surfboard that was a piece of crap, 1978 Boston Whaler Outrage V 20…and turned it into a nice solid boat. All new patched, filled and re coated hull with gelcoat, inside & outside, all new teak, new seats, all new electrical, plumbing, new radio, new GPS/Chart Plotter/Fishfinder. Rebuilt upper end, and Lower unit. gear carrier, seals, gaskets etc… total hours spent on the refit…336 hours. Now if I could only afford the gas. But I’ll be a Ralphs on the first swell, and I’ll get there fast too.
Day 3.
Im going to stiffen this board with some uni-carbon tape on the rails, one layer on the deck and another for the bottom.
This adds strength and gives excellent performance flex to the board.
Here im recessing the top and bottom (slightly), so the carbon fits in nice and snug and poses no problems in the later parts of glassing/sanding.


Time to add the uni-carbon on the bottom side of the rail with some slow epoxy.
i use slow epoxy because it makes the window for trimming the excess carbon off so much longer, trimming is done when the epoxy is not quite hard. Trying to trim hard carbon and epoxy is a nightmare. get it at the right time and its a walk in the park.
See ya later with the top… but not to put the carbon on, a new material iv been working with.


Yorky,
This is definitely worthy of it’s own post…or was anyways.
Good stuff…i like how you sand down where your laying the carbon, very interesting. I’ve never used the stuff, but it’s thick enough to want to inset it like that huh??
I likes.
Hey Gravy, the carbon tape isn’t overly thick. The glass job is going to be light and the filler thin with no finish coat, so if you recess it in you can paint a bit extra epoxy over the rails and not bring up any weave.
cheers mate.
Top carbon is trimmed and spackeled in between the recessed edges.
Bottom carbon is taped up and spackel is being applied.


yorky what was the size of the block of foam?
Now time for an insert.
Forgive me for not saying what this material is, but what I will say is that it is a ballistic fabric (as stated in the data sheets) its 2.5 x stronger then kevlar, as strong as carbon but more flexible and is not affected by uv rays. crazy color hey.
This is a 4 oz cloth and wrapping it around the rail would be near impossible (for me) so it works perfect in between the carbon rails.
So pin in place cut with very very good scissors, wet out with slow epoxy and let sit for a while to soak in then finish as per normal glassing. Trim when not quite hard.


