Brilliant…!!!..
GregTate thanks for sharing and really clever on the build!
you got my mind racing on ideas… hmmm
are these the guys tblank?
http://woodworker.com/tite-joint-fastener-mssu-199-048.asp?search=tite%20joint&searchmode=2
Very nice…as an airline employee I’m extremely jealous. I wish there were more commercial versions available. The Germans make one called MES…pricey and not sold in the US. Until something else comes along I guess Pope Bisect is it.
I am on Rev3 of this board and have pretty much perfected it with a much better joint. If there is interest, I will post some details. It is still a pain to build, but at $400 per RT on the airlines, damn well worth it.
all the best
[quote="$1"]
I am on Rev3 of this board and have pretty much perfected it with a much better joint. If there is interest, I will post some details. It is still a pain to build, but at $400 per RT on the airlines, damn well worth it.
all the best
[/quote]
By all means, post up! Any pictures you have as well.
Yeah, Mr. Tate drawings or photos would be a great help. Instead of allen screws the Torx screws get better purchase and not as easy to strip.
I just took this board to Costa Rica for a week, flying on Delta. I took a lot of pleasure in not payng the $400 RT board fee. It rode well and I could discern no movement between the two parts. The key is the better bolt system below and the thickness of the board which yields a bigger face plate to bear against.
Here are some details of Rev3
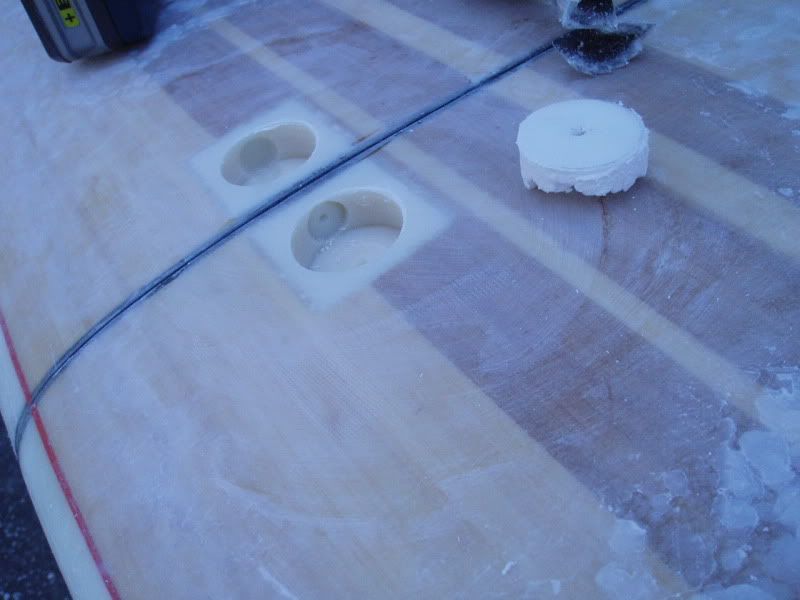
I found some ABS plastic on the internet (forgot where for now, but can look it up if you can’t find it). I had them cut it into a bar about 2.0 inches wide and 1 inch thick and long enough to get 8 pairs of the blocks you see in the photo. I put tape on the bar and marked it up so the machine shop would know how/where to drill. I loaned them my Forstner bit set and had them cut a 1 1/2 inch hole in the top as you can see, and a 5/8 hole for the bolt. That hole had to be cut from the back and the back entry hole plugged with resin. The hole where the joning bolt will go was not cut through (done last), but was counter sunk to hold a washer.
With all the holes drilled, I cut the bar into pieces and routed out holes in the deck of the board. I taped over the hole to keep the resin out while installing it in a resin pool. I had to make a little custom weight block to keep it from floating in the resin (see pics). After the resin set, I then filled the big holes with foam cut with a hole saw, sealed it with Fast and Final then glassed over it in order to cap it. My concern about the ABS blocks being too heavy were misplaced. After the holes were cut they weighed much less. duh.
I also cut some notches in the corners of each block to drop some weight and to allow the resin to lock the ABS blocks in.
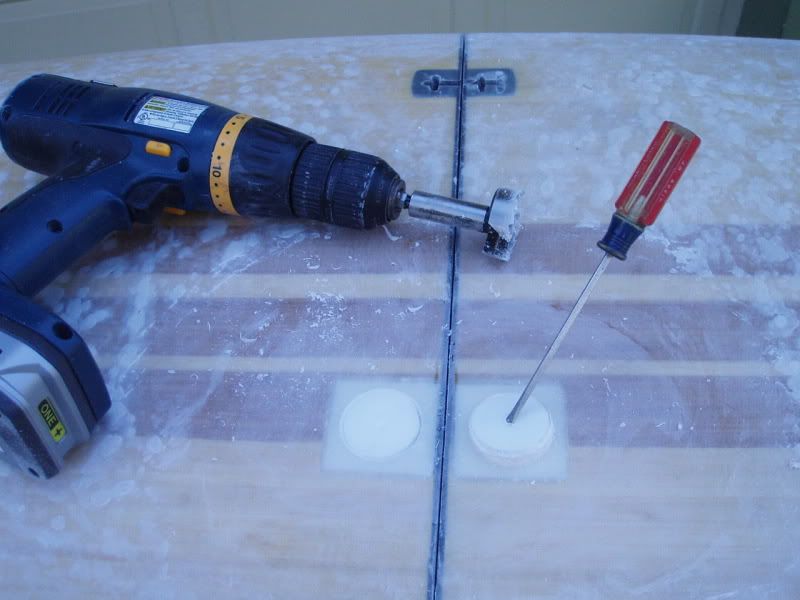
Once the blocks were in, and having measured carefully the locaton of the bolt hole before setting them in the resin, I drilled it out through the face plate.
From a surfing performance stand point, I gotta say, it was very very solid. The Rev1 blocks that I had gotten from Shwuz (and which were very appreciated) just wouldn’t snug up tight enough with the allen head bolts. I had too much play in the two part and I was really unhappy with the ride.
The key to my success in this version was the custom nuts I had on hand from a Bisect board I had a while back. I bought some SS bolts, cut the heads off and threaded on those clever little nuts. Look closely and you see the holes drilled in radius around the nut. You use a fin key to rotate and tighten the nut. Very clever.
However, as good as they work, they are very expensive and I now have much better and simple plan. You won’t need Biset nuts.
Buy some SS bolts with a hex head, some SS washers and SS lock washers. Then buy a socket wrench to fit it and have the socket wrench drilled just like the Bisect nut so that a fin key will rotate it. Double clever. That will be Rev4. If you do it this way, you will want to measure carefully to make sure the bolts will fit in the hole you drill from the top and that the socket wrench tube will fit in the hole as well.
It worked very well, but I am going to route out the old blocks which weren’t even used, and install the new ones. I left the old ones in for a side by side comparison, but didn’t even go there.
Here come the pic’s
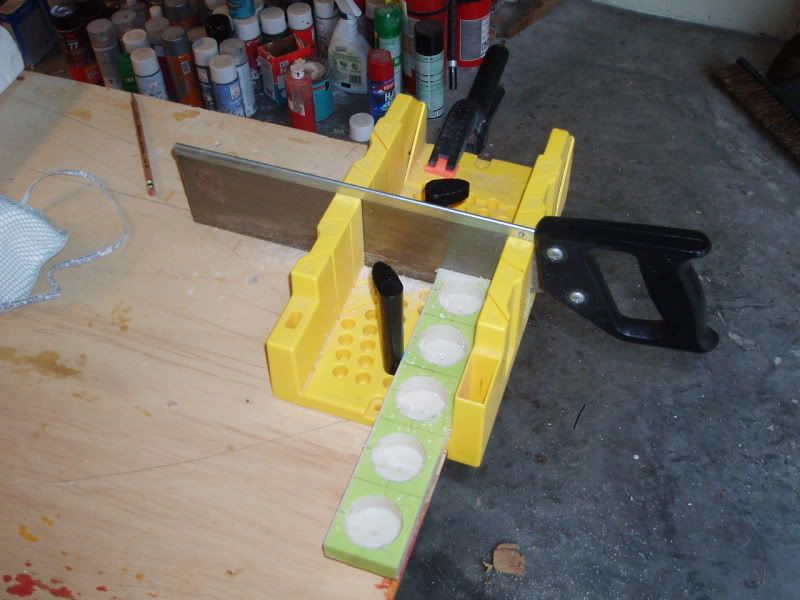
below I am cutting the bar with all the holes drilled. I taped it up to show where to drill and cut.
cutting a plug out of EPS to plug the big hole prior to capping.
below is the high tech device I built with foam and nails and weights to keep the plugs from floating out.

bleow the foam plugs still in for capping with cloth and resin, before drilling out with (again) with the forstner bit
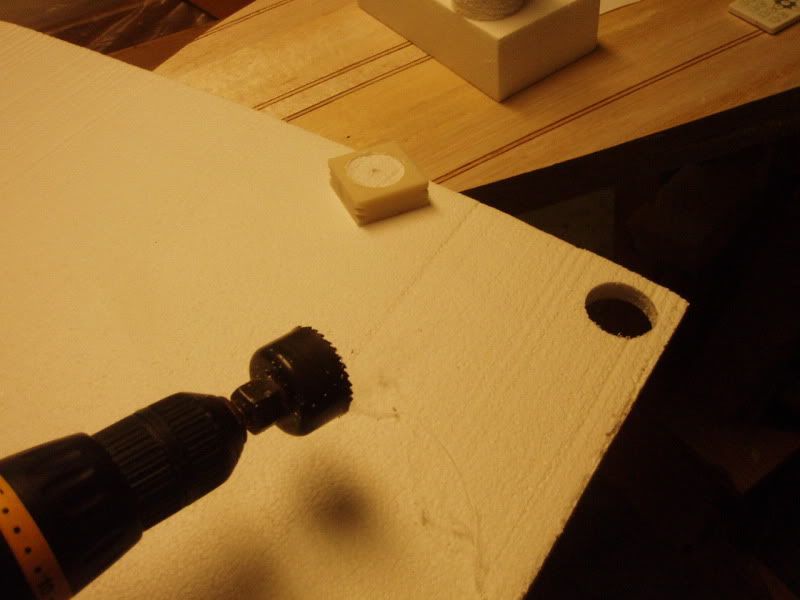
below, cutting out the foam in the hole after capping with resin and glass
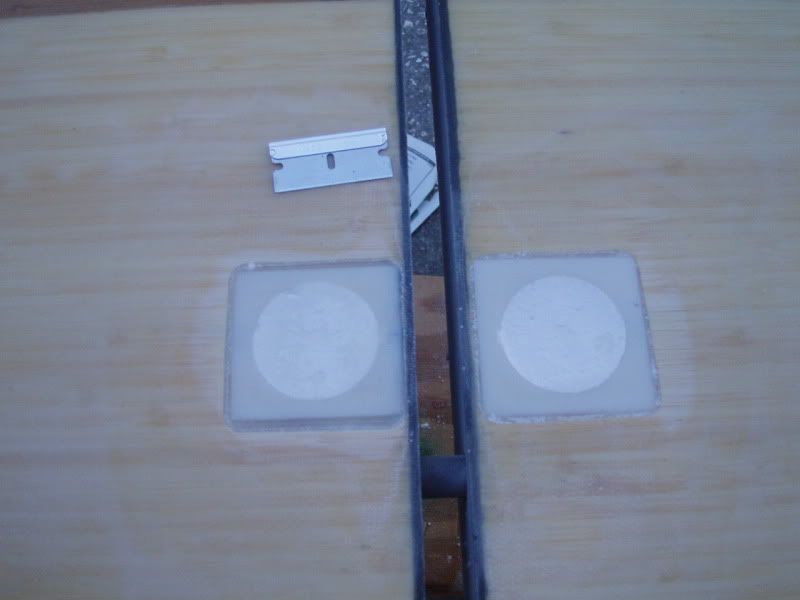
notice the counter sunk hole in the foreground where the washer will fit next to the face plate. you can see the resin plugged hole in the other block where the drill cut the bolt hole for the face plate.
here is what the Rev3 system looks like with a bolt and the Bisect nut. washer in place in the counter sunk hole. see the holes cut in nut in a radius so the fin key can tighten it up. Brilliant move by Bisect. Mr. Pope is a genius.
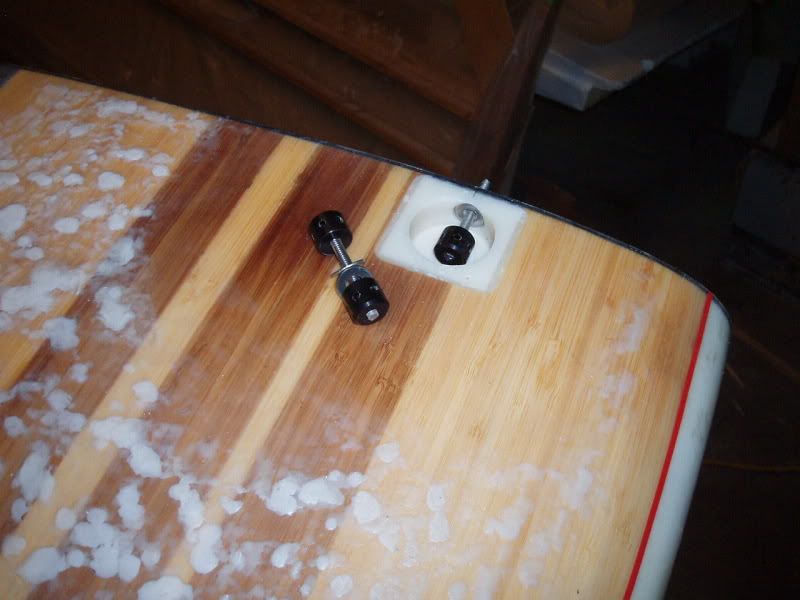
the face plate hole was drilled last

The holy grail. It works. Rock solid.
Very Very Cool Mr. Tate, Thank you for posting that with detailed explanation. Glad to hear it worked out well.
I'm a knothead so I don't know how to post or paste or whatever it is but if you go to :
www.woodwrker.com this is Wooworker's Supply site. Look up "tite joint" mechanical fasteners. Part No; 199-048. These are handy little items but they only come in 1/4" bolts. They are very easy to mill for and have the same tightening method as the Popes. You dont even need a wrench, a nail will suffice or a ridgid piece of steel in a pinch.
$3.79 a piece.
yah, Shwuz’s 3 part mini quiver is pretty ingenious too
So awesome!!
How much weight do you think all the fittings add? Just an estimate if ya didn’t measure… this question is for anyone who’s made one.
Those german boards look nice, I wonder what the weight increase is with them?
Anyone got any idea why we don’t see shortboard travel boards commonly available? Even the Bisect longboards I don’t ever see around?
Is it weight? Performance? Price? or do people just not need them, normal boards are fine?
I dunno…
Don't know about short boards, but the Pope Bi-sect has run aground due to poor business practices and not coming through with the goods.
I have a 9’ Rich Harbour Bisect and am glad I do…
Got it from a friend who is too mental about “his board” to really give it a chance…My benefit …
Love it when I have to go by plane…
The thing rides SOLID…Packs into the included 60" x 30" “suitcase”…
Still a bit of a drag on public transport in the places where you get around that way, but obviously so much easier than a full size board…
One day I’ll make one of my own design…Not hard, just need time…
I’ve been out of the board building game for a year, but I get these thread notifications in my email and just had to congratulate you on some serious work well done, greg. Love it. I’ll probably “borrow” it in fact, especially the drilled socket idea. Are you going to cap the holes for riding somehow?
I’ll be back into board building soon, and back around here again. It’s been a long year…
SHWUZ! good to hear from you, welcome back!
if i remember correctly, you went to Alaska?
please check your PM's
Shwuz, I’ll build you some. You got me started on this, so only fair.
Thanks greg, I may very well take you up on that. I think first, however, I'm going to try those fittings mentioned above. They look like they'd be just TOO easy! I would like to know what kind of plastic you used though. I've had varying degrees of luck with epoxy sticking to plastics, so like to hedge my bets however possible there.
Edit: never mind, I see where you said ABS.
those fittings don’t look to be SS.
Howzit Greg, I am pretty sure they are SS since I used them when I built my bar top. Iused them to hold the 45 degree cut at the corners of the bar and they worked great. I was only about 200 yards from the ocean in Kapa with onshore winds prevailing most of the year and they never showed even a hint of rust after 10 years and anything but SS would have rusted away by then. Aloha,Kokua
kokua, thx for that. Looks like a very clever piece of hardware. These things are so hard to build and get right that I will probably not stray too far fromwhat I have done and know works.
Paul, I’d love to see what you come up with. So I can copy it. Ha.