Summer Build 2012

I always use cloth under the deck and double up on the foot areas.  I used 4 oz and apparently didn’t have enough resin to both wet the cloth and bond to the foam.  I was trying for a really light board.  My return dimenished.  ha.

Spackle will not matter when you use cloth and you are not hand laming.  BTW, I also use 2 oz under the bottom skin.

Been following this thread, good stuff!


I second the importance of sealling the blank if you are going to do cloth/cerex/cloth.


The reason for sealing is just as llilibel stated, resin is being driven down into the blank

which, with the exception of a few substrates (iFoam, hydroflex) is a waste of material

and added weight.

   If you want a really light board, use spackle, sand out, then seal with epoxy using a

yellow spreader.  Then you have set the stage to glass with minimal resin infusion.

If you are bagging (either veneer or skinz) I highly rcommend wetting out the main 

parts of the blank, then rolling the cloth down, only pouring resin out along your laps.

That cloth is laid down or rolled out dry by the way.  Running the resin up from the blank

through the cloth first insures a good connection to your substrate, AND the minimal

resin is driven UP through the dry cloth which reduces wastage.

   The subsequent cerex is laid on the previous lam with the cerex dry, but depending upon

your work style, you might wet out the large panel areas underneath it first, and do the same

method as with the first layer, but NOT TOO JUICY!!!

  As mentioned, you can lay the last layer of cloth dry and do no exterior wetting except

maybe at the lap depending upon how you have it set up to do. (great method btw, genius.)


   You probably know this but the oily nature of epoxy will allow it to go through many layers

if you (can) wait long enough.  Look at some Pressurized Infusion methods on YouTube, where

special low viscosity resin is used (very watery, slow acting)


Best of luck!

George

Lunch break…and you thought I was finished shaping.

Time to do the scoop.  This is 100% inspired by Steve Pendarvis and his pendoflex boards.  I do not know how he does his.  I did contact him years ago when I did the scoop on one of my Delam Specials and he was cool with me sharing.  His exact words, “Do whatever it is you do.”


From what I understand he scoops his out really deep.  Leaves maybe an 1/8" of foam.  He’s going for flex on standard PUPE boards.  Mine is just about getting the cushy feel under the back foot.  I got to ride the Delam Special a few times and it was SOOO nice putting your foot back there.  


I almost didn’t do it.  I was like, “There’s already too much going on with this board. Why complicate it more?”  But then I remembered the cushy feel.


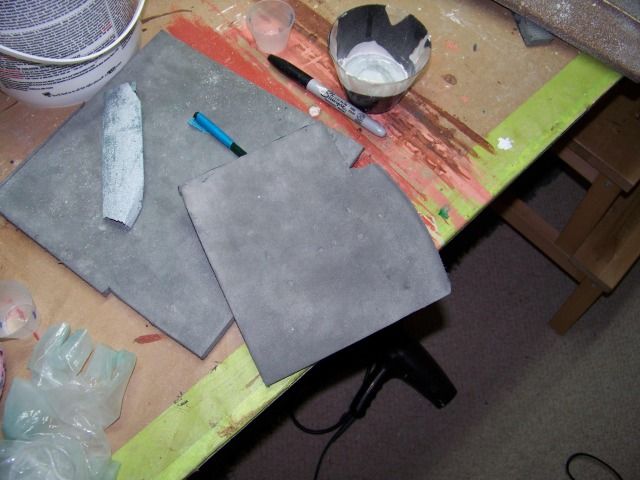
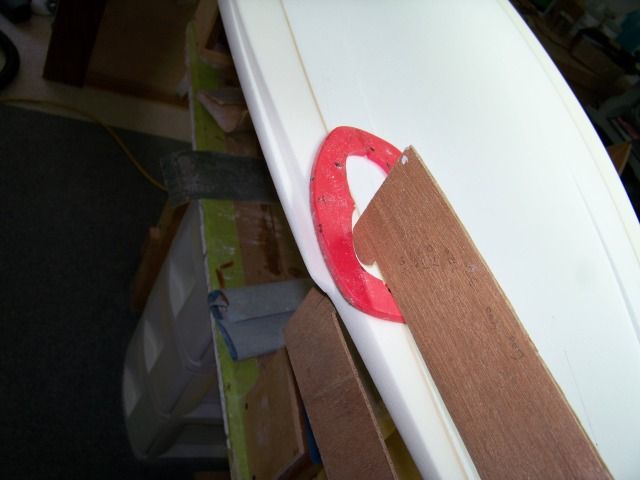
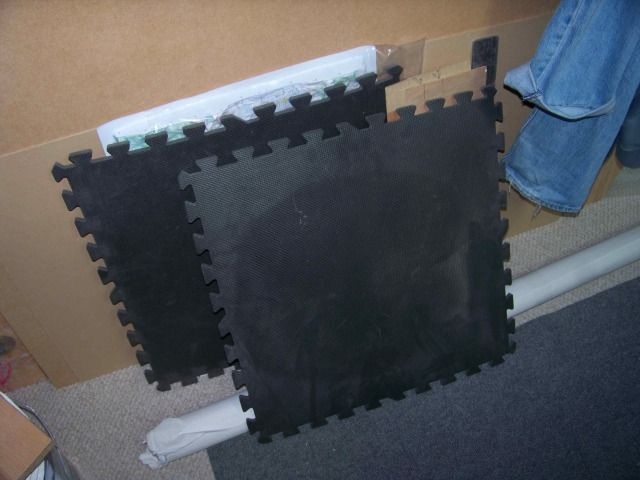
So here it is.  EVA foam.  Available everywhere, used for all kinds of stuff.

I practice cutting and sanding the stuff.  I cut it with scissors and then sand the edge with 36 grit on a hard block. It’s pretty easy but you’ve got watch out for the “spring back” effect.  It compresses while you sand and then springs back.


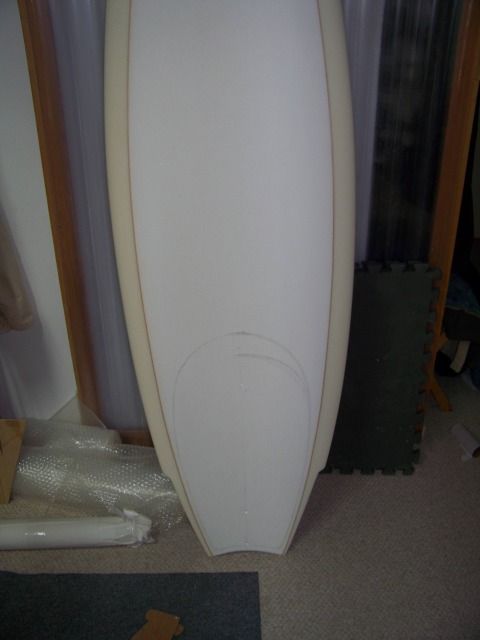
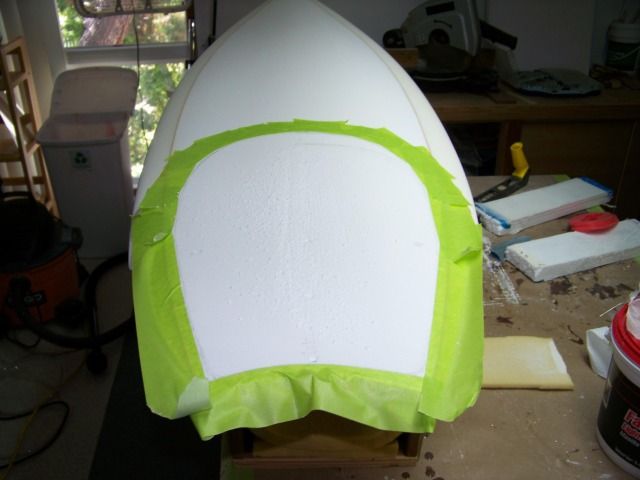
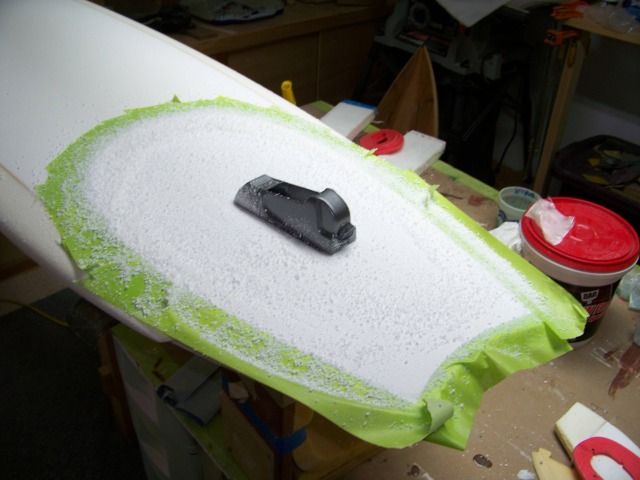
I outlined the countour by hand on one half, took some vellum and traced it, cut the vellum and flipped it to make sure the scoop is symetrical.


I masked the outline with a very special green tape.  What’s so special about this green tape?  I got it for free from Resinhead at last year’s Swayholics camp out.  Now, if anything unwanted happens to this build, I’m blaming the green tape, and by association, Resinhead.


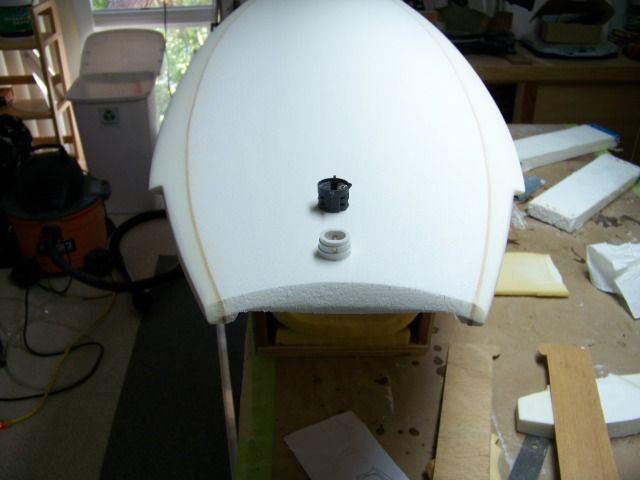
Now I have to leave enough depth to put in a leash cup and one center FCS plug just in case I want a trailer fin.

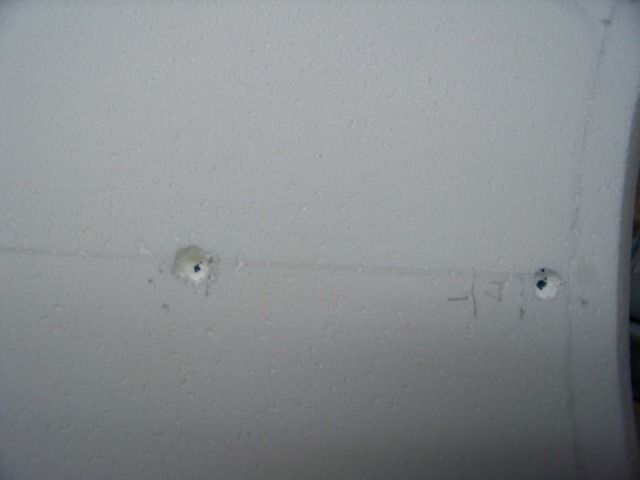
I measure with calipers the thickness, calculate how deep I can cut (leaving 1/4" of foam…5 EPS beads thick) and then drill.  I mark the bottom of the hole with a marker.


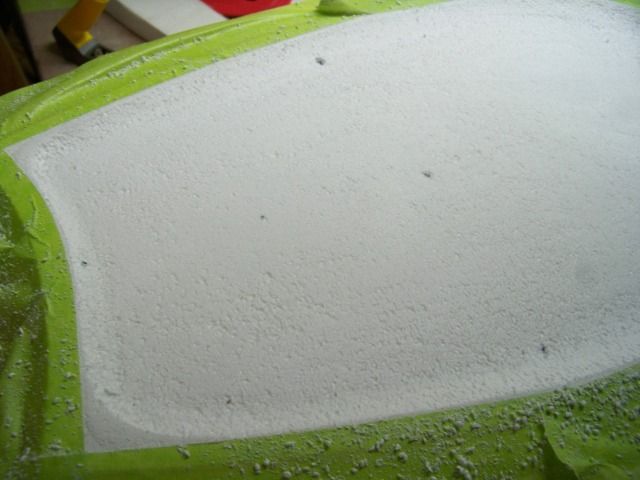
It wasn’t very deep at the very back- 1/4",  3/8" at the center plug,  1" max at the top.

I was just about to start scooping when I decided, maybe I want to use Proboxes for the side fins.  Nothing worse than doing an experimental board (with glass ons) that doesn’t surf well because the fins are slightly off. Jim the Genius said, after rocker fin placement is the most critical design aspect.  So I want adjustability. So now I have to measure for those.   Note to self- you’re going to have to be SO careful routing through those perimeter stringers.


Then I go to town with a small surform.  I could have used a rough rock because I was basically just scrubbing out the beads…

Got close to the marks really fast.


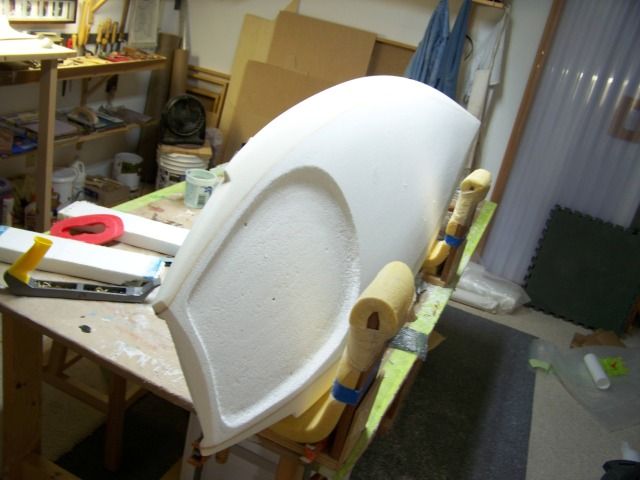
There you go.  Scoop is done. It wasn’t as hard as I thought.  I really sweated and debated about whether or not to do it.  Still not sure how how I’m gong to fit the EVA in the scoop.  Last time I made the pieces really big and just grinded the bits sticking out.  This time I might try to cut to fit. Pendarvis gets his edges so clean. On my last one they were kind of wavy.


Beer and burrito time…


Wow.  Thanks George.  Your reply must have come in while I was typing the scoop description.  Lots of important info there.  This is my first attempt at bagging a lam so any and all advice, especially by the guy who did the innegra testing, is most welcome.  Thanks again.

Cool you are going to “wibb*” it.  Steve’s done quite a few for me, he’s quite the craftsman!


   You will get the edge built up during hotcoat, just use tape float edge along perimeter, a bit like

the edge in the tail of your board.  When you use the contact cement to stick it down, your coarse

grit wheel will bring it down quickly, then switch to a hard hand block.  Progressively finer grits of course…


   When you bag, you run the risk of slightly distorting since you wibbed the deck, so be sure to have

some key areas you can check as you pull the final vac on it.  You got two stringers in that thing so

lengthwise distortion is probably not a huge issue.  Still, if you have a rocker gauge or reference to

a straight stick or something to check it might be a good idea.


   Spanwise distortion is very much a possibility with your board.  I should have said it is a little easier

to lam the bottom, then do the dent for the wibb, but didn’t read previous stuff close enough to catch

it.  That makes the distortion less likely.


   Lastly, if your wibbulation is a constant depth, then you can use a router.  Set it for depth and cut

out the flat zone leaving random “pegs” every couple inches to support the router,  You can chop

the pegs off with a single edge razorblade and hand sand the slope out to the edge.


Fun stuff!


George

Hi Jeff -

At one stage in the old sailboard vacuum building video by Tom Sullivan he uses a stretchy plastic film and pulls it tight around the board - taping the film across the underside every few inches as he pulled.  On the topside, he popped all the little bubbles that were under the film before sliding the whole thing inside the vaccum bag.  I don't recall if he used some sort of breather material on the outside of the stretchy film but a layer or two of non-textured paper towels would work fine.  I've used a piece of plywood with lots of finishing nails through it to punch holes in a peel ply layer... that works fine too.  The tricky part is avoiding wrinkles in the outer glass.  There is a material called Stretchlon that can be pulled tight and mostly wrinkle-free.  A thin plastic drop cloth can be pretty stretchy too.  If you start in the middle of the board and work towards the ends, taping across the bottom as you go, you can fold the extra material at the tips and tape it down.  That will localize any wrinkles to the ends of the board.  A helper is a huge plus in this process.


George, thanks for that.   I was mistakenly thinking that some of the resin needed to penetrate into the foam to create a bond, rather than just sitting on top next to the skin.  But now I don’t have a valid theory for why this skin started to delam.  It was a practically new board with no foot traffic on the area lifting.  It is fixable, but disturbing.  I am actually building him a new one now and will do a little forensic work when I get the old one back.

I like the idea of the resin rising up through the cloth. But just to liven the discussion, if your skin matrix is fairly dry already, why do you need to spackle and resin seal on top of that?  Seems like so little would ooze down into the foam from the skin.

Jeff, if this is a hijack, call me off.  Seems relevent, but I don’t want to divert attention from your build.

And another thing.  I am an not sure I’ve read much of others failures here.  You have been very forthcoming.  Good for you for that.  Seems like everyone who builds something new (for them) just builds and it is a forever success.  It is good to post what doesn’t work.  doh?

Totally relevant Greg.  And thanks for the updated info George. Didn’t think about the rocker changing because of the scoop (wibb?).  And yeah it would have so easy to scoop it after the bottom lam.  And thanks John, I will do some random poking tomorrow!


Speaking of rocker, on Paul Cannon’s thread he said- little nose rocker is good, lots of tail rocker is good.  This board has 4-1/4" nose, and 2-3/8" tail.  I’d say that fits Paul’s criteria.  But when I measured the rocker at the deep end of the channel it was 2-3/4"!  Can you say “loose?”  At least that’s what I’m hoping.  Dims are 6’-0"  x 20-1/4" x 2-5/16".  Tthe board does not feel that thin.  About 1/8" is single concave.

Oh a couple more questions for George if you’re still around.  When you seal , how much resin are we talking?  3-4 oz?  I think i’ll use a roller on the sealed blank before I lay the skinz. Then soak the cloth as normal, maybe not as bone dry as I’ve been doing on my test panels, then lay one more layer of skinz on dry , maybe roll it with whatever’s left on the roller, then wrap and bag.  Sounds so easy


Oh and how much vac do you pull.  I thin the wmd blank is 2 lb.  So I’m thinking about 12 inches.  I went up to 9" with the cheap home depot faom with no distortion…

These build threads I post are always done as I go along, so if I f—up, you will all be along for the ride.  About your delam- is it on the deck by the nose?  A thin nose?  Maybe the nose flexed and since the bamboo said, “I ain’t compressing!” the whole skin went for a ride?


One more photo then I’m going to call it a day and go for an evening surf.

Test piece.  Skinz sands fine.  Innegra not so much.  You can see when I cleaned the edges of my test block the innegra went haywire.

duplicate post

Hi Greg,


   There is a partial bond, but not to much of an advantage as most EPS does not have that kind of robustness, EPS does have other good attributes over PU like fatigue resistance.  By sealing the blank well, you eliminate a lot of unnecessary weight.  Using the spackle is not intuitively pleasing, however we find the seal over that with epoxy results in a good lamination bond with the foam.  This comes from the sanding of the spackle.  Ideally, there will be enough exposed “cut cells” (little balls chopped in half on the outside surface of the shape) to make “good bonds” and yet eliminate the sometimes deep gullies and spaces between the balls “not so good bonds.”  This assumes using a quality foam, where fusion during the expansion of the polystyrene (E, of the PS, lol) is quite good.  Not all EPS is equal of course.


   That said, you would best get answers to your failure analysis by looking at the backside of the delammed skin.  If you are not taking the skin off or peeling it back, it may be hard to tell what is going on.  The bamboo veneer failure I have in my shop right now is the classic, “on the deck, up around the nose for about a foot” type failure.  As stated above, this is partly due to built in stress that, as you know, can be a bitch sometimes, and when combined with a possibly questionable area of EPS bonding, will show bits and pieces of EPS, even entire cells, stuck on the backside of the lifted skin.


  Your new blank is being built, BTW, and it is of good quality EPS!


  Oh, one last thought, I figured out a way to relieve that stress in the deck skin at the nose, so it can take a mild compounded inside-out curve quite well.  PM or email if interested.


George

Hi Jeff (llilibel03 ?)


Yes, that was the older more generic term used for the soft deck inlay.  Steve and Stan Pleskunas and some others in our area came up with the name Wibbulator, or Wibb.  A lot of boards that Steve did were retro fit into existing boards, thus Wibbulation.  Steve Pendarvis kept with the concept and other gnarly flex stuff, eventually using the name Pendoflex, which I see as his unique work.


Paul may be onto something, but I am finding both tail rocker concepts work quite well when combined with the right surfer.  The low nose/high tail rocker suits a “front footed” surfer a little better, making the board very drivey, especially as the waves get better shape.  Low tail rocker tends to work well with back footers and heavier/stronger guys.


The fact that you might have some inherent flex in your board’s tail may actually increase rocker when a demand is made upon the board.  Usually for a flex-tailed-board one would have a pretty flat exit rocker (the very end of the tail.)  NOT always though, as a lot depends upon the surfer and if they adapt or “figure a board out” over time, learning the new weight distribution that best suits that particular board/rocker.


One thing you can do if you feel there might be a bit much rocker and you are back footed or heavier (180+ for example,) is scoot your fins up about a half inch.  This will kind of make the tail end less potent (you won’t be back there pushing) as the fins will dictate foot postition a little bit as well.  Kind of like surfing from the middle of the board more…


BTW, John Mellor’s comments are important.  Why not Peel Ply?  We get “Econo-Ply” in our area from places like (FiberLay, not affiliated,) then just use paper towels over that as the bleeder.  Works well.

re. the sealing.  We use very little, maybe 150 grams total for the entire board (sorry we measure in grams) and it is literally quickly spread on then scraped off, which leaves a film over the sanded spackle.)  I should note the spackle should be sanded back so you can see the exposed round cells.  If you have areas of solid spackle, that is** too much**, sand back using 180 grit screen.  Not sure if you are versed on the spreaders, the 6" yellow ones from FGH.  But you can adjust the quantity of material moved by speed and angle.  If you want to take a lot of epoxy off, scrape slowly, if you want a thicker amount move faster.  And I mean this as a matter of body mechanics, you don’t have to look at your work, just do it and work on staying consistent.  And with the spreader ANGLE, if you want to remove more, hold the spreader closer to vertical, hold it more laid down for delivering more material.


So, I try to keep things simple in my shop and push the skills of our guys with those tools.  I would suggest using a scraper to apply the next epoxy coat as well, but using different speeds and angles.  I wanted to mention before, the sequence is important but also the timing.  Spackle, sand, epoxy seal, then epoxy blank-wetting, lay cloth etc. The epoxy seal should be allowed to go to B-Stage, and not let to go overnight.  We found there is a cool chemical effect that somehow draws the cloth down tight to the blank (you will see.)  Again, this is fresh epoxy on top of B-Staged epoxy, a dry-ish coat followed by a wet coat and then the dry cloth on top of that…


I have not been measuring my vacuum when bagging, I go by how the foam looks.  If I see round cells printing through the bag, I back the vacuum off a little, that keeps me in the “tight as possible” range, ha ha.


Hope this helps,

George


P.S.  Oh, you will notice that Skinz and moreso Innegra will fuzz up when sanded.  You can wetsand (when possible) the fuzz away, or wipe on/wipe off crazy glue and sand the fuzz off after the CG flashes…   …but don’t sand too much! or you will make more fuzz, ha.

Hey Lilibel03,

For what it is worth, my 2 cents.  More importaint than the number is how you got there.  I’ve done a couple of recent boards that have a little more tail rocker than normal, 2 3/4" but some of it came form a kick starting around the last 10 inches.  I didn’t like it.  Turns real easy, but with no “squirt” out of the turns.  Perfect for sitting in the pocket, but doesn’t really want to project.  Also slow off the bottom, but flies when half way up the face.

I much prefer if the tail rocker has no big kick, but gets there gradually.  More stable, and faster.  If you need to put some foam back, 1/8" d cell, and reshape.


George, the info you have given is the best stuff I’ve read here for a long time.

OK.  I’m no longer a virgin!  I have (with the help of a friend) bagged my first lam (sounds like slang in the making)!

I am disappointed and relieved.  Disappointed because I ended up using much more resin than I thought I would, and, also because there were some air bubbles, more air bubbles than I would have had, had I hand lammed.  It has left me wondering what the utility of bagging the lam is?


I couldn’t take pics of the process because, my helper (thanks Andy!) and I both had our hands full.  So I’ll explain the process for the edifictaion of neophytes, and so that the maestros, if they are so inclined, can comment and correct my errors and bugs (little sways inside joke humor there).


First I sealed the EPS portion of the blank (with Kwik Kick), as per Plusone’s advice.  Waited a couple of hours.  Then laid out my cloth.  The first layer was the skinz.  The skinz really wanted to stick where I put it, due to the texture left on the EPS by the seal job.  The skinz reminds me of the fiberglass matt we used at the boat builder.  It, too, was always used between the foam cores and the fiberglass roving.
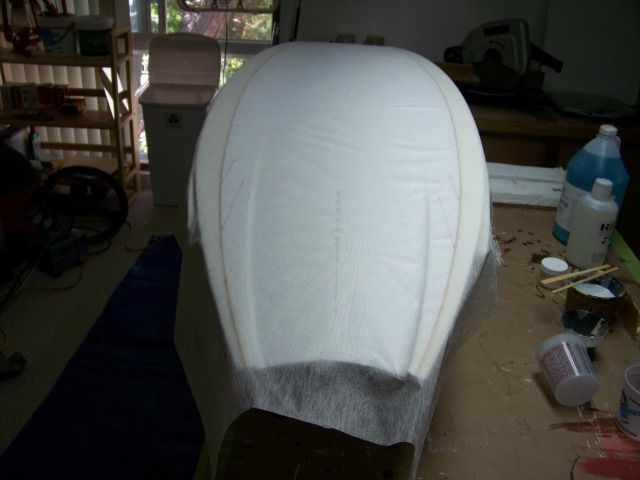
I could foresee problems already.

We then laid out the 4oz S cloth and then another layer of skinz. Cut it all to fit . Then peeled the layers back off the front half of the board and proceeded to roll the resin (now using RR Slow).  When we pulled the skinz back down onto the blank we immediately noticed two things- one it doesn’t soak up resin, at least not immediately like cloth would.  Two, the foreseen problem- it would not lay down very well, especially on the laps.  I will never again lap skinz!  I had to make several relief cuts and it took 20 minutes to get the front half down.  And that was just the skinz! And that was the easy half!  Then we peeled back the back layers from the tail, rolled the resin (this time more generously) and started to lay down the back half of the skinz over the ewings and channels and tail tips…and by the time we got that done I was going into panic mode! Almost 40 minutes and all we had down was the skinz!  With two of us working!


I should mention my friend Andy has made many surfboards but never with epoxy and he was curious to see what I was up to.  So now nearly forty minutes into it and we had the first layer of skinz down.  We then laid out the cloth and poured the resin, moved it around and started the normal glassing phase.  Now I don’t know if it was the skinz underneath or the resin starting to go off, but it seemed to move slower than normal and I decided we’d better mix a little more, just so we could wet the laps without too much mucking around.  I had origianally mixed 15 oz. I mixed 3 more which seems a lot for a bottom lam on what is supposed to be an ultralight board.  

I should mention that when we tucked the channel, air bubbles formed at the Ewing and when you tried to tuck the ewing, the channel would bubble…At a certain point I said, “F—k it.  I’ll fix it later.  And forget the outer layer of skinz! Let’s get it in the bag!”

And then, “Oh wait, the logo laminate!”  Too late to go under the cloth. I slapped it down on top and put a piece of 2oz cloth over it.

By that point over 50 minutes had passed which is RR slow’s pot life.  You could feel the resin gelling. So we wrapped it with the shrink wrap.  In my mind, before actually doing this, I intended to be very meticulous about the wrapping.  I had seen in my test panels how the wrinkles show, thus I had intended to get all the wrinkles out.  But at this point I was in panic mode. So we wrapped it hastily, put the breather cloth over it and got it sealed in the bag. Pump on. Done. One hour and 8 minutes after mixing the first batch of resin.  Whew.  We needed a beer at that point.
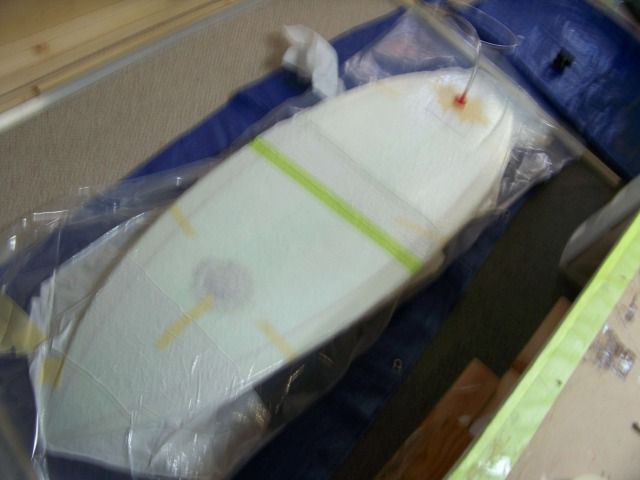
Sorry this photo is blurry.  I was probably shaking by that point. Andy had a stunned look on his face.


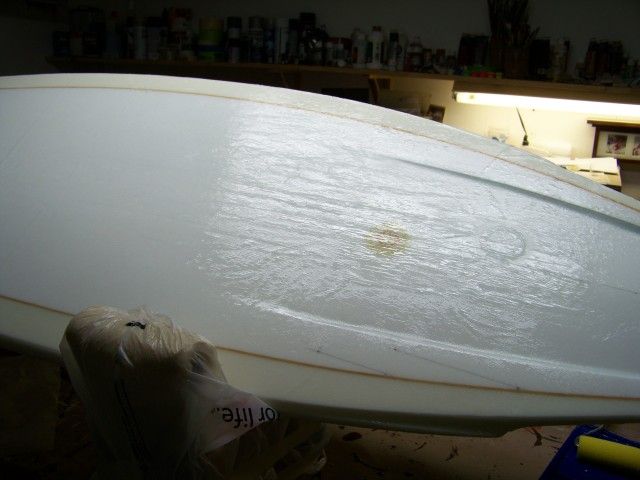
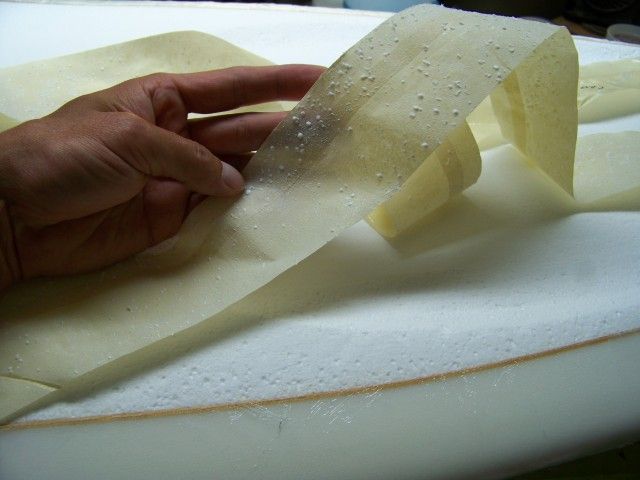
So how’s it look…like I said at the beginning it could be worse.  When I first took it out of the bag it looked like it had air bubbles everywhere, but I couldn’t tell if it was the peel ply or the lam.  Although the resin in the cup was solid the board still felt soft so I started poking the airbubbles and squeezing them out.  

After I got the peel off I’m thinking they were mostly the peel ply.  Still the lam had a bubble here and there, something I almost never have when hand lamming.  And there were wrinkles everywhere.
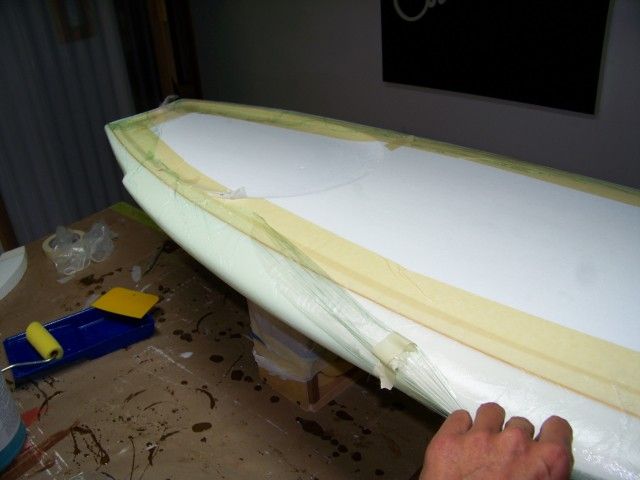
 

One good thing, the channels and ewings pulled tight with just a couple of bubbles.  There is, however, a radius of resin in the channel now.  I’m not sure that a good thing, seems to defeat the purpose of the channel.  Don’t know of I should grind it out.  Probably not since there is no more glass going over it.


One bad thing, I don’t know if it was the fact of bagging or what, butwhen I went to peel the tape after cutting the lam beads were coming off with the tape, something that’s never happened to me before.  I would complain to the company but they are out of business (Warvel).
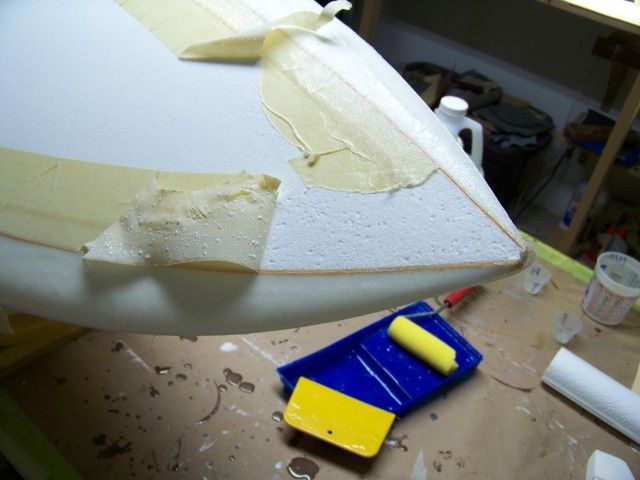
More spackle, the creeping evil…


Whew. What did I learn? I will never lap skinz again.
Thanks again George.  I agree with Sharkcountry.  Great advice.  THAT’s the kind of info that makes this place great!  I’m going to seal it now with Kwik Kick and then,(gulp), bag the lam a few hours later.


Oh,I use the Homedepot shrink wrap because it is $21 for a 1000 feet whereas the econoply (at Fiberglasssupply) is $2.45 a yard if I buy a 100 yard roll, otherwise for the lengths I need it’s $4.12 a yard.  I spoke with their guy on the phone and he said it is disposable, not really meant for multiple uses.  If there is a peel ply that is perforated that is multiple use I’d be interested to know about.  I also looked up that walpaper tool, the roller that makes little holes and they were like $90 too.  I’m a garage hack that makes two or three boards a year (used to one…but I seem to up the number as I go along), so I cannot justify big investments in tools, or buy rolls of material…

This is a great thread.  I personally think more people should post their progress as they build.  A lot more detail comes out this way vs. showing a few shots of the build after completion.  It also takes a lot of guts to tell everyone about what you want to accomplish before you actually do it.

My experience with vaccum bagging is pretty limited, but I went through a few of the stages you are currently dreading.  I saw a veneer vac. bagging demo at Sacred Craft a while back where the demonstrator used a homemade hole puncher.  The guy had glued a few dozen push pins, in tight formation, to a piece of 2x4.  He folded-up a sheet of 3 mil plasic from Home Depot and layed it flat on a wooden work bench.  He proceeded to press the plastic with this mini iron maiden like devise, all over the surface until, it was covered with little holes.  Folding the plastic made is so that he didn’t have such a big surface to cover.  I tried using a variation of this technique when I vac. bagged some glass onto boths sides of a homemade wooden fin.

Here are the steps that I used:

  1. I brushed the fin with RR,
  2. Applied pieces of 4 oz. glass to both sides.
  3. Used the already wet brush to smooth everything out and removed any dry spots,
  4. Applied sheets of perforated 3 mil to each side.  Note:  I didn't have a large surface to cover so I just used one pin and punched the hell out of the folded sheet until it had enough holes.
  5. Added some sheets of dry fiberglass scraps to the outside surfaces in order to soak up any excess epoxy
  6. Put it in the bag, sealed it, and applied the vaccum
Note: My bag was a folded and taped piece of 3 mil plastic sheeting (super cheap).

The final result was a nice smooth surface with little bumps every here and there from the pin holes.  You couldn’t see any of the weave.  The bumps took a minimal amount of effort to sand smooth.

Awsome thread thanks for sharing.