Summer Build 2012

Hi Llilibel03,

Sorry to hear you had so much trouble.  For clarification did you

  1. lay down Skinz
  2. laydown fiberglass cloth
  3. Hand laminate like normal
  4. while still wet, lay a surface layer of Skinz onto the wet laminate below.
  5. Smooth out, but add no more epoxy.
  6. cover with non perforated plastic release and into the bag
I got lost when you were peeling back layers.  I wonder if the RR epoxy is thicker than Fiberglass Hawaii.  When I used the Nylon, it sucked up the epoxy like a sponge.

Jeff-


   Didn’t know that you were going to lap the Skinz!  I only use it in the flats and only in zones where I need panel stiffness.  No point in covering the rails since there are the laps from the other side which increase skin thickness.

   50 minutes seems a long time, did you have everything pre-cut?  I had a very complex racing kiteboard I did, tons of nooks and crannys, I had to mock it up with dry cloth, including bagging it and pulling a vacuum on it.

   The amount of resin sounds a bit high, as if you were trying to get a saturated look out of the Skinz.  That stuff soaks like a sponge, so as it fluffs up and triples in thickness, it will drink 3 times the resin.  It does saturate, but may not seem it as wicks slowly until put under vacuum (it is hard to trust that saturation will happen when starting out with bagging.)  Perhaps you deviated from your plans when you but more resin on the Skinz?  Did your friend influence your decision?

  You did all right for the first time, and dealing with complexities in the shape, plus being heavily distracted with trying to lap Skinz which got you working into B-Stage.  B-Stage is way too late for pulling the vacuum.

  My only critique is the peel ply, a solid sheet doesn’t seem like the excess resin has anywhere to escape.  Even a ton of pin holes is only going to get a fraction of what should have been extracted.  If you used EconoPly, that’s 5 or 10 bucks (I admit I get wholesale on it,) but that is minor for the end effect.  The two of you spent way more than that beating yourselves up, but I was not there to see the situation.  The resin should be pretty freshly applied by the time vacuum is pulled, that way the excess resin still has a low viscosity and very short distance to escape (directly through) and get soaked up by the bleeder sheet.  The bleeder sheet is important either buying the fleece or going budget paper towel style.

  Basically, it seems like you did a pressurized lamination with not too much squeeze out, just mashing down on the glass, which is only half of vacuum bagging…

  I am sure you feel disappointed in some respects but this is your first try at bagging a large part, plus you got hung up on having to correct stuff before going into the bag.  Try to analyze what ate up your time, and really consider going for that peel ply and bleeder, I just cannot see how the board was going to get lighter…


George

Llilibel,

I used to lam RC plan wing with glassy finish with mylar, never have problem. So i try this for boards with plastic film, i always have more or less wrinkles and air in lam even if i spend lot of time clean it befoer vac. Then i go with perf plastic and thick bleeder, no more wrinkles or bubble.

Tixotropic resin (resin+cab-o-sil) have lot of take, it’s simulate “B-stage” and it’s ofen use to lam on vertical surface or with light fiber that want to float on resin.

Sorry for my franglish

Here is a peel ply finish on texaluminum cloth. It almost came out perfect. The scuff marks on there from putting the rails on. Peel ply is used in most cases with CF vac bagging also. Peel ply is a great product for a proper finish and weight reduction when used properly. No filler coat necessary and if you want it lighter just start sanding.

The non-holed peel ply will only saturate so much. I am kind of confused on the no peel ply comments. Peel ply is your friend and very easy to work with and dirt cheap..


https://swaylocks7stage.s3.us-east-2.amazonaws.com/s3fs-public/DSC00974.jpg

hiya llilibel !


LOVING this thread , it's waaay to high tech for my li'l brain , but the photos make it really enjoyable , and your honesty  


 so,  THANKS HEAPS for the photos , mate !


 when I saw the 'e' wing and the tail doodahs and the cut out areas , for some reason I was reminded of the late great ben shipman's bonzers.... 


 I think it's your creativity ?


  I bet 'stingray' woulda loved to have done a nice spray job on this , as he did on ben's boards , eh ? [were yours not vac bagged ]


  thanks for this thread , I can't wait to see the photos of the finished board and [hint hint] , read a 'ride report'


  I hope you take it to big sur this year for people to try


  I would love to provide some fins for it too ...since you thankfully went with pro box !  [ yay !!!  ....good on ya mate ! ]


:)


  keep the stoke coming !


Hi Llibel03,

Earlier you mentioned more tail rocker than you wanted.  If you haven’t set them yet, maybe less toe in to compensate.

Thanks everyone.  


You know George, if I had any brains I would not have tried to lap the skinz.  I did a little test piece about a foot long with a rounded edge (but not a compound curve rounded edge) and even then it didn’t lay down easily.  I also did a little color test on that one and I think I was distracted by the color results (which were disastrous) and didn’t pay adequate attention to the lapping issue.

No more laps with skinz!

Question- so when you’re wetting out you don’t try to get the skinz saturated?  You leave it dry looking?  I rolled epoxy on the foam and then put the skinz down. I think I probably was trying to “wet” it out.  I guess for someone used to wroking with normal glass that’s instinctive.


Today I will inlay skinz and 2oz Innegra on the deck (no laps!).  I will roll the foam with epoxy, put down the skinz, lay the Innegra and then proceed as normal.  I want to try and pull the lam pretty dry though.  After yesterday’s debacle I feel like a runner who is a lap behind (trying to get a light weight surfboard) and need to make up time.  I guess I should be careful to not go the other extreme…


I will hand lam (and lap!) 4 oz S glass in a second, separate step.


Thanks for the kind words Chip.  I remember Ben Shipman’s E wings.  Nice.  In the end this will be another five finner. I have bamboo panels that I will start working on soon.  I should also post up a ride report on the Bonzer “Sinker” I made last year.  At first I thought it was too stiff.  Eventually I changed it to a thicker fin (same template) and now I love it. Amazing what a little change can do.  Though intended as a step up/semi gun  I find I use it all the time now.  Well, that also has to do with the fact that I busted the 6-3.


bb30- that blue texalanium is sick.  If you know where to get peel ply and breather cheap could you share that info?  All that stuff is mono use though, right?


Everysurfer- actually  I really like the rocker on this board.  My previous small wave grovel board had 1-1/2" tail rocker and it does weird things when the waves get steep or when I’m in the lip.

Hey llilibel03,
I’ve only done a handful of vac lams but the disposable peel Ply & breather have been key in getting the proper resin to fiber ratios.  I would split a role of Econo-Ply E with anyone if interested.

Hey Slash you’re the guy that went for extreme lightness and buckled your board after a couple surfs?  How has the reverse engineering been going?  I also remember very cool graphics on your boards.


Well, live and learn.  No laps.  Today doing the skinz/innegra inlay was easy.  And I found my alternative perforated peel ply.


Just took the roll and started stabbing it with a hole punch. When we pulled it off the roll, voila!  You had to pull it off slowly at an oblique angle or the holes would start getting big.  It seems to have worked-

.


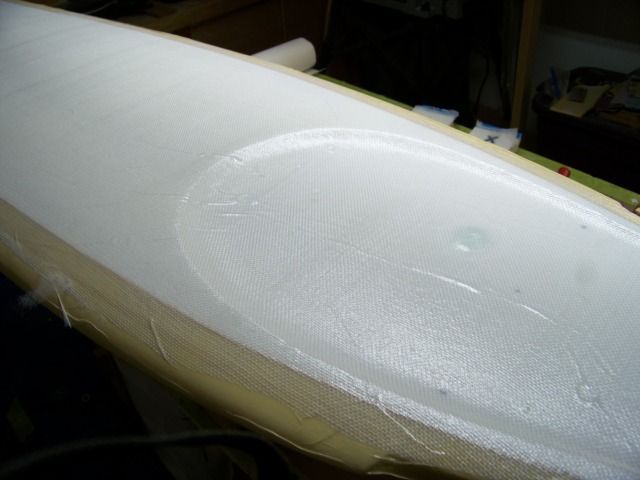
I will have to go back to Joann’s and buy more poly batting for breather as I can see this ones soaking up a lot of resin. The littl bumps you see are from where I poked a few holes yesterday and the batting picked up the resin.


Clever!

Good thinking.

That looks more like perforated release than perforated peel ply.  I hope the breather doesn’t suck through the holes and into the lam.  I have used perforated release on top of polyester peel ply and then breather on top of that to slow the breather absorption but never straight on the lam. Interested to see what happens.

Release vs. peel ply?  What’s the difference?

I’ve only vac lamed a handful of boards so hopefully someone more knowledgeable will expand on this.
The release film I am talking about is similar to your vac bag.  It is a film that doesn’t let anything through and doesn’t stick to polyester, vinyl ester and epoxies.
The polyester peel ply I use is a woven material that allows epoxy to flow through it and into the breather.  The polyester peel ply doesn’t stick to the lam and the woven fibers leave a textured surface perfect for secondary bonding when the peel ply is peeled off.  The cheaper stuff rips and splits on me so I use the Econo-Ply E, 2.74 oz. that is just a few cents more.
If I thoroughly saturate the lam, I pull more vac and suck out more epoxy.  If I do a dryer lam, I pull less of a vac and/or further slow the absorbtion of the epoxy by placing the perf-release film on top of the polyester peel ply and under the breather.
The breather is always fully bonded to the polyester peel ply when I take it out of the bag (and peel it off the laminated board), that is why I think the breather might bond through your holes in your release film.
The breather/peel ply combo is more like using a paper towel to soak up a mess on the counter as opposed to your saran wrap with holes.   I never weighed the breather and peel ply before and after the vac bag but I will definitely do it next time.  I guess close to half the epoxy I pour into the fibers is sucked out through the peel ply and absorbed into the breather.

It might be worth mentioning that various 'perf ply' release films are available to fit various techniques.  I've seen holes spaced at different intervals (1/4", 1/2", etc) to allow more or less resin through the membrane and in to the absorbant breather layer.  With woven nylon/polyester peel plys backed by an absorbant/breather layer I've been able to get such a dry laminate that pin air was the end result.  For this reason it is often useful to apply a  perf ply with widely spaced holes.  For standard lamination materials, it is arguably not even worth the extra effort to vacuum the outer layer.  Weighing the disposables before and after might show that you are basically throwing away a lot of resin. 

For the laminate schedules using bulky fabrics like Innegra, etc it is more worthwhile. 

http://www.aircraftspruce.com/menus/cm/vacuumbagging_film.html

Jeff-


   Slashzilla and John are right on it.  I also emphasize that using peel ply will get your lightest results, so light to the point that you can use more fabric than with an open lay up schedule and still come up lighter.  Equate that with being stronger!

Here are 3 scenarios:

   I have built sailplane wings using Mylar as the release sheet.  Basically, you lay up from the “outside, in” directly onto the waxed/PVA coated 1/16" Mylar sheet, then flop the entire thing onto the awaiting UNSEALED wing blank.  Other than the initial hand lay up, there is NO controlling the resin matrix, as the excess is driven inward, or a little bit out the edges.  When finished, you end up with a shiny, “finished” wing.  Mylar is good for 2-dimensional curves.

   I built boat hulls using using a perforated release sheet, and as John has pointed out, the objective was to keep the resin matrix at a certain ratio.  The resin matrix was “doped” with lightening agents like microspheres, microballoons, colloidal silica, etc. (a "witch’s brew of additives) and multiple layers of different density resins were used.   We wanted to capture some of those resins rather than extract them.  When you thicken a skin it gets stiffer, in fact, stiffness is a cubic factor of thickness (if you double skin thickness, it becomes “2-cubed” or EIGHT times stiffer.)  Stiff skin means less dents and less skin buckles.

   I made sailboards, kiteboards and surfboards using peel ply to reduce the weight and increase the strength.  Conceptually you can build the lightest, strongest board possible using peel ply and vacuum bagging. The resins are extracted straight up through the cloth AND the entire layup is SMASHED down thin, the resin does not have to travel hardly any to be ejected from the lay up.  Thinner means LESS STIFF skin, which means more dents/buckles etc. so more fabric is added.  The “middle layers” just act as “bulk modifiers” to thicken the skin but keep density down.  Enter products like cerex as that intermediate layer.  (Think foam sandwich skin in fabric form, as Skinz is a low density fiber.)  The outer layer serves two purposes, one structural to the entire board, the other for abrasion/environment resistance.


   These 3 scenarios are the range for bagging.  The last scenario is what I am hinting you should strive for when wanting to build the “ultimate” light weight strong surfboard but not inhibit overall “global” flex of the board.  I’m just trying to imply that fabric choices are kinda important, also another thing not addressed is fiber orientation, but that would be a whole other thread!


   I will be candid in asking this, “Are you resistant to using Peel Ply?”   Don’t mean to put you on the spot, but saw you went and got batting, which is part of the equation.  I think for ultimate conformity you will find Peel Ply to be quite good.  I say this only because I have seen it and was stoked with the results…

   Lastly, it is super important to seal the blank, even with open lay ups, with few exceptions actually.  Further doing that double seal of spackle, sanding it to re-expose the round cells, then sealing with a thin film of epoxy will really help your results.  More time doing it will bear this out.  You’ve only done two sides and I see you are learning quickly, MUCH quicker than I did back in the mid-80’s!

   Here is a pic of a complex shape, a Racing Kiteboard, using a very difficult material to conform, (coarse bi-directional carbon graphite.)  I used peel ply and batting to get the job done:

[img_assist|nid=1067288|title=Vacuum Bagging|desc=|link=none|align=left|width=480|height=640]


[img_assist|nid=1067289|title=Racing Kiteboard using vacuum bagging techniques|desc=Biaxial coarse weave carbon graphite conforming over abrupt contours using vacuum bagging|link=none|align=left|width=640|height=480]


This is a good thread, very relavent, as I am working with a company which is working on methods and materials to achieve some of the things mentioned.  Eventually some of the coming materials will benefit surfboard building.


George
Question- so when you’re wetting out you don’t try to get the skinz saturated?  You leave it dry looking?  I rolled epoxy on the foam and then put the skinz down. I think I probably was trying to “wet” it out.  I guess for someone used to wroking with normal glass that’s instinctive.”

Oops.  Sorry Jeff, I got so fired up whilst on my soap box, that I forgot to answer your question. ha ha.

Well, it depends upon whether you are using Peel Ply or Perforated Sheeting.  With Peel Ply, yes, you can leave it dry looking.  The skill in doing good bagging is “planning your shot” with one thing being the anticipation that you have enough resin on your skinz.  That said, you can be a pretty heavy-handed (read “WET”) laminator and still get a pretty dried out lamination by pulling enough vacuum.  In fact, you pull good vacuum and your fiber to resin ratio should come out great.

John also mentioned lots of pin air using Peel Ply.  This does happen.  I will emphasize again sealing the blank, and especially to members here, double sealing it.  Strength and light weight are waiting for you!


George


airtech out of  hunington beach

47 cents per foot length and FIVE feet wide.

suggest you google "Nelson composites maui" and watch the lone employee vacuum glass a sailboard. You may pick up a few tricks.

I did a post on vac bagging supplies a few weeks ago. . peel ply is the only thing I don't recycle. Everything else lasts until it wears out.

the hard way is fine as long as you are enjoying the process

Thanks Slash PlusOne and bb30.  I wish I’d read this thread before I started building…hahaha.  A lot of good info.  I’ll be waiting impatiently for any new revelations PlusOne. Considering what we were doing at the boat builder (Dencho Marine in LongBeach CA) back in the 80’s I’m convinced that other industries are way ahead of the surfboard building industry. 


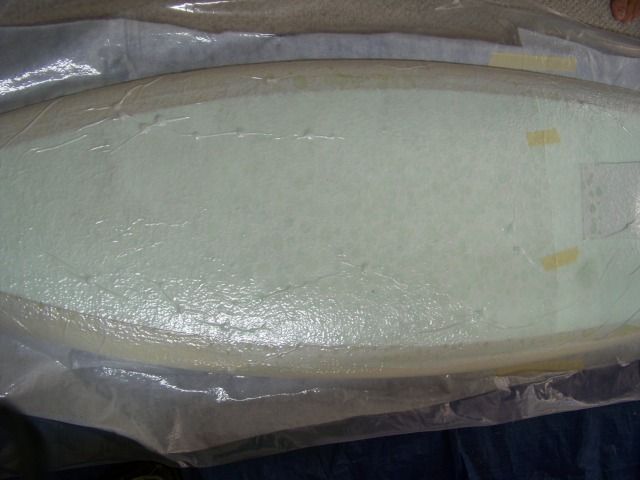
Yesterday’s bagging experience was a lot easier. Skinz and innegra inlay, with…um… perforated release (?).  When we lammed it (with 9 oz resin) I left it kind of rich (left all the resin) on.  But when I lifted the board I said, “No wait, let’s pull it dry.”  So we pulled as much extra resin off as we could.  

Since we didn’t have to use two strips of release side by side (in order to wrap rails), we could pull it tight with all the wrinkles gone (sorry no photos of that).

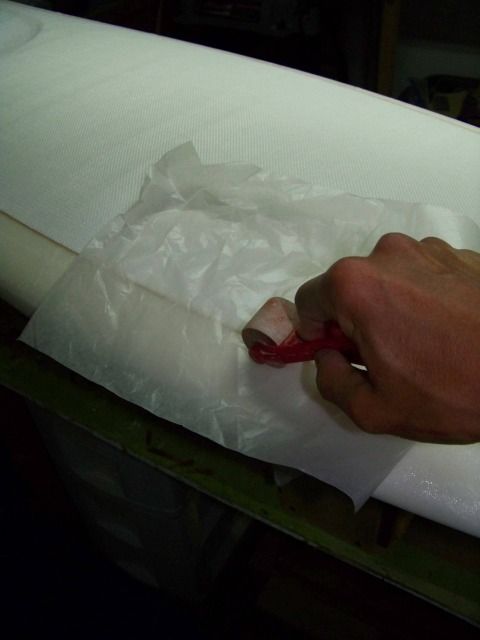
Here’s pulling the release and breather being pulled off.  You can see how much resin got pulled out. Between what we pulled off lamming and what was pulled out by the vacuum, I’m thinking there’s 6-7 oz of resin used at this stage.

Now, I’m wondering- how do you figure out how much resin to pull off while lamming vs amount of holes in release film to get the right saturation ratios? Years of experience?  An engineering degree?  Or for a garage hack like me- an indecent amount of luck?


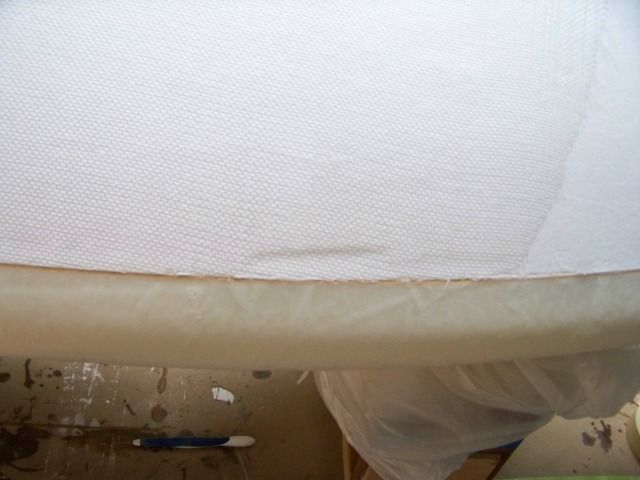
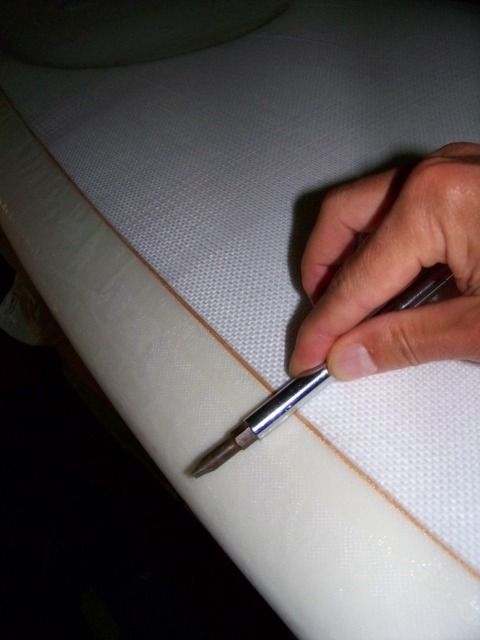
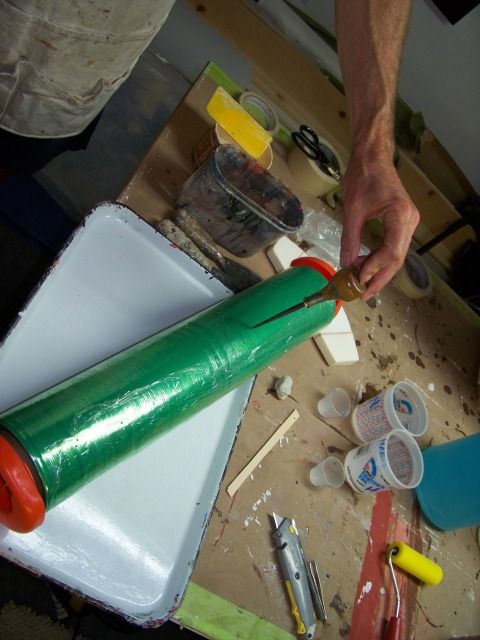
OK, now I said I would show you my f…ups.  Here’s a couple minor ones.  I cut the inlay inside the perimeter stringer.  Then I wanted to push the innegra/skinz flush to the stringer so I wouldn’t sand into it.  I thought I found the ideal tool. It was so clever I even took a photo-

Then I immediately did this-

Duh!

So here’s better tool-


Another minor f…up. The innegra I got was 60" wide.  I figured I could cut it in half.  But then, thinking about it, I thought, “I don’t think I need crush resistance up near the nose, what do you think? I think I can just use the width (60”)."  I thought about it some more and decided to cut it like a normal deck patch.  But innegra is not normal and the deck patch was very visible and some strands went wild. Mostly a cosmetic f…up, but, being an artist, it really  bugs me.  I’ll have to think about what to do to fix it…


Both times I pulled vac I had resin pool at the attachment point,even though I quadrupled the breather underneath.

The lam did pull into the “wibb” very nicely.


The overall result looks nice.  I gave it the thumb test and could feel it give a little, but then I’m thinking, “This is only 2.7 oz total material.”


Today is just sanding and a hand lam, so I’ll spare you all the photos, unless something extrodinary happens…

So a couple of pics.

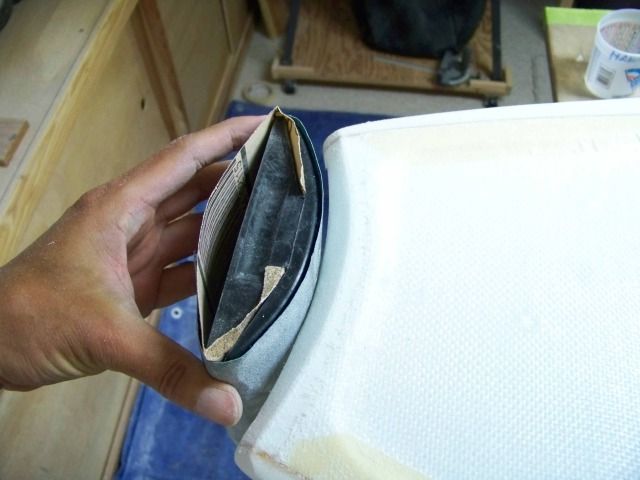
Another semi improvised tool.  To sand the gibson les paul moon tail, after trying various tools, I found this worked just fine, the back side of a  rubber sanding block-


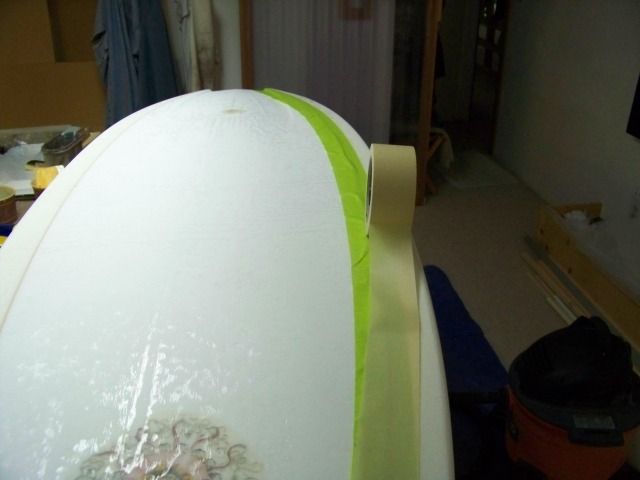
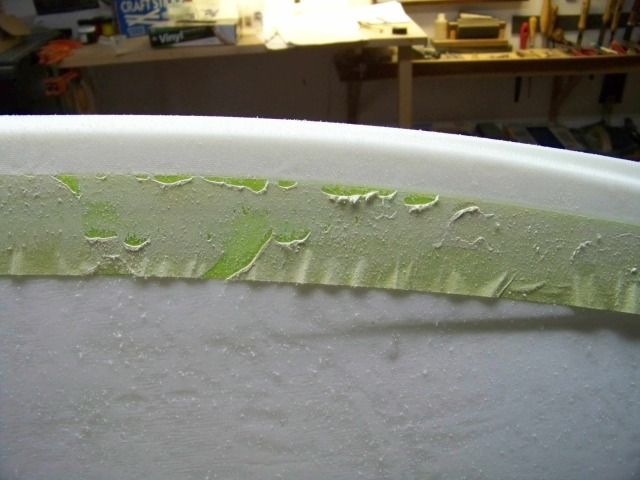
Now, someone here at Sways wrote about this and ever since, when I need to do a lap that is not a cutlap I do this.  Two layers of tape of different colors.  Grind the lap until you hit the second color then stop.  It works great.  It’s kind of half way between a cut and a free lap.


Finally, I might start a new thread for this one, but anyways I came across this site and thought it would be good to share.  Lots of interesting stuff going on-  http://www.compositesworld.com/

Llilibel03,

I’m stuck on the Skins not lapping.  I just vacuumed some Cerex down, and yes it needed relief cuts, but no worse than 4 oz s-cloth needs them.  What weight was your skinz.  The stuff I’m using is 1.3 oz per yard.